2003 BMW 325Ci instrument cluster
[x] Cancel search: instrument clusterPage 8 of 178

Contents
Notes
About this Owner's Manual4
Symbols used4
Your individual vehicle4
Status at time of printing5
For your own safety5
Symbol on vehicle parts6
Service and warranty6
Reporting safety defects6
Overview
Cockpit14
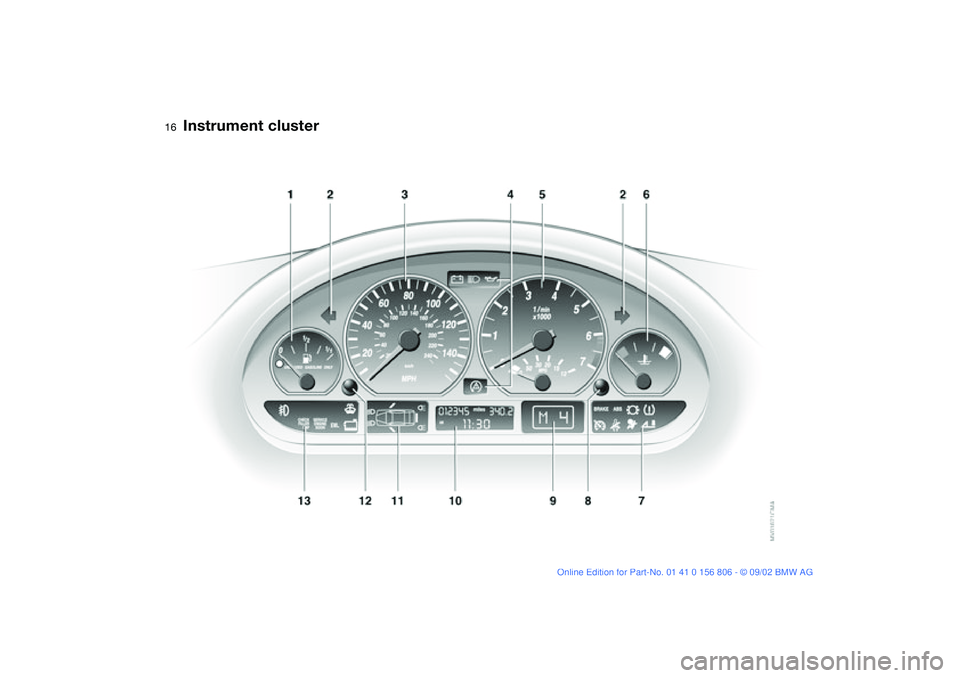
Instrument cluster16
Indicator and warning lamps18
Steering wheel with multifunction
buttons*22
Hazard warning triangle*23
First-aid kit*23
Refueling24
Fuel specifications25
Tire inflation pressure25
Controls and features
Opening and closing:
Keys30
Central locking system30
Opening and closing – via the
remote control31
Opening and closing – via the
door lock33
Opening and closing – from the
inside34
Luggage compartment lid35
Luggage compartment37
Alarm system*38
Electric power windows40
Manual convertible top41
Fully-automatic convertible
top*46
Wind deflector*50
To adjust:
Safe seating position52
Seats52
Adjusting electric power
seats53
Lumbar support*53
Head restraints54
Entering the rear55
Safety belts56
Seat and mirror memory*57
Seat heating*58
Steering wheel59
Mirrors59
handbook.book Page 8 Wednesday, July 31, 2002 9:29 AM
Page 16 of 178
16
Instrument cluster
handbook.book Page 16 Wednesday, July 31, 2002 9:29 AM
Page 17 of 178
17
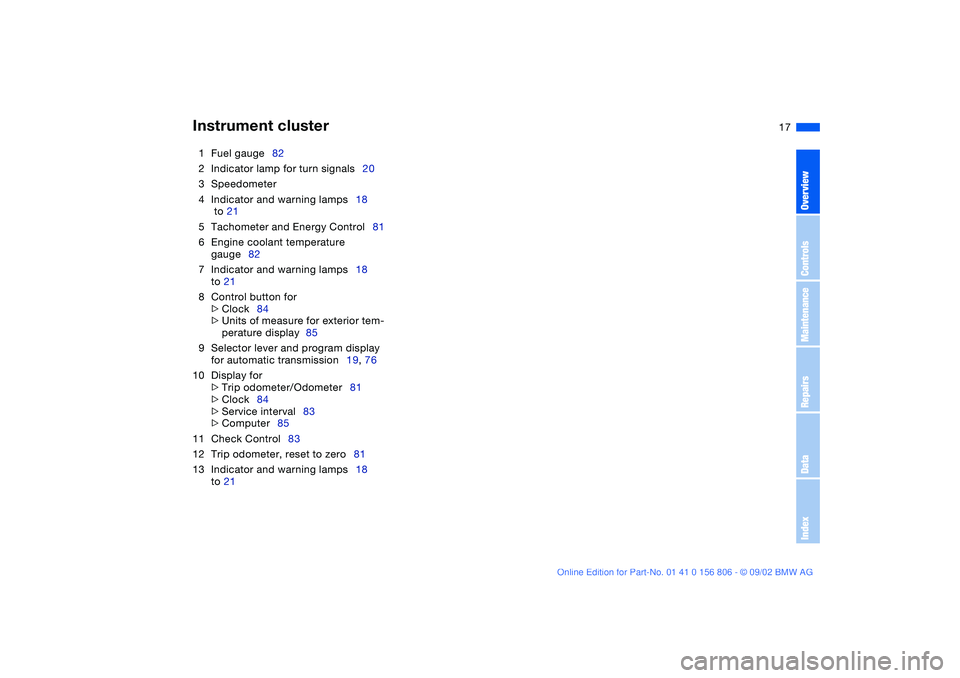
1Fuel gauge82
2Indicator lamp for turn signals20
3Speedometer
4Indicator and warning lamps18
to 21
5Tachometer and Energy Control81
6Engine coolant temperature
gauge82
7Indicator and warning lamps18
to 21
8Control button for
>
Clock84
>
Units of measure for exterior tem-
perature display 85
9Selector lever and program display
for automatic transmission19, 76
10 Display for
>
Trip odometer/Odometer81
>
Clock84
>
Service interval83
>
Computer85
11 Check Control83
12 Trip odometer, reset to zero81
13 Indicator and warning lamps18
to 21
Instrument cluster
OverviewControlsMaintenanceRepairsDataIndex
handbook.book Page 17 Wednesday, July 31, 2002 9:29 AM
Page 55 of 178
55
Do not remove the rear head
restraints, as this would damage
them.<
For further information, please consult
your BMW center.
Do not use the rear head
restraints as storage shelves.
Always keep the travel path for the roll-
over protection system free and clear.
Never place protective covers or similar
items on the head restraints. See also
the labels on the head restraints.<
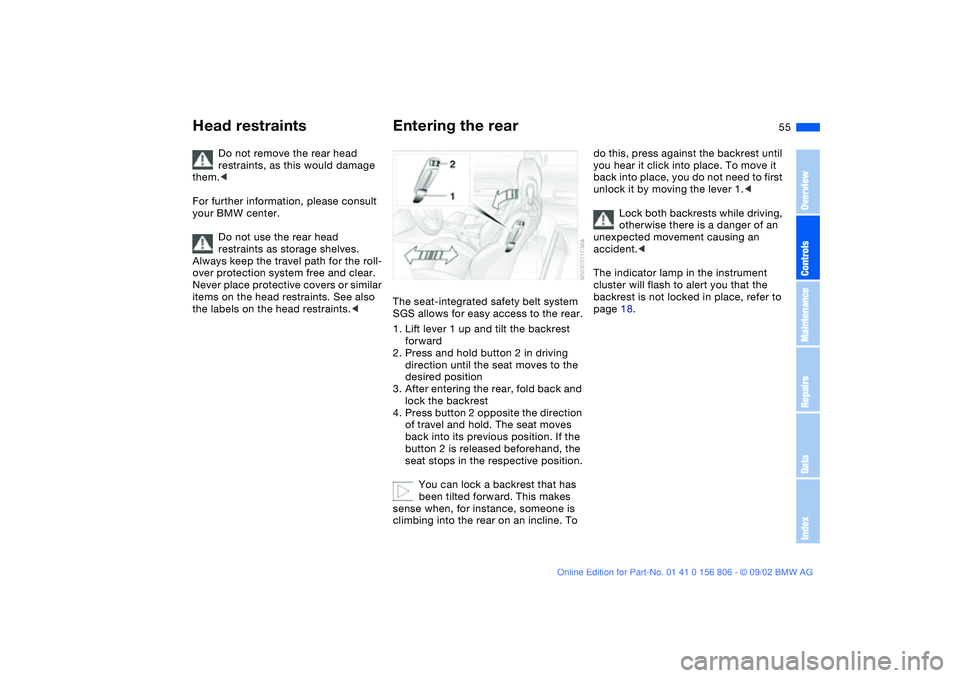
Entering the rearThe seat-integrated safety belt system
SGS allows for easy access to the rear.
1. Lift lever 1 up and tilt the backrest
forward
2. Press and hold button 2 in driving
direction until the seat moves to the
desired position
3. After entering the rear, fold back and
lock the backrest
4. Press button 2 opposite the direction
of travel and hold. The seat moves
back into its previous position. If the
button 2 is released beforehand, the
seat stops in the respective position.
You can lock a backrest that has
been tilted forward. This makes
sense when, for instance, someone is
climbing into the rear on an incline. To
do this, press against the backrest until
you hear it click into place. To move it
back into place, you do not need to first
unlock it by moving the lever 1.<
Lock both backrests while driving,
otherwise there is a danger of an
unexpected movement causing an
accident.<
The indicator lamp in the instrument
cluster will flash to alert you that the
backrest is not locked in place, refer to
page 18.
Head restraints
OverviewControlsMaintenanceRepairsDataIndex
handbook.book Page 55 Wednesday, July 31, 2002 9:29 AM
Page 69 of 178
69
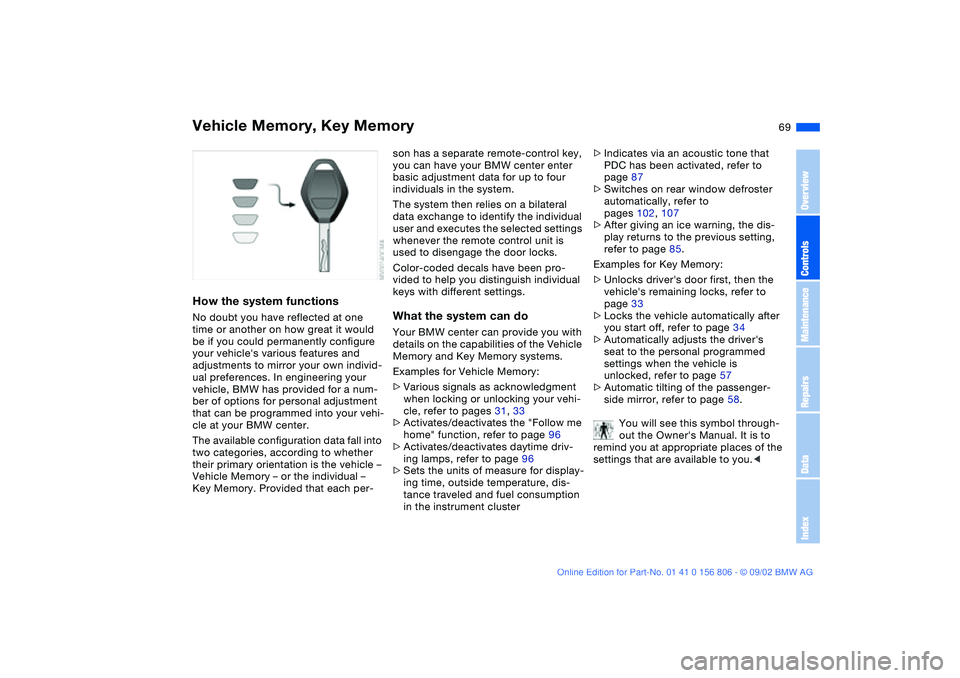
Vehicle Memory, Key MemoryHow the system functionsNo doubt you have reflected at one
time or another on how great it would
be if you could permanently configure
your vehicle's various features and
adjustments to mirror your own individ-
ual preferences. In engineering your
vehicle, BMW has provided for a num-
ber of options for personal adjustment
that can be programmed into your vehi-
cle at your BMW center.
The available configuration data fall into
two categories, according to whether
their primary orientation is the vehicle –
Vehicle Memory – or the individual –
Key Memory. Provided that each per-
son has a separate remote-control key,
you can have your BMW center enter
basic adjustment data for up to four
individuals in the system.
The system then relies on a bilateral
data exchange to identify the individual
user and executes the selected settings
whenever the remote control unit is
used to disengage the door locks.
Color-coded decals have been pro-
vided to help you distinguish individual
keys with different settings.What the system can doYour BMW center can provide you with
details on the capabilities of the Vehicle
Memory and Key Memory systems.
Examples for Vehicle Memory:
>Various signals as acknowledgment
when locking or unlocking your vehi-
cle, refer to pages 31, 33
>Activates/deactivates the "Follow me
home" function, refer to page 96
>Activates/deactivates daytime driv-
ing lamps, refer to page 96
>Sets the units of measure for display-
ing time, outside temperature, dis-
tance traveled and fuel consumption
in the instrument cluster>Indicates via an acoustic tone that
PDC has been activated, refer to
page 87
>Switches on rear window defroster
automatically, refer to
pages 102, 107
>After giving an ice warning, the dis-
play returns to the previous setting,
refer to page 85.
Examples for Key Memory:
>Unlocks driver's door first, then the
vehicle's remaining locks, refer to
page 33
>Locks the vehicle automatically after
you start off, refer to page 34
>Automatically adjusts the driver's
seat to the personal programmed
settings when the vehicle is
unlocked, refer to page 57
>Automatic tilting of the passenger-
side mirror, refer to page 58.
You will see this symbol through-
out the Owner's Manual. It is to
remind you at appropriate places of the
settings that are available to you.<
OverviewControlsMaintenanceRepairsDataIndex
handbook.book Page 69 Wednesday, July 31, 2002 9:29 AM
Page 72 of 178
72
Switching off the engineTurn the ignition key to position 1 or 0.
You should never remove the igni-
tion key when the vehicle is in
motion, as the steering lock could
engage.
When you leave the vehicle, always
remove the ignition key and engage the
steering lock.<
Vehicles with manual transmis-
sion:
Always engage the parking brake when
parking on slopes and inclined sur-
faces. Placing the lever in gear may not
provide adequate resistance to rolling.
Vehicles with automatic transmission:
place the selector lever in P.<
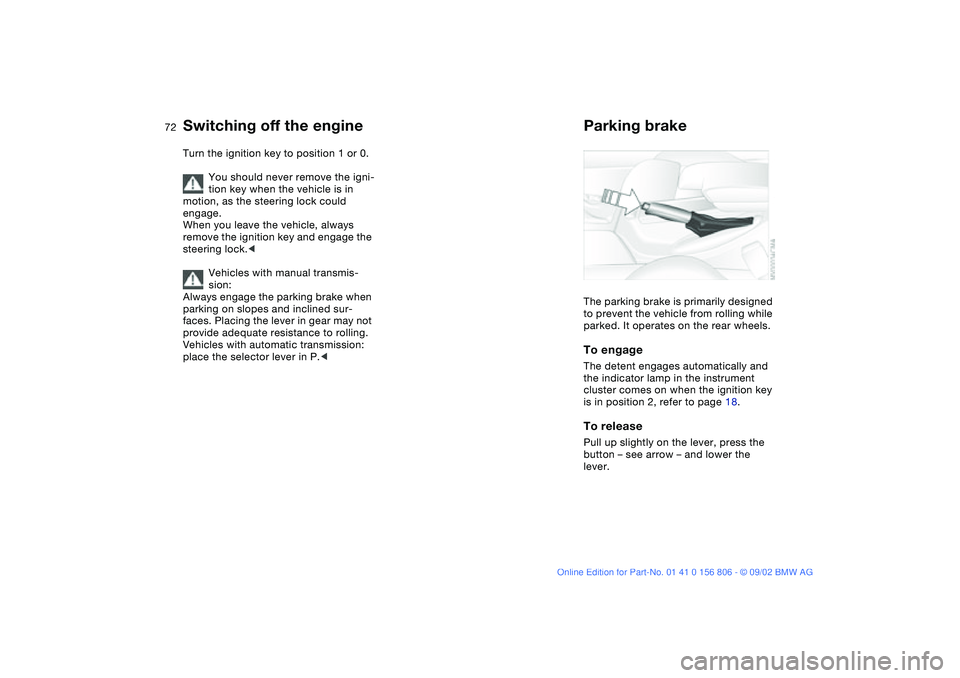
Parking brakeThe parking brake is primarily designed
to prevent the vehicle from rolling while
parked. It operates on the rear wheels.To engageThe detent engages automatically and
the indicator lamp in the instrument
cluster comes on when the ignition key
is in position 2, refer to page 18.To releasePull up slightly on the lever, press the
button – see arrow – and lower the
lever.
handbook.book Page 72 Wednesday, July 31, 2002 9:29 AM
Page 75 of 178
75
NNeutralSelect only when stopping for an
extended period.DDrive – automatic shift programThis position is designed for driving
under all normal operating conditions.
All forward gears are available.KickdownIn the kickdown mode, you achieve
maximum acceleration and top speed
in position D.
Depress the accelerator pedal past the
increased resistance point at the full-
throttle position.
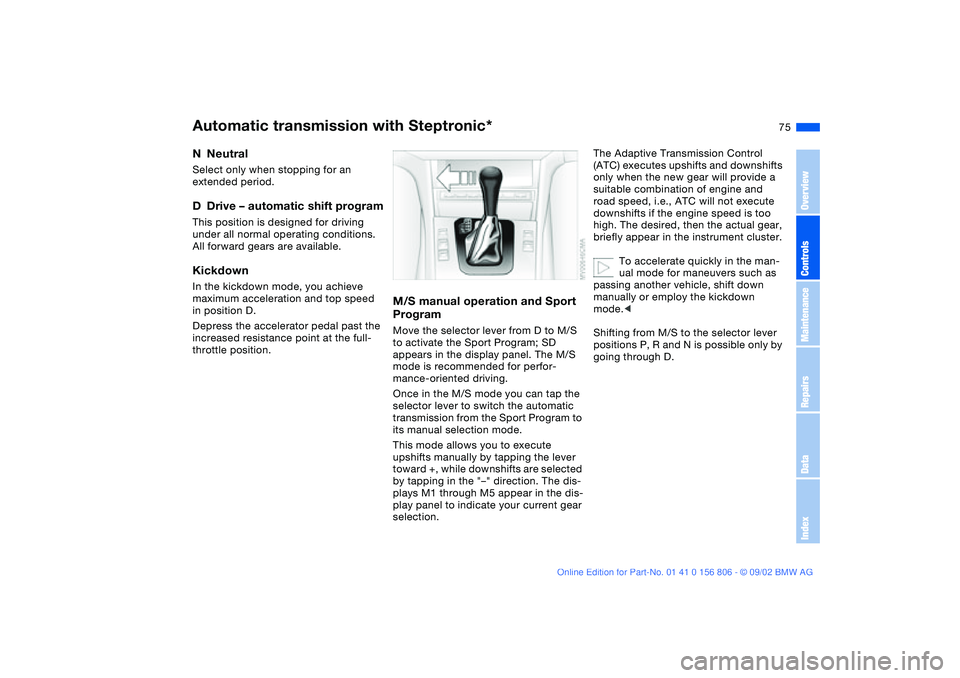
M/S manual operation and Sport
ProgramMove the selector lever from D to M/S
to activate the Sport Program; SD
appears in the display panel. The M/S
mode is recommended for perfor-
mance-oriented driving.
Once in the M/S mode you can tap the
selector lever to switch the automatic
transmission from the Sport Program to
its manual selection mode.
This mode allows you to execute
upshifts manually by tapping the lever
toward +, while downshifts are selected
by tapping in the "–" direction. The dis-
plays M1 through M5 appear in the dis-
play panel to indicate your current gear
selection.
The Adaptive Transmission Control
(ATC) executes upshifts and downshifts
only when the new gear will provide a
suitable combination of engine and
road speed, i.e., ATC will not execute
downshifts if the engine speed is too
high. The desired, then the actual gear,
briefly appear in the instrument cluster.
To accelerate quickly in the man-
ual mode for maneuvers such as
passing another vehicle, shift down
manually or employ the kickdown
mode.<
Shifting from M/S to the selector lever
positions P, R and N is possible only by
going through D.
Automatic transmission with Steptronic*
OverviewControlsMaintenanceRepairsDataIndex
handbook.book Page 75 Wednesday, July 31, 2002 9:29 AM
Page 79 of 178

79
0Wipers retracted
1Clean windshield and headlampsClean windshield and headlamps*
Do not use the washers if there is
any danger that the fluid will
freeze on the windshield, as your vision
could be obscured. Always use a wind-
shield washer antifreeze in cold
weather. Refer to page 136.
Do not use the washers when the reser-
voir is empty. This could cause damage
to the washer pump.<
The system sprays washer fluid against
the windshield and activates the wipers
for a brief period.
When the vehicle's lighting system is
switched on, the headlamps will also be
cleaned at reasonable intervals.Windshield washer nozzlesThe windshield washer nozzles are
heated automatically* when the ignition
key is in position 2.
Cruise control*You can store and automatically main-
tain any desired vehicle speed above
approx. 20 mph / 30 km/h.
The cruise control is available whenever
the engine is running and the system
has been activated.To activate the systemWith the ignition key in position 2:
Press the button. The indicator lamp in
the instrument cluster comes on, refer
to page 20. You can now use the cruise
control.
Do not use cruise control on twist-
ing roads, when high traffic den-
sity prevents driving at a constant
speed, or when the road surface is slick
– snow, rain, ice – or loose – rocks or
gravel, sand.
ment cluster goes out.
Cruise control is also deactivated when
the ignition key is in position 0.
Washer/wiper system/Rain sensor*
OverviewControlsMaintenanceRepairsDataIndex
handbook.book Page 79 Wednesday, July 31, 2002 9:29 AM