2003 BMW 3.0i ROADSTER brake light
[x] Cancel search: brake lightPage 4 of 106

Contents
Contents
Notes
6About this Owner's Manual
6Symbols used
6Symbol on vehicle parts
6Your individual vehicle
6Status at time of printing
7For your own safety
7Service and warranty
8Reporting safety defects
Overview
12Cockpit
13Instrument cluster
14Indicator and warning lamps
Opening and closing
18Keys
18Central locking system
18Remote control
20Door lock
20Interior
21Luggage compartment lid
22Luggage compartment
22Electric power windows
23Manual convertible top
24Fully automatic convertible top*
26Wind deflector*
27Alarm system*
Adjustments
29Safe seating position
29Seats
30Seat memory*
31Seat heating*
31Safety belts
32Steering wheel
32Mirrors
33Airbags
34Transporting children safely
37Vehicle Memory, Key Memory
Driving
38Ignition lock
38Engine
39Parking brake
40Manual transmission
40Automatic transmission with
Steptronic*
42Electric Power Steering EPS
42Drivelogic*
42Turn signal indicators/Headlamp
flasher
43Washer/wiper system and
rain sensor*
44Cruise control*
Lamps
45Parking lamps/Low beams
46High beams/Standing lamps
46Instrument lighting
46Fog lamps
46Interior lamps
© 2002 Bayerische Motoren Werke
Aktiengesellschaft
Munich, Germany
Reprinting, including excerpts, only with the
written consent of BMW AG, Munich.
Order No. 01 41 0 156 897
US English VIII/02
Printed in Germany
Printed on environmentally friendly paper –
bleached without chlorine, suitable for recycling.
Page 14 of 106

Overview
14
Indicator and warning
lamps
Technology that monitors itself
Indicator and warning lamps that are iden-
tified by
+ are tested for proper functioning
whenever the ignition key is turned. They
each light up once for different periods of
time.
If a fault should occur in one of these sys-
tems, the corresponding lamp does not go
out after the engine is started or it lights up
again while the vehicle is moving. The indi-
cated pages provide information on what
measures to take.
Please fasten safety belts
+31
Airbags
+33
Battery charge current
+87
Engine oil pressure/Engine oil level/
Engine oil sensor
+79
Parking brake/Chassis control sys-
tem/Dynamic Brake Control/Brake
fluid
+39/ 51/ 52/ 81
Brake warning lamp for Canadian
models
Antilock Brake System ABS/Chas-
sis control system
+53/ 51
Antilock Brake System ABS/Chas-
sis control system for Canadian
modelsDynamic Stability Control DSC
+51
Dynamic Traction Control DTC
+51
Flat Tire Monitor
+53
Automatic transmission
+41
Brake pads
+66
Add coolant80
Check Gas Cap
+
Service engine soon +83
Service engine soon
+
warning lamp for Canadian
models.
Defective bulbs45
Turn signal indicators42
Fog lamps46
Headlamp flasher/
High beams42/ 46
Page 39 of 106
At a glance
Controls
Driving tips
Mobility
Reference
39
the ignition key immediately when the
engine starts.<
Extended starting attempts, charac-
terized by excessively frequent or
long periods with the starter engaged, can
damage the catalytic converter.<
If the engine fails to start on the first
attempt – if it is very hot or cold, for
instance:
>Press the accelerator pedal halfway
down.
Cold starts at very low temperatures –
starting at approx. +57 / –156
>Press the accelerator pedal halfway
down while engaging the starter
>On the first start attempt, engage the
starter for a longer period –
approx. 10 seconds.
Manual transmission
1.Engage the parking brake
2.Gearshift lever in idling position
3.Depress clutch pedal
4.Start the engine.
Automatic transmission
1.Depress footbrake
2.Place selector lever in position P or N
3.Start the engine.
Before leaving the vehicle with the
engine running, place the selector
lever in position P and pull the parking
brake.
Do not leave the vehicle unattended with
the engine running. An unattended vehicle
with a running engine poses a safety haz-
ard.<
Switching off the engine
Do not remove the ignition key while
the vehicle is still moving. If you did so,
the steering lock would engage when the
steering wheel is turned.
When you leave the vehicle, always remove
the ignition key and engage the steering lock.
Always engage the parking brake when park-
ing on downhill roads.<
Manual transmission
Turn the ignition key to position 1 or 0.
Automatic transmission
Place the selector lever in position P and
turn the ignition key to position 1 or 0.
Parking brake
The parking brake is designed primarily to
prevent the vehicle from rolling when
parked. It operates against the rear wheels.
The brake warning lamp lights up
when the parking brake is engaged;
if you start driving, an acoustic sig-
nal is heard as well.
Brake warning lamp for Canadian
models
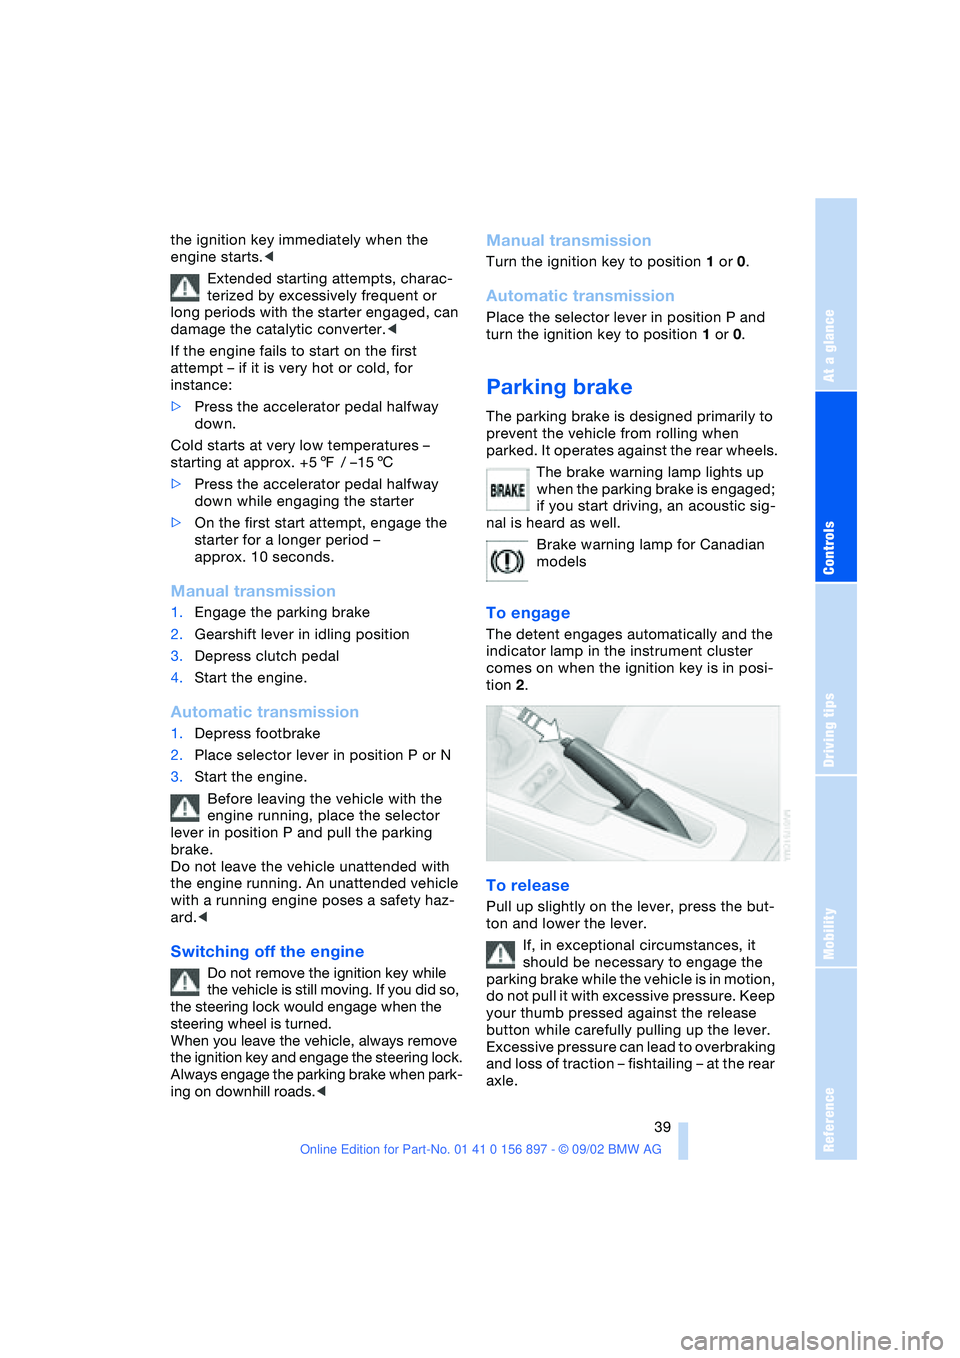
To engage
The detent engages automatically and the
indicator lamp in the instrument cluster
comes on when the ignition key is in posi-
tion 2.
To release
Pull up slightly on the lever, press the but-
ton and lower the lever.
If, in exceptional circumstances, it
should be necessary to engage the
parking brake while the vehicle is in motion,
do not pull it with excessive pressure. Keep
your thumb pressed against the release
button while carefully pulling up the lever.
Excessive pressure can lead to overbraking
and loss of traction – fishtailing – at the rear
axle.
Page 40 of 106
Driving
40 The brake lamps do not come on when the
parking brake is engaged.<
Vehicles with manual transmission:
Always engage the parking brake
when parking on slopes and inclined sur-
faces, since shifting into 1st gear or reverse
may not provide adequate resistance to
rolling. Vehicles with automatic transmis-
sion: place the selector lever in
position P.<
To avoid corrosion and one-sided
braking, apply the parking brake
lightly from time to time when coasting to a
standstill – at a traffic signal, for example –
provided that it is safe to do so.<
Manual transmission
6-gear transmission*
When shifting into 5th or 6th gear, it is
important to press the gear shift lever to the
right to avoid accidentally engaging 3rd or
4th gear.
Reverse
Select reverse only when the vehicle is sta-
tionary. Press the gearshift lever to the left
to overcome the resistance.
As you do this, the backup lamps will turn
on automatically when the ignition key is in
position 2.
Do not hold the vehicle in place on
slopes by slipping or "riding" the
clutch. Use the parking brake instead, oth-
erwise, the ensuing friction to the clutch
plates will cause a great deal of wear and
tear on the clutch.<
Automatic transmission
with Steptronic*
You can drive as with a normal automatic
transmission. In addition, you can also shift
manually.
When you move the selector lever from the
D position to the left into the M/S range, the
performance-oriented shift programs of the
automatic transmission are engaged. As
soon as you briefly tap the selector lever in
the "+" or "–" direction, Steptronic changes
the gear. The manual mode is engaged.
When you wish to use the automatic trans-
mission mode again, move the selector
lever to the right to position D.
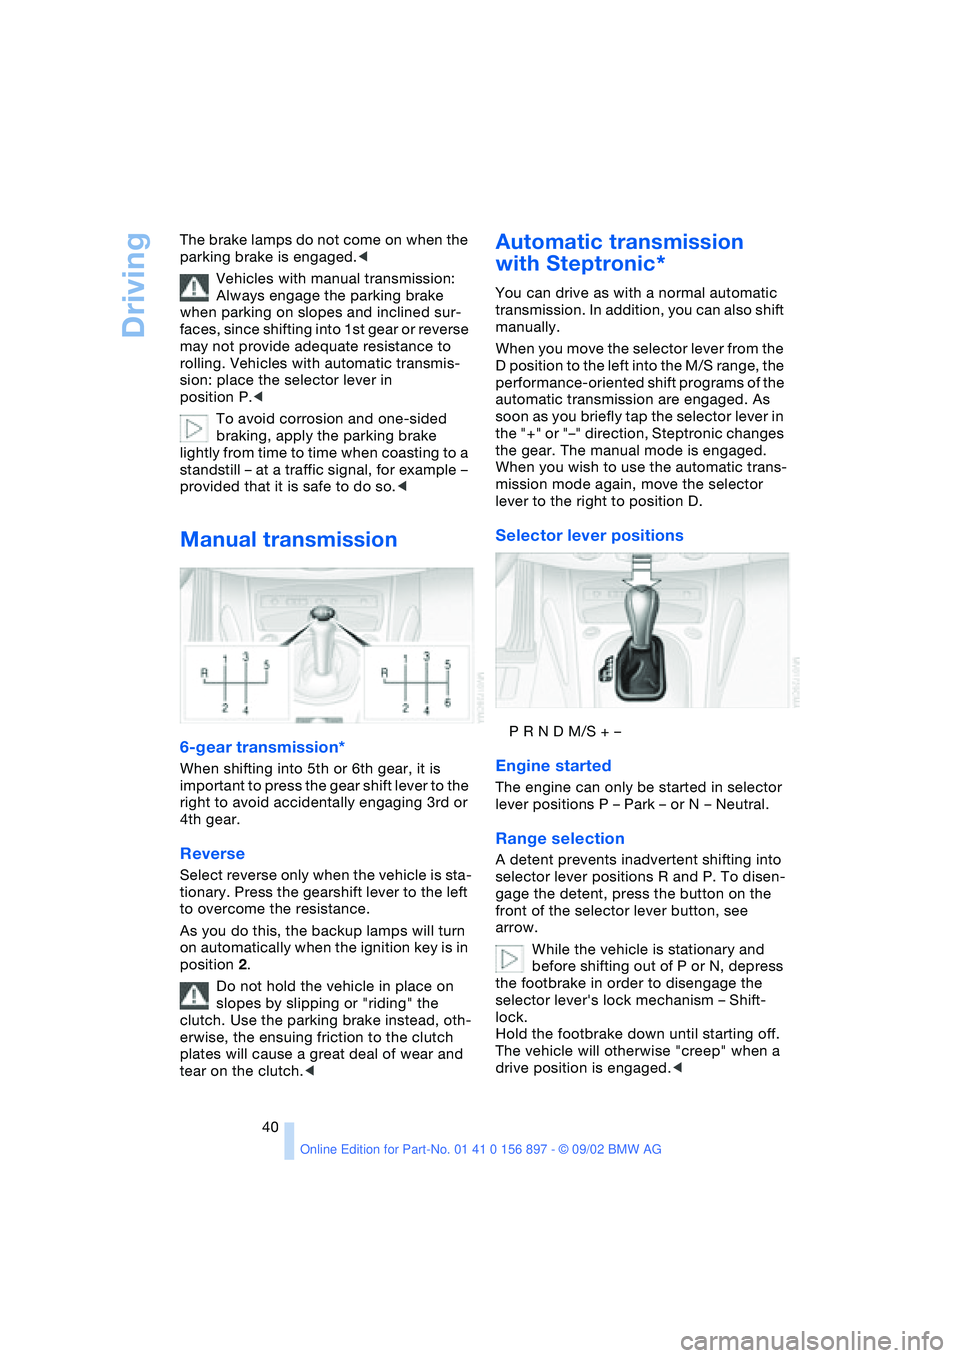
Selector lever positions
P R N D M/S + –
Engine started
The engine can only be started in selector
lever positions P – Park – or N – Neutral.
Range selection
A detent prevents inadvertent shifting into
selector lever positions R and P. To disen-
gage the detent, press the button on the
front of the selector lever button, see
arrow.
While the vehicle is stationary and
before shifting out of P or N, depress
the footbrake in order to disengage the
selector lever's lock mechanism – Shift-
lock.
Hold the footbrake down until starting off.
The vehicle will otherwise "creep" when a
drive position is engaged.<
Page 51 of 106

At a glance
Controls
Driving tips
Mobility
Reference
51
Technology for safety and driving
convenience
Dynamic Stability Control
DSC
The concept
DSC maintains vehicle stability, even in
critical driving situations.
The DSC is operational every time you start
the engine.
For additional details on the system
and the various functions, please
refer to the "Technology" brochure.<
Indicator lamps
The indicator lamps in the instrument clus-
ter go out shortly after you switch on the
ignition.
Dynamic Stability Control DSC indi-
cator lamp flashes:
The system is active and governs
drive torque and braking intervention.
The indicator lamp stays lit:
Dynamic Stability Control DSC and
Dynamic Traction Control DTC have been
switched off via the button.
Dynamic Traction Control DTC indi-
cator lamp lights up permanently:
DTC has been deactivated via the
DSC button.
Dynamic Stability Control DSC indi-
cator lamp flashes:
Dynamic Traction Control DTC indi-
cator lamp lights up permanently:
DTC is actively regulating drive
torque and braking intervention.
Interventions to increase stability are
being performed to a limited degree
only.
warning lamp for Dynamic Brake
Control DBC light up continuously:
Dynamic Stability Control DSC,
Dynamic Traction Control DTC and
Dynamic Brake Control DBC are malfunc-
tioning.
Have the system repaired at your BMW
center.
Indicator and warning lamps for
Canadian models.
The vehicle remains completely oper-
ational without the DSC, DTC and
DBC functions.<
In the event of a malfunction, please see
your BMW center.
If the brake warning lamp comes on
together with the yellow indicator
lamps for the Antilock Brake Sys-
tem ABS and the Dynamic Stability
Control DSC:
The entire ABS and DSC control
system has failed. Continue driving
cautiously and defensively. Avoid
hard brake applications. Please have the
system checked by your BMW center as
soon as possible.
ABS and DSC indicator and warn-
ing lamps for Canadian models.
Page 52 of 106
Technology for safety and driving convenience
52 For more information on the various
systems, refer to the "Technology"
brochure.<
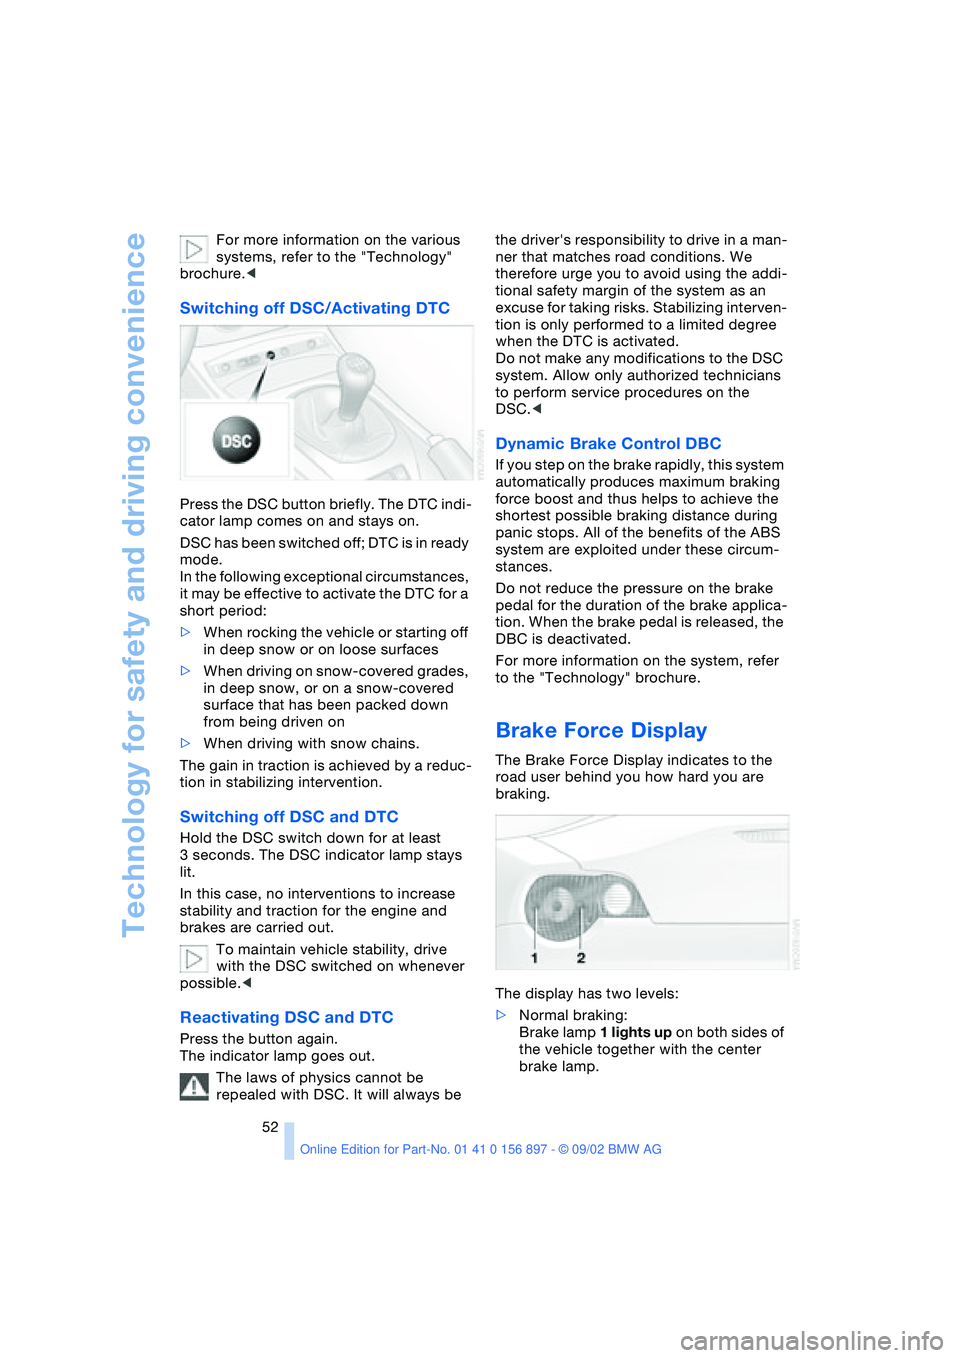
Switching off DSC/Activating DTC
Press the DSC button briefly. The DTC indi-
cator lamp comes on and stays on.
DSC has been switched off; DTC is in ready
mode.
In the following exceptional circumstances,
it may be effective to activate the DTC for a
short period:
>When rocking the vehicle or starting off
in deep snow or on loose surfaces
>When driving on snow-covered grades,
in deep snow, or on a snow-covered
surface that has been packed down
from being driven on
>When driving with snow chains.
The gain in traction is achieved by a reduc-
tion in stabilizing intervention.
Switching off DSC and DTC
Hold the DSC switch down for at least
3 seconds. The DSC indicator lamp stays
lit.
In this case, no interventions to increase
stability and traction for the engine and
brakes are carried out.
To maintain vehicle stability, drive
with the DSC switched on whenever
possible.<
Reactivating DSC and DTC
Press the button again.
The indicator lamp goes out.
The laws of physics cannot be
repealed with DSC. It will always be the driver's responsibility to drive in a man-
ner that matches road conditions. We
therefore urge you to avoid using the addi-
tional safety margin of the system as an
excuse for taking risks. Stabilizing interven-
tion is only performed to a limited degree
when the DTC is activated.
Do not make any modifications to the DSC
system. Allow only authorized technicians
to perform service procedures on the
DSC.<
Dynamic Brake Control DBC
If you step on the brake rapidly, this system
automatically produces maximum braking
force boost and thus helps to achieve the
shortest possible braking distance during
panic stops. All of the benefits of the ABS
system are exploited under these circum-
stances.
Do not reduce the pressure on the brake
pedal for the duration of the brake applica-
tion. When the brake pedal is released, the
DBC is deactivated.
For more information on the system, refer
to the "Technology" brochure.
Brake Force Display
The Brake Force Display indicates to the
road user behind you how hard you are
braking.
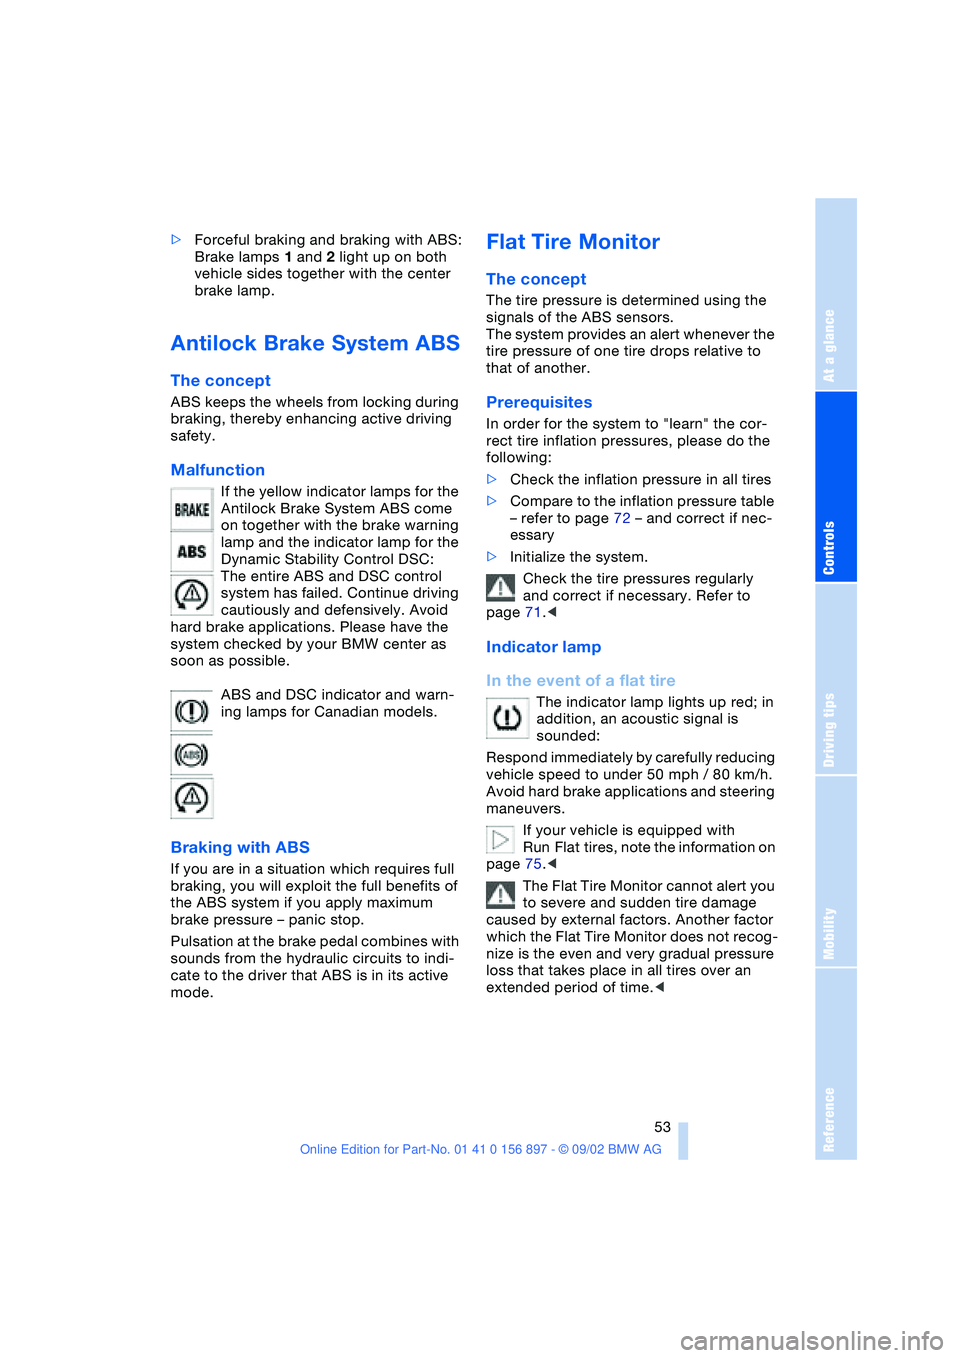
The display has two levels:
>Normal braking:
Brake lamp 1 lights up on both sides of
the vehicle together with the center
brake lamp.
Page 53 of 106
At a glance
Controls
Driving tips
Mobility
Reference
53
>Forceful braking and braking with ABS:
Brake lamps 1 and 2 light up on both
vehicle sides together with the center
brake lamp.
Antilock Brake System ABS
The concept
ABS keeps the wheels from locking during
braking, thereby enhancing active driving
safety.
Malfunction
If the yellow indicator lamps for the
Antilock Brake System ABS come
on together with the brake warning
lamp and the indicator lamp for the
Dynamic Stability Control DSC:
The entire ABS and DSC control
system has failed. Continue driving
cautiously and defensively. Avoid
hard brake applications. Please have the
system checked by your BMW center as
soon as possible.
ABS and DSC indicator and warn-
ing lamps for Canadian models.
Braking with ABS
If you are in a situation which requires full
braking, you will exploit the full benefits of
the ABS system if you apply maximum
brake pressure – panic stop.
Pulsation at the brake pedal combines with
sounds from the hydraulic circuits to indi-
cate to the driver that ABS is in its active
mode.
Flat Tire Monitor
The concept
The tire pressure is determined using the
signals of the ABS sensors.
The system provides an alert whenever the
tire pressure of one tire drops relative to
that of another.
Prerequisites
In order for the system to "learn" the cor-
rect tire inflation pressures, please do the
following:
>Check the inflation pressure in all tires
>Compare to the inflation pressure table
– refer to page 72 – and correct if nec-
essary
>Initialize the system.
Check the tire pressures regularly
and correct if necessary. Refer to
page 71.<
Indicator lamp
In the event of a flat tire
The indicator lamp lights up red; in
addition, an acoustic signal is
sounded:
Respond immediately by carefully reducing
vehicle speed to under 50 mph / 80 km/h.
Avoid hard brake applications and steering
maneuvers.
If your vehicle is equipped with
Run Flat tires, note the information on
page 75.<
The Flat Tire Monitor cannot alert you
to severe and sudden tire damage
caused by external factors. Another factor
which the Flat Tire Monitor does not recog-
nize is the even and very gradual pressure
loss that takes place in all tires over an
extended period of time.<
Page 64 of 106
Special operating instructions
64
Special operating instructions
Break-in procedures
To ensure that your vehicle provides maxi-
mum economy throughout a long service
life, we request that you observe the fol-
lowing:
Engine and differential
Up to 1,250 miles / 2,000 km:
Drive at varying engine and road speeds,
but do not exceed the following engine or
road speed:
4,500/min or 100 mph / 160 km/h:
Obey your local and state maximum speed
limits.
Refrain from using full throttle and avoid
pressing the accelerator beyond the kick-
down point.
After you have driven 1,250 miles /
2,000 km, you can gradually increase the
engine or road speeds.
You should also comply with these break-in
procedures if the engine or differential is
replaced later in the course of the vehicle's
service life.
Tires
Due to technical factors associated with
their manufacture, tires do not achieve their
full traction potential until an initial break-in
period has elapsed. You should therefore
drive with extra caution during the first
200 miles / 300 km.
Obey your local and state maximum speed
limits.
When the vehicle is operated on wet
or slushy roads, a wedge of water
may form between the tire and the road
surface. This phenomenon is referred to as
hydroplaning and can lead to partial or
complete loss of traction, vehicle control
and braking effectiveness. Reduce your
speed on wet roads.<
Brake system
Approx. 300 miles / 500 km must elapse
before the brake pads and rotors achieve
their optimal surface and wear pattern.
To break in the separate parking brake
drums, apply the parking brake lightly when
coasting to a standstill – at a traffic signal,
for instance; use caution to avoid posing a
danger to other road users.
To avoid corrosion, repeat this procedure
from time to time.
The brake lamps do not come on when the
parking brake is set.
Vacuum for the brake system servo
unit on your BMW is available only
when the engine is running. When you
move the car with the engine off – e.g., by
towing – substantially higher levels of pedal
force will be required to brake the vehicle.<
Clutch
The clutch will achieve its optimal function-
ality after approx. 300 miles / 500 km. Shift
gears carefully during the break-in period.