Page 204 of 694

3 - 19
INSP
ADJ
ENGINE IDLING SPEED ADJUSTMENT
1. Start the engine and thoroughly warm it
up.
2. Attach:
�Inductive tachometer
To spark plug lead.
3. Adjust:
�Engine idling speed
Adjustment steps:
�Adjust the pilot screw.
Refer to “PILOT SCREW ADJUSTMENT”
section.
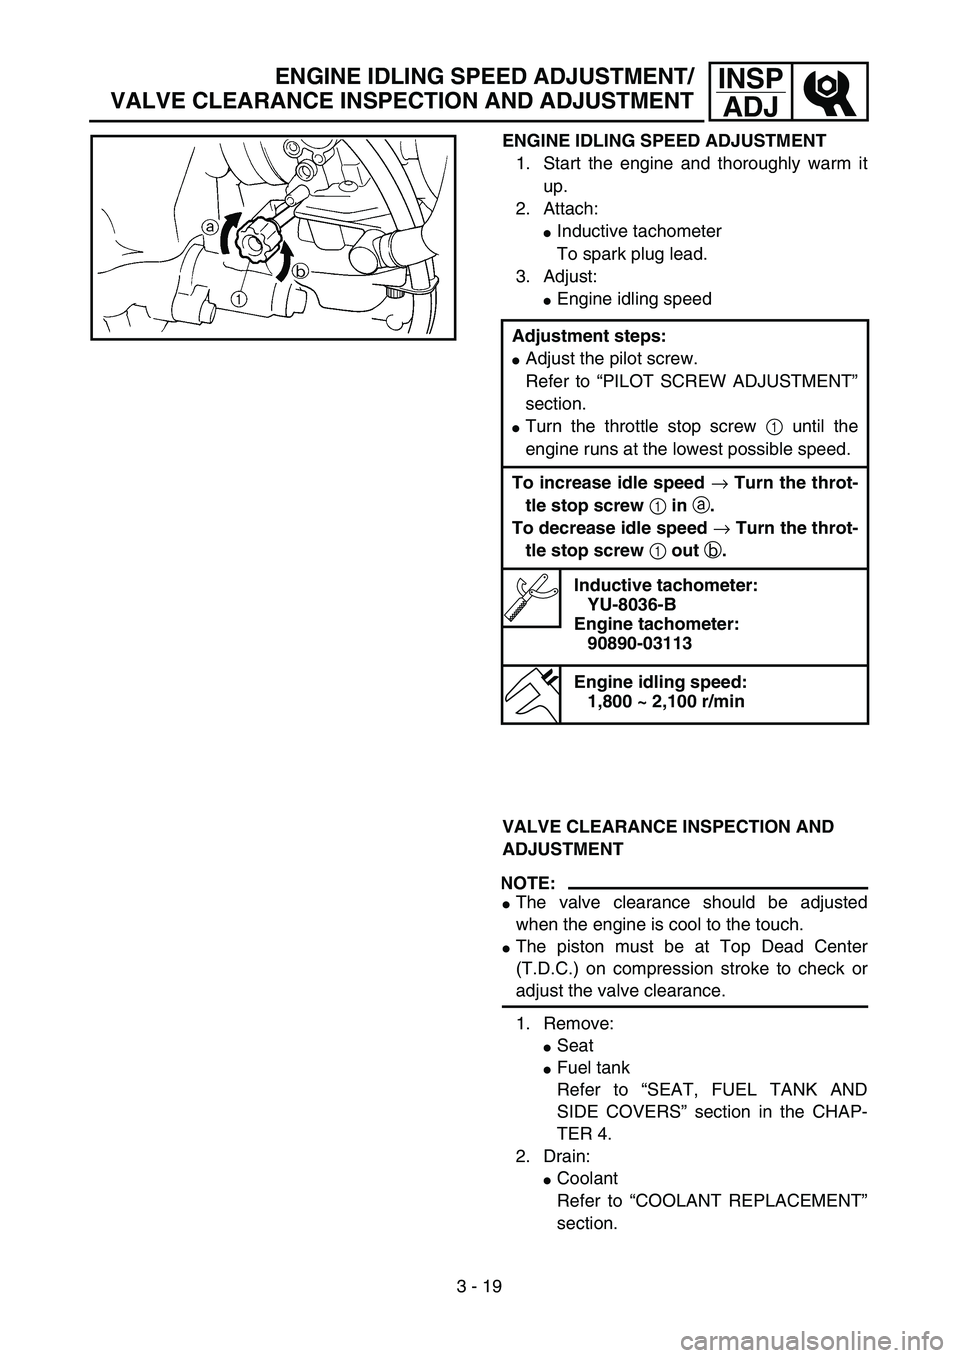
�Turn the throttle stop screw 1 until the
engine runs at the lowest possible speed.
To increase idle speed → Turn the throt-
tle stop screw 1 in a.
To decrease idle speed → Turn the throt-
tle stop screw 1 out b.
Inductive tachometer:
YU-8036-B
Engine tachometer:
90890-03113
Engine idling speed:
1,800 ~ 2,100 r/min
VALVE CLEARANCE INSPECTION AND
ADJUSTMENT
NOTE:
�The valve clearance should be adjusted
when the engine is cool to the touch.
�The piston must be at Top Dead Center
(T.D.C.) on compression stroke to check or
adjust the valve clearance.
1. Remove:
�Seat
�Fuel tank
Refer to “SEAT, FUEL TANK AND
SIDE COVERS” section in the CHAP-
TER 4.
2. Drain:
�Coolant
Refer to “COOLANT REPLACEMENT”
section.
ENGINE IDLING SPEED ADJUSTMENT/
VALVE CLEARANCE INSPECTION AND ADJUSTMENT
Page 280 of 694

4 - 6
ENGRADIATOR
3. Install:
�Right radiator 1
�Bolt (right radiator) 2
�Radiator hose 3 3
Refer to “CABLE ROUTING DIA-
GRAM” section in the CHAPTER 2.
T R..10 Nm (1.0 m · kg, 7.2 ft · lb)
4. Install:
�Left radiator 1
�Bolt (left radiator) 2
�Radiator hose 1 3
Refer to “CABLE ROUTING DIA-
GRAM” section in the CHAPTER 2.
5. Tighten:
�Radiator hose clamp 4
6. Install:
�Radiator guard 1
�Bolt (radiator guard) 2
NOTE:
Fit the hook a on the inner side first into the
radiator.
T R..10 Nm (1.0 m · kg, 7.2 ft · lb)
T R..2 Nm (0.2 m · kg, 1.4 ft · lb)
T R..2 Nm (0.2 m · kg, 1.4 ft · lb)
T R..10 Nm (1.0 m · kg, 7.2 ft · lb)
7. Install:
�Coolant reservoir 1
�Clamp 2
�Bolt [coolant reservoir (front)] 3
�Bolt [coolant reservoir (rear)] 4
�Coolant reservoir hose 5
�Coolant reservoir breather hose 6
Refer to “CABLE ROUTING DIA-
GRAM” section in the CHAPTER 2.
8. Fill:
�Radiator
�Engine
�Coolant reservoir
Refer to “COOLANT REPLACEMENT”
section in the CHAPTER 3.
LOWFULLCOOLANT
1
5
2
6
34
T R..7 Nm (0.7 m · kg, 5.1 ft · lb)
T R..11 Nm (1.1 m · kg, 8.0 ft · lb)
Page 382 of 694
4 - 57
ENG
OIL FILTER ELEMENT, WATER PUMP AND RIGHT
CRANKCASE COVER
OIL FILTER ELEMENT, WATER PUMP AND RIGHT
CRANKCASE COVER
Extent of removal:
1
Oil filter element removal
2
Water pump removal
3
Right crankcase cover removal
Extent of removal Order Part name Q’ty Remarks
OIL FILTER ELEMENT, WATER
PUMP AND RIGHT CRANK-
CASE COVER REMOVAL
Preparation for removal Drain the engine oil. Refer to “ENGINE OIL REPLACEMENT”
section in the CHAPTER 3.
Drain the coolant. Refer to “COOLANT REPLACEMENT”
section in the CHAPTER 3.
Radiator hose 3 Disconnect at water pump side.
Exhaust pipe Refer to “EXHAUST PIPE AND
SILENCER” section.
Brake pedal Refer to “ENGINE REMOVAL” section.
Right engine guard
1 Oil filter element cover 1
2 Oil filter element 1
13
Page 590 of 694
5 - 60
CHASREAR SHOCK ABSORBER
EC580000
REAR SHOCK ABSORBER
Extent of removal:1 Rear shock absorber removal2 Rear shock absorber disassembly
Extent of removal Order Part name Q’ty Remarks
Preparation for removalREAR SHOCK ABSORBER
REMOVAL
Hold the machine by placing the
suitable stand under the engine.
WARNING
Support the machine securely so there is nodanger of it falling over.
Seat and side covers Refer to “SEAT, FUEL TANK AND SIDE
COVERS” section in the CHAPTER 4.
Silencer Refer to “EXHAUST PIPE AND
SILENCER” section in the CHAPTER 4.
Drain the coolant. Refer to “COOLANT REPLACEMENT”
section in the CHAPTER 3.
Coolant reservoir Refer to “RADIATOR” section in the
CHAPTER 4.
1 Taillight connector 2
2 Band 2
3 Bolt (reservoir tank) 1
4 Clamp (air filter joint) 1 Only loosening.
5 Rear frame 1
6 Bolt (rear shock absorber-relay arm) 1Hold the swingarm.
7 Bolt (rear shock absorber-frame) 1
8 Rear shock absorber 1
12