Page 49 of 106
3-14
E
3. Gradually open the throttle lever to 3/4 or
less.
4. Continue operation at 3/4 throttle or less
until the first tankful of fuel has been
used.
5. Fill the tank once more with a fuel-to-oil
ratio of 25:1, and proceed with normal
operation.
CAUTION:@ Failure to follow the engine break-in pro-
cedure properly can result in severe
damage to the engine.
@
E_F1N-70.book Page 14 Wednesday, July 18, 2001 3:28 PM
Page 50 of 106

3-15
E
EJU01137
Starting the engine
WARNING@ Never start the engine or let it run for any
length of time in an enclosed area.
Exhaust fumes contain carbon monox-
ide, a colorless, odorless gas that may
cause loss of consciousness and death
within a short time. Always operate the
watercraft in an open area.
@
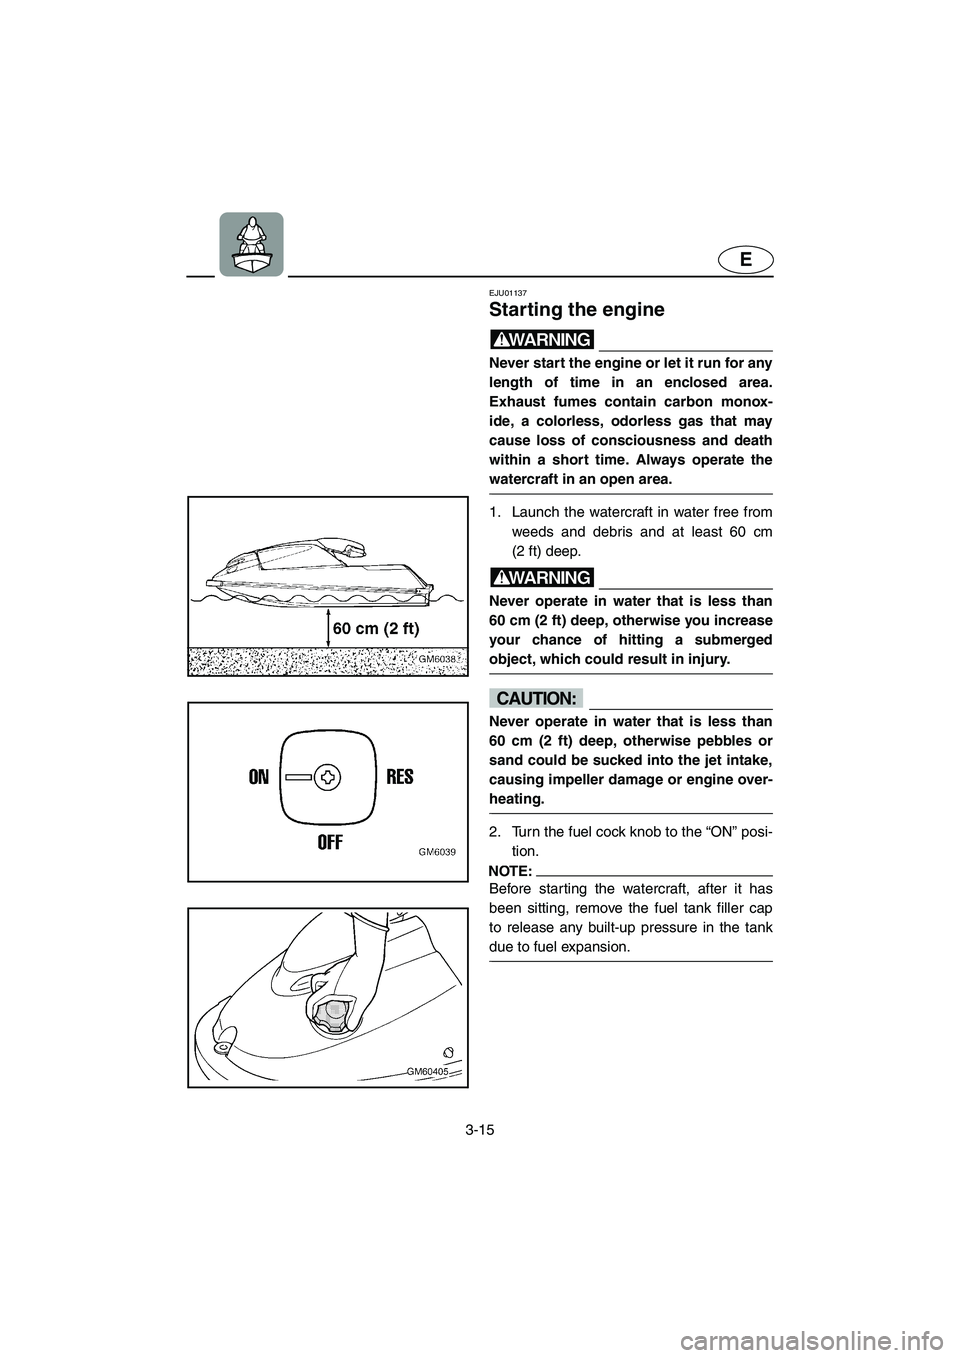
1. Launch the watercraft in water free from
weeds and debris and at least 60 cm
(2 ft) deep.
WARNING@ Never operate in water that is less than
60 cm (2 ft) deep, otherwise you increase
your chance of hitting a submerged
object, which could result in injury.
@
CAUTION:@ Never operate in water that is less than
60 cm (2 ft) deep, otherwise pebbles or
sand could be sucked into the jet intake,
causing impeller damage or engine over-
heating.
@
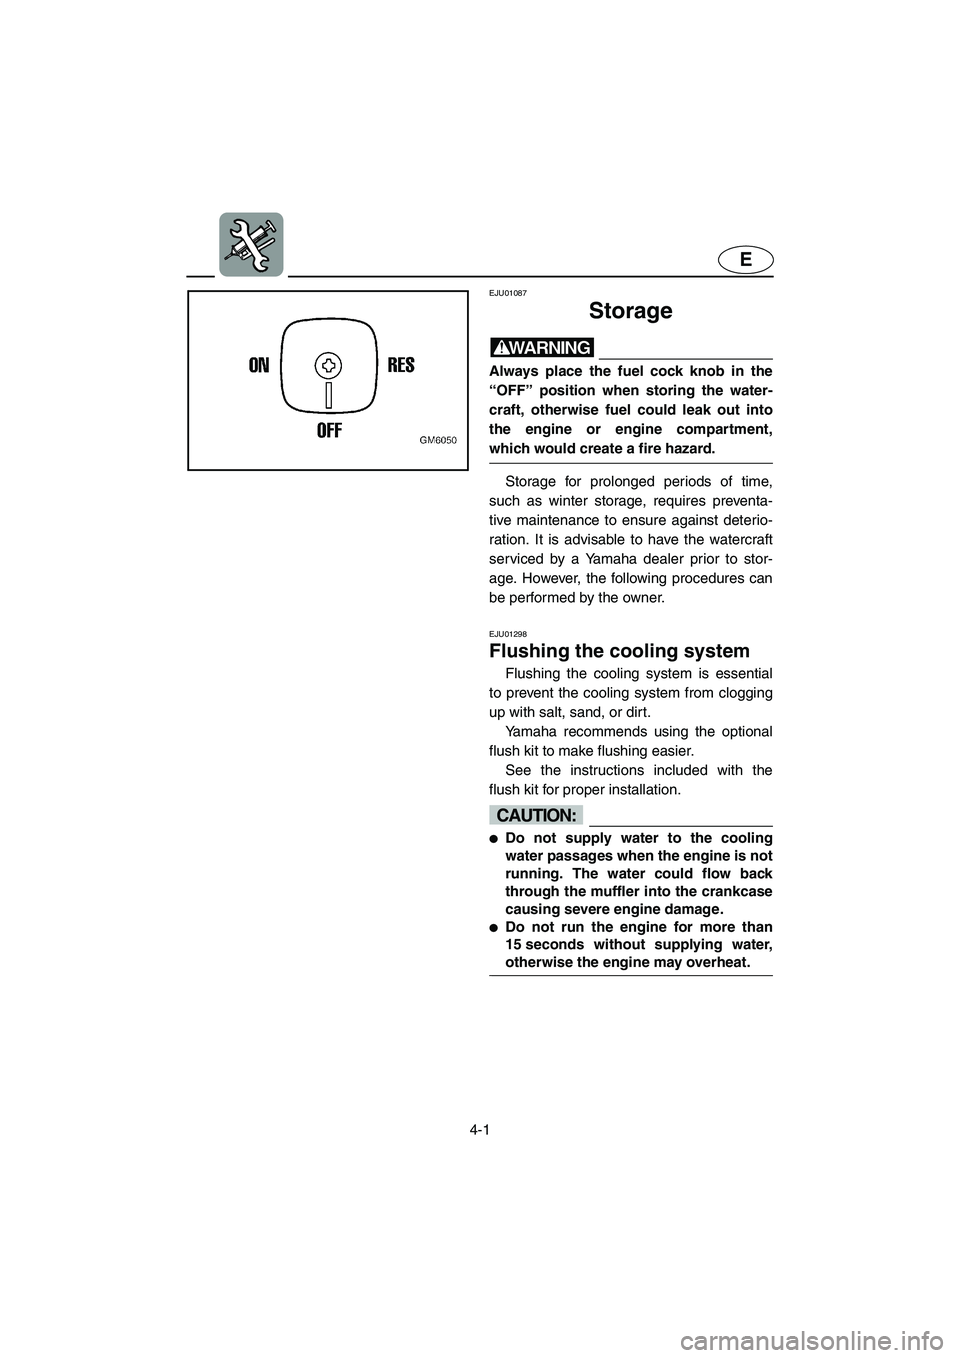
2. Turn the fuel cock knob to the “ON” posi-
tion.
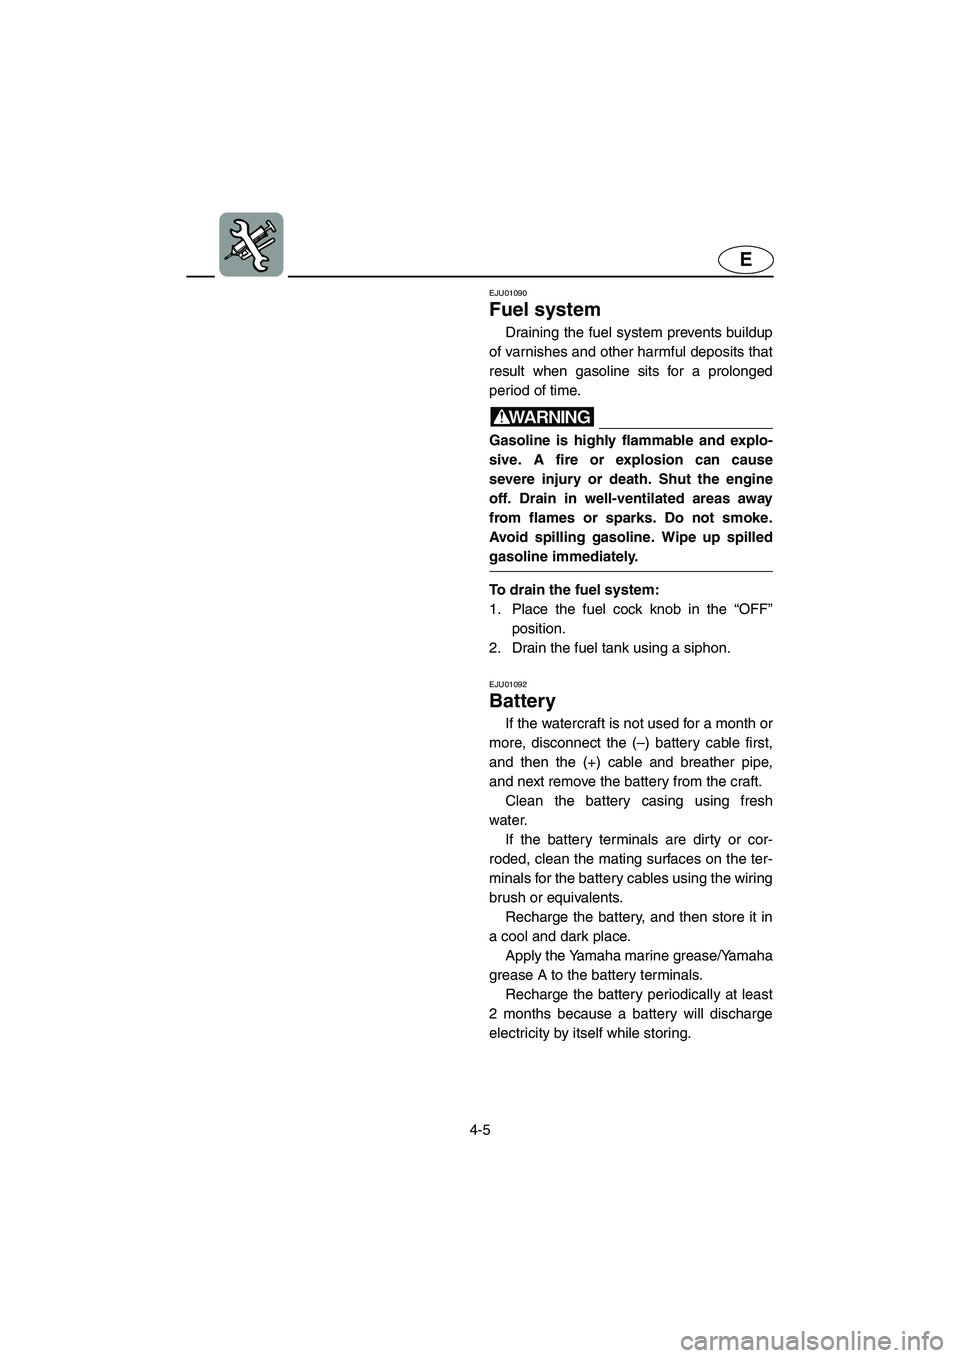
NOTE:@ Before starting the watercraft, after it has
been sitting, remove the fuel tank filler cap
to release any built-up pressure in the tank
due to fuel expansion.
@
E_F1N-70.book Page 15 Wednesday, July 18, 2001 3:28 PM
Page 68 of 106
3-33
E
EJU01297
Transporting
WARNING@ Always place the fuel cock knob in the
“OFF” position when transporting the
watercraft, otherwise fuel could leak out
into the engine or engine compartment,
which would create a fire hazard.
@
Transport this watercraft using the special
trailer that incorporates a hole into which the
pin 1 can be inserted and locked after
passing it through the rope hole 2.
After securing the bow with the pin,
secure the stern with ropes or tie downs 2
over the gunwale. Use a rubber shock
cord1 to hold the steering pole.
CAUTION:@ �Do not route ropes or tie downs over
the steering pole, as they may damage
it. Also, wrap the ropes or tie downs
with towels or rags where they touch
the body of the watercraft to avoid
scratching or damage.
�Do not transport the watercraft with
steering pole up, or the steering pole
may be damaged during transporta-
tion.
@
E_F1N-70.book Page 33 Wednesday, July 18, 2001 3:28 PM
Page 69 of 106

E
4
EJU01086
MAINTENANCE AND
CARE
Storage ...................................................... 4-1
Flushing the cooling system .................. 4-1
Lubrication .............................................. 4-3
Fuel system ............................................ 4-5
Battery .................................................... 4-5
Cleaning the watercraft .......................... 4-6
Maintenance and adjustments .............. 4-7
Owner’s/Operator’s Manual and
tool kit ..................................................... 4-8
Periodic maintenance chart ................... 4-9
Inspecting the fuel system ................... 4-10
Inspecting the steering cable ............... 4-12
Inspecting and adjusting the throttle
cable ..................................................... 4-12
Cleaning and adjusting the spark
plugs ..................................................... 4-13
Lubrication points ................................. 4-14
Adjusting the choke cable .................... 4-16
Inspecting the battery .......................... 4-17
Adjusting the carburetor ...................... 4-19
Replacing the fuse ............................... 4-20
Adjusting the steering friction .............. 4-20
Adjusting the jet thrust nozzle angle ... 4-21
Specifications ........................................ 4-23
E_F1N-70.book Page 1 Wednesday, July 18, 2001 3:28 PM
Page 70 of 106

4-1
E
EJU01087
Storage
WARNING@ Always place the fuel cock knob in the
“OFF” position when storing the water-
craft, otherwise fuel could leak out into
the engine or engine compartment,
which would create a fire hazard.
@
Storage for prolonged periods of time,
such as winter storage, requires preventa-
tive maintenance to ensure against deterio-
ration. It is advisable to have the watercraft
serviced by a Yamaha dealer prior to stor-
age. However, the following procedures can
be performed by the owner.
EJU01298
Flushing the cooling system
Flushing the cooling system is essential
to prevent the cooling system from clogging
up with salt, sand, or dirt.
Yamaha recommends using the optional
flush kit to make flushing easier.
See the instructions included with the
flush kit for proper installation.
CAUTION:@ �Do not supply water to the cooling
water passages when the engine is not
running. The water could flow back
through the muffler into the crankcase
causing severe engine damage.
�Do not run the engine for more than
15 seconds without supplying water,
otherwise the engine may overheat.
@
E_F1N-70.book Page 1 Wednesday, July 18, 2001 3:28 PM
Page 74 of 106

4-5
E
EJU01090
Fuel system
Draining the fuel system prevents buildup
of varnishes and other harmful deposits that
result when gasoline sits for a prolonged
period of time.
WARNING@ Gasoline is highly flammable and explo-
sive. A fire or explosion can cause
severe injury or death. Shut the engine
off. Drain in well-ventilated areas away
from flames or sparks. Do not smoke.
Avoid spilling gasoline. Wipe up spilled
gasoline immediately.
@
To drain the fuel system:
1. Place the fuel cock knob in the “OFF”
position.
2. Drain the fuel tank using a siphon.
EJU01092
Battery
If the watercraft is not used for a month or
more, disconnect the (–) battery cable first,
and then the (+) cable and breather pipe,
and next remove the battery from the craft.
Clean the battery casing using fresh
water.
If the battery terminals are dirty or cor-
roded, clean the mating surfaces on the ter-
minals for the battery cables using the wiring
brush or equivalents.
Recharge the battery, and then store it in
a cool and dark place.
Apply the Yamaha marine grease/Yamaha
grease A to the battery terminals.
Recharge the battery periodically at least
2 months because a battery will discharge
electricity by itself while storing.
E_F1N-70.book Page 5 Wednesday, July 18, 2001 3:28 PM
Page 78 of 106

4-9
E
EJU01355
Periodic maintenance chart
The following chart gives general guidelines for periodic maintenance. However, depend-
ing on your operating conditions maintenance may need to be performed more frequently.
*1: Grease capacity: 20.0–22.0 cm3 (0.68–0.74 oz)
*2: Grease capacity: 3.0–5.0 cm3 (0.10–0.17 oz)
(�) This mark indicates maintenance that you may do yourself.
(
❍) This mark indicates work to be done by a Yamaha dealer.
MAINTENANCE INTERVAL INITIALTHEREAF-
TER EVERYPA G E
10
hours50
hours100
hours 100
hours 200
hours
ITEM
3
months6
months6
months12
months
Spark plug Inspect, clean, adjust ����
4-13
Lubrication points Lubricate��
4-14
Intermediate housing Lubricate❍
*1�
*2�
*2 4-16
Fuel system Inspect❍❍
4-10
Fuel filter Check, replace❍❍
4-11
Fuel tank Clean❍
4-11
Carburetor setting Inspect, adjust❍❍❍
4-19
Trolling speed Adjust��
4-19
Carburetor throttle shaft Inspect❍❍
—
Cooling water passages Flush�
(after
ever y
use) 4-1
Bilge strainer Clean���
—
Impeller Inspect���
—
Steering cable Inspect��
4-12
Steering pivot Inspect❍❍❍
—
Steering friction Inspect���
4-20
Throttle cable Inspect, adjust��
4-12
Choke cable Inspect, adjust ��
4-16
Battery Inspect�
(Inspect
fluid level
before
ever y
use)4-17
Rubber coupling Inspect❍
—
Nuts and bolts Tighten❍❍❍
—
E_F1N-70.book Page 9 Wednesday, July 18, 2001 3:28 PM
Page 79 of 106
4-10
E
EJU01383
Inspecting the fuel system
WARNING@ Gasoline is highly flammable and explo-
sive. A fire or explosion can cause
severe injury or death. Shut off the
engine. Do not smoke. Avoid spilling
gasoline.
@
Check the fuel system for leaks, cracks,
or malfunctions. If any problem is found, do
the necessary repair or replacement as
required. If repair is necessary, consult a
Yamaha dealer.
Check:
�Carburetor for leakage.
�Fuel pump for malfunction or leakage.
�Fuel tank for water or dirt.
�Fuel tank for damage, cracks or leakage.
�Fuel hose joint for leakage.
�Fuel hose for cracks or other damage.
�Fuel filter for leakage.
�Fuel cock for leakage.
�Air vent check valve for leakage.
�Fuel tank filler cap for damage.
WARNING@ Failure to check for and repair any fuel
leakage may result in fire or explosion.
@
E_F1N-70.book Page 10 Wednesday, July 18, 2001 3:28 PM