Page 65 of 114
6-15
PERIODIC MAINTENANCE AND MINOR REPAIR
63. Wait a few minutes until the oil
settles, remove the oil filler cap,
wipe the dipstick clean, insert it
back into the oil filler hole (with-
out screwing it in), and then
remove it again to check the oil
level.
NOTE:
The engine oil should be between the
minimum and maximum level marks.
3121
1. Engine oil filler cap
2. Maximum level mark
3. Minimum level mark
To change the engine oil
1. Start the engine, warm it up for
several minutes, and then turn it
off.
2. Place an oil pan under the
engine to collect the used oil.
3. Remove the engine oil filler cap
and the engine oil drain bolt to
drain the oil from the crankcase.
1
1. Engine oil drain bolt
4. If the engine oil is below the min-
imum level mark, add sufficient
oil of the recommended type to
raise it to the correct level.
5. Insert the dipstick into the oil filler
hole, and then tighten the oil filler
cap.
5SJ-28199-E0 1/24/02 6:14 PM Page 64
Page 66 of 114

6-16
PERIODIC MAINTENANCE AND MINOR REPAIR
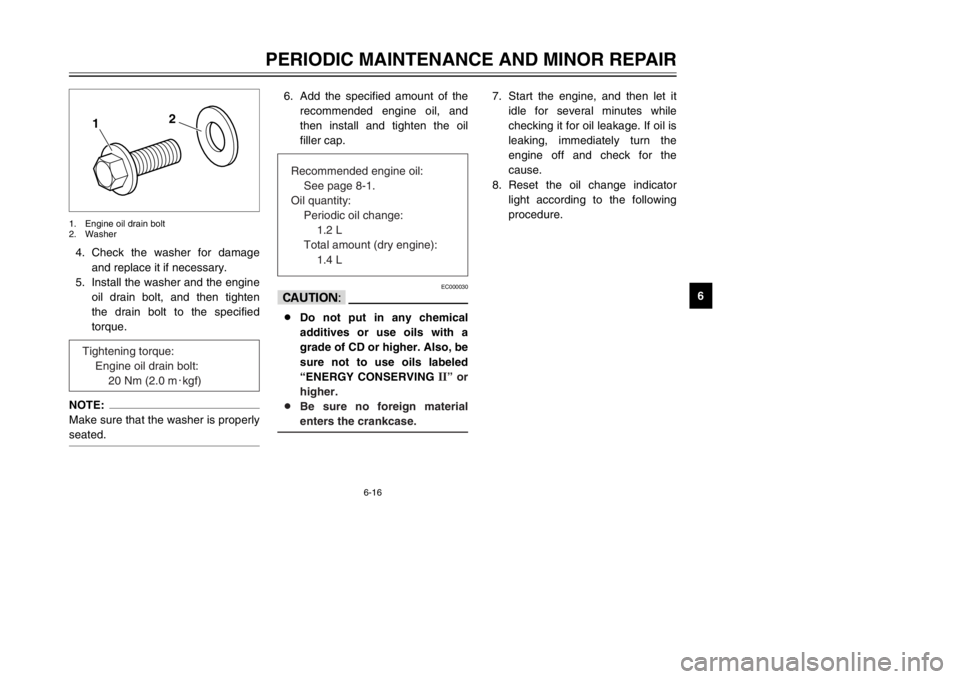
6 4. Check the washer for damage
and replace it if necessary.
5. Install the washer and the engine
oil drain bolt, and then tighten
the drain bolt to the specified
torque.
NOTE:
Make sure that the washer is properly
seated.
12
1. Engine oil drain bolt
2. Washer
7. Start the engine, and then let it
idle for several minutes while
checking it for oil leakage. If oil is
leaking, immediately turn the
engine off and check for the
cause.
8. Reset the oil change indicator
light according to the following
procedure. 6. Add the specified amount of the
recommended engine oil, and
then install and tighten the oil
filler cap.
EC000030
cC8Do not put in any chemical
additives or use oils with a
grade of CD or higher. Also, be
sure not to use oils labeled
“ENERGY CONSERVING
II” or
higher.
8Be sure no foreign material
enters the crankcase.
Tightening torque:
Engine oil drain bolt:
20 Nm (2.0 m0kgf)
Recommended engine oil:
See page 8-1.
Oil quantity:
Periodic oil change:
1.2 L
Total amount (dry engine):
1.4 L
5SJ-28199-E0 1/24/02 6:14 PM Page 65
Page 68 of 114

6-18
PERIODIC MAINTENANCE AND MINOR REPAIR
6
EAU04228
Final transmission oilFinal transmission oilThe final transmission case must be
checked for oil leakage before each
ride. If any leakage is found, have a
Yamaha dealer check and repair the
scooter. In addition, the final trans-
mission oil must be changed as fol-
lows at the intervals specified in the
periodic maintenance and lubrication
chart.
1. Start the engine, warm it up by
riding the scooter for several
minutes, and then stop the
engine.
2. Place the scooter on the center-
stand.
3. Place an oil pan under the final
transmission case to collect the
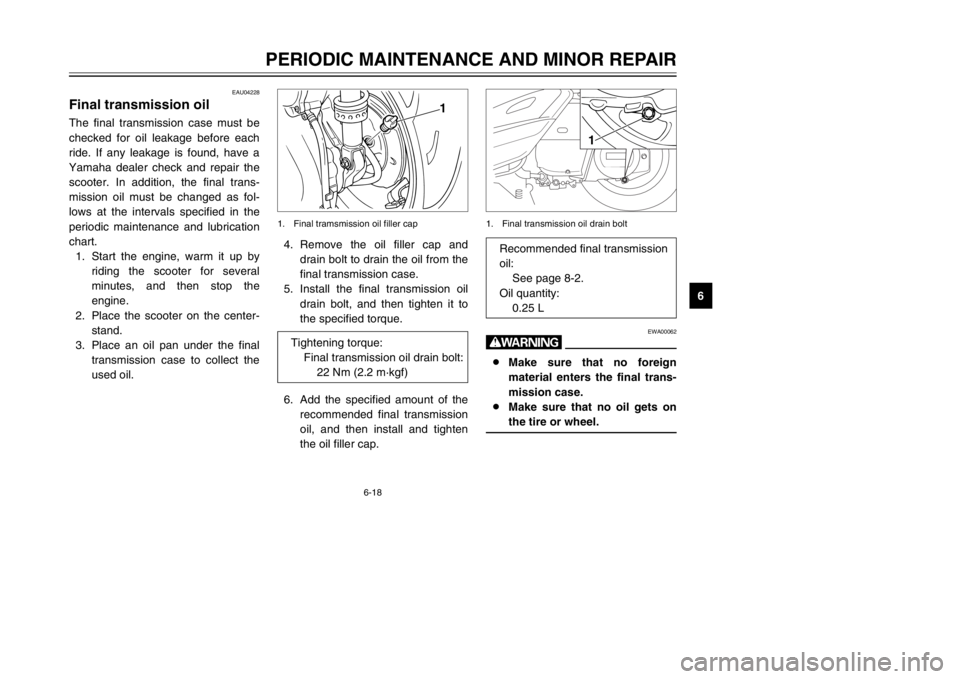
used oil.4. Remove the oil filler cap and
drain bolt to drain the oil from the
final transmission case.
5. Install the final transmission oil
drain bolt, and then tighten it to
the specified torque.
6. Add the specified amount of the
recommended final transmission
oil, and then install and tighten
the oil filler cap.
1
1. Final tramsmission oil filler cap
EWA00062
w8Make sure that no foreign
material enters the final trans-
mission case.
8Make sure that no oil gets on
the tire or wheel.
1
1. Final transmission oil drain bolt
Tightening torque:
Final transmission oil drain bolt:
22 Nm (2.2 m·kgf)
Recommended final transmission
oil:
See page 8-2.
Oil quantity:
0.25 L
5SJ-28199-E0 1/24/02 6:14 PM Page 67
Page 100 of 114

7-4
SCOOTER CARE AND STORAGE
7
StorageStorageShort-term
Always store your scooter in a cool,
dry place and, if necessary, protect it
against dust with a porous cover.
ECA00015
cC8Storing the scooter in a poorly
ventilated room or covering it
with a tarp, while it is still wet,
will allow water and humidity
to seep in and cause rust.
8To prevent corrosion, avoid
damp cellars, stables (because
of the presence of ammonia)
and areas where strong chemi-
cals are stored.
Long-term
Before storing your scooter for sever-
al months:
1. Follow all the instructions in the
“Care” section of this chapter.
2. Drain the carburetor float cham-
ber by loosening the drain bolt;
this will prevent fuel deposits
from building up. Pour the
drained fuel into the fuel tank.
3. Fill up the fuel tank and add fuel
stabilizer (if available) to prevent
the fuel tank from rusting and the
fuel from deteriorating.
4. Perform the following steps to
protect the cylinder, piston rings,
etc. from corrosion.a. Remove the spark plug cap
and spark plug.
b. Pour a teaspoonful of engine
oil into the spark plug bore.
c. Install the spark plug cap onto
the spark plug, and then place
the spark plug on the cylinder
head so that the electrodes
are grounded. (This will limit
sparking during the next step.)
d. Turn the engine over several
times with the starter. (This
will coat the cylinder wall with
oil.)
e. Remove the spark plug cap
from the spark plug, and then
install the spark plug and the
spark plug cap.
EWA00003
wTo prevent damage or injury from
sparking, make sure to ground the
spark plug electrodes while turn-
ing the engine over.
5SJ-28199-E0 1/24/02 6:14 PM Page 99