2002 YAMAHA MAJESTY 250 Spark plug
[x] Cancel search: Spark plugPage 31 of 114

3-15
INSTRUMENT AND CONTROL FUNCTIONS
3
EAU04284
ECA00104
cCUse only unleaded gasoline. The
use of leaded gasoline will cause
severe damage to internal engine
parts, such as the valves and pis-
ton rings, as well as to the exhaust
system.
EAU03098
Catalytic converterCatalytic converterThis scooter is equipped with a cat-
alytic converter in the muffler.
EW000128
wThe exhaust system is hot after
operation. Make sure that the
exhaust system has cooled down
before doing any maintenance
work.
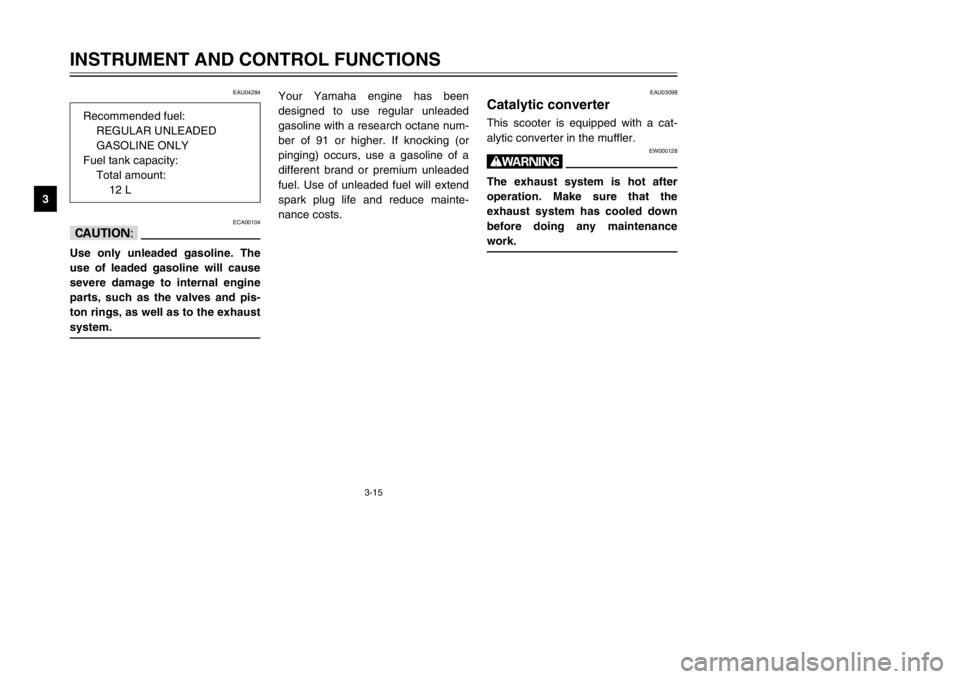
Your Yamaha engine has been
designed to use regular unleaded
gasoline with a research octane num-
ber of 91 or higher. If knocking (or
pinging) occurs, use a gasoline of a
different brand or premium unleaded
fuel. Use of unleaded fuel will extend
spark plug life and reduce mainte-
nance costs. Recommended fuel:
REGULAR UNLEADED
GASOLINE ONLY
Fuel tank capacity:
Total amount:
12 L
5SJ-28199-E0 1/24/02 6:14 PM Page 30
Page 50 of 114

PERIODIC MAINTENANCE AND MINOR REPAIR
Owner’s tool kit ......................................................6-1
Periodic maintenance and lubrication chart ..........6-3
Removing and installing the cowlings and panel ...6-6
Checking the spark plug ......................................6-12
Engine oil .............................................................6-14
Final transmission oil ...........................................6-18
Coolant ................................................................6-19
Air filter and V-belt case air filter elements ..........6-21
Air flow louver ......................................................6-23
Adjusting the throttle cable free play ...................6-23
Adjusting the valve clearance ..............................6-23
Tires ....................................................................6-24
Cast wheels .........................................................6-26
Adjusting the front and rear brake lever
free play .............................................................6-27
Checking the front and rear brake pads ..............6-28
Checking the brake fluid level .............................6-29
Changing the brake fluid .....................................6-30
Checking and lubricating the cables ....................6-30
Checking and lubricating the throttle grip
and cable ...........................................................6-31
Lubricating the front and rear brake levers ..........6-31
Checking and lubricating the centerstand
and sidestand ....................................................6-31Checking the front fork ........................................6-32
Checking the steering ..........................................6-33
Checking the wheel bearings ..............................6-33
Removing the battery cover ................................6-34
Battery .................................................................6-34
Replacing the fuses .............................................6-36
Replacing a headlight bulb ..................................6-37
Replacing a front turn signal light bulb ................6-39
Replacing a rear turn signal light bulb .................6-40
Replacing a tail/brake light bulb ..........................6-40
Replacing the license plate light bulb ..................6-41
Troubleshooting ...................................................6-42
Troubleshooting charts ........................................6-43
6
5SJ-28199-E0 1/24/02 6:14 PM Page 49
Page 53 of 114

6-3
PERIODIC MAINTENANCE AND MINOR REPAIR
6
EAU03685
Periodic maintenance and lubrication chart
Periodic maintenance and lubrication chartNOTE:
8The annual checks must be performed every year, except if a kilometer-based maintenance is performed instead.
8From 50,000 km, repeat the maintenance intervals starting from 10,000 km.
8Items marked with an asterisk should be performed by a Yamaha dealer as they require special tools, data and
technical skills.NO. ITEM CHECK OR MAINTENANCE JOBODOMETER READING (× 1,000 km)
ANNUAL
CHECK
1 10203040
1
*Fuel line•Check fuel hoses and vacuum hose for cracks or damage.√√√√ √
2 Spark plug•Check condition.
•Clean and regap.√√
•Replace.√√
3*Valves•Check valve clearance.
•Adjust.√√
4 Air filter element•Clean.√√
•Replace.√√
5V-belt case air filter
element•Clean.√√√√
6*Front brake•Check operation, fluid level and vehicle for fluid leakage.
(See NOTE on page 6-5.)√√√√√ √
•Replace brake pads.Whenever worn to the limit
7*Rear brake•Check operation, fluid level and vehicle for fluid leakage.
(See NOTE on page 6-5.)√√√√√ √
•Replace brake pads.Whenever worn to the limit
5SJ-28199-E0 1/24/02 6:14 PM Page 52
Page 62 of 114

6-12
PERIODIC MAINTENANCE AND MINOR REPAIR
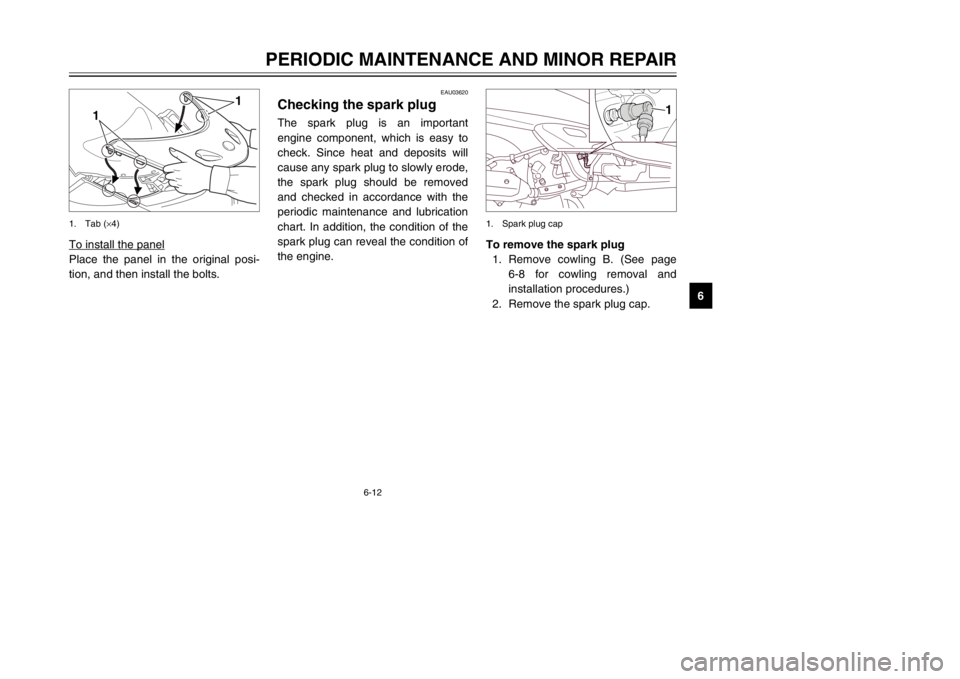
6 To install the panel
Place the panel in the original posi-
tion, and then install the bolts.
1
1
1. Tab (×4)
To remove the spark plug
1. Remove cowling B. (See page
6-8 for cowling removal and
installation procedures.)
2. Remove the spark plug cap.
1
1. Spark plug cap
EAU03620
Checking the spark plugSpark plug, checkingThe spark plug is an important
engine component, which is easy to
check. Since heat and deposits will
cause any spark plug to slowly erode,
the spark plug should be removed
and checked in accordance with the
periodic maintenance and lubrication
chart. In addition, the condition of the
spark plug can reveal the condition of
the engine.
5SJ-28199-E0 1/24/02 6:14 PM Page 61
Page 63 of 114

6-13
PERIODIC MAINTENANCE AND MINOR REPAIR
63. Remove the spark plug as
shown, with the spark plug
wrench included in the owner’s
tool kit.
1
1. Spark plug wrench
To install the spark plug
1. Measure the spark plug gap with
a wire thickness gauge and, if
necessary, adjust the gap to
specification.
2. Clean the surface of the spark
plug gasket and its mating sur-
face, and then wipe off any grime
from the spark plug threads.
3. Install the spark plug with the
spark plug wrench, and then
tighten it to the specified torque.
a
a. Spark plug gap
To check the spark plug
1. Check that the porcelain insula-
tor around the center electrode
of the spark plug is a medium-to-
light tan (the ideal color when the
scooter is ridden normally).NOTE:
If the spark plug shows a distinctly
different color, the engine could be
defective. Do not attempt to diagnose
such problems yourself. Instead,
have a Yamaha dealer check the
scooter.2. Check the spark plug for elec-
trode erosion and excessive car-
bon or other deposits, and
replace it if necessary.
Specified spark plug:
DR8EA (NGK)
Spark plug gap:
0.6–0.7 mm
5SJ-28199-E0 1/24/02 6:14 PM Page 62
Page 64 of 114

6-14
PERIODIC MAINTENANCE AND MINOR REPAIR
6
NOTE:
If a torque wrench is not available
when installing a spark plug, a good
estimate of the correct torque is
1/4–1/2 turn past finger tight.
However, the spark plug should be
tightened to the specified torque as
soon as possible.4. Install the spark plug cap.
5. Install the cowling.To check the engine oil level
1. Place the scooter on the center-
stand.
NOTE:
Make sure that the scooter is posi-
tioned straight up when checking the
oil level. A slight tilt to the side can
result in a false reading.2. Start the engine, warm it up for
several minutes, and then turn it
off.
EAU03119
Engine oilEngine oilThe engine oil level should be
checked before each ride. In addition,
the oil must be changed at the inter-
vals specified in the periodic mainte-
nance and lubrication chart and when
the oil change indicator light comes
on. Tightening torque:
Spark plug:
17.5 Nm (1.75 m·kgf)
5SJ-28199-E0 1/24/02 6:14 PM Page 63
Page 93 of 114

6-43
PERIODIC MAINTENANCE AND MINOR REPAIR
6
EAU01581
Troubleshooting chartsTroubleshooting chartsStarting problems or poor engine performance
EW000125
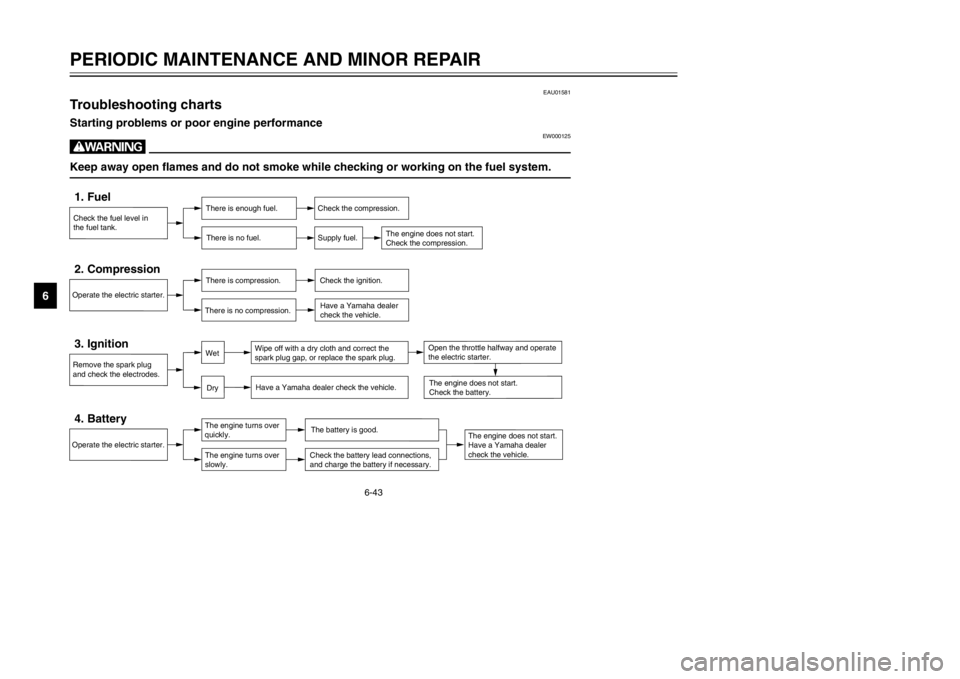
wKeep away open flames and do not smoke while checking or working on the fuel system.Check the fuel level in
the fuel tank.1. Fuel
There is enough fuel.
There is no fuel.
Check the compression.
Supply fuel.
The engine does not start.
Check the compression.
Operate the electric starter.2. Compression
There is compression.
There is no compression.
Check the ignition.
Have a Yamaha dealer
check the vehicle.
Remove the spark plug
and check the electrodes.3. Ignition
Wipe off with a dry cloth and correct the
spark plug gap, or replace the spark plug.
Have a Yamaha dealer check the vehicle.
The engine does not start.
Have a Yamaha dealer
check the vehicle.
The engine does not start.
Check the battery.
Operate the electric starter.4. Battery
The engine turns over
The engine turns over
The battery is good.Check the battery lead connections,
and charge the battery if necessary.
DryWet
Open the throttle halfway and operate
the electric starter.
quickly.
slowly.
5SJ-28199-E0 1/24/02 6:14 PM Page 92
Page 97 of 114

7-1
EAU03434
SCOOTER CARE AND STORAGE
7
CareCareWhile the open design of a scooter
reveals the attractiveness of the tech-
nology, it also makes it more vulnera-
ble. Rust and corrosion can develop
even if high-quality components are
used. A rusty exhaust pipe may go
unnoticed on a car, however, it
detracts from the overall appearance
of a scooter. Frequent and proper
care does not only comply with the
terms of the warranty, but it will also
keep your scooter looking good,
extend its life and optimize its perfor-
mance.Before cleaning
1. Cover the muffler outlet with a
plastic bag after the engine has
cooled down.
2. Make sure that all caps and cov-
ers as well as all electrical cou-
plers and connectors, including
the spark plug cap, are tightly
installed.
3. Remove extremely stubborn dirt,
like oil burnt onto the crankcase,
with a degreasing agent and a
brush, but never apply such
products onto seals, gaskets and
wheel axles. Always rinse the dirt
and degreaser off with water.Cleaning
ECA00011
cC8Avoid using strong acidic
wheel cleaners, especially on
spoked wheels. If such prod-
ucts are used on hard-to-
remove dirt, do not leave the
cleaner on the affected area
any longer than instructed.
Also, thoroughly rinse the area
off with water, immediately dry
it, and then apply a corrosion
protection spray.
8Improper cleaning can damage
windshields, cowlings, panels
and other plastic parts. Use
only a soft, clean cloth or
sponge with mild detergent
and water to clean plastic.
5SJ-28199-E0 1/24/02 6:14 PM Page 96