Page 76 of 114

6-26
PERIODIC MAINTENANCE AND MINOR REPAIR
6
EAU00683
w8Have a Yamaha dealer replace
excessively worn tires.
Besides being illegal, operat-
ing the scooter with exces-
sively worn tires decreases
riding stability and can lead to
loss of control.
8The replacement of all wheel
and brake related parts,
including the tires, should be
left to a Yamaha dealer, who
has the necessary profession-
al knowledge and experience.
NOTE:
The tire tread depth limits may differ
from country to country. Always com-
ply with the local regulations.Tire information
This scooter is equipped with tube-
less tires.FRONT
Manufacturer Size Model
IRC 110/90-12 64L MB67
MICHELIN 110/90-12 64L BOPPER
REAR
Manufacturer Size Model
IRC 130/70-12 62L MB67
MICHELIN 130/70-12 62L BOPPER
EAU03773
Cast wheelsWheelsTo maximize the performance, dura-
bility, and safe operation of your
scooter, note the following points
regarding the specified wheels.
8The wheel rims should be
checked for cracks, bends or
warpage before each ride. If any
damage is found, have a
Yamaha dealer replace the
wheel. Do not attempt even the
smallest repair to the wheel. A
deformed or cracked wheel must
be replaced.
8The wheel should be balanced
whenever either the tire or wheel
has been changed or replaced.
An unbalanced wheel can result
in poor performance, adverse
handling characteristics, and a
shortened tire life.
5SJ-28199-E0 1/24/02 6:14 PM Page 75
Page 77 of 114
EAU00703
Adjusting the front and rear
brake lever free playFront and rear brake lever free play, adjustingThe front and rear brake lever free
play should measure 2–5 mm as
shown. Periodically check the front
and rear brake lever free play and, if
necessary, adjust them as follows.
a b
c 1
2
1. Locknut
2. Adjusting bolt
c. Brake lever free play
6-27
PERIODIC MAINTENANCE AND MINOR REPAIR
6
FRONT
8Ride at moderate speeds after
changing a tire since the tire sur-
face must first be “broken in” for
it to develop its optimal charac-
teristics.
1. Loosen the locknut at the brake
lever.
2. To increase the brake lever free
play, turn the adjusting bolt in
direction a. To decrease the
brake lever free play, turn the
adjusting bolt in direction b.
3. Tighten the locknut.
EW000101
wIf proper adjustment cannot be
obtained as described, have a
Yamaha dealer make this adjust-
ment.
1
c
a
b
2
1. Locknut
2. Adjusting bolt
c. Brake lever free playREAR
5SJ-28199-E0 1/24/02 6:14 PM Page 76
Page 78 of 114
6-28
PERIODIC MAINTENANCE AND MINOR REPAIR
6
EAU00721
Checking the front and rear
brake padsFront and rear brake pads, checkingThe front and rear brake pads must
be checked for wear at the intervals
specified in the periodic maintenance
and lubrication chart.
EAU04583
Front brake pads
Each front brake pad is provided with
a wear indicator groove, which allows
you to check the brake pad wear
without having to disassemble the
brake. Check the brake pad wear as
follows.
1. Remove the brake caliper bolt,
and then tilt the caliper forward
to inspect the wear indicator
groove. If a brake pad has worn
to the point that the wear indica-
tor groove has almost disap-
peared, have a Yamaha dealer
replace the brake pads as a set.
1
2
1. Brake caliper bolt
2. Brake caliperFRONT
2. Install the brake caliper bolt, and
then tighten it to the specified
torque.
1
1. Wear indicator groove (×2)
Tightening torque:
Brake caliper bolt:
26.5 Nm (2.65 m·kgf)
5SJ-28199-E0 1/24/02 6:14 PM Page 77
Page 79 of 114

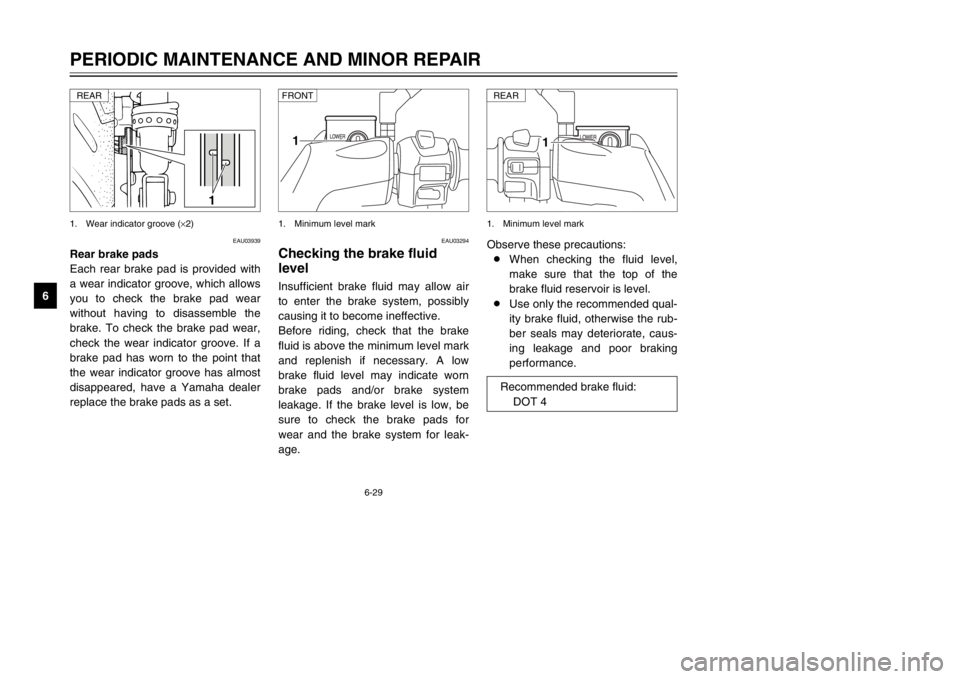
Observe these precautions:
8When checking the fluid level,
make sure that the top of the
brake fluid reservoir is level.
8Use only the recommended qual-
ity brake fluid, otherwise the rub-
ber seals may deteriorate, caus-
ing leakage and poor braking
performance.
1
1. Minimum level mark
6-29
PERIODIC MAINTENANCE AND MINOR REPAIR
6
EAU03294
Checking the brake fluid
levelBrake fluid level, checkingInsufficient brake fluid may allow air
to enter the brake system, possibly
causing it to become ineffective.
Before riding, check that the brake
fluid is above the minimum level mark
and replenish if necessary. A low
brake fluid level may indicate worn
brake pads and/or brake system
leakage. If the brake level is low, be
sure to check the brake pads for
wear and the brake system for leak-
age.
1
1. Minimum level mark
EAU03939
Rear brake pads
Each rear brake pad is provided with
a wear indicator groove, which allows
you to check the brake pad wear
without having to disassemble the
brake. To check the brake pad wear,
check the wear indicator groove. If a
brake pad has worn to the point that
the wear indicator groove has almost
disappeared, have a Yamaha dealer
replace the brake pads as a set.
1
1. Wear indicator groove (×2)REAR
FRONT
REARRecommended brake fluid:
DOT 4
5SJ-28199-E0 1/24/02 6:14 PM Page 78
Page 80 of 114

6-30
PERIODIC MAINTENANCE AND MINOR REPAIR
6 8Refill with the same type of brake
fluid. Mixing fluids may result in a
harmful chemical reaction and
lead to poor braking perfor-
mance.
8Be careful that water does not
enter the brake fluid reservoir
when refilling. Water will signifi-
cantly lower the boiling point of
the fluid and may result in vapor
lock.
8Brake fluid may deteriorate paint-
ed surfaces or plastic parts.
Always clean up spilled fluid
immediately.
8As the brake pads wear, it is nor-
mal for the brake fluid level to
gradually go down. However, if
the brake fluid level goes down
suddenly, have a Yamaha dealer
check the cause.
EAU03976
Changing the brake fluidBrake fluid, changingHave a Yamaha dealer change the
brake fluid at the intervals specified in
the NOTE after the periodic mainte-
nance and lubrication chart. In addi-
tion, have the oil seals of the master
cylinders and calipers as well as the
brake hoses replaced at the intervals
listed below or whenever they are
damaged or leaking.
8Oil seals: Replace every two
years.
8Brake hoses: Replace every four
years.
EAU02962
Checking and lubricating the
cablesCables, checking and lubricatingThe operation of all control cables
and the condition of the cables
should be checked before each ride,
and the cables and cable ends
should be lubricated if necessary. If a
cable is damaged or does not move
smoothly, have a Yamaha dealer
check or replace it.
EW000112
wDamage to the outer sheath may
interfere with proper cable opera-
tion and will cause the inner cable
to rust. Replace a damaged cable
as soon as possible to prevent
unsafe conditions.
Recommended lubricant:
Engine oil
5SJ-28199-E0 1/24/02 6:14 PM Page 79
Page 81 of 114

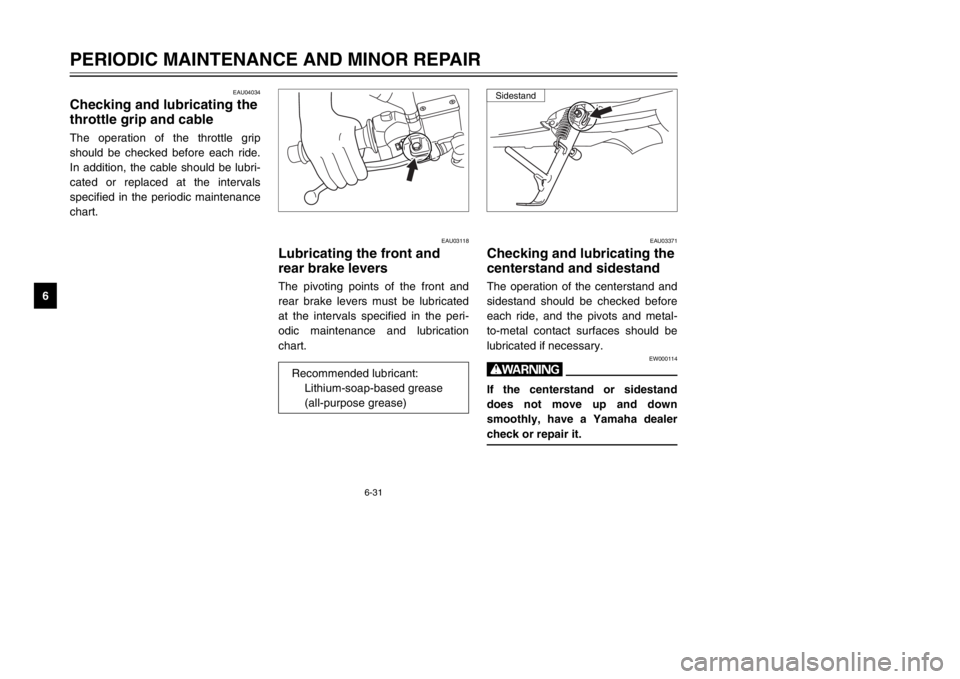
EAU03118
Lubricating the front and
rear brake leversBrake levers, lubricatingThe pivoting points of the front and
rear brake levers must be lubricated
at the intervals specified in the peri-
odic maintenance and lubrication
chart.
EAU03371
Checking and lubricating the
centerstand and sidestandCenterstand and sidestand, checking and lubricatingThe operation of the centerstand and
sidestand should be checked before
each ride, and the pivots and metal-
to-metal contact surfaces should be
lubricated if necessary.
EW000114
wIf the centerstand or sidestand
does not move up and down
smoothly, have a Yamaha dealer
check or repair it.
6-31
PERIODIC MAINTENANCE AND MINOR REPAIR
6
EAU04034
Checking and lubricating the
throttle grip and cableThrottle grip and cable, checking and lubricatingThe operation of the throttle grip
should be checked before each ride.
In addition, the cable should be lubri-
cated or replaced at the intervals
specified in the periodic maintenance
chart.
Recommended lubricant:
Lithium-soap-based grease
(all-purpose grease)
Sidestand
5SJ-28199-E0 1/24/02 6:14 PM Page 80
Page 82 of 114
6-32
PERIODIC MAINTENANCE AND MINOR REPAIR
6
CenterstandRecommended lubricant:
Lithium-soap-based grease
(all-purpose grease)
EAU02939
Checking the front forkFront fork, checkingThe condition and operation of the
front fork must be checked as follows
at the intervals specified in the peri-
odic maintenance and lubrication
chart.
To check the condition
EW000115
wSecurely support the scooter so
that there is no danger of it falling
over.Check the inner tubes for scratches,
damage and excessive oil leakage.To check the operation
1. Place the scooter on a level sur-
face and hold it in an upright
position.
2. While applying the front brake,
push down hard on the handle-
bars several times to check if the
front fork compresses and
rebounds smoothly.
EC000098
cCIf any damage is found or the front
fork does not operate smoothly,
have a Yamaha dealer check or
repair it.
5SJ-28199-E0 1/24/02 6:14 PM Page 81
Page 90 of 114
6-40
PERIODIC MAINTENANCE AND MINOR REPAIR
6 3. Remove the socket (together
with the bulb) by turning it coun-
terclockwise.
4. Remove the defective bulb by
pulling it out.
5. Insert a new bulb into the socket.
6. Install the socket (together with
the bulb) by turning it clockwise.
7. Install the cowling.
1
1. Socket
EAU03618
Replacing a rear turn signal
light bulbTurn signal light bulb (rear), replacing1. Place the scooter on the center-
stand.
2. Remove cowling C. (See page
6-10 for cowling removal and
installation procedures.)
EAU03619
Replacing a tail/brake light
bulbTail/brake light bulb, replacing1. Place the scooter on the center-
stand.
2. Remove cowling C. (See page
6-10 for cowling removal and
installation procedures.)
5SJ-28199-E0 1/24/02 6:14 PM Page 89