2002 YAMAHA BT1100 engine
[x] Cancel search: enginePage 48 of 96

EAU00462PERIODIC MAINTENANCE AND MINOR REPAIR
To install a spark plug
1. Measure the spark plug gap with a
wire thickness gauge and, if neces-
sary, adjust the gap to specification.
2. Clean the surface of the spark plug
gasket and its mating surface, and
then wipe off any grime from the
spark plug threads.3. Install the spark plug with the spark
plug wrench, and then tighten it to the
specified torque.
NOTE:
If a torque wrench is not available when
installing a spark plug, a good estimate of
the correct torque is 1/4–1/2 turn past fin-
ger tight. However, the spark plug should
be tightened to the specified torque as
soon as possible.
4. Install the spark plug cap.
5. Place the spark plug cover in the orig-
inal position.
6-6
6
a. Spark plug gap
To check the spark plugs
1. Check that the porcelain insulator
around the center electrode on each
spark plug is a medium-to-light tan
(the ideal color when the motorcycle
is ridden normally).
2. Check that all spark plugs installed in
the engine have the same color.
NOTE:
If any spark plug shows a distinctly differ-
ent color, the engine could be defective.
Do not attempt to diagnose such problems
yourself. Instead, have a Yamaha dealer
check the motorcycle.
3. Check each spark plug for electrode
erosion and excessive carbon or oth-
er deposits, and replace it if neces-
sary.
Specified spark plug:
BPR7ES (NGK) or
W22EPR-U (DENSO)
Tightening torque:
Spark plug:
20 Nm (2.0 m·kgf)
Spark plug gap:
0.7-0.8 mm
Page 49 of 96

EAU00462
1. Engine oil filler cap
PERIODIC MAINTENANCE AND MINOR REPAIR
1
NOTE:
Make sure that the motorcycle is posi-
tioned straight up when checking the oil
level. A slight tilt to the side can result in a
false reading.
2. Start the engine, warm it up for sever-
al minutes, and then turn it off.
3. Wait a few minutes until the oil set-
tles, and then check the oil level
through the check window located at
the bottom-left side of the crankcase.
NOTE:
The engine oil should be between the min-
imum and maximum level marks.
4. If the engine oil is below the minimum
level mark, add sufficient oil of the
recommended type to raise it to the
correct level.To change the engine oil without oil
filter element replacement
1. Start the engine, warm it up for sever-
al minutes, and then turn it off.
2. Place an oil pan under the engine to
collect the used oil.
3. Remove the engine oil filler cap and
drain bolt to drain the oil from the
crankcase.
6-7
6
2
31
EAU01712
Engine oil and oil filter element
The engine oil level should be checked be-
fore each ride. In addition, the oil must be
changed and the oil filter element replaced
at the intervals specified in the periodic
maintenance and lubrication chart.
To check the engine oil level
1. Place the motorcycle on a level sur-
face and hold it in an upright position.
1. Engine oil level window
2. Maximum level mark
3. Minimum level mark
Page 50 of 96

EAU00462PERIODIC MAINTENANCE AND MINOR REPAIR
EC000072
•In order to prevent clutch slippage
(since the engine oil also lubri-
cates the clutch), do not mix any
chemical additives with the oil or
use oils of a higher grade than
“CD”. In addition, do not use oils
labeled "ENERGY CONSERVING II"
or higher.
•Make sure that no foreign material
enters the crankcase.
CAUTION:6. Start the engine, and then let it idle for
several minutes while checking it for
oil leakage. If oil is leaking, immedi-
ately turn the engine off and check for
the cause.
NOTE:
After the engine is started, the engine oil
level warning light should go off if the oil
level is sufficient.
EC000067
If the oil level warning light flickers or
remains on, immediately turn the
engine off and have a Yamaha dealer
check the vehicle.
7. Turn the engine off, and then check
the oil level and correct it if neces-
sary.
NOTE:
Have a Yamaha dealer replace the oil filter
element when necessary.
CAUTION:
1. Engine oil drain bolt
6-8
6
1
4. Install the engine oil drain bolt, and
then tighten it to the specified torque.
5. Add the specified amount of the rec-
ommended engine oil, and then in-
stall and tighten the oil filler cap. Tightening torque:
Engine oil drain bolt:
43 Nm (4.3 m·kgf)
Recommended engine oil:
See page 8-1.
Oil quantity:
Without oil filter element
replacement:
3.0 L
With oil filter element
replacement:
3.1 L
Total amount (dry engine):
3.6 L
Page 51 of 96

EAU00462PERIODIC MAINTENANCE AND MINOR REPAIR
3
1 2
To check the final gear oil level
1. Place the motorcycle on a level sur-
face and hold it in an upright position.
NOTE:
•The final gear oil level must be
checked on a cold engine.
•Make sure that the motorcycle is posi-
tioned straight up when checking the
oil level. A slight tilt to the side can
result in a false reading.2. Remove the oil filler bolt, and then
check the oil level in the final gear
case.
NOTE:
The oil level should be at the brim of the
filler hole.
3. If the oil is below the brim of the filler
hole, add sufficient oil of the recom-
mended type to raise it to the correct
level.
To change the final gear oil
1. Place an oil pan under the final gear
case to collect the used oil.
2. Remove the oil filler bolt and drain
bolt to drain the oil from the final gear
case.
6-9
6
1. Final gear oil drain bolt
2. Final gear oil filler bolt
3. Oil level
EAU04083
Final gear oil
The final gear case must be checked for oil
leakage before each ride. If any leakage is
found, have a Yamaha dealer check and
repair the motorcycle. In addition, the final
gear oil level must be checked and the oil
changed as follows at the intervals speci-
fied in the periodic maintenance and lubri-
cation chart.
EW000066WARNING0
•Make sure that no foreign material
enters the final gear case.
• Make sure that no oil gets on the
tire or wheel.
Page 53 of 96

PERIODIC MAINTENANCE AND MINOR REPAIR
23
1
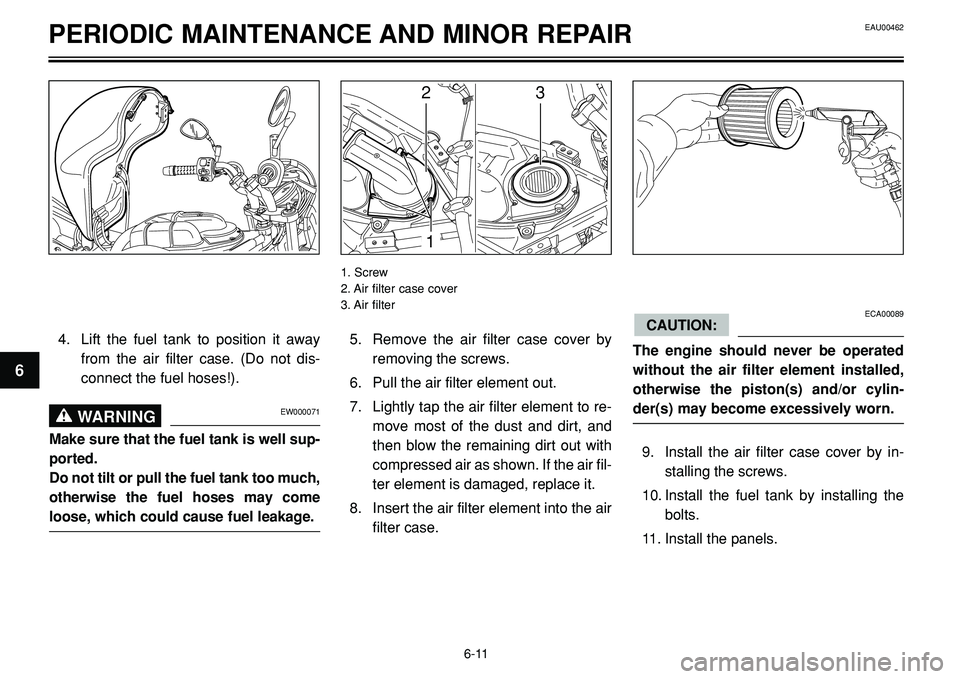
5. Remove the air filter case cover by
removing the screws.
6. Pull the air filter element out.
7. Lightly tap the air filter element to re-
move most of the dust and dirt, and
then blow the remaining dirt out with
compressed air as shown. If the air fil-
ter element is damaged, replace it.
8. Insert the air filter element into the air
filter case.
1. Screw
2. Air filter case cover
3. Air filter
ECA00089
The engine should never be operated
without the air filter element installed,
otherwise the piston(s) and/or cylin-
der(s) may become excessively worn.
9. Install the air filter case cover by in-
stalling the screws.
10. Install the fuel tank by installing the
bolts.
11. Install the panels.
CAUTION:
EAU00462
6-11
6
4. Lift the fuel tank to position it away
from the air filter case. (Do not dis-
connect the fuel hoses!).
EW000071WARNING0
Make sure that the fuel tank is well sup-
ported.
Do not tilt or pull the fuel tank too much,
otherwise the fuel hoses may come
loose, which could cause fuel leakage.
Page 54 of 96

EAU00462PERIODIC MAINTENANCE AND MINOR REPAIR
EAU00630
Adjusting the carburetors
The carburetors are important parts of the
engine and require very sophisticated ad-
justment. Therefore, most carburetor ad-
justments should be left to a Yamaha deal-
er, who has the necessary professional
knowledge and experience. The adjust-
ment described in the following section,
however, may be serviced by the owner as
part of routine maintenance.
EC000095
The carburetors have been set and
extensively tested at the Yamaha facto-
ry. Changing these settings without
sufficient technical knowledge may
result in poor performance of or dam-
age to the engine.
CAUTION:
EAU01168
Adjusting the engine idling
speed
The engine idling speed must be checked
and, if necessary, adjusted as follows at
the intervals specified in the periodic main-
tenance and lubrication chart.
NOTE:
A diagnostic tachometer is needed to
make this adjustment.
1. Attach the tachometer to the spark
plug lead.
2. Start the engine and warm it up for
several minutes at 1,000-2,000 r/min
while occasionally revving it to
4,000-5,000 r/min.
NOTE:
The engine is warm when it quickly
responds to the throttle.
6-12
6
1
2
1. Pin (x 2)
2. Pin seat (x 2)
EWA00052WARNING0
Before installing the fuel tank, make
sure that the fuel hoses are not dam-
aged. If any fuel hose is damaged, do
not start the engine but have a Yamaha
dealer replace the hose, otherwise fuel
may leak.
Make sure that the fuel hoses are prop-
erly connected and routed, and not
pinched.
Be sure to place the fuel tank breather
hose in the original position.
12. Install the seat.
Page 55 of 96

EAU00462PERIODIC MAINTENANCE AND MINOR REPAIR
a
EAU00635
Adjusting the throttle
cable free play
The throttle cable free play should mea-
sure 3-5 mm at the throttle grip. Periodical-
ly check the throttle cable free play and, if
necessary, have a Yamaha dealer adjust
it.
EAU00637
Adjusting the valve clearance
The valve clearance changes with use, re-
sulting in improper air-fuel mixture and/or
engine noise. To prevent this from occur-
ring, the valve clearance must be adjusted
by a Yamaha dealer at the intervals speci-
fied in the periodic maintenance and lubri-
cation chart.
6-13
6
a. Throttle cable free play
1
ba
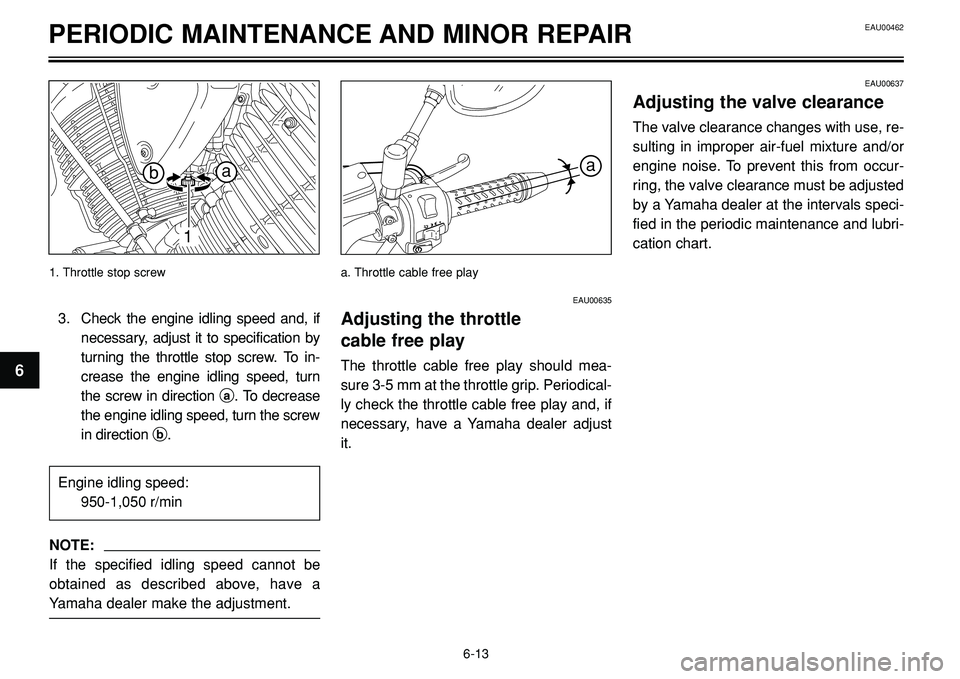
3. Check the engine idling speed and, if
necessary, adjust it to specification by
turning the throttle stop screw. To in-
crease the engine idling speed, turn
the screw in direction a. To decrease
the engine idling speed, turn the screw
in direction b.
Engine idling speed:
950-1,050 r/min
NOTE:
If the specified idling speed cannot be
obtained as described above, have a
Yamaha dealer make the adjustment.
1. Throttle stop screw
Page 64 of 96

EAU00462PERIODIC MAINTENANCE AND MINOR REPAIR
EAU02962
Checking and lubricating the
cables
The operation of all control cables and the
condition of the cables should be checked
before each ride, and the cables and cable
ends should be lubricated if necessary. If a
cable is damaged or does not move
smoothly, have a Yamaha dealer check or
replace it.
EW000112WARNING0
Damage to the outer sheath may inter-
fere with proper cable operation and
will cause the inner cable to rust.
Replace a damaged cable as soon as
possible to prevent unsafe conditions.
EAU03209
Checking and lubricating the
throttle grip and cable
The operation of the throttle grip and the
condition of the throttle cable should be
checked before each ride, and the cable
should be lubricated or replaced if neces-
sary.
NOTE:
Since the throttle grip must be removed to
access the throttle cable end, the throttle
grip and the cable should always be lubri-
cated at the same time.
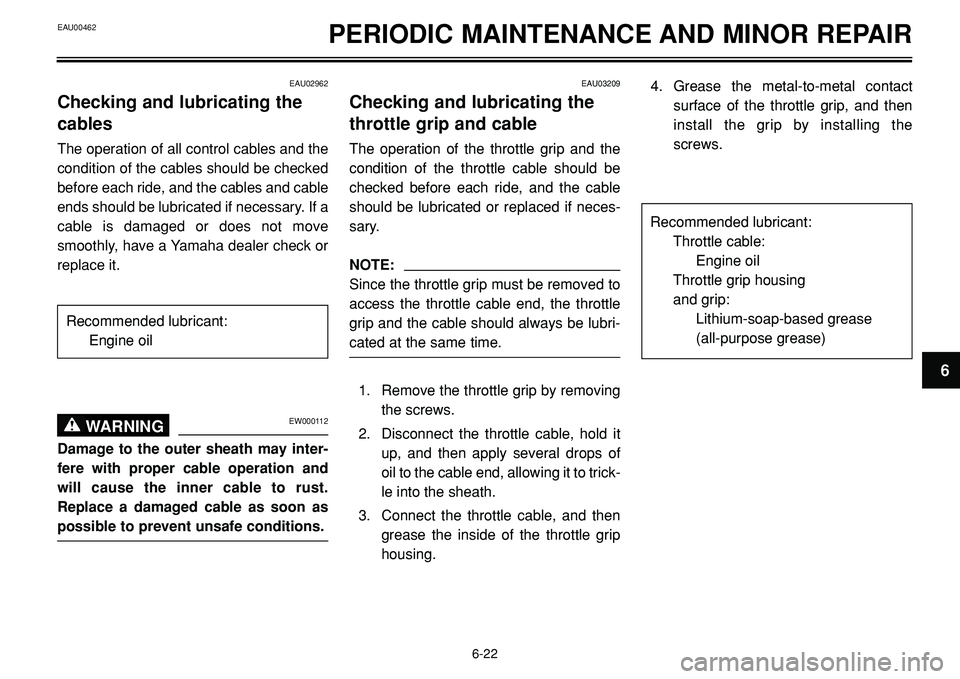
1. Remove the throttle grip by removing
the screws.
2. Disconnect the throttle cable, hold it
up, and then apply several drops of
oil to the cable end, allowing it to trick-
le into the sheath.
3. Connect the throttle cable, and then
grease the inside of the throttle grip
housing.4. Grease the metal-to-metal contact
surface of the throttle grip, and then
install the grip by installing the
screws.
6-22
6
Recommended lubricant:
Engine oil
Recommended lubricant:
Throttle cable:
Engine oil
Throttle grip housing
and grip:
Lithium-soap-based grease
(all-purpose grease)