Page 20 of 286
’02 L/C U (L/O 0108)
16
Your vehicle has a wireless remote
control system that can lock or unlock
all the side doors and back door from a
distance within approximately 1 m (3
ft.) of the vehicle.
LOCKING AND UNLOCKING THE SIDE
DOORS AND BACK DOOR
To lock and unlock all the side doors
and back door, push the switches slow-
ly and securely. At this time, the indica-
tor light on the key grip flashes once.
To lock: Push the ”LOCK” switch. All the
side doors and back door are locked si-
multaneously. At this time, parking lights
and tail lights flash once.
Check to see that all the side doors and
back door are securely locked.
If any of the side doors or back door is
not securely closed, or if the key is in the
ignition switch, locking cannot be per-
formed by the ”LOCK” switch.
To unlock: Push the ”UNLOCK” switch
once to unlock the driver ’s door alone.
Pushing the switch twice within 3 seconds
unlocks all the side doors and back door
simultaneously. At this time, parking lights
and tail lights flash twice.Together with the activation of unlocking,
the interior light comes on for 15 seconds
if the interior light switch is in “DOOR”
position. However, this function does not
work when the ignition key is in the “ON”
position. (For detailed information, see “In-
terior light” in Section 1�4.)
You have 30 seconds to open a door after
using the wireless remote unlock feature.
If a door is not opened by then, all the
side doors and back door will be automati-
cally locked again.
If the ”LOCK” or ”UNLOCK” switch is kept
pressed in, the locking or unlocking opera-
tion is not repeated. Release the button
and then push again.
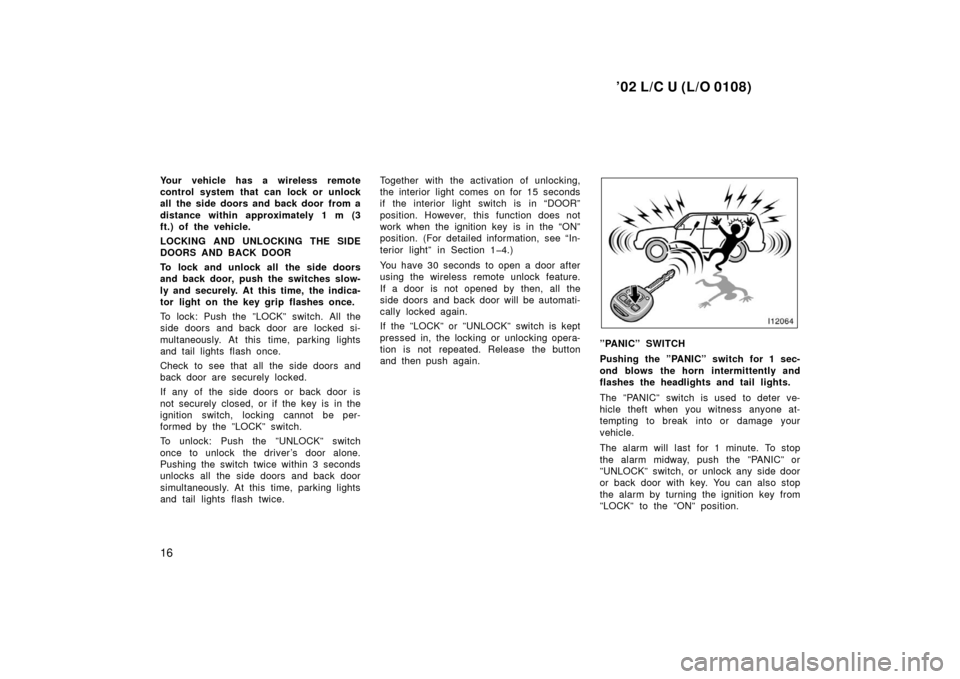
”PANIC” SWITCH
Pushing the ”PANIC” switch for 1 sec-
ond blows the horn intermittently and
flashes the headlights and tail lights.
The ”PANIC” switch is used to deter ve-
hicle theft when you witness anyone at-
tempting to break into or damage your
vehicle.
The alarm will last for 1 minute. To stop
the alarm midway, push the ”PANIC” or
”UNLOCK” switch, or unlock any side door
or back door with key. You can also stop
the alarm by turning the ignition key from
”LOCK” to the ”ON” position.
Page 23 of 286
’02 L/C U (L/O 0108)
19
2. Remove the module from the keyframe.3. Remove the 2 screws to take out thelid of the module. Take out the dis-
charged battery and put a new battery
with the positive side up.
NOTICE
Do not bend the terminals.
4. Install the lid with the 2 screws.
5. Install the module into the key frameand secure the cover with the screw.
6. When pushing any switch on the wire- less key, make sure the indicator light
comes on.
NOTICE
�Make sure the positive side and
negative side of the battery should
be faced correctly.
� Do not replace the battery with wet
hands. Water may cause unexpected
rust.
� Do not touch or move any conpon-
ents inside of the transmitter, or it
may interfere with proper operation.
� Be careful not to bend the electrode
of the battery insertion and that
dust or oils do not adhere to the
case.
� Take care not to lose the screws.
� Close the cover securely.
Page 29 of 286
’02 L/C U (L/O 0108)
25
CAUTION
Before driving, be sure that the back
door is closed and locked, especially
when small children are in the ve-
hicle. Along with the proper use of
seat belts, locking the doors helps
prevent the driver and passengers
from being thrown out from the ve-
hicle during an accident. It also helps
prevent the doors from being opened
unintentionally.
Hood
To open the hood:1. Pull the hood lock release lever. The hood will spring up slightly.
CAUTION
Before driving, be sure that the hood
is closed and securely locked. Other-
wise, the hood may open unexpected-
ly while driving and an accident may
occur.
2. In front of the vehicle, pull up theauxiliary catch l ever and lift the
hood.
Before closing the hood, check to see that
you have not forgotten any tools, rags,
etc. Then lower the hood and make sure
it locks into place. If necessary, press
down gently on the front edge to lock it.
Page 32 of 286
’02 L/C U (L/O 0108)
28
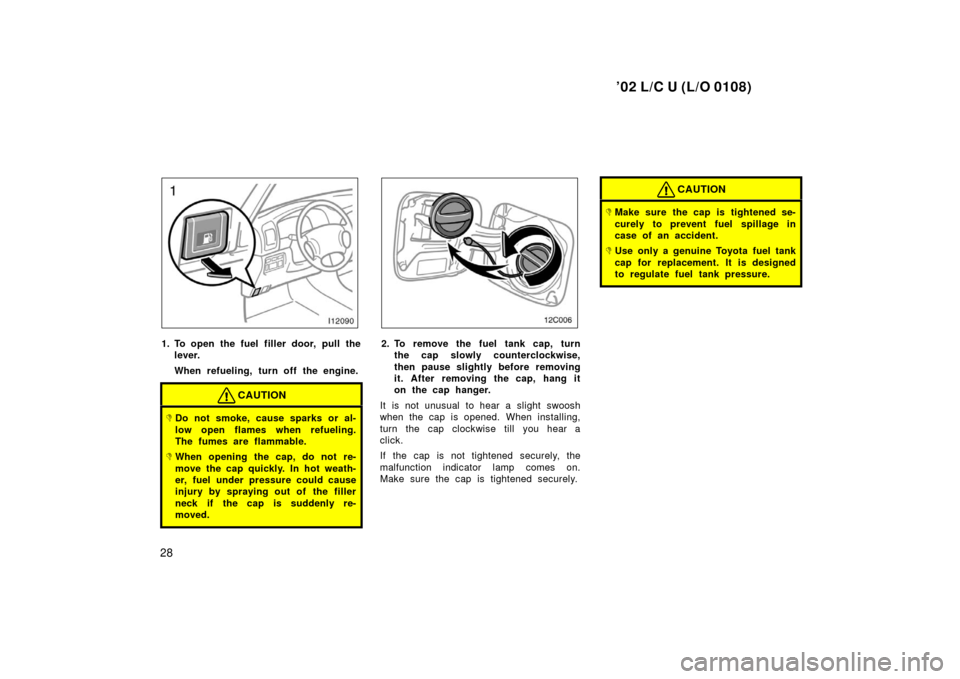
1. To open the fuel filler door, pull thelever.
When refueling, turn off the engine.
CAUTION
�Do not smoke, cause sparks or al-
low open flames when refueling.
The fumes are flammable.
�When opening the cap, do not re-
move the cap quickly. In hot weath-
er, fuel under pressure could cause
injury by spraying out of the filler
neck if the cap is suddenly re-
moved.
12C006
2. To remove the fuel tank cap, turnthe cap slowly counterclockwise,
then pause slightly before removing
it. After removing the cap, hang it
on the cap hanger.
It is not unusual to hear a slight swoosh
when the cap is opened. When insta lling,
turn the cap clockwise till you hear a
click.
If the cap is not tightened securely, the
malfunction indicator lamp comes on.
Make sure the cap is tightened securely.
CAUTION
�Make sure the cap is tightened se-
curely to prevent fuel sp illage in
case of an accident.
�Use only a genuine Toyota fuel tank
cap for replacement. It is designed
to regulate fuel tank pressure.
Page 38 of 286
’02 L/C U (L/O 0108)
34
Armrest
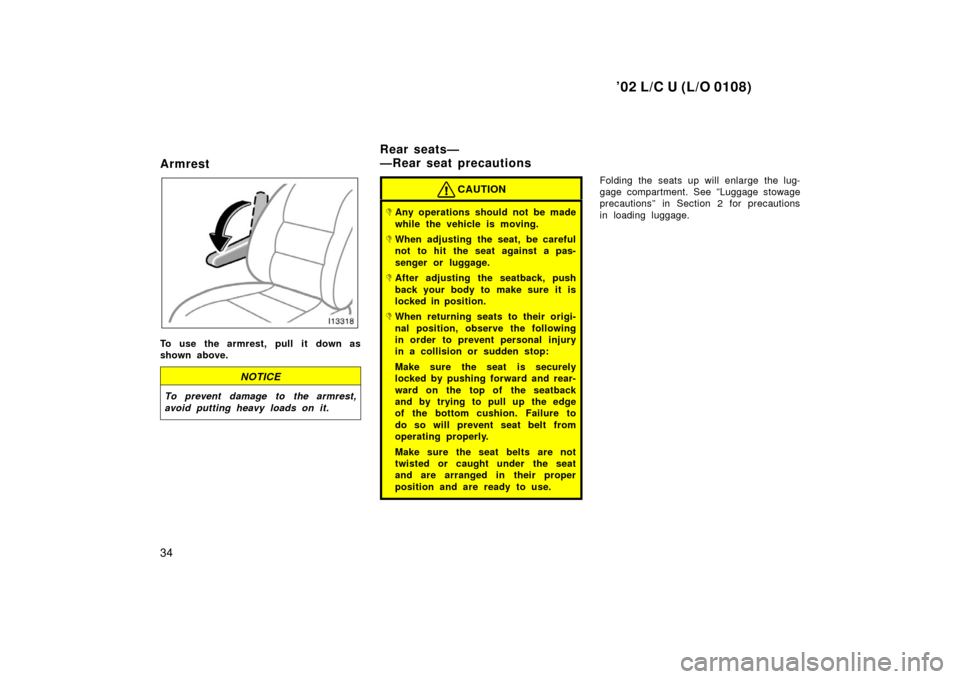
To use the armrest, pull it down as
shown above.
NOTICE
To prevent damage to the armrest,
avoid putting heavy loads on it.
CAUTION
�Any operations should not be made
while the vehicle is moving.
�When adjusting the seat, be careful
not to hit the seat against a pas-
senger or luggage.
�After adjusting the seatback, push
back your body to make sure it is
locked in position.
�When returning seats to their origi-
nal position, observe the following
in order to prevent personal injury
in a collision or sudden stop:
Make sure the seat is securely
locked by pushing forward and rear-
ward on the top of the seatback
and by trying to pull up the edge
of the bottom cushion. Failure to
do so will prevent seat belt from
operating properly.
Make sure the seat belts are not
twisted or caught under the seat
and are arranged in their proper
position and are ready to use.
Folding the seats up will enlarge the lug-
gage compartment. See ”Luggage stowage
precautions” in Section 2 for precautions
in loading luggage.
Rear seats—
—Rear seat precautions
Page 40 of 286
’02 L/C U (L/O 0108)
36
CAUTION
After returning the seat, make sure
the seat is securely locked by push-
ing forward and rearward on the top
of the seatback and by trying to pull
up the edge of the bottom cushion.
—Folding up second seat
BEFORE FOLDING UP SECOND SEAT1. Stow the second seat belt buckles as shown in the illustration.
This prevents the seat belt buckles from
falling out when you fold up the second
seat.
NOTICE
The seat belt buckles must be stowed
before you fold up the second seat.
2. Make sure the shoulder belt passes through the hanger when folding the
second seat.
This prevents the shoulder belt from being
damaged.
CAUTION
The seat belt must be removed from
the hanger when the seat belt is in
use.
Page 42 of 286
’02 L/C U (L/O 0108)
38
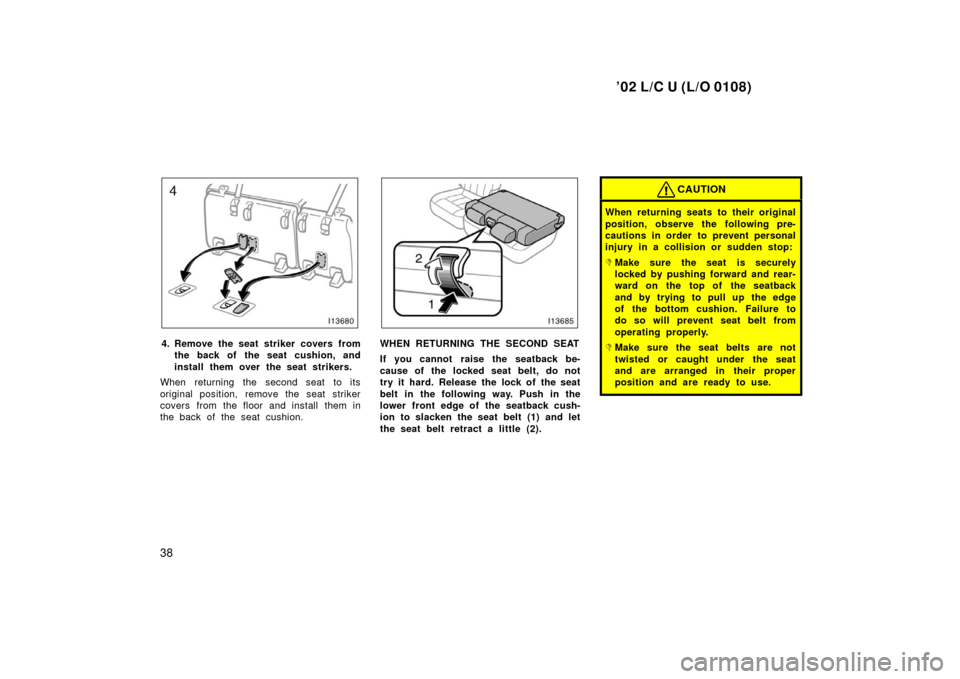
4. Remove the seat striker covers fromthe back of the seat cushion, and
install them over the seat strikers.
When returning the second seat to its
original position, remove the seat striker
covers from the floor and install them in
the back of the seat cushion.WHEN RETURNING THE SECOND SEAT
If you cannot raise the seatback be-
cause of the locked seat belt, do not
try it hard. Release the lock of the seat
belt in the following way. Push in the
lower front edge of the seatback cush-
ion to slacken the seat belt (1) and let
the seat belt retract a little (2).
CAUTION
When returning seats to their original
position, observe the following pre-
cautions in order to prevent personal
injury in a collision or sudden stop:
�Make sure the seat is securely
locked by pushing forward and rear-
ward on the top of the seatback
and by trying to pull up the edge
of the bottom cushion. Failure to
do so will prevent seat belt from
operating properly.
�Make sure the seat belts are not
twisted or caught under the seat
and are arranged in their proper
position and are ready to use.
Page 46 of 286
’02 L/C U (L/O 0108)
42
CAUTION
When returning seats to their original
position, observe the following pre-
cautions in order to prevent personal
injury in a collision or sudden stop:
�Make sure the seat is securely
locked by pushing forward and rear-
ward on the top of the seatback
and by trying to pull up the edge
of the bottom cushion. Be certain
to replace head restraint. Failure to
do so will prevent seat belt from
operating properly.
�Make sure the seat belts are not
twisted or caught under the seat
and are arranged in their proper
position and are ready to use.
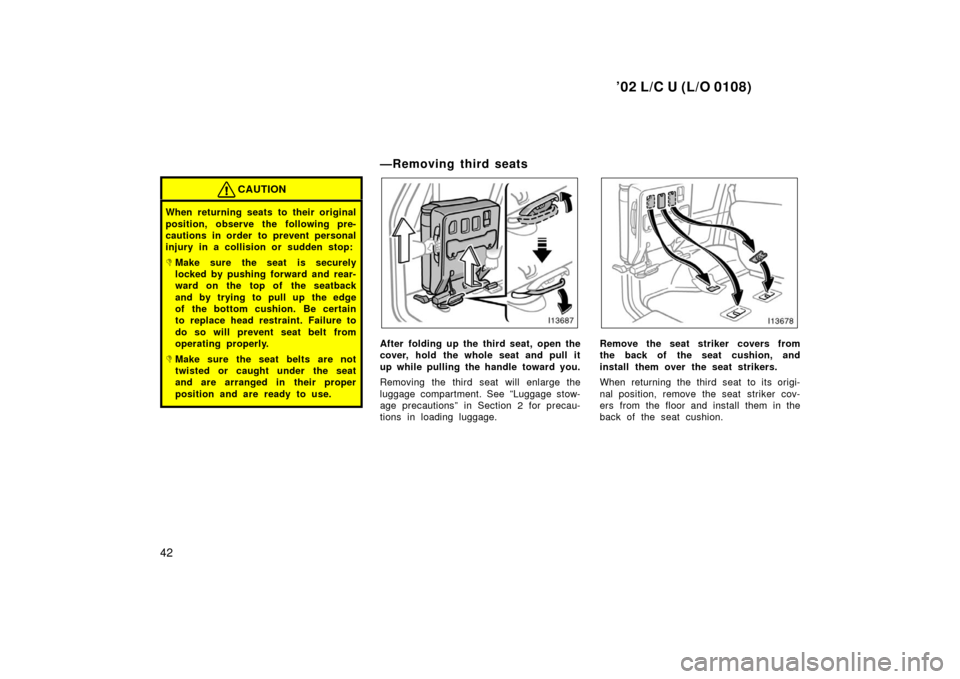
—Removing third seats
After folding up the third seat, open the
cover, hold the whole seat and pull it
up while pulling the handle toward you.
Removing the third seat will enlarge the
luggage compartment. See ”Luggage stow-
age precautions” in Section 2 for precau-
tions in loading luggage.Remove the seat striker covers from
the back of the seat cushion, and
install them over the seat strikers.
When returning the third seat to its origi-
nal position, remove the seat striker cov-
ers from the floor and install them in the
back of the seat cushion.