Page 703 of 801
YH4
GRAND
VITARA
1. Upper anchor
2. Lower anchor
3. Retractor assembly
4. Buckle
SEAT BELT 10A-3
FRONT SEAT BELT
WARNING:
Be sure to read ªService Precautionsº before starting to work and observe every precaution during
work.
REMOVAL
Refer to the figure below to remove front seat belts.
Page 704 of 801

YH4
GRAND
VITARA
1. Buckle tongue
2. Buckle catch
10A-4 SEAT BELT
INSPECTION
Seat belts and attaching parts can affect the vital components and
systems of a vehicle. Therefore, they should be inspected carefully
and replaced with genuine parts only.
Seat belt
�The seat belt webbing or strap should be free from damage.
�Fully extend the seat belt to make sure there are no twists or tears
in it.
Retractor assembly
Let the seat belt retract fully to confirm its easy retraction.
�The retractor assembly should lock webbing when pulled quickly.
�The retractor assembly should lock webbing even when tilted
(approx. 15�) toward the fore and aft or right and left directions.
Anchor bolt
�Inspect all seat belt anchor bolts to verify that they are secure.
�All anchor bolts should be secure and torqued to specification.
Belt latch
�Belt latch should be secure when latched.
�Inspect the seat belt buckle, ensuring that it locks and unlocks
easily.
�After buckling the seat belt, tug sharply on the belt, checking that
the buckle remains locked.
Warning system
Check driver side seat belt strap switch for continuity by using ohm-
meter.
Without inserted buckle tongue to buckle catch:
Terminal ªAº and ªBº: Continuity
With inserted buckle tongue to buckle catch:
Terminal ªAº and ªBº: No continuity (��)
As to seat belts with ALR (other than driver side seat belt), check
them as follows in addition to above check.
�With vehicle at stop, pull seat belt all the way out, let it retract a
little and try to pull it. It should not be pulled out, that is, it should
be locked where retracted.
�Let seat belt retract to its original state. Next, pull it half way out,
let it retract a little and try to pull it again. It should be pulled out
smoothly, that is it should not be locked at this time.
Page 706 of 801
YH4
GRAND
VITARA
10A-6 SEAT BELT
1. Upper anchor
2. Lower anchor
3. Retractor assembly
4. Buckle: If equipped* *
REAR SEAT BELT
WARNING:
Be sure to read ªService Precautionsº before starting to work and observe every precaution during
work.
REMOVAL
Refer to the figure below to remove rear seat belts.
INSPECTION
Check the rear seat belt in the same way as when inspecting front seat belt. (Refer to page 10A-4.)
INSTALLATION
Install the rear seat belt observing the same precautions as when installing front seat belt. (Refer to page 10A-5.)
Tightening Torque
(a): 35 N
.m (3.5 kg-m, 25.5 lb-ft)
TIGHTENING TORQUE SPECIFICATIONS
FasteningpartsTightening torqueFastening artsN.mkg-mlb-ft
Upper and lower anchor bolt353.525.5
Retractor assembly bolt353.525.5
Retractor assembly screw5.50.554.0
Buckle bolt353.525.5
Page 709 of 801

1-1. SDM
1-1. Sensor
1-2. Voltage converter1-3. Safing sensor
1-4. Micro-controller
1-5")
YH4
GRAND
VITARA
12
3
3
1. Driver side air bag
2. Passenger side air bag
3. Seat belt pretensioner
(if equipped)
1-1. SDM
1-1. Sensor
1-2. Voltage converter1-3. Safing sensor
1-4. Micro-controller
1-5. Energy reserve circuit1-6. Ignition driver circuit
1-2. Power source
3. Driver air bag 4. Passenger air bag
5. Seat belt pretensioner (if equipped)
6. Squib circuit
AIR BAG SYSTEM 10B-3
GENERAL DESCRIPTION
With the air bag system which includes air bags for both the driver's
and passenger's sides as well as the seat belt pretensioners (if
equipped), the sag of the seat belt is taken up, the driver air bag (in-
flator) module is deployed from the center of the steering column
and the passenger air bag (inflator) module from the top of the
instrument panel in front of the front passenger seat in occurrence
of a front collision with an impact larger than a certain set value to
supplement protection offered by the driver and front passenger
seat belts.
The air bag system is designed to activate only in severe frontal col-
lisions. It is not designed to activate in rear impacts, side impacts,
rollovers, or minor frontal collisions, since it would offer no protec-
tion in those types of accidents.
Page 772 of 801
YH4
GRAND
VITARA
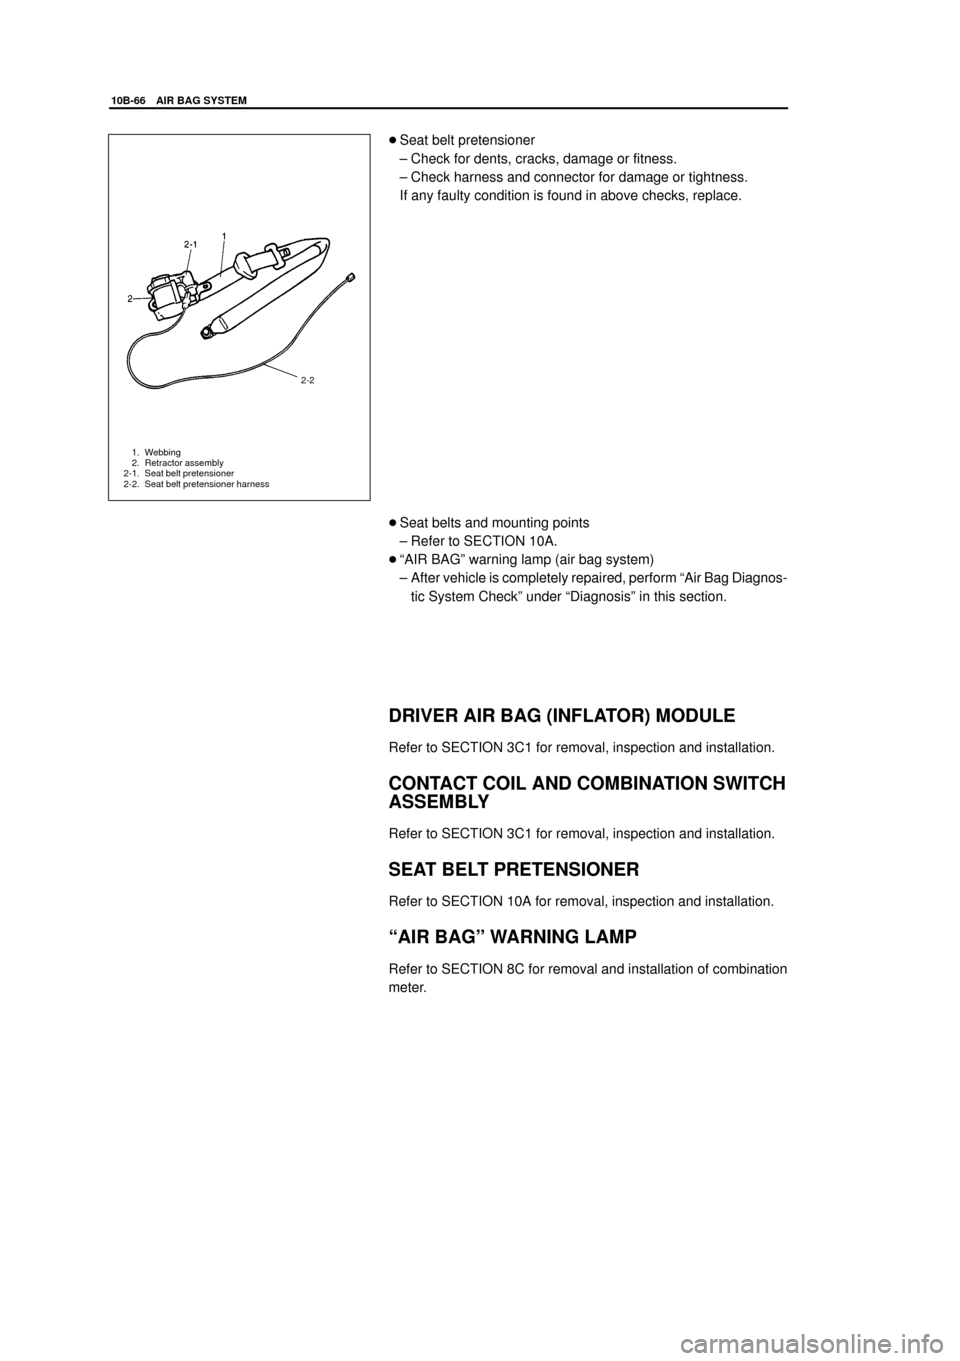
2-2
2-1. Webbing
2-2. Retractor assembly
2-1. Seat belt pretensioner
2-2. Seat belt pretensioner harness
10B-66 AIR BAG SYSTEM
�Seat belt pretensioner
± Check for dents, cracks, damage or fitness.
± Check harness and connector for damage or tightness.
If any faulty condition is found in above checks, replace.
�Seat belts and mounting points
± Refer to SECTION 10A.
�ªAIR BAGº warning lamp (air bag system)
± After vehicle is completely repaired, perform ªAir Bag Diagnos-
tic System Checkº under ªDiagnosisº in this section.
DRIVER AIR BAG (INFLATOR) MODULE
Refer to SECTION 3C1 for removal, inspection and installation.
CONTACT COIL AND COMBINATION SWITCH
ASSEMBLY
Refer to SECTION 3C1 for removal, inspection and installation.
SEAT BELT PRETENSIONER
Refer to SECTION 10A for removal, inspection and installation.
ªAIR BAGº WARNING LAMP
Refer to SECTION 8C for removal and installation of combination
meter.