Page 265 of 374

6-3
CAUTION:
You can be injured and your vehicle could be
damaged if you try to do service work on a
vehicle without knowing enough about it.
�Be sure you have sufficient knowledge,
experience, the proper replacement parts
and tools before you attempt any vehicle
maintenance task.
�Be sure to use the proper nuts, bolts and
other fasteners. ªEnglishº and ªmetricº
fasteners can be easily confused. If you use
the wrong fasteners, parts can later break
or fall off. You could be hurt.
Adding Equipment to the Outside of
Your Vehicle
Things you might add to the outside of your vehicle can
affect the airflow around it. This may cause wind noise
and affect windshield washer performance. Check with
your dealer before adding equipment to the outside of
your vehicle.
Fuel
The 8th digit of your vehicle identification number
(VIN) shows the code letter or number that identifies
your engine. You will find the VIN at the top left of the
instrument panel. See ªVehicle Identification Numberº
in the Index.
Gasoline Octane
If your vehicle has the 3100 V6 engine (VIN Code J)
or 3800 V6 engine (VIN Code K), use regular unleaded
gasoline with a posted octane of 87 or higher. If the
octane is less than 87, you may get a heavy knocking
noise when you drive. If it is bad enough, it can damage
your engine. A little pinging noise when you accelerate
or drive uphill is considered normal. This does not
indicate a problem exists or that a higher
-octane fuel
is necessary.
If your vehicle has the 3800 Supercharged V6 engine
(VIN Code1), use only premium unleaded gasoline with
a posted octane of 91 or higher. In an emergency, you
may be able to use a lower octane
-- as low as 87 -- if
heavy knocking does not occur. Refill your tank with
premium fuel as soon as possible. If you are using
91 octane or higher
-octane fuel and you hear heavy
knocking, your engine needs service.
Page 282 of 374

6-20
Engine Air Cleaner/Filter
The engine air cleaner/filter is located in the front of the
engine compartment on the driver's side. See ªEngine
Compartment Overviewº in the Index for more
information on location.
To check or replace the engine air cleaner/filter do
the following:
1. Loosen the two clips located on the top of the engine
air cleaner/filter housing and lift the filter cover tabs
out of the housing.
2. Push the filter cover housing toward the engine.
3. Pull out the old filter.
4. Check or install a new engine air cleaner/filter.
See ªNormal Maintenance Replacement Partsº in
the Index.
5. To reinstall the cover, position the tabs through the
slots on the housing. A notch on the sides of the
filter cover will indicate the correct placement.
Reinstall the two clips on the top of the engine air
cleaner/filter housing when you are finished.
Refer to the Maintenance Schedule to determine when to
replace the air filter.
See ªScheduled Maintenance Servicesº in the Index.
Page 283 of 374

6-21
CAUTION:
Operating the engine with the air cleaner/filter
off can cause you or others to be burned. The air
cleaner not only cleans the air, it stops flame if
the engine backfires. If it isn't there, and the
engine backfires, you could be burned. Don't
drive with it off, and be careful working on the
engine with the air cleaner/filter off.
NOTICE:
If the air cleaner/filter is off, a backfire can
cause a damaging engine fire. And, dirt can easily
get into your engine, which will damage it.
Always have the air cleaner/filter in place when
you're driving.
Supercharger Oil
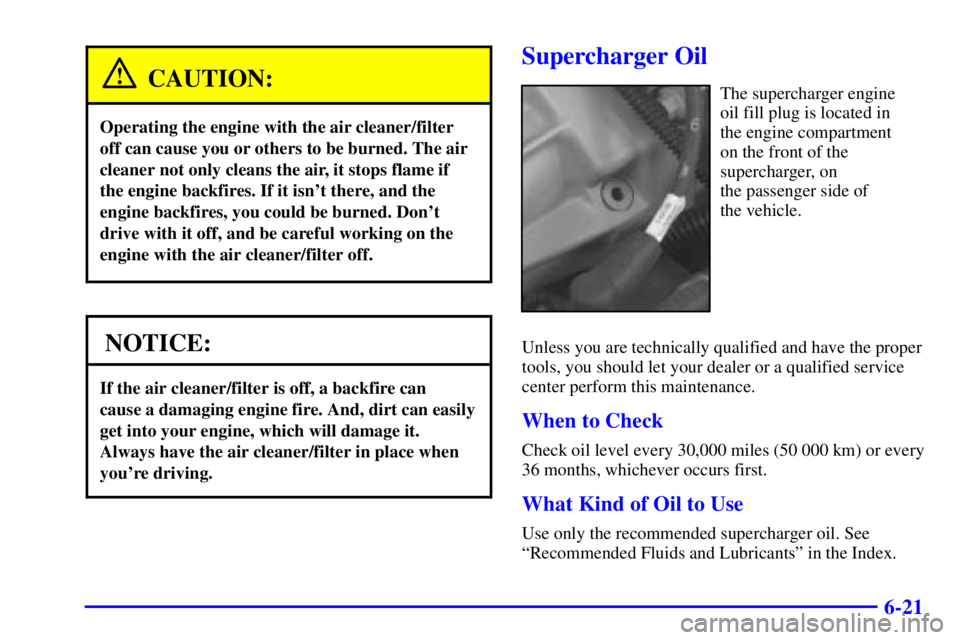
The supercharger engine
oil fill plug is located in
the engine compartment
on the front of the
supercharger, on
the passenger side of
the vehicle.
Unless you are technically qualified and have the proper
tools, you should let your dealer or a qualified service
center perform this maintenance.
When to Check
Check oil level every 30,000 miles (50 000 km) or every
36 months, whichever occurs first.
What Kind of Oil to Use
Use only the recommended supercharger oil. See
ªRecommended Fluids and Lubricantsº in the Index.
Page 284 of 374

6-22 How to Check and Add Oil
Park the vehicle on a level surface. Check oil only when
the engine is cold. Allow the engine to cool two to three
hours after running.
CAUTION:
If you remove the supercharger oil fill plug while
the engine is hot, pressure may cause hot oil to
blow out of the oil fill hole. You may be burned.
Do not remove the plug until the engine cools.
1. Clean the area around the oil fill plug before
removing it.
2. Remove the oil fill plug using a 3/16 inch
Allen wrench.
3. The oil level is correct when it just reaches the
bottom of the threads of the inspection hole.
4. Replace the oil plug with the O
-ring in place.
Tighten to 88 lb
-in (10 N´m).
Automatic Transaxle Fluid
When to Check and Change
A good time to check your automatic transaxle fluid
level is when the engine oil is changed.
Change both the fluid and filter every 50,000 miles
(83 000 km) if the vehicle is mainly driven under one or
more of these conditions:
�In heavy city traffic where the outside temperature
regularly reaches 90�F (32�C) or higher.
�In hilly or mountainous terrain.
�When doing frequent trailer towing.
�Uses such as found in taxi, police or delivery service.
If you do not use your vehicle under any of
these conditions, change the fluid and filter
at 100,000 miles (166 000 km).
See ªScheduled Maintenance Servicesº in the Index.
Page 288 of 374
6-26 How to Add Fluid
Refer to the Maintenance Schedule to determine what
kind of transaxle fluid to use. See ªRecommended
Fluids and Lubricantsº in the Index.
If the fluid level is low, add only enough of the proper
fluid to bring the level into the cross
-hatched area on
the dipstick.
1. Pull out the dipstick.
2. Using a long
-neck funnel, add enough fluid at the
dipstick hole to bring it to the proper level.
It doesn't take much fluid, generally less than
one pint (0.5 L). Don't overfill.
NOTICE:
We recommend you use only fluid labeled
DEXRON�-III, because fluid with that label is
made especially for your automatic transaxle.
Damage caused by fluid other than
DEXRON
�-III is not covered by your new
vehicle warranty.
3. After adding fluid, recheck the fluid level as
described under ªHow to Check.º
4. When the correct fluid level is obtained, push the
dipstick back in all the way.
Page 299 of 374

6-37 Brake Wear
Your vehicle has four-wheel disc brakes.
Disc brake pads have built
-in wear indicators that
make a high
-pitched warning sound when the brake
pads are worn and new pads are needed. The sound
may come and go or be heard all the time your vehicle is
moving (except when you are pushing on the brake
pedal firmly).
CAUTION:
The brake wear warning sound means that soon
your brakes won't work well. That could lead to
an accident. When you hear the brake wear
warning sound, have your vehicle serviced.
NOTICE:
Continuing to drive with worn-out brake pads
could result in costly brake repair.
Some driving conditions or climates may cause a
brake squeal when the brakes are first applied or lightly
applied. This does not mean something is wrong with
your brakes.
Properly torqued wheel nuts are necessary to help
prevent brake pulsation. When tires are rotated, inspect
brake pads for wear and evenly tighten wheel nuts in the
proper sequence to GM torque specifications.
Brake linings should always be replaced as complete
axle sets.
See ªBrake System Inspectionº in Section 7
of this manual under Part C ªPeriodic
Maintenance Inspections.º
Page 301 of 374

6-39
Battery
Your new vehicle comes with a maintenance free
ACDelco� battery. When it's time for a new battery,
get one that has the replacement number shown on the
original battery's label. We recommend an ACDelco
battery. See ªEngine Compartment Overviewº in the
Index for battery location.
WARNING: Battery posts, terminals and related
accessories contain lead and lead compounds, chemicals
known to the State of California to cause cancer and
reproductive harm. Wash hands after handling.
If your battery has a very low charge or is dead, you
may not be able to remove the ignition key from the
ignition switch or shift out of PARK (P). Refer to
ªShifting Out of PARK(P)º in the Index.
Vehicle Storage
If you're not going to drive your vehicle for 25 days
or more, remove the black, negative (
-) cable from
the battery. This will help keep your battery from
running down.
CAUTION:
Batteries have acid that can burn you and gas
that can explode. You can be badly hurt if you
aren't careful. See ªJump Startingº in the Index
for tips on working around a battery without
getting hurt.
Contact your dealer to learn how to prepare your vehicle
for longer storage periods.
Also, for your audio system, see ªTheft
-Deterrent
Featureº in the Index.
Page 310 of 374
6-48
Windshield Wiper
Blade Replacement
Windshield wiper blades should be inspected at
least twice a year for wear or cracking. See
ªWindshield Wipers, Blade Checkº in the
Index for more information.
Replacement blades come in different types and are
removed in different ways. For the proper type and
length, see ªNormal Maintenance and Replacement
Partsº in the Index.To remove the wiper blade do the following:
1. Pull the windshield wiper arm away from
the windshield.
2. Push the release lever and slide the wiper assembly
toward the driver's side of the vehicle.
3. Install a new blade by reversing Steps 1 and 2.