Page 174 of 427

2-111
2. Adjust the seat, if necessary, before setting the height
using the IMAGE switch.
Press and hold the top of the IMAGE switch, raising
the HUD image as far as possible. Then press on the
bottom of the HUD IMAGE switch to move the
image down, so the image is as low as possible, but
in full view.
3. Turn the INTENSITY knob counterclockwise until
the HUD image is no brighter than necessary. To turn
the HUD off, turn the HUD INTENSITY knob all
the way counterclockwise.
If the sun comes out, or it becomes cloudy, or if you turn
on your headlamps, you may need to adjust the HUD
brightness using the HUD INTENSITY knob. Polarized
sunglasses could make the HUD image harder to see.
Clean the inside of the windshield as needed to remove
any dirt or film that reduces the sharpness or clarity of
the HUD image.Spray household glass cleaner on a soft, clean cloth.
Wipe the HUD lens gently, then dry it. Do not spray
cleaner directly on the lens, because the cleaner fluid
could leak inside the unit.
If you can't see the HUD image when the ignition is on,
check to see if:
�The HUD unit is covered,
�the HUD INTENSITY knob is adjusted correctly,
�the HUD image is adjusted to the proper height, or
�a fuse in the fuse panel may have blown. See ªFuses
and Circuit Breakersº in the Index.
If the HUD image is not clear, it could be too bright.
Move the HUD INTENSITY knob counterclockwise.
You may need to clean the windshield and HUD lens.
Your windshield is part of the HUD system. If you ever
have to have a new windshield, be sure to get one
designed for HUD. If you don't, the HUD image may
look blurred and out of focus.
Page 298 of 427

6-3
CAUTION:
You can be injured and your vehicle could be
damaged if you try to do service work on a
vehicle without knowing enough about it.
�Be sure you have sufficient knowledge,
experience, the proper replacement parts
and tools before you attempt any vehicle
maintenance task.
�Be sure to use the proper nuts, bolts and
other fasteners. ªEnglishº and ªmetricº
fasteners can be easily confused. If you use
the wrong fasteners, parts can later break
or fall off. You could be hurt.
Adding Equipment to the Outside of
Your Vehicle
Things you might add to the outside of your vehicle can
affect the airflow around it. This may cause wind noise
and affect windshield washer performance. Check with
your dealer before adding equipment to the outside of
your vehicle.
Fuel
The 8th digit of your vehicle identification number
(VIN) shows the code letter or number that identifies
your engine. You will find the VIN at the top left of the
instrument panel. See ªVehicle Identification Numberº
in the Index.
Gasoline Octane
If your vehicle has the 3800 V6 engine (VIN Code K),
use regular unleaded gasoline with a posted octane of 87
or higher. If the octane is less than 87, you may get a
heavy knocking noise when you drive. If it is bad
enough, it can damage your engine. A little pinging
noise when you accelerate or drive uphill is considered
normal. This does not indicate a problem exists or that
a higher
-octane fuel is necessary.
If your vehicle has the 3800 Supercharged V6 engine
(VIN Code1), use only premium unleaded gasoline with
a posted octane of 91 or higher. In an emergency, you
may be able to use a lower octane
-- as low as 87 -- if
heavy knocking does not occur. Refill your tank with
premium fuel as soon as possible. If you are using
91 octane or higher
-octane fuel and you hear heavy
knocking, your engine needs service.
Page 306 of 427
6-11 Engine Compartment Overview
When you open the hood on the 3800 (L36) engine (3800 Supercharged (L67) engine similar), here's what you will see:
A. Engine Compartment Fuse Block
B. Windshield Washer
Fluid Reservoir
C. Engine Coolant Recovery TankD. Radiator Pressure Cap
E. Power Steering Fluid Reservoir
F. Engine Oil Dipstick
G. Engine Oil Fill CapH. Automatic Transaxle
Fluid Dipstick
I. Brake Master Cylinder
J. Engine Air Cleaner/Filter
Page 362 of 427

6-67
Electrical System
Add-On Electrical Equipment
NOTICE:
Don't add anything electrical to your vehicle
unless you check with your dealer first. Some
electrical equipment can damage your vehicle
and the damage wouldn't be covered by your
warranty. Some add
-on electrical equipment
can keep other components from working as
they should.
Your vehicle has an air bag system. Before attempting to
add anything electrical to your vehicle, see ªServicing
Your Air Bag
-Equipped Vehicleº in the Index.
Headlamp Wiring
The headlamp wiring is protected by an internal circuit
breaker. An electrical overload will cause the lamps to
go on and off, or in some cases to remain off. If this
happens, have your headlamp system checked
right away.
Windshield Wipers
The windshield wiper motor is protected by an internal
circuit breaker and a fuse. If the motor overheats due to
heavy snow, etc., the wiper will stop until the motor
cools. If the overload is caused by some electrical
problem, be sure to have it fixed.
Power Windows and Other Power Options
Circuit breakers in the rear fuse block protect the power
windows and other power accessories. When the current
load is too heavy, the circuit breaker opens and closes,
protecting the circuit until the problem is fixed or
goes away.
Page 363 of 427

6-68 Fuses and Circuit Breakers
The wiring circuits in your vehicle are protected from
short circuits by a combination of fuses and circuit
breakers. This greatly reduces the chance of damage
caused by electrical problems.
Look at the silver
-colored band inside the fuse. If the
band is broken or melted, replace the fuse. Be sure you
replace a bad fuse with a new one of the identical size
and rating.
The MaxiFuses are located in two fuse blocks, one
located in the engine compartment on the passenger's
side and the other under the rear seat on the driver's
side. If a MaxiFuse should blow, have your vehicle
serviced by your dealer immediately.
Removing Fuses
You will find a fuse puller attached in both of the fuse
blocks. Snap the wide end of the fuse puller on to the
fuse, at the side indentations holding the puller and pull
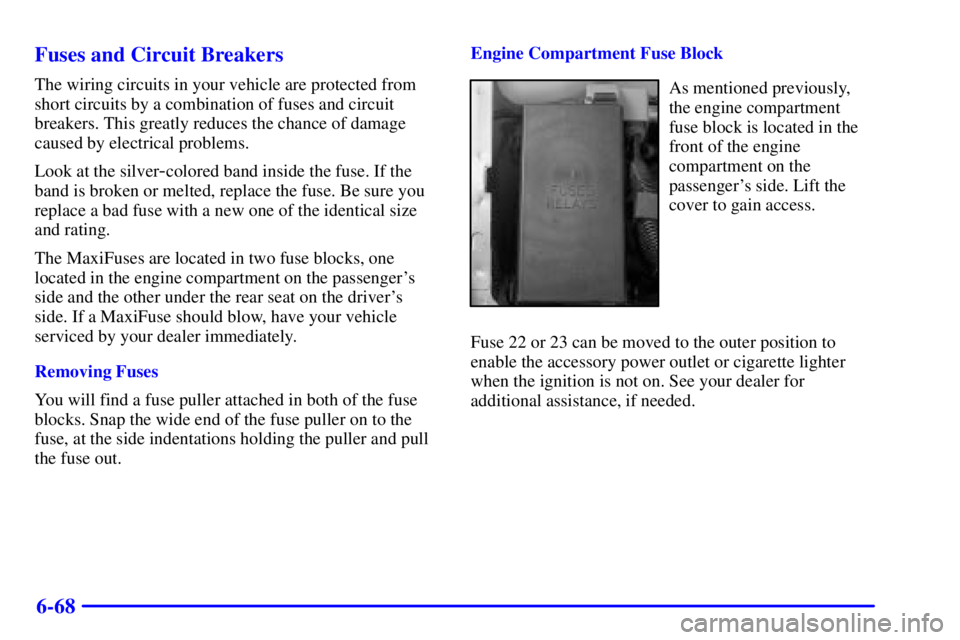
the fuse out.Engine Compartment Fuse Block
As mentioned previously,
the engine compartment
fuse block is located in the
front of the engine
compartment on the
passenger's side. Lift the
cover to gain access.
Fuse 22 or 23 can be moved to the outer position to
enable the accessory power outlet or cigarette lighter
when the ignition is not on. See your dealer for
additional assistance, if needed.
Page 364 of 427
6-69
Minifuse Usage
1 Not Used
2 Accessory
3 Windshield Wipers
4 Not Used
5 Headlamp Low Beam LeftMinifuse Usage
6 Headlamp Low Beam Right
7 Spare
8 Powertrain Control
Module Battery
9 Headlamp High Beam Right
10 Headlamp High Beam Left
11 Ignition 1
12 Not Used
13 Transaxle
14 Cruise Control
15 Direct Ignition System
16 Injector Bank #2
17 Not Used
18 Not Used
19 Powertrain Control
Module Ignition
Page 365 of 427
6-70
Minifuse Usage
20 Oxygen Sensor
21 Injector Bank #1
22 Auxiliary Power
23 Cigar Lighter
24 Fog Lamps/Daytime
Running Lamps
25 Horn
26 Air Conditioning Clutch
Micro Relay Usage
27 Headlamp High Beam
28 Headlamp Low Beam
29 Fog Lamps
30 Daytime Running LampsMicro Relay Usage
31 Horn
32 Air Conditioning Clutch
33 HVAC Solenoid
Mini Relay Usage
34 Accessory
35 Air Pump
36 Starter 1
37 Cooling Fan Secondary
38 Ignition 1
39 Cooling Fan Series/Parallel
40 Cooling Fan Primary
Page 366 of 427
6-71
Maxibreaker Usage
41 Starter
Maxifuse Usage
42 A.I.R.
43 Not Used
44 Antilock Brake System
45 Not Used
46 Cooling Fan Secondary
47 Cooling Fan Primary
48 Spare
49 Spare
50 Spare
51 Spare
52 Spare
53 Fuse PullerRemoving the Rear Seat Cushion
NOTICE:
The battery and main fuse blocks are located
under the rear seat cushion. The battery's ground
terminal and some relay wires are exposed.
To help avoid damage to the battery and wires,
be careful when removing or reinstalling the
seat cushion. Do not remove covers from covered
parts. Do not store anything under the seat, as
objects could touch exposed wires and cause
a short.
To remove the rear seat cushion, do the following:
1. Pull up on the front of the cushion to release the
front hooks.
2. Pull the cushion up and out toward the front of
the vehicle.