Page 74 of 155

17-06-2002
YOUR 206 IN DETAIL73
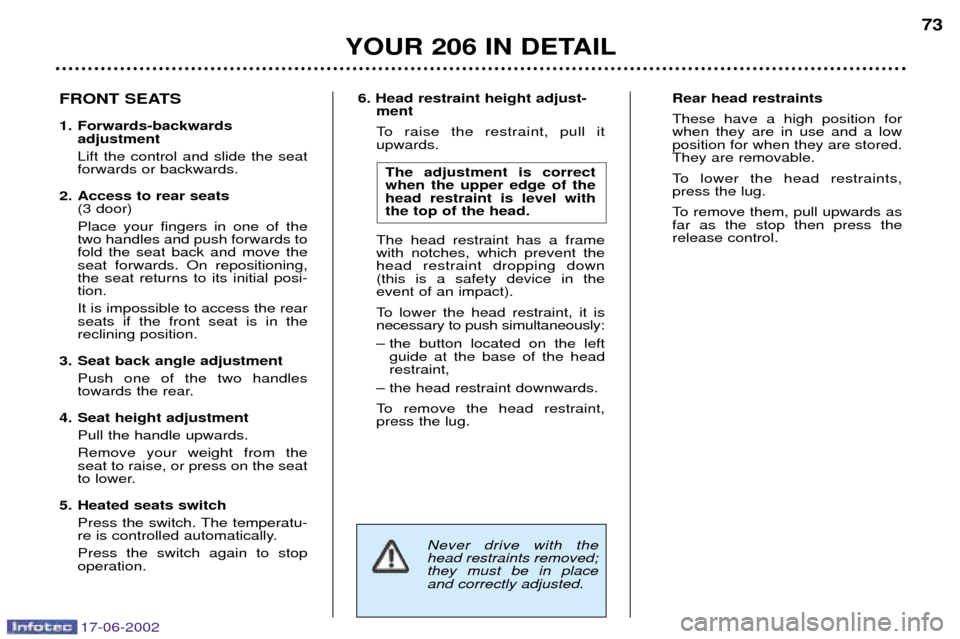
6. Head restraint height adjust-
ment
To raise the restraint, pull it upwards.
The adjustment is correctwhen the upper edge of thehead restraint is level withthe top of the head.
The head restraint has a framewith notches, which prevent thehead restraint dropping down(this is a safety device in theevent of an impact).
To lower the head restraint, it is necessary to push simultaneously:
Ð the button located on the left guide at the base of the head restraint,
Ð the head restraint downwards.
To remove the head restraint, press the lug.
Never drive with thehead restraints removed;they must be in placeand correctly adjusted. Rear head restraints These have a high position for when they are in use and a lowposition for when they are stored.They are removable.
To lower the head restraints, press the lug.
To remove them, pull upwards as far as the stop then press therelease control.FRONT SEATS
1. Forwards-backwards
adjustment Lift the control and slide the seat forwards or backwards.
2. Access to rear seats (3 door) Place your fingers in one of the two handles and push forwards tofold the seat back and move theseat forwards. On repositioning,the seat returns to its initial posi-tion. It is impossible to access the rear seats if the front seat is in thereclining position.
3. Seat back angle adjustment Push one of the two handles
towards the rear.
4. Seat height adjustment Pull the handle upwards. Remove your weight from the seat to raise, or press on the seat
to lower.
5. Heated seats switch Press the switch. The temperatu-
re is controlled automatically. Press the switch again to stop operation.
Page 77 of 155

17-06-2002
YOUR 206 IN DETAIL73
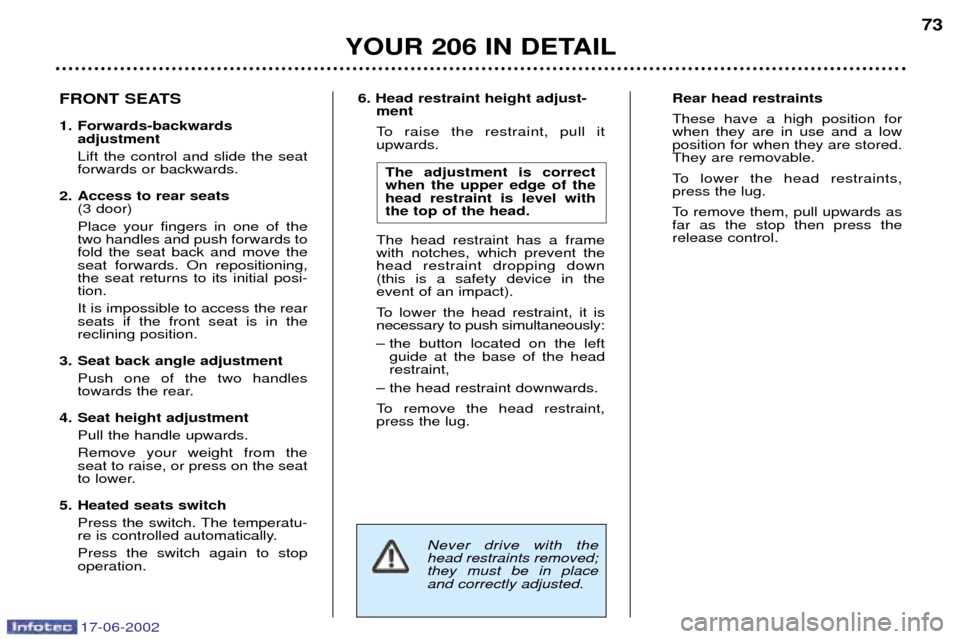
6. Head restraint height adjust-
ment
To raise the restraint, pull it upwards.
The adjustment is correctwhen the upper edge of thehead restraint is level withthe top of the head.
The head restraint has a framewith notches, which prevent thehead restraint dropping down(this is a safety device in theevent of an impact).
To lower the head restraint, it is necessary to push simultaneously:
Ð the button located on the left guide at the base of the head restraint,
Ð the head restraint downwards.
To remove the head restraint, press the lug.
Never drive with thehead restraints removed;they must be in placeand correctly adjusted. Rear head restraints These have a high position for when they are in use and a lowposition for when they are stored.They are removable.
To lower the head restraints, press the lug.
To remove them, pull upwards as far as the stop then press therelease control.FRONT SEATS
1. Forwards-backwards
adjustment Lift the control and slide the seat forwards or backwards.
2. Access to rear seats (3 door) Place your fingers in one of the two handles and push forwards tofold the seat back and move theseat forwards. On repositioning,the seat returns to its initial posi-tion. It is impossible to access the rear seats if the front seat is in thereclining position.
3. Seat back angle adjustment Push one of the two handles
towards the rear.
4. Seat height adjustment Pull the handle upwards. Remove your weight from the seat to raise, or press on the seat
to lower.
5. Heated seats switch Press the switch. The temperatu-
re is controlled automatically. Press the switch again to stop operation.
Page 81 of 155

17-06-2002
YOUR 206 IN DETAIL79
CHILD SEATS Although one of PEUGEOT's main concerns when designing your vehicle, the safety of your children also depends on you.
For maximum safety, please follow these precautions:
- All children under the age of 10 must travel in a special approved child seat*, adapted to their weight, in a seat fitted with a seat belt.
- Front passenger seat*: children under the age of 10 must not travel in the "forwards facing" position**. The "rearwards facing" position is permitted. In this position, it is compulsory to disarm the passenger air bag.
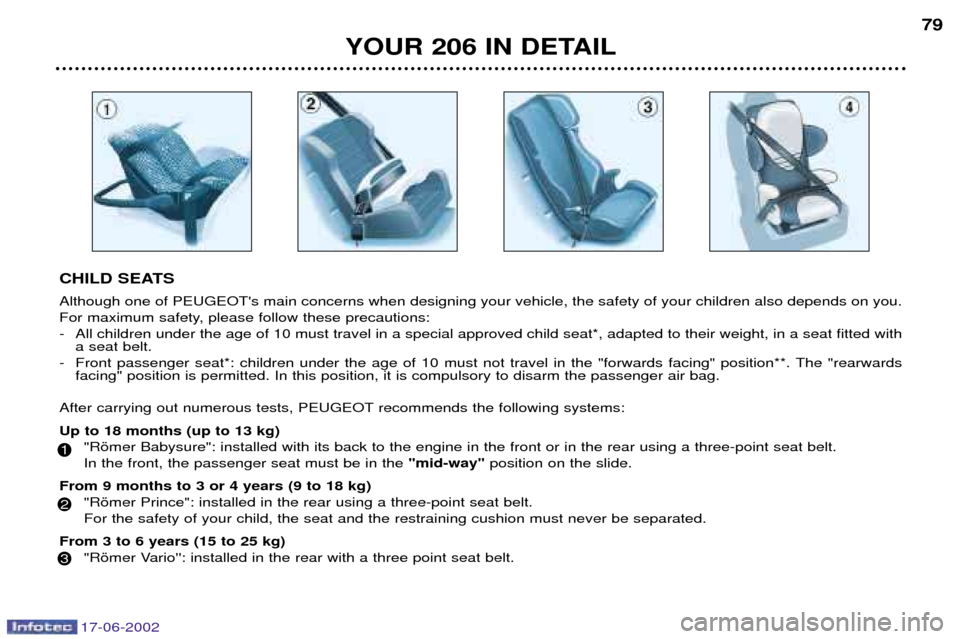
After carrying out numerous tests, PEUGEOT recommends the following systems: Up to 18 months (up to 13 kg) "Ršmer Babysure": installed with its back to the engine in the front or in the rear using a three-point seat belt. In the front, the passenger seat must be in the "mid-way"position on the slide.
From 9 months to 3 or 4 years (9 to 18 kg) "Ršmer Prince": installed in the rear using a three-point seat belt.For the safety of your child, the seat and the restraining cushion must never be separated.
From 3 to 6 years (15 to 25 kg) "Ršmer Vario'': installed in the rear with a three point seat belt.
1
2
3
Page 83 of 155

17-06-2002
YOUR 206 IN DETAIL81
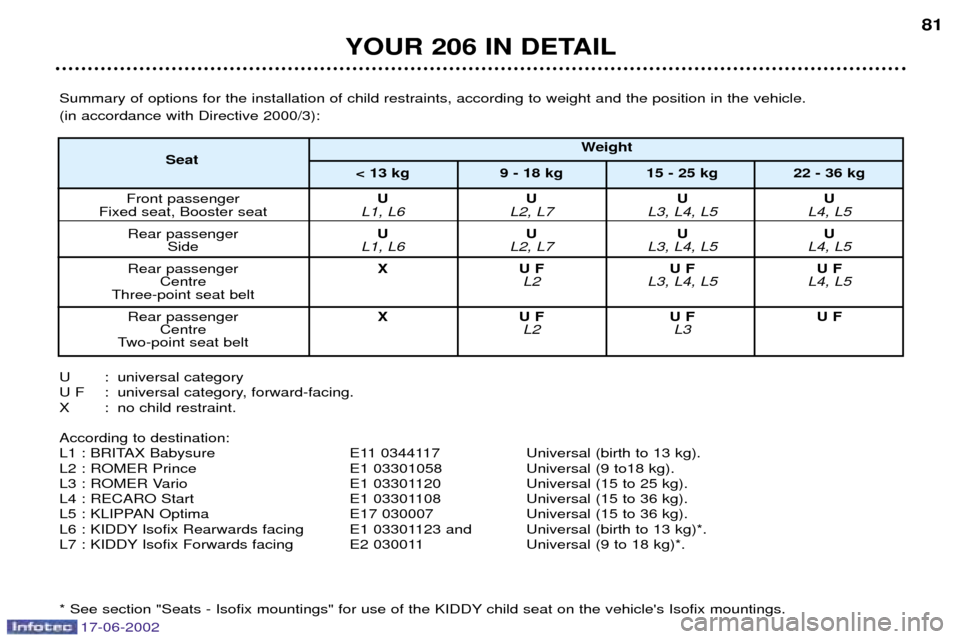
Summary of options for the installation of child restraints, according to weight and the position in the vehicle. (in accordance with Directive 2000/3):
U : universal category
U F : universal category, forward-facing.
X : no child restraint. According to destination:
L1 : BRITAX Babysure E11 0344117 Universal (birth to 13 kg).
L2 : ROMER Prince E1 03301058 Universal (9 to18 kg).
L3 : ROMER Vario E1 03301120 Universal (15 to 25 kg).
L4 : RECARO Start E1 03301108 Universal (15 to 36 kg).
L5 : KLIPPAN Optima E17 030007 Universal (15 to 36 kg).
L6 : KIDDY Isofix Rearwards facing E1 03301123 and Universal (birth to 13 kg)*.
L7 : KIDDY Isofix Forwards facing E2 030011 Universal (9 to 18 kg)*.
* See section "Seats - Isofix mountings" for use of the KIDDY child seat on the vehicle's Isofix mountings. Weight
Seat < 13 kg 9 - 18 kg 15 - 25 kg 22 - 36 kg
Front passenger UU UU
Fixed seat, Booster seat L1, L6 L2, L7 L3, L4, L5 L4, L5
Rear passenger UU UU
Side L1, L6 L2, L7 L3, L4, L5 L4, L5
Rear passenger X U F U F U F
Centre L2 L3, L4, L5 L4, L5
Three-point seat belt
Rear passenger X U F U F U F
Centre L2 L3
Two-point seat belt
Page 144 of 155

17-06-2002
PRACTICAL INFORMATION
134
TOWING A TRAILER,
CARAVAN, BOAT etc,
Only use original PEUGEOT tow bars that have been tested andapproved from the design stage of
your vehicle. The tow bar must be
fitted by a PEUGEOT dealer.
Your vehicle is basically designed for transporting people and luggagebut it may also be used for towing a
trailer. Driving with a trailer subjects the towing vehicle to more significantstress and its driver must be particu-larly careful. Air density decreases with altitude, thus reducing engine performance.Above 1000 metres, the maximumtowing load must be reduced by10% and so on for every 1000metres of altitude. Driving advice Distribution of loads
: distribute the
load in the trailer so that the hea- viest items are as close as possibleto the axle and the nose weightapproaches the maximum permittedwithout exceeding it. Cooling : towing a trailer on a slope
increases the temperature of the
coolant. As the fan is electricallycontrolled, its cooling capacity is notdependent on the engine speed.
On the contrary, use a high gear to lower the engine speed, and reduceyour speed. The maximum towing load on a long slope depends on the gradient andthe outside temperature. In all cases, pay attention to thecoolant temperature. If the warning light comes on, stop
the vehicle and switch off the engineas soon as possible.
Tyres
: check the tyre pressures of
the towing vehicle and of the trailer, observing the recommended pres-sures. Braking : towing increases the bra-
king distance.Lights : adjust your headlamps so
that they do not dazzle other road users. Check the electrical signalling
on the trailer. Side wind : take into acount the
increased sensitivity to side wind.
Page 145 of 155
17-06-2002
PRACTICAL INFORMATION135
Removing the mat When removing the mat on the dri- ver's side, move the seat as far backas possible and remove the fixings. When refitting the mat, position it and replace the fixings by turningthem a quarter of a turn.
When fitting transverse roof bars, ensure that they are positioned cor-
rectly. The correct positions are shown by marks on each of the longitudinalbars. Use accessories approved by
PEUGEOT and follow the manufac-turer's fitting instructions.
Maximum authorised
weight on the roof rack: 75 kg
FITTING ROOF BARS (206 SW)
Page 150 of 155
17-06-2002
TECHNICAL DATA
140
SALOON CONSUMPTION
Fuel consumption values correct at time of printing.
In accordance with directive 99/100 in M.P.G. (litres/100 km)
Engine Gearbox Model Urban driving Inter- Mixed Emission of codes urban CO 2 by weight
g/Km
1.1 litre Manual HFXF 8,2 5 6,2 148
1.1 litre Manual HFXU / A 8,4 5,2 6,3 151
1.4 litre Manual K6D2 9,4 5,5 7 162
1.4 litre Manual KFWF 8,4 5 6,3 149 KFWA 8,5 5,2 6,3 151
1.4 litre Automatic KFWR 9,5 5,4 6,9 165
1.6 litre 16V Manual NFUF 8,6 5,1 6,4 153 HNFUF 8,7 5,7 6,8 161
1.6 litre 16V Automatic NFUR 9,9 5,5 7,1 171 HNFUR 10,2 5,8 7,5 179
2 litre 16V Manual RFNF 10,7 6,1 7,7 185
1.4 litre Turbo HDI Manual 8HXF 5,5 3,6 4,3 113
1.9 litre Diesel Manual WJYF 7,4 4,4 5,5 144 WJYU 7,8 4,6 5,8 153
2 litre Turbo HDI Manual RHYF 6,6 4,1 5 136 HRHYF 6,9 4,4 5,3 144
2 litre Turbo HDI (ECO)Manual RHYU 5,8 3,8 4,5 120
Page 151 of 155
17-06-2002
TECHNICAL DATA141
206 SW CONSUMPTION
In accordance with directive 99/100 In M.P.G. (litres/100 km)
Engine Gearbox Model Urban Inter- Mixed Emission of codes driving urban CO 2 by weight
g/Km
1.1 litre Manual 2EHFXF Ñ Ñ Ñ Ñ
1.4 litre Manual 2EKFWF 8,5 5,2 6,4 153 2EKFWA 8,5 5,2 6,4 153
1.6 litre 16V Manual 2ENFUF 8,6 5,1 6,4 153 2KNFUF 8,7 5,5 6,7 159
1.6 litre 16V Automatic 2ENFUR 9,9 5,5 7,1 171 2KNFUR 10,2 5,8 7,5 179
2 litre 16V Manual 2ERFNF Ñ Ñ Ñ Ñ
1.4 litre Turbo HDI Manual 2E8HXF 5,6 3,8 4,4 117
2 litre Turbo HDI Manual 2ERHYF 6,8 4,1 5,1 138 2KHHYF 6,9 4,4 5,3 144
Fuel consumption values correct at time of printing.