2002 NISSAN XTERRA brake fluid
[x] Cancel search: brake fluidPage 57 of 263
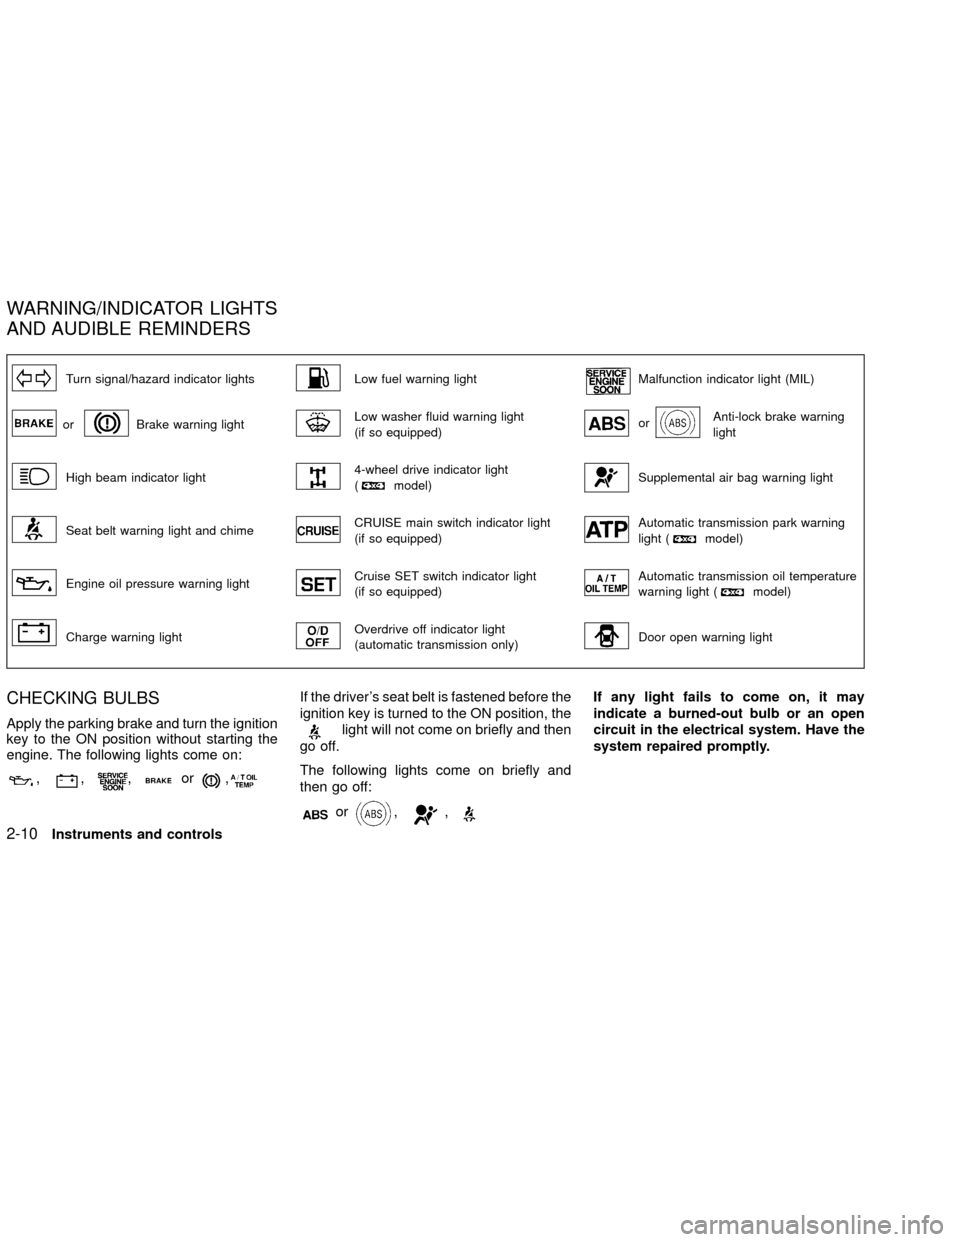
Turn signal/hazard indicator lightsLow fuel warning lightMalfunction indicator light (MIL)
orBrake warning lightLow washer fluid warning light
(if so equipped)orAnti-lock brake warning
light
High beam indicator light4-wheel drive indicator light
(model)Supplemental air bag warning light
Seat belt warning light and chimeCRUISE main switch indicator light
(if so equipped)Automatic transmission park warning
light (model)
Engine oil pressure warning lightCruise SET switch indicator light
(if so equipped)Automatic transmission oil temperature
warning light (model)
Charge warning lightOverdrive off indicator light
(automatic transmission only)Door open warning light
CHECKING BULBS
Apply the parking brake and turn the ignition
key to the ON position without starting the
engine. The following lights come on:
,,,or,
If the driver's seat belt is fastened before the
ignition key is turned to the ON position, the
light will not come on briefly and then
go off.
The following lights come on briefly and
then go off:
or,,
If any light fails to come on, it may
indicate a burned-out bulb or an open
circuit in the electrical system. Have the
system repaired promptly.
WARNING/INDICATOR LIGHTS
AND AUDIBLE REMINDERS
2-10Instruments and controls
ZX
Page 58 of 263
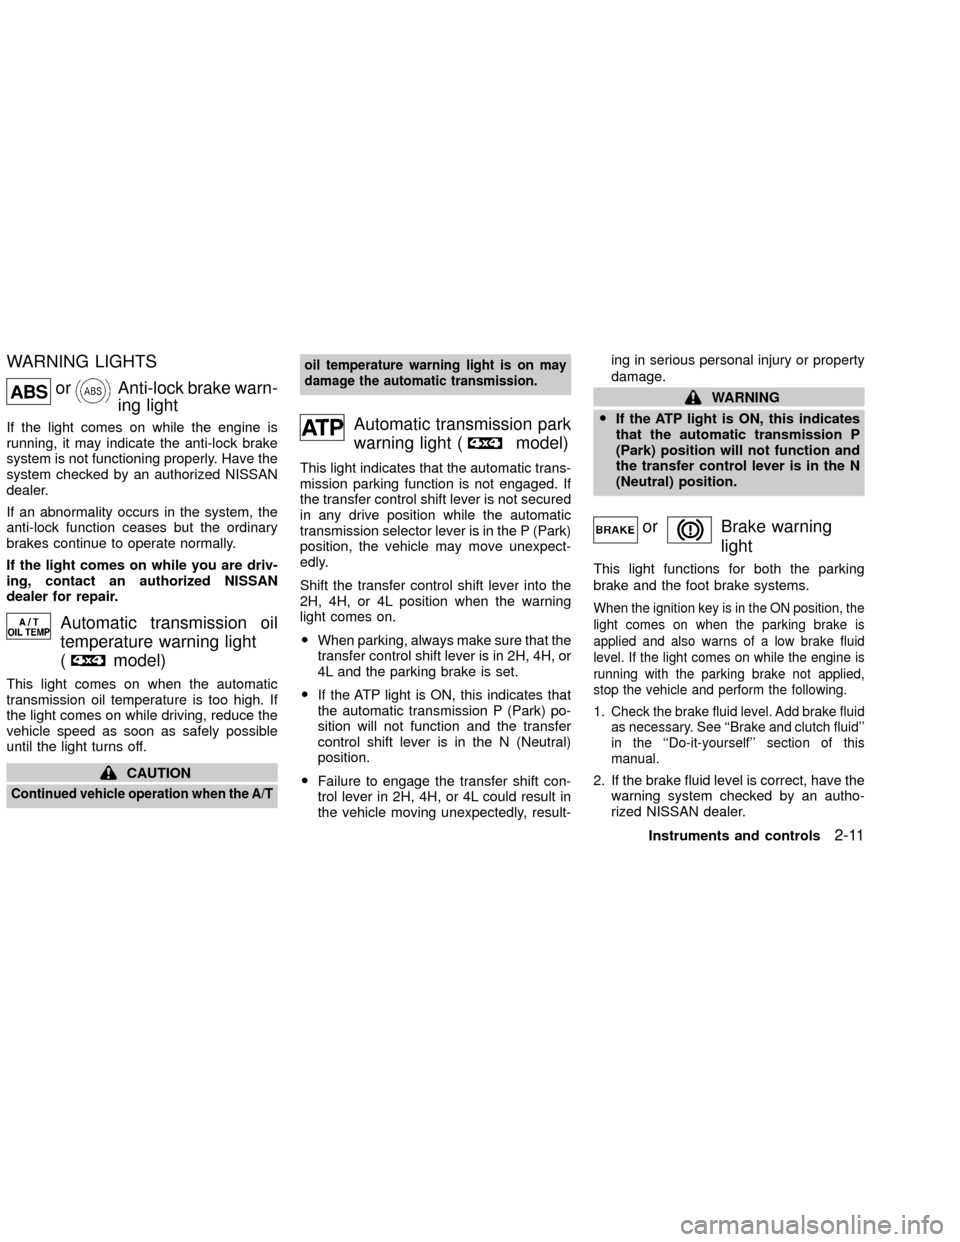
WARNING LIGHTS
orAnti-lock brake warn-
ing light
If the light comes on while the engine is
running, it may indicate the anti-lock brake
system is not functioning properly. Have the
system checked by an authorized NISSAN
dealer.
If an abnormality occurs in the system, the
anti-lock function ceases but the ordinary
brakes continue to operate normally.
If the light comes on while you are driv-
ing, contact an authorized NISSAN
dealer for repair.
Automatic transmission oil
temperature warning light
(
model)
This light comes on when the automatic
transmission oil temperature is too high. If
the light comes on while driving, reduce the
vehicle speed as soon as safely possible
until the light turns off.
CAUTION
Continued vehicle operation when the A/Toil temperature warning light is on may
damage the automatic transmission.
Automatic transmission park
warning light (
model)
This light indicates that the automatic trans-
mission parking function is not engaged. If
the transfer control shift lever is not secured
in any drive position while the automatic
transmission selector lever is in the P (Park)
position, the vehicle may move unexpect-
edly.
Shift the transfer control shift lever into the
2H, 4H, or 4L position when the warning
light comes on.
OWhen parking, always make sure that the
transfer control shift lever is in 2H, 4H, or
4L and the parking brake is set.
OIf the ATP light is ON, this indicates that
the automatic transmission P (Park) po-
sition will not function and the transfer
control shift lever is in the N (Neutral)
position.
OFailure to engage the transfer shift con-
trol lever in 2H, 4H, or 4L could result in
the vehicle moving unexpectedly, result-ing in serious personal injury or property
damage.
WARNING
OIf the ATP light is ON, this indicates
that the automatic transmission P
(Park) position will not function and
the transfer control lever is in the N
(Neutral) position.
orBrake warning
light
This light functions for both the parking
brake and the foot brake systems.
When the ignition key is in the ON position, the
light comes on when the parking brake is
applied and also warns of a low brake fluid
level. If the light comes on while the engine is
running with the parking brake not applied,
stop the vehicle and perform the following.
1.Check the brake fluid level. Add brake fluid
as necessary. See ``Brake and clutch fluid''
in the ``Do-it-yourself'' section of this
manual.
2. If the brake fluid level is correct, have the
warning system checked by an autho-
rized NISSAN dealer.
Instruments and controls
2-11
ZX
Page 59 of 263
WARNING
O
Your brake system may not be working
properly if the warning light is on.
Driving could be dangerous. If you
judge it to be safe, drive carefully to
the nearest service station for repairs.
Otherwise have your vehicle towed be-
cause driving it could be dangerous.
OPressing the brake pedal with the
engine stopped and/or low brake
fluid level may increase your stop-
ping distance and require greater
pedal effort as well as pedal travel.
OIf the brake fluid level is below the
MINIMUM or MIN mark on the brake
fluid reservoir, do not drive until the
brake system has been checked at
an authorized NISSAN dealer.
Charge warning light
If this light comes on while the engine is
running, it may indicate the charging system
is not functioning properly. Turn the engine
off and check the generator belt. If the belt is
loose, broken, missing or if the light remains
on, see an authorized NISSAN dealer imme-
diately.
CAUTION
Do not continue driving if the belt is
loose, broken or missing.
Door open warning light
This light comes on when any of the doors
are not closed securely while the ignition
key is in the ON position.
Engine oil pressure warning
light
This light warns of low engine oil pressure. If
the light flickers or comes on during normal
driving, pull off the road in a safe area, stop
the engineimmediatelyand call an autho-
rized NISSAN dealer.
The engine oil pressure warning light is
not designed to indicate a low oil level.
Use the dipstick to check the oil level.
See ``Engine oil'' in the ``Maintenance and
do-it-yourself'' section of this manual.
CAUTION
Running the engine with the engine oil
pressure warning light on could causeserious damage to the engine almost
immediately. Such damage is not cov-
ered by warranty. Turn off the engine as
soon as it is safe to do so.
Low fuel warning light
This light comes on when the fuel in the tank
is low. Refuel as soon as it is convenient,
preferably before the fuel gauge reaches E
(Empty).
There will be a small reserve of fuel
remaining in the tank when the fuel
gauge needle reaches E (Empty).
Low washer fluid warning
light (if so equipped)
This light comes on when the washer tank
fluid is at a low level. Add washer fluid as
necessary. See ``Window washer fluid'' in
the ``Do-it-yourself'' section of this manual.
Seat belt warning light and
chime
The light and chime remind you to fasten
your seat belts. The light illuminates when-
ever the ignition key is turned to ON or
START and remains illuminated until the
2-12Instruments and controls
ZX
Page 139 of 263

ON (Normal operating position) (3)
This position turns on the ignition system
and electrical accessories.
START (4)
This position starts the engine. As soon as
the engine has started, release the key. It
automatically returns to the ON position.OMake sure the area around the vehicle is
clear.
OCheck fluid levels such as engine oil,
coolant, brake and clutch fluid, and win-
dow washer fluid as frequently as pos-
sible, at least whenever you refuel.
OCheck that all windows and lights are
clean.
OVisually inspect tires for their appearance
and condition. Also check tires for proper
inflation.
OLock all doors.
OPosition seat and adjust head restraints.
OAdjust inside and outside mirrors.
OFasten seat belts and ask all passengers
to do likewise.
OCheck the operation of warning lights
when key is turned to the ON (3) position.
See9Warning/Indicator lights and au-
dible reminders9in the9Instruments and
controls9section.1. Apply the parking brake.
2.Automatic transmission:
Move the selector lever to P (Park) or N
(Neutral). P (Park) is preferred.
The shift lever cannot be moved out of
P (Park) and into any of the other gear
positions if the ignition key is turned
to OFF or if the key is removed from
the ignition switch.
The starter is designed not to operate
if the selector lever is in one of the
driving positions.
Manual transmission:
Move the gearshift lever to N (Neutral),
and fully depress the clutch pedal to the
floor while starting the engine.
The starter is designed not to operate
unless the clutch pedal is fully de-
pressed.
3.With your foot off the accelerator
pedal,turn the ignition key to START.
Release the key when the engine starts.
If the engine starts, but fails to run, repeat
the above procedure.
BEFORE STARTING THE
ENGINESTARTING THE ENGINE
5-8Starting and driving
ZX
Page 158 of 263
WARNING
OThe anti-lock brake system is a
sophisticated device, but it cannot
prevent accidents resulting from
careless or dangerous driving tech-
niques. It can help maintain vehicle
control under braking on slippery
surfaces, but remember that the
stopping distance on slippery sur-
faces will be longer than on normal
surfaces even with the anti-lock
brake system. Stopping distances
may also be longer on rough, gravel,
or snow covered roads, or if you are
using tire chains. Always maintain a
safe distance from the vehicle in
front of you. Ultimately, the respon-
sibility for safety of self and others
rests in the hands of the driver.
Tire type and condition may also affect
braking effectiveness.
OWhen replacing tires, install the
specified tire size on all four wheels.
OWhen installing a spare tire, make
sure it is the proper size and type as
specified on the tire placard. For tireplacard location information refer to
``Tire placard'' in the ``Technical and
consumer information'' section of
this manual.FREEING A FROZEN DOOR
LOCK
To prevent a door lock from freezing, apply
de-icer or glycerin through the key hole. If
the lock becomes frozen, heat the key be-
fore inserting it in the key hole.
ANTI-FREEZE
In the winter when it is anticipated that the
temperature will drop below 32ÉF (0ÉC),
check anti-freeze (ethylene glycol base) to
assure proper winter protection. For details,
see ``Engine cooling system'' in the ``Main-
tenance and do-it-yourself'' section of this
manual.
BATTERY
If the battery is not fully charged during
extremely cold weather conditions, the bat-
tery fluid may freeze and damage the bat-
tery. To maintain maximum efficiency, the
battery should be checked regularly. For
details, see ``Battery'' in the ``Maintenance
and do-it-yourself'' section of this manual.
DRAINING OF COOLANT WATER
If the vehicle is to be left outside without
anti-freeze, drain the cooling system by open-
COLD WEATHER DRIVING
Starting and driving5-27
ZX
Page 169 of 263
COLD pressure:
After vehicle has been parked for three
hours or more or driven less than 1 mile
(1.6 km).
COLD tire pressures are shown on the
tire placard affixed to the inside of the
glove box lid.
ORetighten the wheel nuts when the
vehicle has been driven for 600 miles
(1,000 km) (also in cases of a flat tire,
etc.).
5. Securely store the flat tire and jacking
equipment in the vehicle.
WARNING
Always make sure that the spare tire
and jacking equipment are properly se-
cured after use. Such items can be-
come dangerous projectiles in an acci-
dent or sudden stop.To start your engine with a booster battery,
the instructions and precautions below must
be followed.
WARNING
OIf done incorrectly, jump starting can
lead to a battery explosion, resulting
in severe injury or death. It could
also damage your vehicle.
OExplosive hydrogen gas is always
present in the vicinity of the battery.
Keep all sparks and flames away
from the battery.
ODo not allow battery fluid to come
into contact with eyes, skin, clothing
or painted surfaces. Battery fluid is a
corrosive sulphuric acid solution
which can cause severe burns. If the
fluid should come into contact with
anything, immediately flush the con-
tacted area with water.
OKeep battery out of the reach of
children.
OThe booster battery must be rated at
12 volts. Use of an improperly rated
battery can damage your vehicle.OYour vehicle has and automatic en-
gine cooling fan. It could come on at
any time. Keep hands and other ob-
jects away from it.
OWhenever working on or near a bat-
tery, always wear suitable eye pro-
tectors (for example, goggles or in-
dustrial safety spectacles) and
remove rings, metal bands, or any
other jewelry. Do not lean over the
battery when jump starting.
ODo not attempt to jump start a frozen
battery. It could explode and cause
serious injury.
WARNING
Always follow the instructions be-
low. Failure to do so could result in
damage to the charging system and
cause personal injury.
1.
If the booster battery is in another vehicle,
position the two vehicles to bring their
batteries into close proximity to each other.
Do not allow the two vehicles to touch.
2. Apply the parking brake. Move the shift
selector lever to N (Neutral) (on auto-
JUMP STARTING
6-8In case of emergency
ZX
Page 183 of 263

8 Maintenance and do-it-yourself
Maintenance requirements .....................................8-2
General maintenance .............................................8-3
Explanation of general maintenance
items ..................................................................8-3
Exterior maintenance.........................................8-3
Interior maintenance ..........................................8-3
Maintenance precautions .......................................8-5
Engine compartment check locations ....................8-7
Engine cooling system .........................................8-10
Checking engine coolant level ........................8-10
Changing engine coolant ................................ 8-11
Engine oil ............................................................. 8-11
Checking engine oil level ................................ 8-11
Changing engine oil ........................................8-13
Changing engine oil filter.................................8-14
Automatic transmission fluid ................................8-15
Temperature conditions for checking ..............8-15
Power steering fluid..............................................8-17
Brake and clutch fluid...........................................8-17
Window washer fluid ............................................8-18
Window washer fluid reservoir ........................8-18
Battery ..................................................................8-19Jump starting ...................................................8-20
Drive belts ............................................................8-20
Spark plugs ..........................................................8-21
Replacing spark plugs
(except supercharger) .....................................8-22
Replacing spark plugs
(with supercharger)..........................................8-23
Air cleaner ............................................................8-23
Windshield wiper blades ......................................8-25
Cleaning ..........................................................8-25
Replacing .........................................................8-25
Parking brake and brake pedal ............................8-27
Checking parking brake...................................8-27
Checking brake pedal .....................................8-27
Brake booster ..................................................8-28
Clutch pedal .........................................................8-29
Checking clutch pedal .....................................8-29
Fuses ....................................................................8-30
Passenger compartment .................................8-30
Keyfob battery replacement .................................8-31
Lights ....................................................................8-32
Headlights ........................................................8-32
ZX
Page 187 of 263

Additional information on the following
items with an ``*'' is found later in this
section.
Warning lights and chimesMake sure all
warning lights and chimes are operating
properly.
Windshield wiper and washer*Check that
the wipers and washer operate properly and
that the wipers do not streak.
Windshield defrosterCheck that the air
comes out of the defroster outlets properly
and in sufficient quantity when operating the
heater or air conditioner.
Steering wheelCheck for changes in the
steering conditions, such as excessive free-
play, hard steering or strange noises.
SeatsCheck seat position controls such as
seat adjusters, seatback recliner, etc. to
ensure they operate smoothly and all
latches lock securely in every position.
Check that the head restraints move up and
down smoothly and the locks (if so
equipped) hold securely in all latched posi-
tions.
Seat beltsCheck that all parts of the seat
belt system (e.g., buckles, anchors, adjust-ers and retractors) operate properly and
smoothly, and are installed securely. Check
the belt webbing for cuts, fraying, wear or
damage.
Accelerator pedalCheck the pedal for
smooth operation and make sure the pedal
does not catch or require uneven effort.
Keep the floor mat away from the pedal.
Clutch pedal*Make sure the pedal oper-
ates smoothly and check that it has the
proper free travel.
BrakesCheck that the brakes do not pull
the vehicle to one side when applied.
Brake pedal and booster*Check the pedal
for smooth operation and make sure it has
the proper distance under it when de-
pressed fully. Check the brake booster func-
tion. Be certain to keep the floor mat away
from the pedal.
Parking brake*Check that the lever has
the proper travel and confirm that your
vehicle is held securely on a fairly steep hill
with only the parking brake applied.
Automatic transmission P (Park) posi-
tion mechanismCheck that the lock re-
lease button on the selector lever operatesproperly and smoothly. On a fairly steep hill
check that your vehicle is held securely with
the selector lever in the P position without
applying any brakes.
Under the hood and vehicle
The maintenance items listed here should
be checked periodically (e.g., each time you
check the engine oil or refuel).
Additional information on the following
items with an ``*'' is found later in this
section.
Windshield washer fluid*Check that there
is adequate fluid in the reservoir.
Engine oil level*Check the level after
parking the vehicle on a level surface with
the engine off. Wait a few minutes for the oil
to drain back into the oil pan.
Brake and clutch fluid levels*Make sure
that the brake and clutch fluid level is be-
tween the MIN and MAX lines on the reser-
voir.
Power steering fluid level* and lines
Check the level when the fluid is cold, with
the engine off. Check the lines for proper
attachment, leaks, cracks, etc.
8-4Maintenance and do-it-yourself
ZX