2002 NISSAN XTERRA wheel
[x] Cancel search: wheelPage 166 of 263
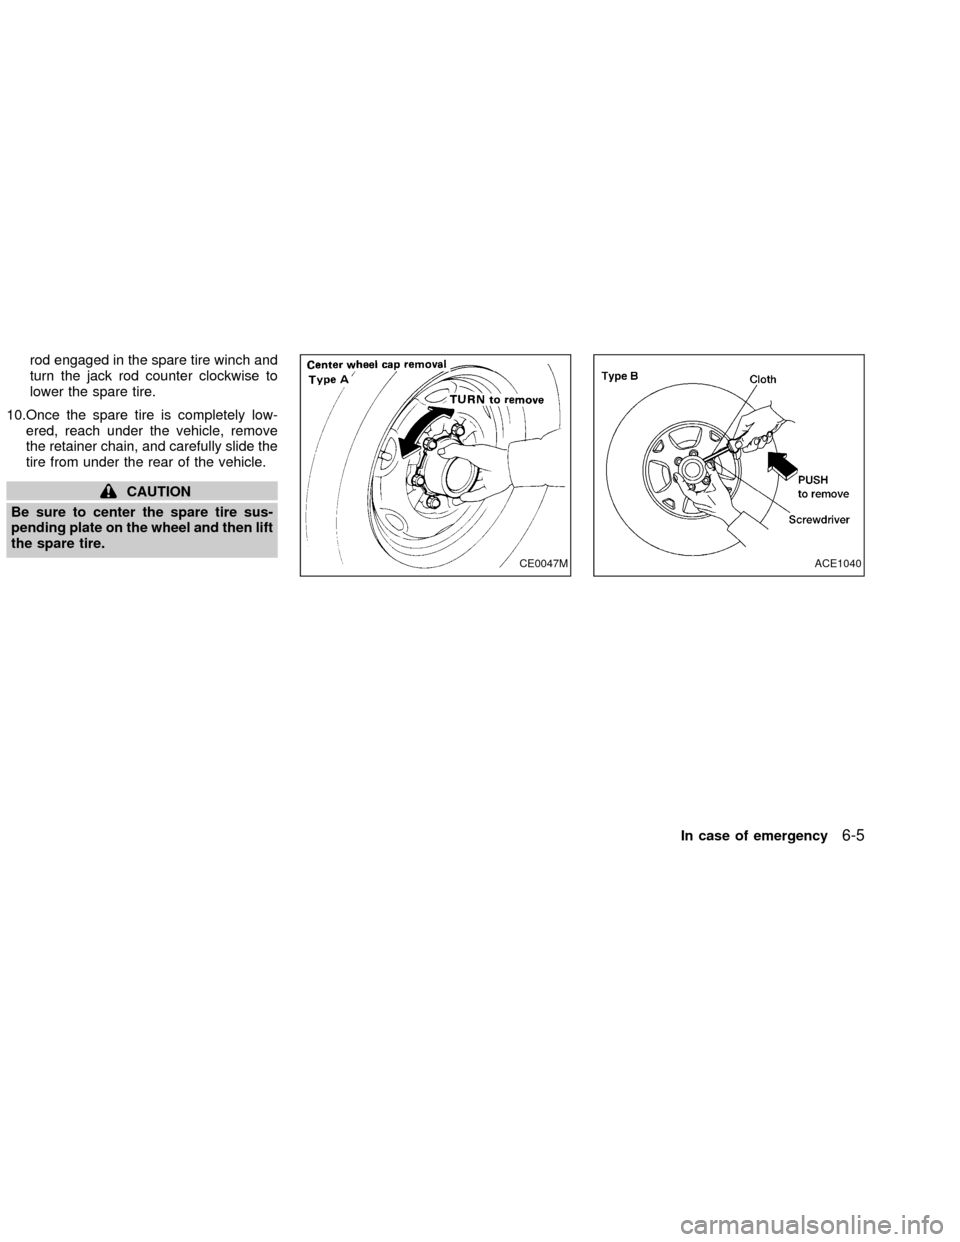
rod engaged in the spare tire winch and
turn the jack rod counter clockwise to
lower the spare tire.
10.Once the spare tire is completely low-
ered, reach under the vehicle, remove
the retainer chain, and carefully slide the
tire from under the rear of the vehicle.
CAUTION
Be sure to center the spare tire sus-
pending plate on the wheel and then lift
the spare tire.
CE0047MACE1040
In case of emergency6-5
ZX
Page 167 of 263
Removing wheel cover
CAUTION
Do not use your hands to pry off wheel
caps or wheel covers. Doing so could
result in personal injury.
Use caution not to scratch the wheel cover
or wheel surface.
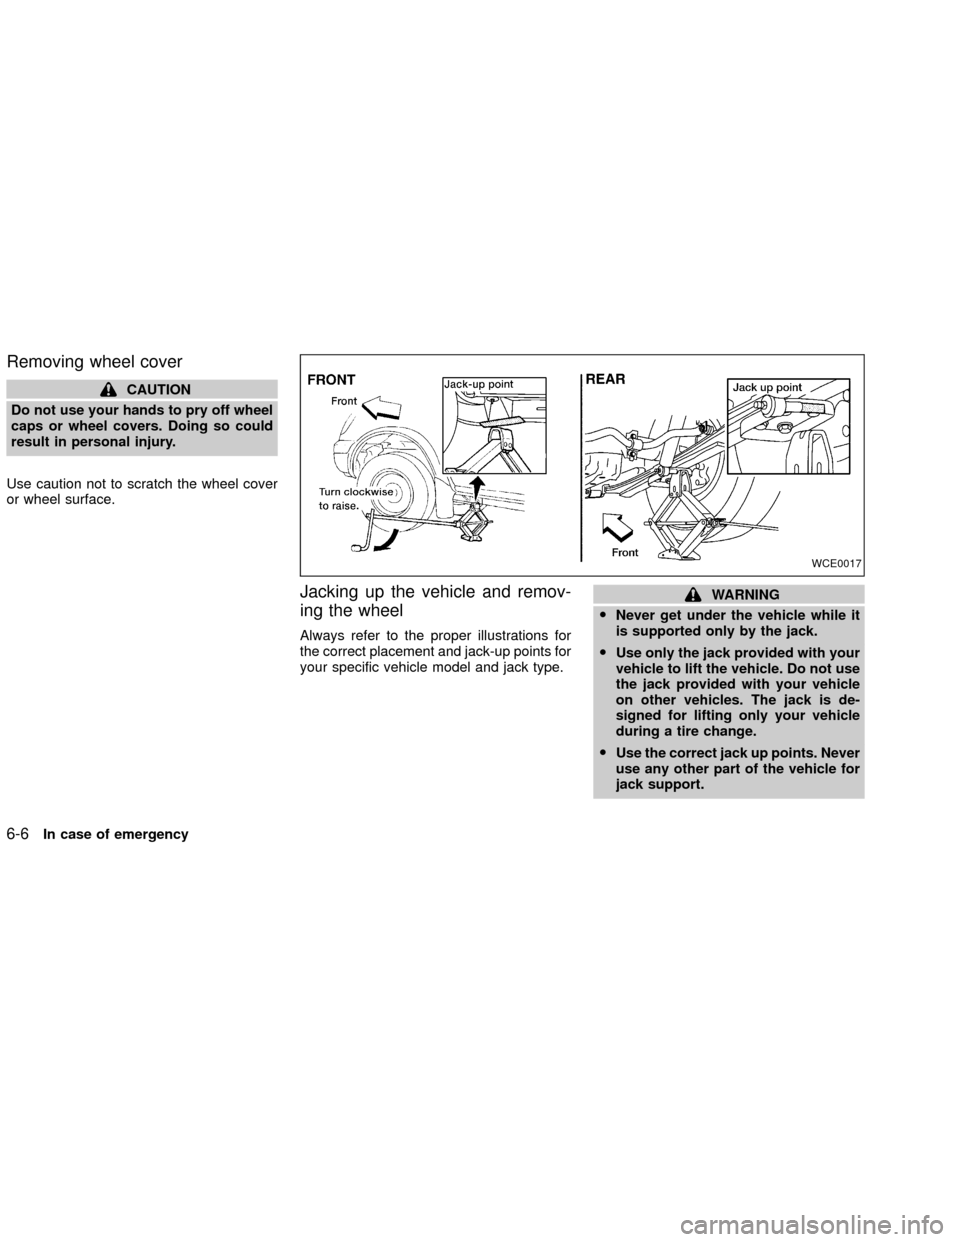
Jacking up the vehicle and remov-
ing the wheel
Always refer to the proper illustrations for
the correct placement and jack-up points for
your specific vehicle model and jack type.
WARNING
ONever get under the vehicle while it
is supported only by the jack.
OUse only the jack provided with your
vehicle to lift the vehicle. Do not use
the jack provided with your vehicle
on other vehicles. The jack is de-
signed for lifting only your vehicle
during a tire change.
OUse the correct jack up points. Never
use any other part of the vehicle for
jack support.
WCE0017
6-6In case of emergency
ZX
Page 168 of 263
ONever jack up the vehicle more than
necessary.
ONever use blocks on or under the
jack.
ONever use the tool tray as a jacking
surface.
ODo not allow passengers to stay in
the vehicle while it is on the jack.
ODo not start or run engine while
vehicle is on the jack. It may cause
the vehicle to move. This is espe-
cially true for vehicles with limited
slip differential carriers.
WARNING
OIncorrect wheel nuts or improperly
tightened wheel nuts can cause the
wheel to become loose or come off.
This could cause an accident.
ODo not use oil or grease on the wheel
studs or nuts. This could cause the
nuts to become loose.
Installing the spare tire
1. Clean any mud or dirt from the surface
between the wheel and hub.
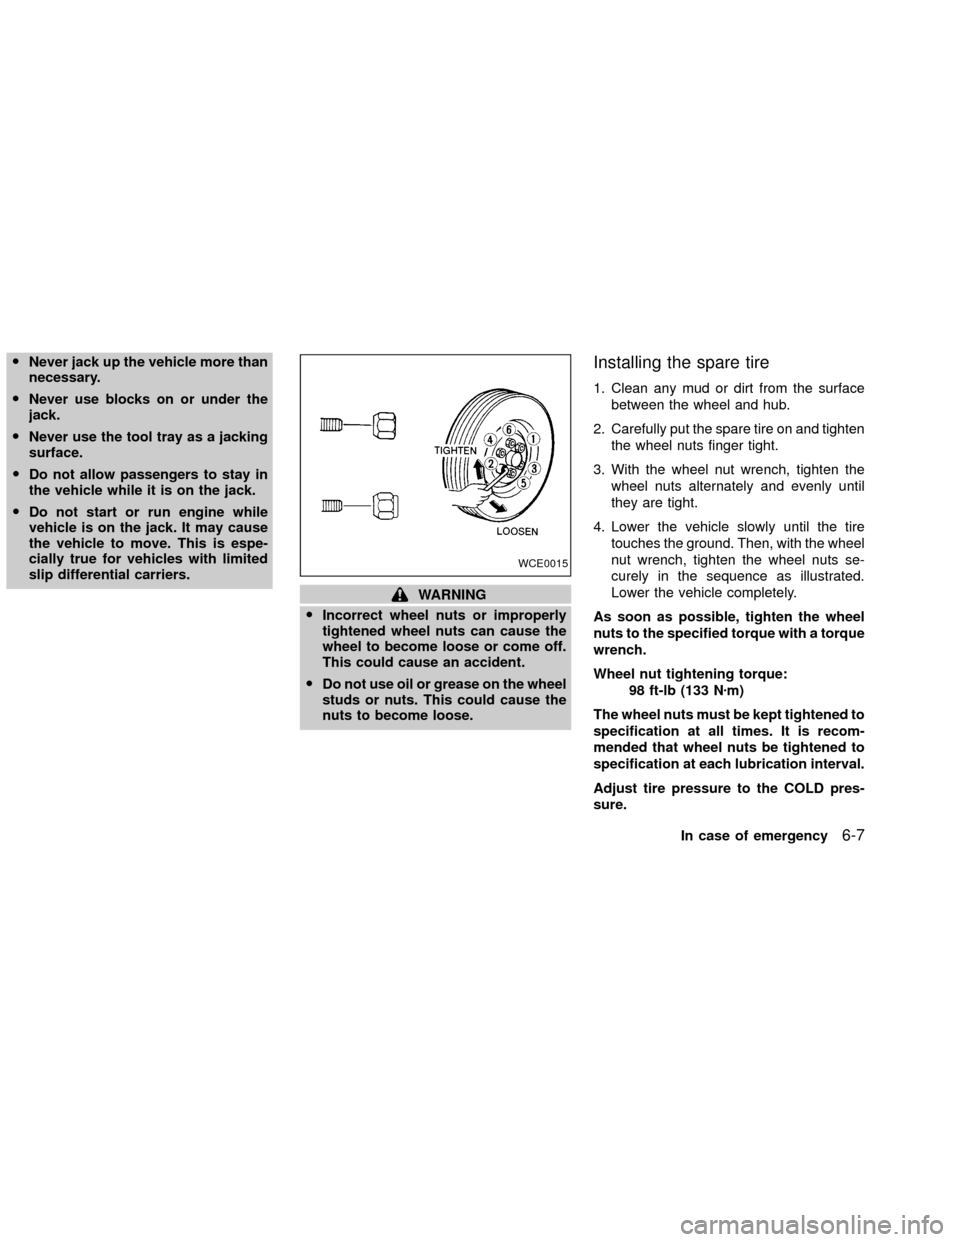
2. Carefully put the spare tire on and tighten
the wheel nuts finger tight.
3. With the wheel nut wrench, tighten the
wheel nuts alternately and evenly until
they are tight.
4. Lower the vehicle slowly until the tire
touches the ground. Then, with the wheel
nut wrench, tighten the wheel nuts se-
curely in the sequence as illustrated.
Lower the vehicle completely.
As soon as possible, tighten the wheel
nuts to the specified torque with a torque
wrench.
Wheel nut tightening torque:
98 ft-lb (133 Nzm)
The wheel nuts must be kept tightened to
specification at all times. It is recom-
mended that wheel nuts be tightened to
specification at each lubrication interval.
Adjust tire pressure to the COLD pres-
sure.
WCE0015
In case of emergency6-7
ZX
Page 169 of 263
COLD pressure:
After vehicle has been parked for three
hours or more or driven less than 1 mile
(1.6 km).
COLD tire pressures are shown on the
tire placard affixed to the inside of the
glove box lid.
ORetighten the wheel nuts when the
vehicle has been driven for 600 miles
(1,000 km) (also in cases of a flat tire,
etc.).
5. Securely store the flat tire and jacking
equipment in the vehicle.
WARNING
Always make sure that the spare tire
and jacking equipment are properly se-
cured after use. Such items can be-
come dangerous projectiles in an acci-
dent or sudden stop.To start your engine with a booster battery,
the instructions and precautions below must
be followed.
WARNING
OIf done incorrectly, jump starting can
lead to a battery explosion, resulting
in severe injury or death. It could
also damage your vehicle.
OExplosive hydrogen gas is always
present in the vicinity of the battery.
Keep all sparks and flames away
from the battery.
ODo not allow battery fluid to come
into contact with eyes, skin, clothing
or painted surfaces. Battery fluid is a
corrosive sulphuric acid solution
which can cause severe burns. If the
fluid should come into contact with
anything, immediately flush the con-
tacted area with water.
OKeep battery out of the reach of
children.
OThe booster battery must be rated at
12 volts. Use of an improperly rated
battery can damage your vehicle.OYour vehicle has and automatic en-
gine cooling fan. It could come on at
any time. Keep hands and other ob-
jects away from it.
OWhenever working on or near a bat-
tery, always wear suitable eye pro-
tectors (for example, goggles or in-
dustrial safety spectacles) and
remove rings, metal bands, or any
other jewelry. Do not lean over the
battery when jump starting.
ODo not attempt to jump start a frozen
battery. It could explode and cause
serious injury.
WARNING
Always follow the instructions be-
low. Failure to do so could result in
damage to the charging system and
cause personal injury.
1.
If the booster battery is in another vehicle,
position the two vehicles to bring their
batteries into close proximity to each other.
Do not allow the two vehicles to touch.
2. Apply the parking brake. Move the shift
selector lever to N (Neutral) (on auto-
JUMP STARTING
6-8In case of emergency
ZX
Page 173 of 263
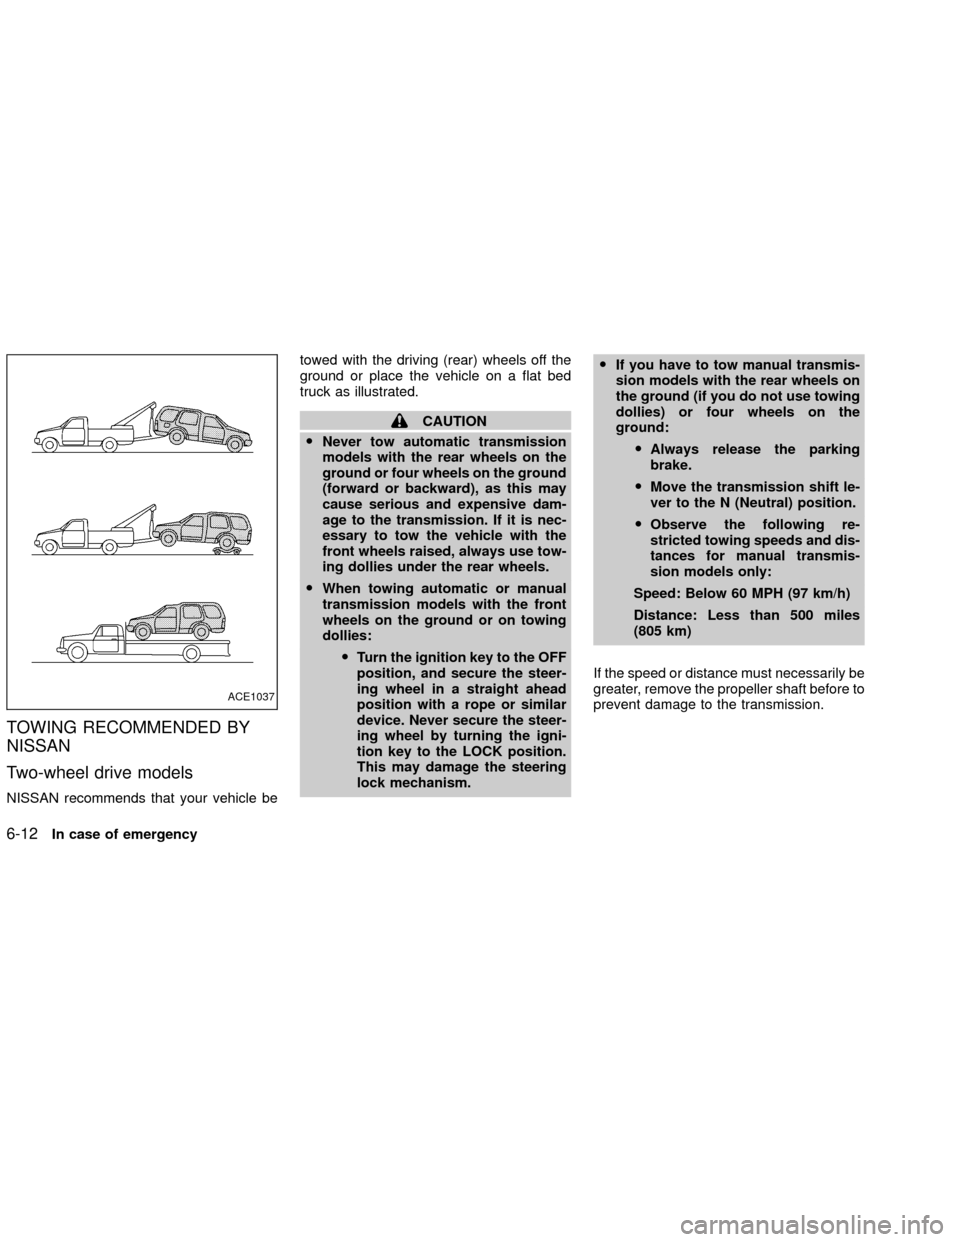
TOWING RECOMMENDED BY
NISSAN
Two-wheel drive models
NISSAN recommends that your vehicle betowed with the driving (rear) wheels off the
ground or place the vehicle on a flat bed
truck as illustrated.
CAUTION
ONever tow automatic transmission
models with the rear wheels on the
ground or four wheels on the ground
(forward or backward), as this may
cause serious and expensive dam-
age to the transmission. If it is nec-
essary to tow the vehicle with the
front wheels raised, always use tow-
ing dollies under the rear wheels.
OWhen towing automatic or manual
transmission models with the front
wheels on the ground or on towing
dollies:
OTurn the ignition key to the OFF
position, and secure the steer-
ing wheel in a straight ahead
position with a rope or similar
device. Never secure the steer-
ing wheel by turning the igni-
tion key to the LOCK position.
This may damage the steering
lock mechanism.OIf you have to tow manual transmis-
sion models with the rear wheels on
the ground (if you do not use towing
dollies) or four wheels on the
ground:
OAlways release the parking
brake.
OMove the transmission shift le-
ver to the N (Neutral) position.
OObserve the following re-
stricted towing speeds and dis-
tances for manual transmis-
sion models only:
Speed: Below 60 MPH (97 km/h)
Distance: Less than 500 miles
(805 km)
If the speed or distance must necessarily be
greater, remove the propeller shaft before to
prevent damage to the transmission.
ACE1037
6-12In case of emergency
ZX
Page 174 of 263
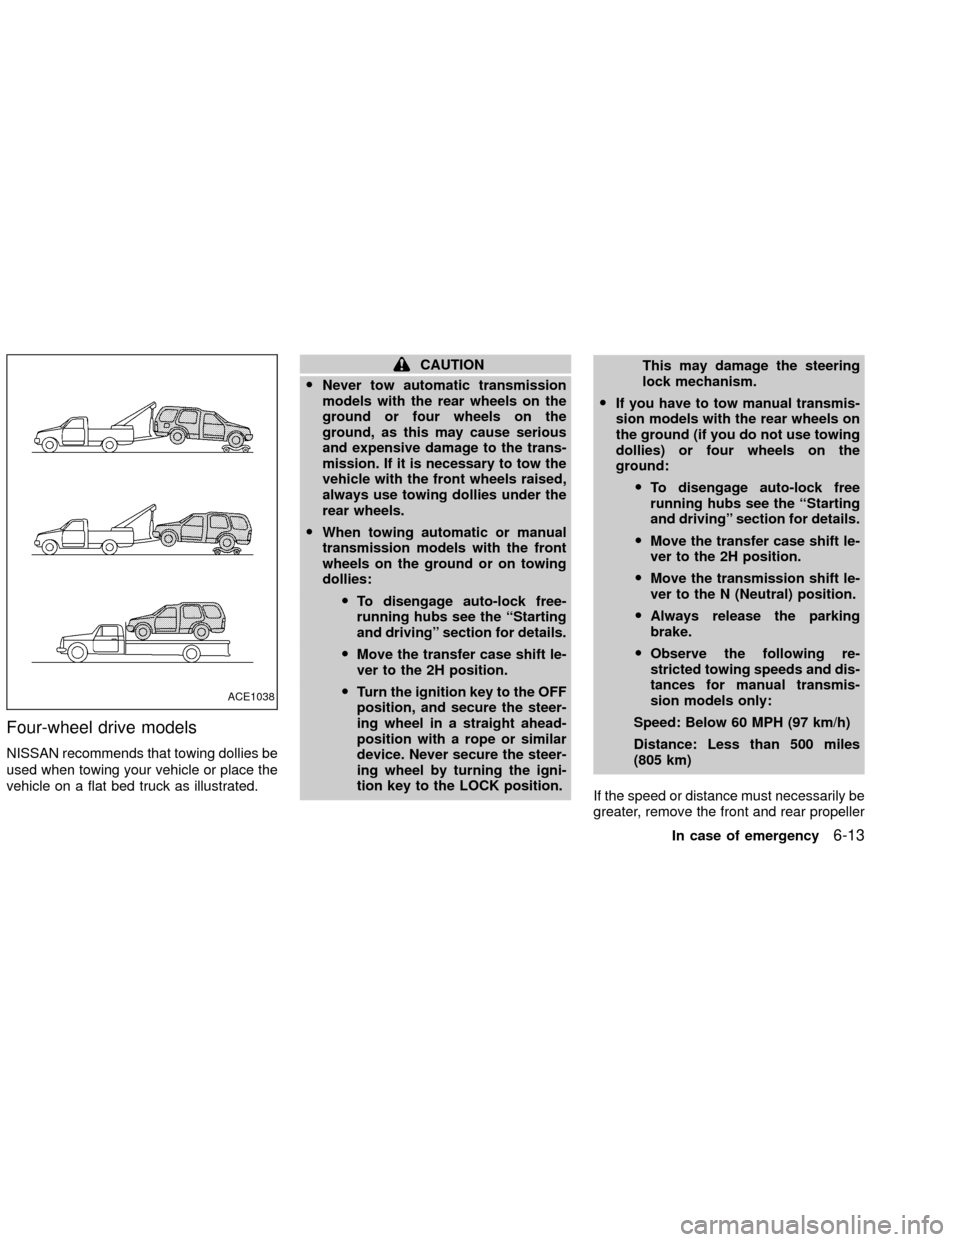
Four-wheel drive models
NISSAN recommends that towing dollies be
used when towing your vehicle or place the
vehicle on a flat bed truck as illustrated.
CAUTION
ONever tow automatic transmission
models with the rear wheels on the
ground or four wheels on the
ground, as this may cause serious
and expensive damage to the trans-
mission. If it is necessary to tow the
vehicle with the front wheels raised,
always use towing dollies under the
rear wheels.
OWhen towing automatic or manual
transmission models with the front
wheels on the ground or on towing
dollies:
OTo disengage auto-lock free-
running hubs see the ``Starting
and driving'' section for details.
OMove the transfer case shift le-
ver to the 2H position.
OTurn the ignition key to the OFF
position, and secure the steer-
ing wheel in a straight ahead-
position with a rope or similar
device. Never secure the steer-
ing wheel by turning the igni-
tion key to the LOCK position.This may damage the steering
lock mechanism.
OIf you have to tow manual transmis-
sion models with the rear wheels on
the ground (if you do not use towing
dollies) or four wheels on the
ground:
OTo disengage auto-lock free
running hubs see the ``Starting
and driving'' section for details.
OMove the transfer case shift le-
ver to the 2H position.
OMove the transmission shift le-
ver to the N (Neutral) position.
OAlways release the parking
brake.
OObserve the following re-
stricted towing speeds and dis-
tances for manual transmis-
sion models only:
Speed: Below 60 MPH (97 km/h)
Distance: Less than 500 miles
(805 km)
If the speed or distance must necessarily be
greater, remove the front and rear propeller
ACE1038
In case of emergency6-13
ZX
Page 176 of 263

7 Appearance and care
Cleaning exterior ....................................................7-2
Washing .............................................................7-2
Waxing ...............................................................7-2
Removing spots .................................................7-3
Underbody .........................................................7-3
Glass..................................................................7-3
Aluminum alloy wheels ......................................7-3
Chrome parts .....................................................7-3
Cleaning interior .....................................................7-4Floor mats..........................................................7-4
Seat belts ..........................................................7-5
Corrosion protection ...............................................7-5
Most common factors contributing to
vehicle corrosion................................................7-5
Environmental factors influence the rate
of corrosion. .......................................................7-5
To protect your vehicle from corrosion ..............7-5
ZX
Page 177 of 263
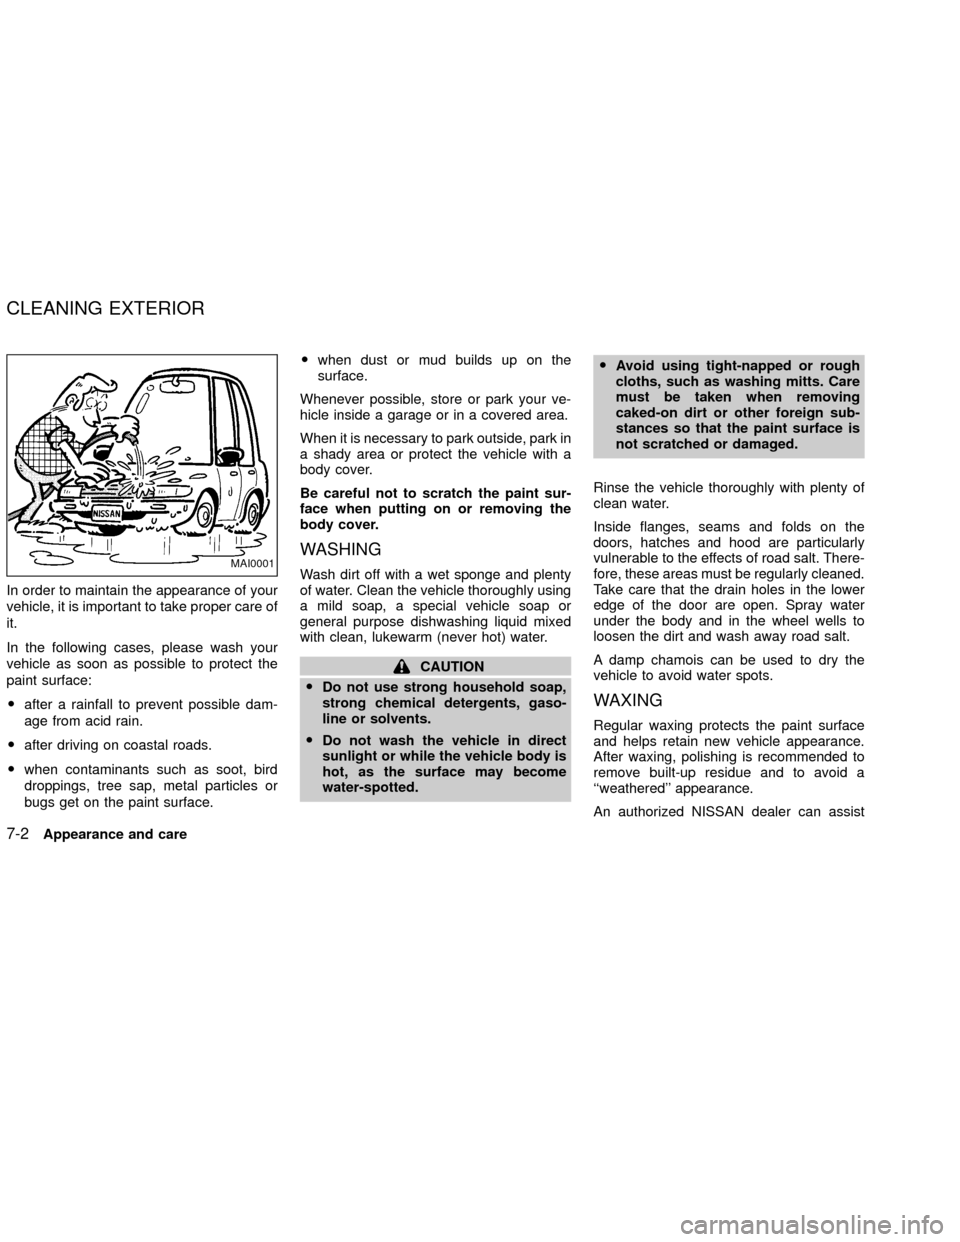
In order to maintain the appearance of your
vehicle, it is important to take proper care of
it.
In the following cases, please wash your
vehicle as soon as possible to protect the
paint surface:
Oafter a rainfall to prevent possible dam-
age from acid rain.
Oafter driving on coastal roads.
Owhen contaminants such as soot, bird
droppings, tree sap, metal particles or
bugs get on the paint surface.Owhen dust or mud builds up on the
surface.
Whenever possible, store or park your ve-
hicle inside a garage or in a covered area.
When it is necessary to park outside, park in
a shady area or protect the vehicle with a
body cover.
Be careful not to scratch the paint sur-
face when putting on or removing the
body cover.
WASHING
Wash dirt off with a wet sponge and plenty
of water. Clean the vehicle thoroughly using
a mild soap, a special vehicle soap or
general purpose dishwashing liquid mixed
with clean, lukewarm (never hot) water.
CAUTION
ODo not use strong household soap,
strong chemical detergents, gaso-
line or solvents.
ODo not wash the vehicle in direct
sunlight or while the vehicle body is
hot, as the surface may become
water-spotted.OAvoid using tight-napped or rough
cloths, such as washing mitts. Care
must be taken when removing
caked-on dirt or other foreign sub-
stances so that the paint surface is
not scratched or damaged.
Rinse the vehicle thoroughly with plenty of
clean water.
Inside flanges, seams and folds on the
doors, hatches and hood are particularly
vulnerable to the effects of road salt. There-
fore, these areas must be regularly cleaned.
Take care that the drain holes in the lower
edge of the door are open. Spray water
under the body and in the wheel wells to
loosen the dirt and wash away road salt.
A damp chamois can be used to dry the
vehicle to avoid water spots.
WAXING
Regular waxing protects the paint surface
and helps retain new vehicle appearance.
After waxing, polishing is recommended to
remove built-up residue and to avoid a
``weathered'' appearance.
An authorized NISSAN dealer can assist
MAI0001
CLEANING EXTERIOR
7-2Appearance and care
ZX