Page 70 of 263

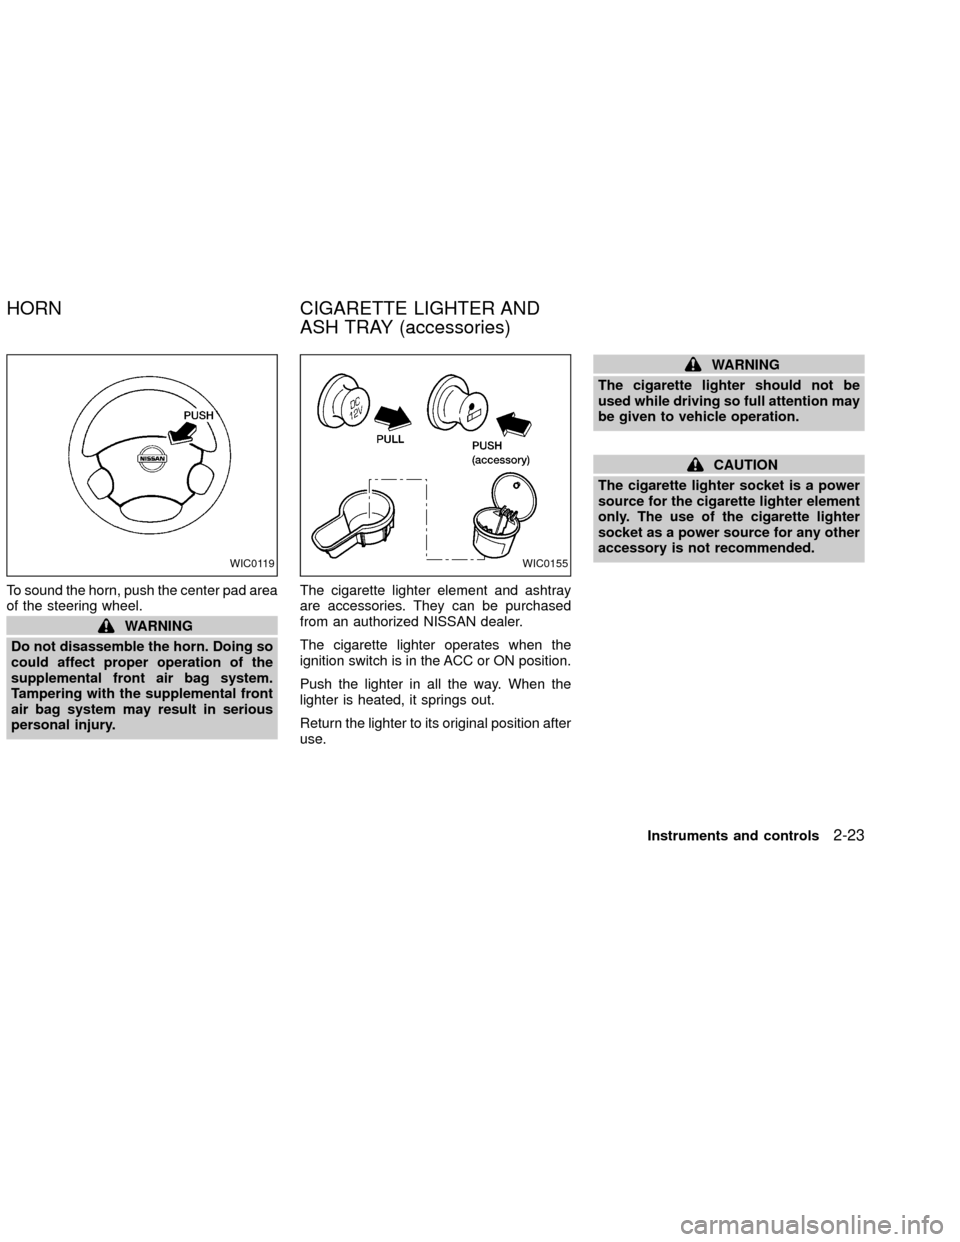
To sound the horn, push the center pad area
of the steering wheel.
WARNING
Do not disassemble the horn. Doing so
could affect proper operation of the
supplemental front air bag system.
Tampering with the supplemental front
air bag system may result in serious
personal injury.The cigarette lighter element and ashtray
are accessories. They can be purchased
from an authorized NISSAN dealer.
The cigarette lighter operates when the
ignition switch is in the ACC or ON position.
Push the lighter in all the way. When the
lighter is heated, it springs out.
Return the lighter to its original position after
use.
WARNING
The cigarette lighter should not be
used while driving so full attention may
be given to vehicle operation.
CAUTION
The cigarette lighter socket is a power
source for the cigarette lighter element
only. The use of the cigarette lighter
socket as a power source for any other
accessory is not recommended.
WIC0119WIC0155
HORN CIGARETTE LIGHTER AND
ASH TRAY (accessories)
Instruments and controls2-23
ZX
Page 74 of 263
GLOVE BOX
Open the glove box by pulling the handle.
WARNING
Keep glove box lid closed while driving
to prevent injury in an accident or a
sudden stop.
CONSOLE BOX (if so equipped)
WARNING
The center console box should not be
used while driving so full attention may
be given to vehicle operation.
CAUTION
cThis power socket is not designed
for use with a cigarette lighter unit.
cDo not use accessories that exceed
12 volt, 120W (10A) power draw. Do
not use double adapters or more
than one electrical accessory.
Upper half
Pull up on the lever to open the upper half of
the console box. The rubber mat may be
removed for cleaning.
LIC0098
LIC0128
Instruments and controls2-27
ZX
Page 80 of 263
REMOVING/INSTALLING
WARNING
Do not remove or install the sun shade
while driving so full attention may be
given to vehicle operation.
Sun shade
1. Turn each lock bolt counterclockwise
while supporting the sun shade.
2. Slide the shade backward to remove it.
3. Insert the two hooks on the front edge of
sun shade into holders on the sunroof.4. Align the two lock bolts on the rear edge
of sun shade with the lock nuts. Turn
each lock bolt clockwise to securely lock
the sun shade in place.
The dome light has a three-position switch
and operates regardless of ignition key
position.
OWhen the switch is in the OFF position,
the dome light does not illuminate, re-
gardless of door position.
OWhen the switch is in the centerjor
DOOR position, the dome light illumi-
nates by opening a door.
OWhen the switch is in the ON position,
the dome light illuminates regardless of
door position.
AIC1083IC1235M
INTERIOR LIGHT
Instruments and controls2-33
ZX
Page 89 of 263
2. The theft warning alarm and headlights
will stay on for 30 seconds.
3. The panic alarm stops when:
Oit has run for 30 seconds, or
Othe LOCK or UNLOCK button is pressed,
on the keyfob.
Silencing the horn beep feature
If desired, the horn beep feature can be
deactivated using the keyfob.
To deactivate:Press and hold the LOCK
and UNLOCKtogether for at least two
seconds.
The hazard lights will quickly flash three
times to confirm that the horn beep feature
has been deactivated.
To activate:Press and hold the LOCK and
UNLOCKtogether for at least two sec-
onds once more.
The hazard lights will quickly flash once and
the horn will sound once to confirm that the
horn beep feature has been reactivated.
Deactivating the horn feature does not si-
lence the horn if the alarm is triggered.
LIC0116
3-6Pre-driving checks and adjustments
ZX
Page 91 of 263
device must accept any interference re-
ceived including interference that may
cause undesired operation of the device.
WARNING
OMake sure the hood is completely
closed and latched before driving.
Failure to do so could cause the
hood to fly open and result in an
accident.
OIf you see steam or smoke coming
from the engine compartment, to
avoid injury do not open the hood.
1. Pull the hood lock release handle located
below the driver side instrument panel;
the hood then springs up slightly.2. Lift the lever at the front of the hood with
your fingertips and raise the hood.
3. Insert the support rod into the slot in the
front edge of the hood.
4. When closing the hood, reset the support
rod to its original position, lower the hood
to approximately 12 inches (30.5 cm)
above the latch and release it. This al-
lows proper engagement of the hood
latch.
LPD0061
HOOD
3-8Pre-driving checks and adjustments
ZX
Page 96 of 263

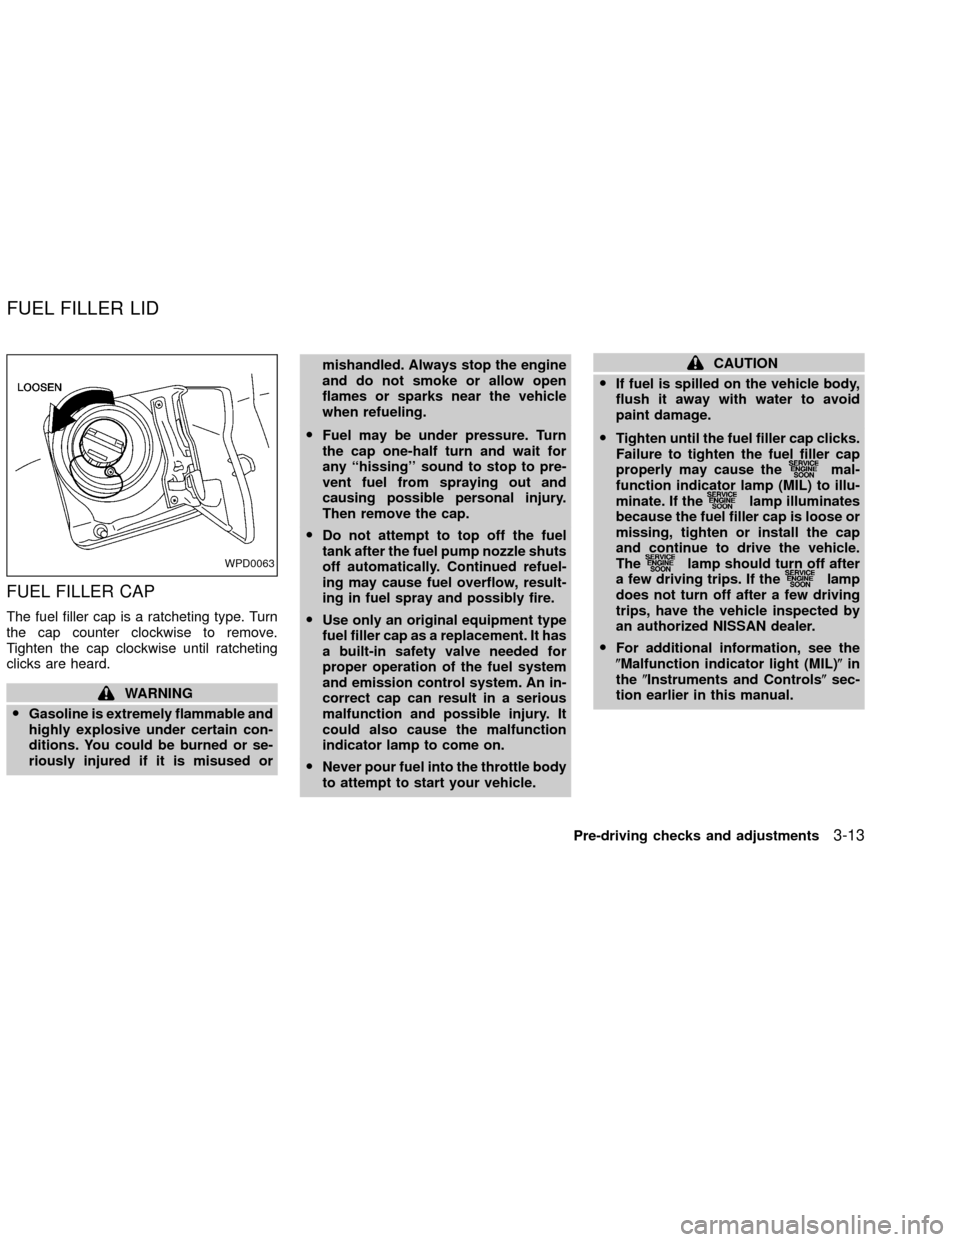
FUEL FILLER CAP
The fuel filler cap is a ratcheting type. Turn
the cap counter clockwise to remove.
Tighten the cap clockwise until ratcheting
clicks are heard.
WARNING
OGasoline is extremely flammable and
highly explosive under certain con-
ditions. You could be burned or se-
riously injured if it is misused ormishandled. Always stop the engine
and do not smoke or allow open
flames or sparks near the vehicle
when refueling.
OFuel may be under pressure. Turn
the cap one-half turn and wait for
any ``hissing'' sound to stop to pre-
vent fuel from spraying out and
causing possible personal injury.
Then remove the cap.
ODo not attempt to top off the fuel
tank after the fuel pump nozzle shuts
off automatically. Continued refuel-
ing may cause fuel overflow, result-
ing in fuel spray and possibly fire.
OUse only an original equipment type
fuel filler cap as a replacement. It has
a built-in safety valve needed for
proper operation of the fuel system
and emission control system. An in-
correct cap can result in a serious
malfunction and possible injury. It
could also cause the malfunction
indicator lamp to come on.
ONever pour fuel into the throttle body
to attempt to start your vehicle.
CAUTION
OIf fuel is spilled on the vehicle body,
flush it away with water to avoid
paint damage.
OTighten until the fuel filler cap clicks.
Failure to tighten the fuel filler cap
properly may cause the
mal-
function indicator lamp (MIL) to illu-
minate. If the
lamp illuminates
because the fuel filler cap is loose or
missing, tighten or install the cap
and continue to drive the vehicle.
The
lamp should turn off after
a few driving trips. If thelamp
does not turn off after a few driving
trips, have the vehicle inspected by
an authorized NISSAN dealer.
OFor additional information, see the
(Malfunction indicator light (MIL)(in
the(Instruments and Controls(sec-
tion earlier in this manual.
WPD0063
FUEL FILLER LID
Pre-driving checks and adjustments3-13
ZX
Page 98 of 263
INSIDE MIRROR
The night position reduces glare from the
headlights of vehicles behind you.
WARNING
Use the night position only when nec-
essary because it reduces rear view
clarity.
OUTSIDE MIRRORS
The outside mirror can be moved in any
direction for a better rear view.
AIC0703APD1090APD1096
MIRRORS
Pre-driving checks and adjustments3-15
ZX
Page 102 of 263

WARNING
OThe air conditioner cooling function
operates only when the engine is
running.
ODo not leave children, unreliable
adults, or pets alone in your vehicle.
On hot sunny days, temperatures in
a closed vehicle could quickly be-
come high enough to cause severe
or possibly fatal injuries to people or
animals.
ODo not use the recirculation mode
for long periods as it may cause theinterior air to become stale and the
windows to fog up.
OPositioning of the heater or air con-
ditioner controls should not be done
while driving so full attention may be
given to vehicle operation.
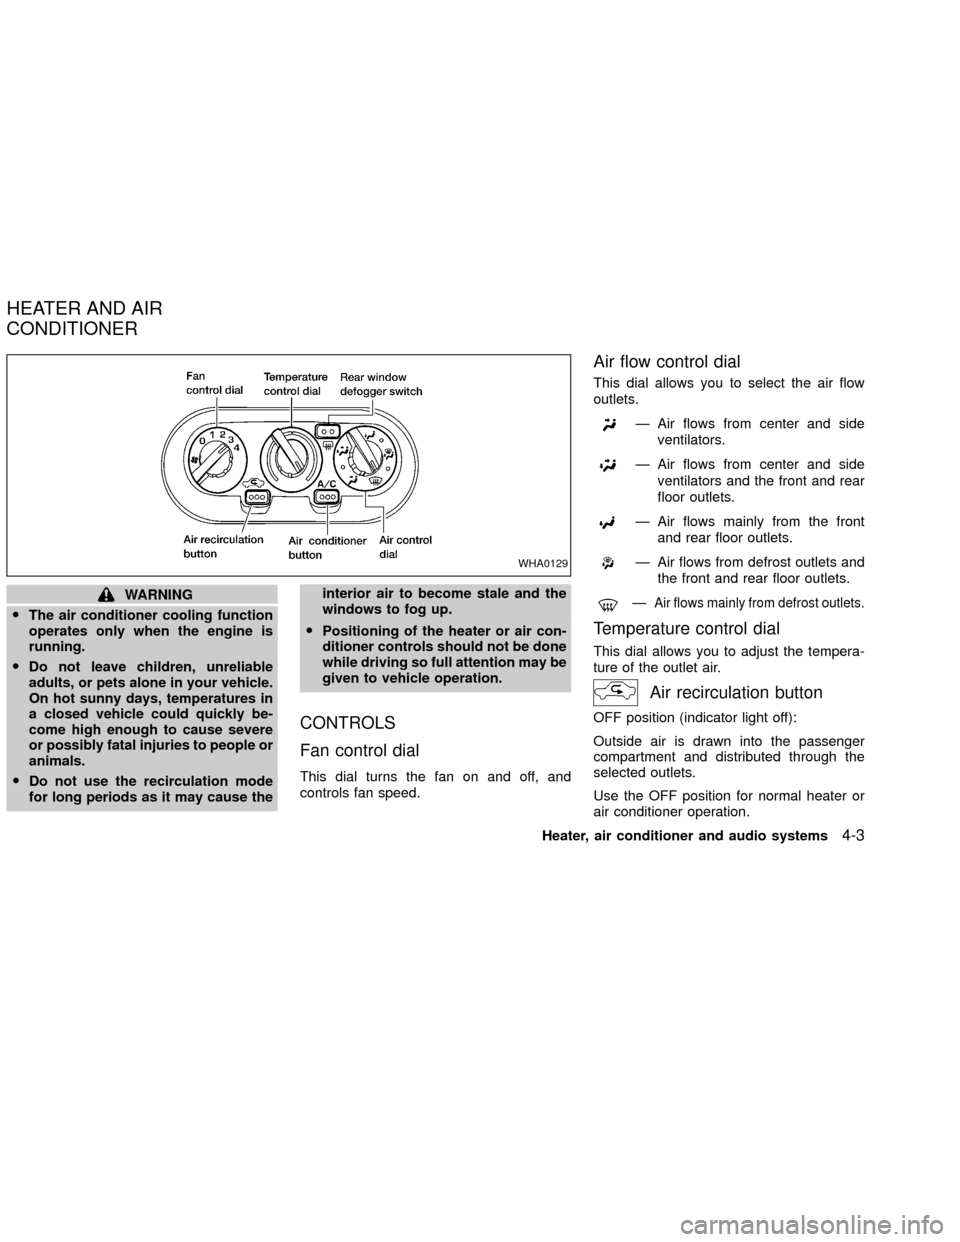
CONTROLS
Fan control dial
This dial turns the fan on and off, and
controls fan speed.
Air flow control dial
This dial allows you to select the air flow
outlets.
Ð Air flows from center and side
ventilators.
Ð Air flows from center and side
ventilators and the front and rear
floor outlets.
Ð Air flows mainly from the front
and rear floor outlets.
Ð Air flows from defrost outlets and
the front and rear floor outlets.
ÐAir flows mainly from defrost outlets.
Temperature control dial
This dial allows you to adjust the tempera-
ture of the outlet air.
Air recirculation button
OFF position (indicator light off):
Outside air is drawn into the passenger
compartment and distributed through the
selected outlets.
Use the OFF position for normal heater or
air conditioner operation.
WHA0129
HEATER AND AIR
CONDITIONER
Heater, air conditioner and audio systems4-3
ZX