2002 NISSAN SENTRA fog light
[x] Cancel search: fog lightPage 46 of 235

2 Instruments and controls
Instrument panel ....................................................2-2
Meters and gauges ................................................2-3
Speedometer and odometer .............................2-3
Tachometer (if so equipped) .............................2-4
Engine coolant temperature gauge ...................2-5
Fuel gauge ........................................................2-5
Warning/indicator lights and audible
reminders................................................................2-7
Checking bulbs ..................................................2-7
Warning lights ....................................................2-7
Indicator lights ...................................................2-9
Audible reminders............................................2-11
Security systems ..................................................2-11
Nissan vehicle immobilizer system
(NVIS) (if so equipped)....................................2-11
Vehicle security system (if so equipped) ........2-12
Windshield wiper and washer switch ...................2-15
Switch operation ..............................................2-15
Rear window defogger switch ..............................2-16
Headlight and turn signal switch ..........................2-16
Headlight control switch ..................................2-16Turn signal switch............................................2-17
Fog light switch (if so equipped) ..........................2-18
Hazard warning flasher switch .............................2-18
Horn ......................................................................2-19
Power outlet .........................................................2-19
Cigarette lighter (accessory) and ashtray ............2-20
Storage .................................................................2-21
Sunglasses case (if so equipped) ...................2-21
Cup holders .....................................................2-21
Glove box ........................................................2-22
Coin box ..........................................................2-22
Console box (if so equipped) ..........................2-23
Instrument panel storage (if so
equipped) .........................................................2-23
Windows ...............................................................2-24
Power windows (if so equipped) .....................2-24
Manual windows ..............................................2-25
Sunroof (if so equipped).......................................2-26
Interior light...........................................................2-27
Map lights (if so equipped)...................................2-27
Trunk light (if so equipped) ..................................2-28
ZX
Page 61 of 235

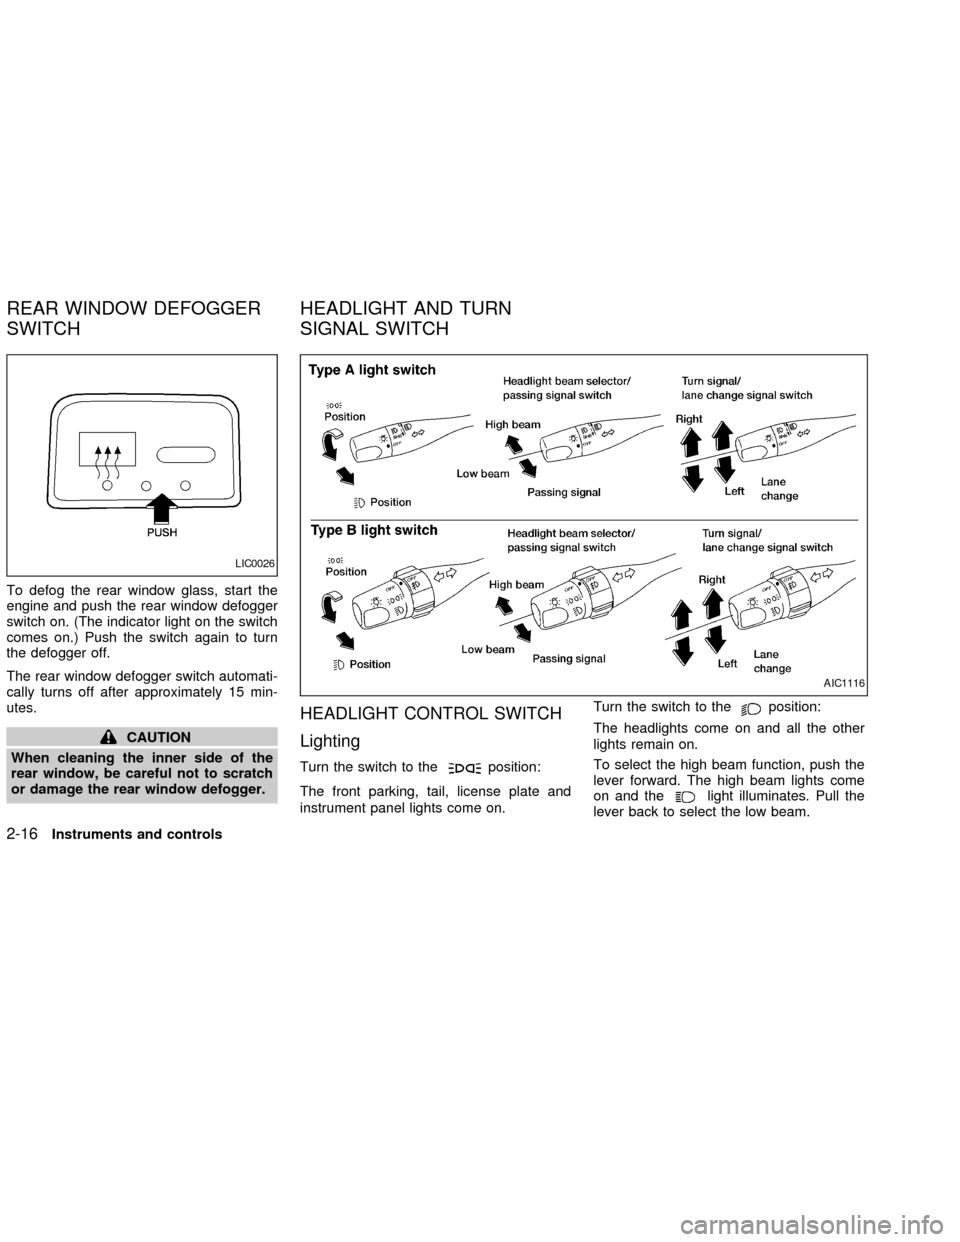
To defog the rear window glass, start the
engine and push the rear window defogger
switch on. (The indicator light on the switch
comes on.) Push the switch again to turn
the defogger off.
The rear window defogger switch automati-
cally turns off after approximately 15 min-
utes.
CAUTION
When cleaning the inner side of the
rear window, be careful not to scratch
or damage the rear window defogger.
HEADLIGHT CONTROL SWITCH
Lighting
Turn the switch to theposition:
The front parking, tail, license plate and
instrument panel lights come on.Turn the switch to the
position:
The headlights come on and all the other
lights remain on.
To select the high beam function, push the
lever forward. The high beam lights come
on and the
light illuminates. Pull the
lever back to select the low beam.
LIC0026
AIC1116
REAR WINDOW DEFOGGER
SWITCHHEADLIGHT AND TURN
SIGNAL SWITCH
2-16Instruments and controls
ZX
Page 63 of 235

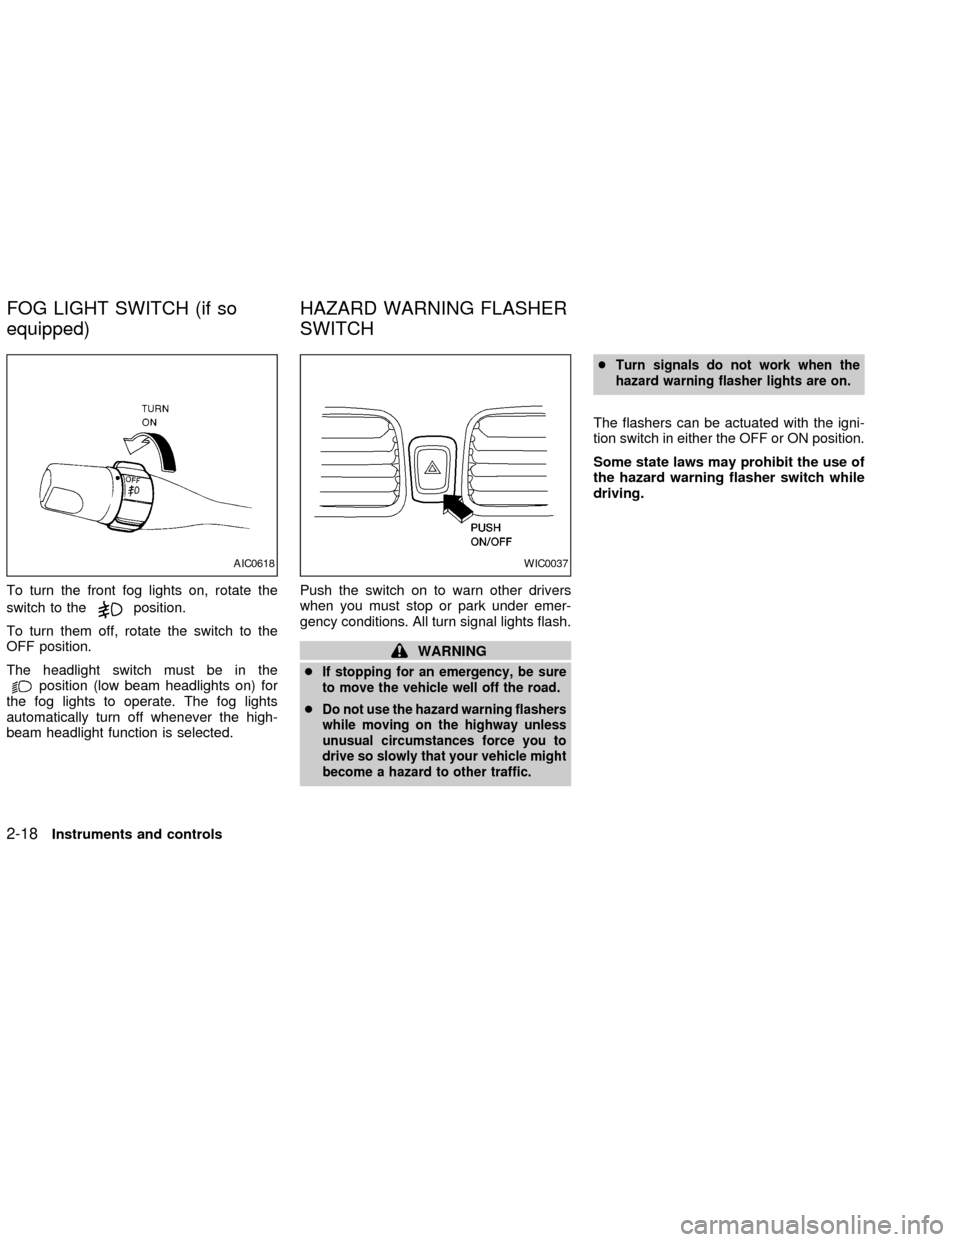
To turn the front fog lights on, rotate the
switch to the
position.
To turn them off, rotate the switch to the
OFF position.
The headlight switch must be in the
position (low beam headlights on) for
the fog lights to operate. The fog lights
automatically turn off whenever the high-
beam headlight function is selected.Push the switch on to warn other drivers
when you must stop or park under emer-
gency conditions. All turn signal lights flash.
WARNING
c
If stopping for an emergency, be sure
to move the vehicle well off the road.
cDo not use the hazard warning flashers
while moving on the highway unless
unusual circumstances force you to
drive so slowly that your vehicle might
become a hazard to other traffic.cTurn signals do not work when the
hazard warning flasher lights are on.
The flashers can be actuated with the igni-
tion switch in either the OFF or ON position.
Some state laws may prohibit the use of
the hazard warning flasher switch while
driving.
AIC0618WIC0037
FOG LIGHT SWITCH (if so
equipped)HAZARD WARNING FLASHER
SWITCH
2-18Instruments and controls
ZX
Page 64 of 235

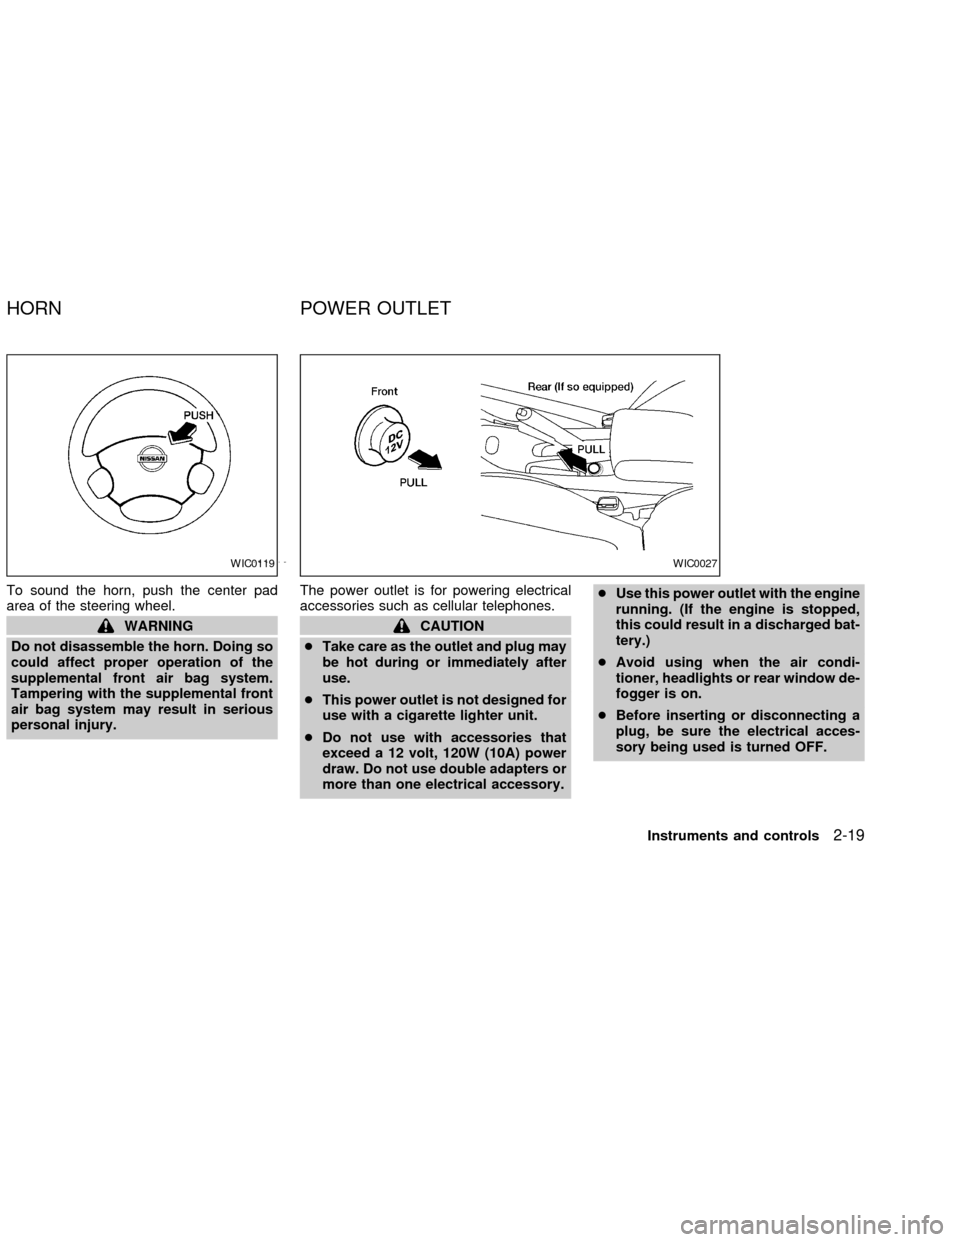
To sound the horn, push the center pad
area of the steering wheel.
WARNING
Do not disassemble the horn. Doing so
could affect proper operation of the
supplemental front air bag system.
Tampering with the supplemental front
air bag system may result in serious
personal injury.The power outlet is for powering electrical
accessories such as cellular telephones.CAUTION
cTake care as the outlet and plug may
be hot during or immediately after
use.
cThis power outlet is not designed for
use with a cigarette lighter unit.
cDo not use with accessories that
exceed a 12 volt, 120W (10A) power
draw. Do not use double adapters or
more than one electrical accessory.cUse this power outlet with the engine
running. (If the engine is stopped,
this could result in a discharged bat-
tery.)
cAvoid using when the air condi-
tioner, headlights or rear window de-
fogger is on.
cBefore inserting or disconnecting a
plug, be sure the electrical acces-
sory being used is turned OFF.
WIC0119WIC0027
HORN POWER OUTLET
Instruments and controls2-19
ZX
Page 89 of 235

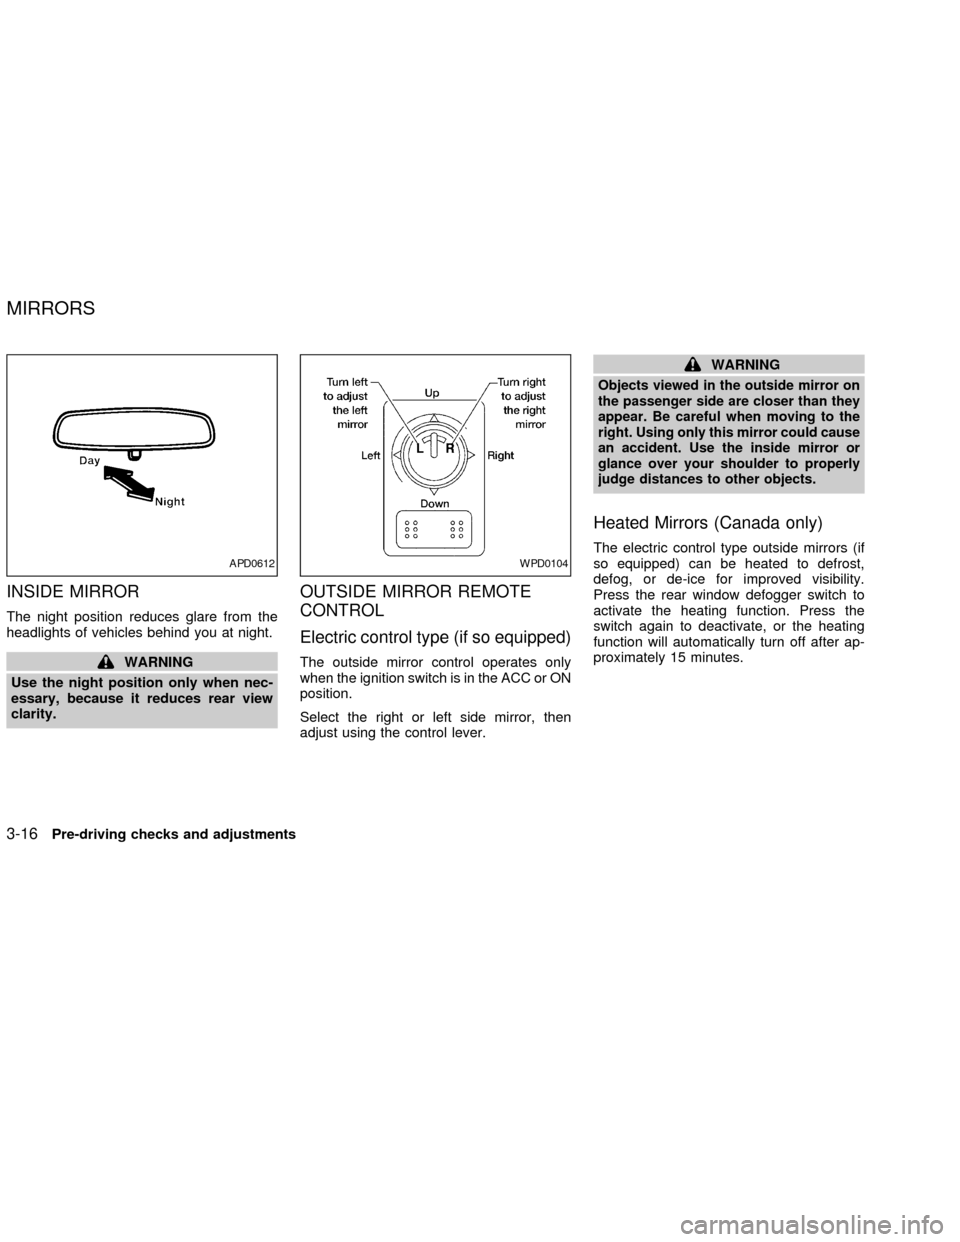
INSIDE MIRROR
The night position reduces glare from the
headlights of vehicles behind you at night.
WARNING
Use the night position only when nec-
essary, because it reduces rear view
clarity.
OUTSIDE MIRROR REMOTE
CONTROL
Electric control type (if so equipped)
The outside mirror control operates only
when the ignition switch is in the ACC or ON
position.
Select the right or left side mirror, then
adjust using the control lever.
WARNING
Objects viewed in the outside mirror on
the passenger side are closer than they
appear. Be careful when moving to the
right. Using only this mirror could cause
an accident. Use the inside mirror or
glance over your shoulder to properly
judge distances to other objects.
Heated Mirrors (Canada only)
The electric control type outside mirrors (if
so equipped) can be heated to defrost,
defog, or de-ice for improved visibility.
Press the rear window defogger switch to
activate the heating function. Press the
switch again to deactivate, or the heating
function will automatically turn off after ap-
proximately 15 minutes.APD0612WPD0104
MIRRORS
3-16Pre-driving checks and adjustments
ZX
Page 95 of 235

Air recirculation button
(if so equipped)
NOTE:
The air recirculation feature is available
only on those vehicles equipped with air
conditioning.
OFF position (indicator light off):
Outside air is drawn into the passenger
compartment and distributed through the
selected outlets.
Use the OFF position for normal heater or
air conditioner operation.
ON position (indicator light on):
Interior air is recirculated inside the vehicle.
Push the
button to the on position
when:
cdriving on a dusty road.
cto avoid traffic fumes.
cfor maximum cooling when using the air
conditioner.
Air conditioner button
(if so equipped)
Start the engine, turn the fan control dial to
the desired (one to four) position, and push
the
button to turn on the air condi-
tioner. The indicator light comes on when
the air conditioner is operating. To turn off
the air conditioner, push the
button
again.
The air conditioner cooling function op-
erates only when the engine is running.
HEATER OPERATION
Heating
This mode is used to direct hot air mainly
from the foot outlets. A small amount of air
also flows from the defrost outlets.
1. Push the
button (if so equipped) to
the off position for normal heating.
2. Move the air flow control dial to the
position.
3. Move the fan control dial to the desired
position.
4. Move the temperature control dial to thedesired position between the middle and
the hot position.
Ventilation
This mode directs outside air from the side
and center vents.
1. Push the
button (if so equipped) to
the off position.
2. Move the air flow control dial to the
position.
3. Move the fan control dial to the desired
position.
4. Move the temperature control dial to the
desired position.
Defrosting or defogging
This mode is used to defrost/defog the
windows.
1. Move the air flow control dial to the
position.
2. Move the fan control dial to the desired
position.
3. Move the temperature control dial to the
desired position between the middle and
the hot position.
4-4Heater, air conditioner and audio systems
ZX
Page 96 of 235

cTo quickly remove ice or fog from the
windows, turn on the fan control dial to 4
and the temperature control lever to the
full HOT position.
cWhen the
position is selected, the
air conditioner automatically turns on
(however, the indicator light will not illu-
minate). This dehumidifies the air which
helps defog the windshield.
Bi-level heating
This mode directs cooler air from the side
and center vents and warmer air from the
floor outlets. When the temperature control
dial is moved to the full hot or full cool
position, the air between the vents and the
floor outlets is the same temperature.
1. Push the
button (if so equipped) to
the off position.
2. Move the air flow control dial to the
position.
3. Move the fan control dial to the desired
position.
4. Move the temperature control dial to the
the desired position.
Heating and defogging
This mode heats the interior and defogs the
windshield.
1. Move the air flow control dial to the
position.
cWhen the
position is selected the
function automatically cancels.
Outside air is drawn into the passenger
compartment to improve the defogging
performance.
2. Move the fan control dial to the desired
position.
3. Move the temperature control dial to the
desired position between the middle and
the hot position.
cWhen the
position is selected, the
air conditioner automatically turns on
(however, the indicator light will not illu-
minate). This dehumidifies the air which
helps defog the windshield.
Operating tips
Clear snow and ice from the wiper
blades and air inlet in front of the wind-
shield. This improves heater operation.
AIR CONDITIONER OPERATION
(if so equipped)
Start the engine, move the fan control dial to
the desired (one to four) position, and push
in the
button to activate the air condi-
tioner. When the air conditioner is on, cool-
ing and dehumidifying functions are added
to the heater operation.
The air conditioner cooling function op-
erates only when the engine is running.
Cooling
This mode is used to cool and dehumidify
the air.
1. Push the
button to the off position.
2. Move the air flow control dial to the
position.
3. Move the fan control dial to the desired
position.
4. Push the
button. The indicator light
comes on.
5. Move the temperature control dial to the
desired position.
For quick cooling when the outside tem-
perature is high, push the
button to
Heater, air conditioner and audio systems
4-5
ZX
Page 97 of 235

the on position. Be sure to return theto the off position for normal cooling.
Dehumidified heating
This mode is used to heat and dehumidify
the air.
1. Push the
button to the off position.
2. Move the air flow control dial to the
position.
3. Move the fan control dial to the desired
position.
4. Push the
button. The indicator light
comes on.
5. Move the temperature control dial to the
desired position.
Dehumidified defogging
This mode is used to defog the windows
and dehumidify the air.
1. Move the air flow control dial to the
position.
cWhen the
position is selected thefunction automatically cancels.
Outside air is drawn into the passenger
compartment to improve the defogging
performance.cWhen the
position is selected, the
air conditioner automatically turns on
(however, the indicator light will not illu-
minate). This dehumidifies the air which
helps defog the windshield.
2. Move the fan control dial to the desired
position.
3. Move the temperature control dial to the
desired position.
Operating tips
cKeep windows and sunroof closed while
the air conditioner is in operation.
cAfter parking in the sun, drive for two or
three minutes with the windows open to
vent hot air from the passenger compart-
ment. Then, close the windows. This
allows the air conditioner to cool the
interior more quickly.
cThe air conditioning system should be
operated for approximately ten min-
utes at least once a month. This helps
prevent damage to the system due to
lack of lubrication.
cIf the engine coolant temperature
gauge indicates engine coolant tem-
perature over the normal range, turnthe air conditioner off. See ``If your
vehicle overheats'' in the ``In case of
emergency'' section of this manual.
AIR FLOW CHARTS
The following charts show the button and
dial positions forMAXIMUM AND QUICK
heating, cooling or defrosting.The air recir-
culation button should always be in the
OFF position for heating and defrosting.
4-6Heater, air conditioner and audio systems
ZX