Page 72 of 235
The interior light has a three-position switch.
The interior light operates regardless of
ignition key position.
cWhen the switch is in the OFF position,
the interior light does not illuminate, re-
gardless of door position.
cWhen the switch is in the centerj
position, the interior light illuminates
when a door is opened.
cWhen the switch is in the ON position,
the interior light illuminates, regardless of
door position.
CAUTION
Do not use for extended periods of time
with the engine stopped. This could
result in a discharged battery.
To turn the map lights on, press the
switches. To turn them off, press the
switches again.
SIC0025LIC0045
INTERIOR LIGHT MAP LIGHTS (if so equipped)
Instruments and controls2-27
ZX
Page 73 of 235
The light illuminates when the trunk lid is
opened. When the trunk lid is closed, the
light goes off. For bulb replacement proce-
dures, refer to ªBulb replacementº in the
``Maintenance and do-it-yourself'' section of
this manual.
TRUNK LIGHT (if so equipped)
2-28Instruments and controls
ZX
Page 82 of 235
1. Pull the hood lock release handles1
located below the driver side instrument
panel. The hood will spring up slightly.
2. Push the lever to the left
s2at the front
of the hood with your fingertips and raise
the hood.
3. Insert the support rod
s3into the slot
marked with the arrow on the underside
of the hood.
4. When closing the hood, return the sup-
port rod to its original position, lower the
hood to approximately 12 inches above
the latch and release it. This allows
proper engagement of the hood latch.
WARNING
cMake sure the hood is completely
closed and latched before driving.
Failure to do so could cause the
hood to fly open and result in an
accident.
cIf you see steam or smoke coming
from the engine compartment, to
avoid injury do not open the hood.
WPD0030WPD0020
HOOD
Pre-driving checks and adjustments3-9
ZX
Page 83 of 235
OPENER OPERATION
WARNING
cDo not drive with the trunk lid open.
This could allow dangerous exhaust
gases to be drawn into the vehicle.
See ``Exhaust gas'' in the ``Starting
and driving'' section of this manual.
cClosely supervise children when
they are around cars to prevent them
from playing and becoming locked
in the trunk where they could be
seriously injured. Keep the carlocked, with the trunk closed, when
not in use, and prevent children's
access to car keys.
Type A
The trunk lid opener lever is located on the
outside of the driver's seat. To open the
trunk lid, pull up the opener lever. To close,
push the trunk lid down securely.Type B
The trunk lid release is located on the
instrument panel. To open the trunk, push
the release in the direction indicated in the
illustration. To close the trunk lid, push it
down securely.
WPD0026
TRUNK LID
3-10Pre-driving checks and adjustments
ZX
Page 87 of 235

WARNING
c
Gasoline is extremely flammable and
highly explosive under certain condi-
tions. You could be burned or seriously
injured if it is misused or mishandled.
Always stop the engine and do not
smoke or allow open flames or sparks
near the vehicle when refueling.
cFuel may be under pressure. Turn the
cap one-half turn and wait for any ``hiss-
ing'' sound to stop to prevent fuel from
spraying out and possibly causing per-
sonal injury. Then remove the cap.
cDo not attempt to top off the fuel
tank after the fuel pump nozzle shuts
off automatically. Continued refuel-
ing may cause fuel overflow, result-
ing in fuel spray and possibly fire.
cUse only an original equipment type
fuel filler cap as a replacement. It has
a built-in safety valve needed for
proper operation of the fuel system
and emission control system. An in-
correct cap can result in a serious
malfunction and possible injury. It
could also cause the malfunction
indicator lamp to come on.Do not fill a portable fuel container in
the vehicle or trailer. Static electric-
ity can cause an explosion of flam-
mable liquid, vapor or gas in any
vehicle or trailer. To reduce the risk
of serious injury or death when fill-
ing portable fuel containers:
Ð Always place the container on
the ground when filling.
Ð Do not use electronic devices
while filling.
Ð Keep the pump nozzle in contact
with the container while you are
filling it.
Ð Use only approved portable fuel
containers for flammable liquid.
cNever pour fuel into the throttle body
to attempt to start your vehicle.
CAUTION
cIf fuel is spilled on the vehicle body,
flush it away with water to avoid
paint damage.cTighten until the fuel filler cap clicks.
Failure to tighten the fuel filler cap
properly may cause the
mal-
function indicator lamp (MIL) to illu-
minate. If the
lamp illuminates
because the fuel filler cap is loose or
missing, tighten or install the cap
and continue to drive the vehicle.
The
lamp should turn off after a
few driving trips. If thelamp
does not turn off after a few driving
trips, have the vehicle inspected by
an authorized NISSAN dealer.
cFor additional information, see the
``Malfunction indicator lamp (MIL)''
in the ``Instruments and controls''
section earlier in this manual.
3-14Pre-driving checks and adjustments
ZX
Page 117 of 235

START: (4)
This position activates the starter motor,
which starts the engine.
NISSAN VEHICLE IMMOBILIZER
SYSTEM (NVIS) (if so equipped)
The Nissan Vehicle Immobilizer System
(NVIS) will not allow the engine to start
without the use of a registered NVIS key.
If the engine fails to start using a registered
NVIS key, it may be due to interference
caused by another NVIS key, an automated
toll road device or automated payment de-
vice on the key ring. Restart the engine
using the following procedures:
1. Leave the ignition switch in the ON posi-
tion for approximately 5 seconds.
2. Turn the ignition switch to the OFF or
LOCK position and wait approximately 5
seconds.
3. Repeat step 1 and 2 again.
4. Restart the engine while holding the de-
vice (which may have caused the inter-
ference) separate from the registered
NVIS key.
If this procedure allows the engine to start,NISSAN recommends placing the regis-
tered NVIS key on a separate key ring to
avoid interference from other devices.cMake sure the area around the vehicle is
clear.
cMaintenance items listed here should be
checked periodically, for example, each
time you check engine oil.
cCheck that all windows and lights are
clean.
cVisually inspect tires for their appearance
and condition. Also check tires for proper
inflation.
cLock all doors.
cPosition seat and adjust head restraints.
cAdjust inside and outside mirrors.
cFasten seat belts and ask all passengers
to do likewise.
c
Check the operation of warning lights
when key is turned to the ON (3) position.
See ``Warning/indicator lights and audible
reminders'' in the ``Instrument and con-
trols'' section.
BEFORE STARTING THE
ENGINE
5-6Starting and driving
ZX
Page 122 of 235

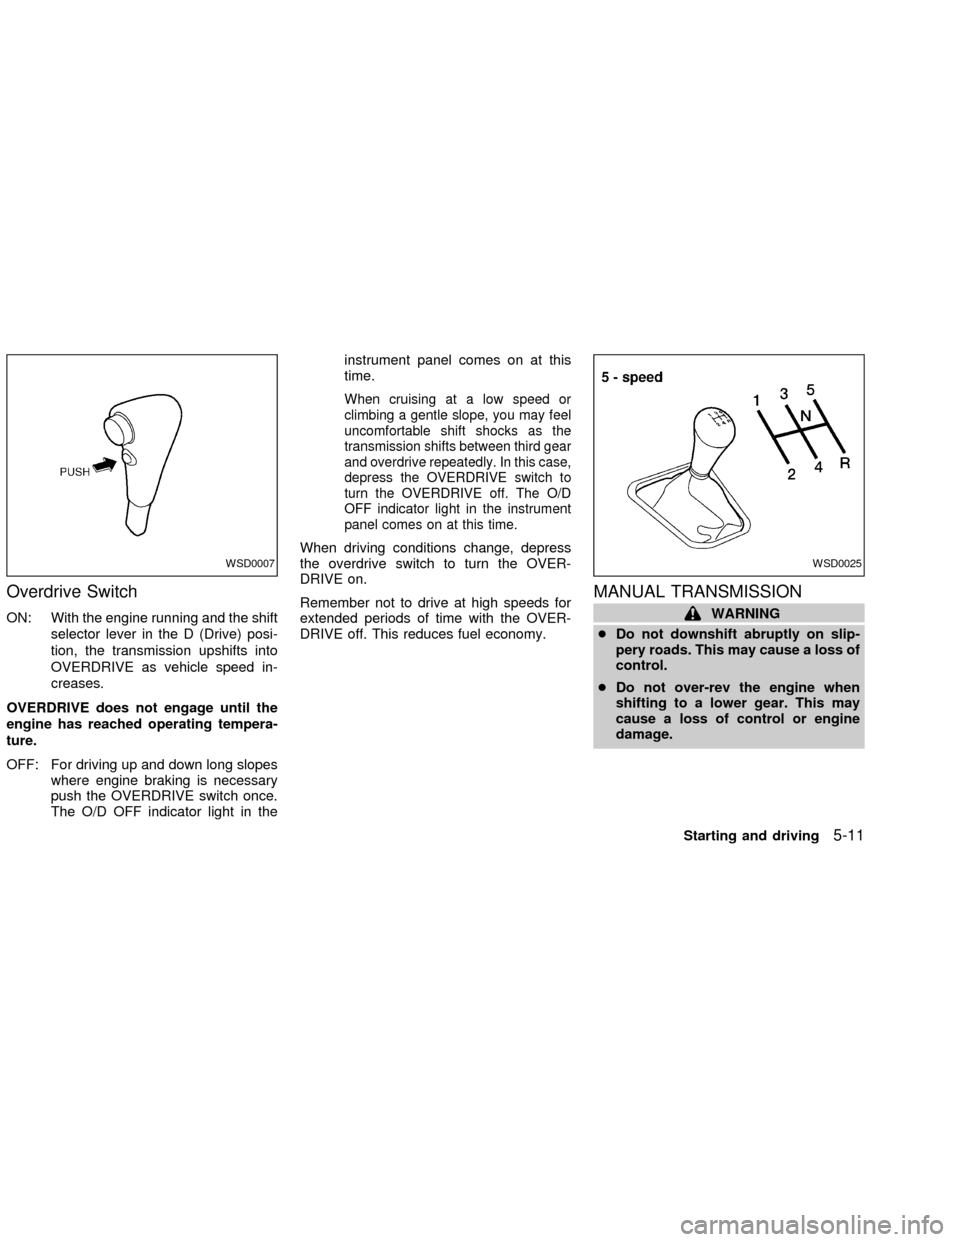
Overdrive Switch
ON: With the engine running and the shift
selector lever in the D (Drive) posi-
tion, the transmission upshifts into
OVERDRIVE as vehicle speed in-
creases.
OVERDRIVE does not engage until the
engine has reached operating tempera-
ture.
OFF: For driving up and down long slopes
where engine braking is necessary
push the OVERDRIVE switch once.
The O/D OFF indicator light in theinstrument panel comes on at this
time.
When cruising at a low speed or
climbing a gentle slope, you may feel
uncomfortable shift shocks as the
transmission shifts between third gear
and overdrive repeatedly. In this case,
depress the OVERDRIVE switch to
turn the OVERDRIVE off. The O/D
OFF indicator light in the instrument
panel comes on at this time.
When driving conditions change, depress
the overdrive switch to turn the OVER-
DRIVE on.
Remember not to drive at high speeds for
extended periods of time with the OVER-
DRIVE off. This reduces fuel economy.
MANUAL TRANSMISSION
WARNING
cDo not downshift abruptly on slip-
pery roads. This may cause a loss of
control.
cDo not over-rev the engine when
shifting to a lower gear. This may
cause a loss of control or engine
damage.
WSD0007WSD0025
Starting and driving5-11
ZX
Page 125 of 235

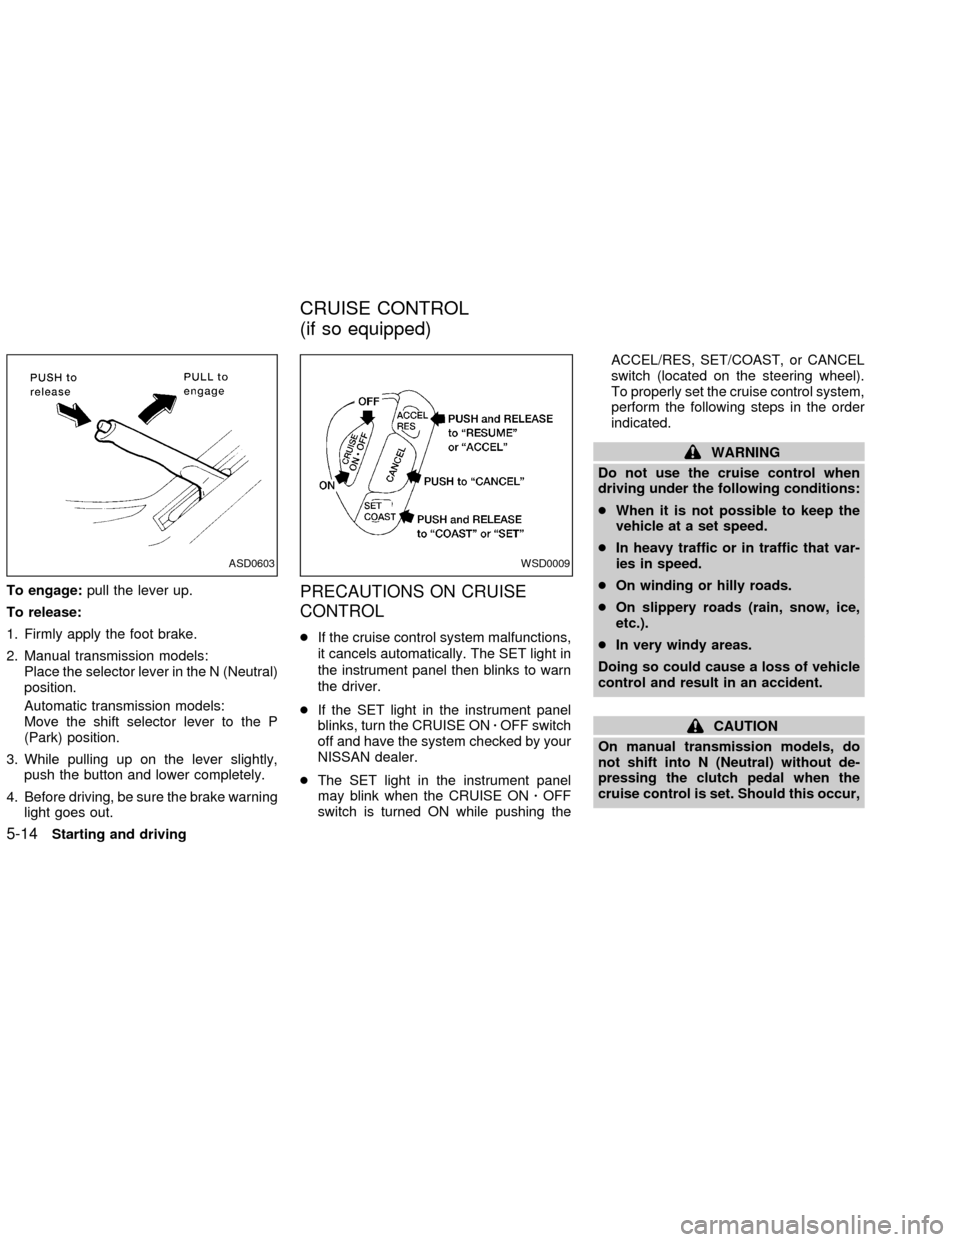
To engage:pull the lever up.
To release:
1. Firmly apply the foot brake.
2. Manual transmission models:
Place the selector lever in the N (Neutral)
position.
Automatic transmission models:
Move the shift selector lever to the P
(Park) position.
3. While pulling up on the lever slightly,
push the button and lower completely.
4. Before driving, be sure the brake warning
light goes out.PRECAUTIONS ON CRUISE
CONTROL
cIf the cruise control system malfunctions,
it cancels automatically. The SET light in
the instrument panel then blinks to warn
the driver.
cIf the SET light in the instrument panel
blinks, turn the CRUISE ONzOFF switch
off and have the system checked by your
NISSAN dealer.
cThe SET light in the instrument panel
may blink when the CRUISE ONzOFF
switch is turned ON while pushing theACCEL/RES, SET/COAST, or CANCEL
switch (located on the steering wheel).
To properly set the cruise control system,
perform the following steps in the order
indicated.
WARNING
Do not use the cruise control when
driving under the following conditions:
cWhen it is not possible to keep the
vehicle at a set speed.
cIn heavy traffic or in traffic that var-
ies in speed.
cOn winding or hilly roads.
cOn slippery roads (rain, snow, ice,
etc.).
cIn very windy areas.
Doing so could cause a loss of vehicle
control and result in an accident.
CAUTION
On manual transmission models, do
not shift into N (Neutral) without de-
pressing the clutch pedal when the
cruise control is set. Should this occur,
ASD0603WSD0009
CRUISE CONTROL
(if so equipped)
5-14Starting and driving
ZX