Page 31 of 235

WARNING
cAfter adjustment, release the adjust-
ment button and try to move the
shoulder belt anchor up and down to
make sure it is securely fixed in
position.
cThe shoulder belt anchor height
should be adjusted to the position
best for you. Failure to do so may
reduce the effectiveness of the en-
tire restraint system and increase
the chance or severity of injury in an
accident.
SEAT BELT EXTENDERS
If, because of body size or driving position,
it is not possible to properly fit the lap-
shoulder belt and fasten it, an extender is
available which is compatible with the in-
stalled seat belts. The extender adds ap-
proximately 8 inches (200 mm) of length
and may be used for either the driver or front
passenger seating position. See an autho-
rized NISSAN dealer for assistance if the
extender is required.
WARNING
cOnly NISSAN seat belt extenders,
made by the same company which
made the original equipment seat
belts, should be used with NISSAN
seat belts.
cAdults and children who can use the
standard seat belt should not use an
extender. Such unnecessary use
could result in serious personal in-
jury in the event of an accident.
Never use seat belt extenders to in-
stall child restraints. If the child re-
straint is not serviced properly, the
child could be seriously injured in a
collision or sudden stop.SEAT BELT MAINTENANCE
cTo clean the seat belt webbings,apply
a mild soap solution or any solution
recommended for cleaning upholstery or
carpet. Then wipe with a cloth and allow
the seat belts to dry in the shade. Do not
allow the seat belts to retract until they
are completely dry.
cIf dirt builds up in the shoulder belt
guideof the seat belt anchors, the seat
belts may retract slowly. Wipe the shoul-
der belt guide with a clean, dry cloth.
c
Periodically check to see that the seat
belt and metal components,such as
buckles, tongues, retractors, flexible
wires and anchors, work properly. If loose
parts, deterioration, cuts or other damage
on the webbing is found, the entire seat
belt assembly should be replaced.
1-24Seats, restraints and supplemental air bag systems
ZX
Page 32 of 235

PRECAUTIONS ON CHILD
RESTRAINTS
WARNING
cInfants and small children should
always be placed in an appropriate
child restraint while riding in the ve-
hicle. Failure to use a child restraint
can result in serious injury or death.
cInfants and small children should
never be carried on your lap. It is not
possible for even the strongest adultto resist the forces of a severe
accident. The child could be crushed
between the adult and parts of the
vehicle. Also, do not put the same
seat belt around both your child and
yourself.
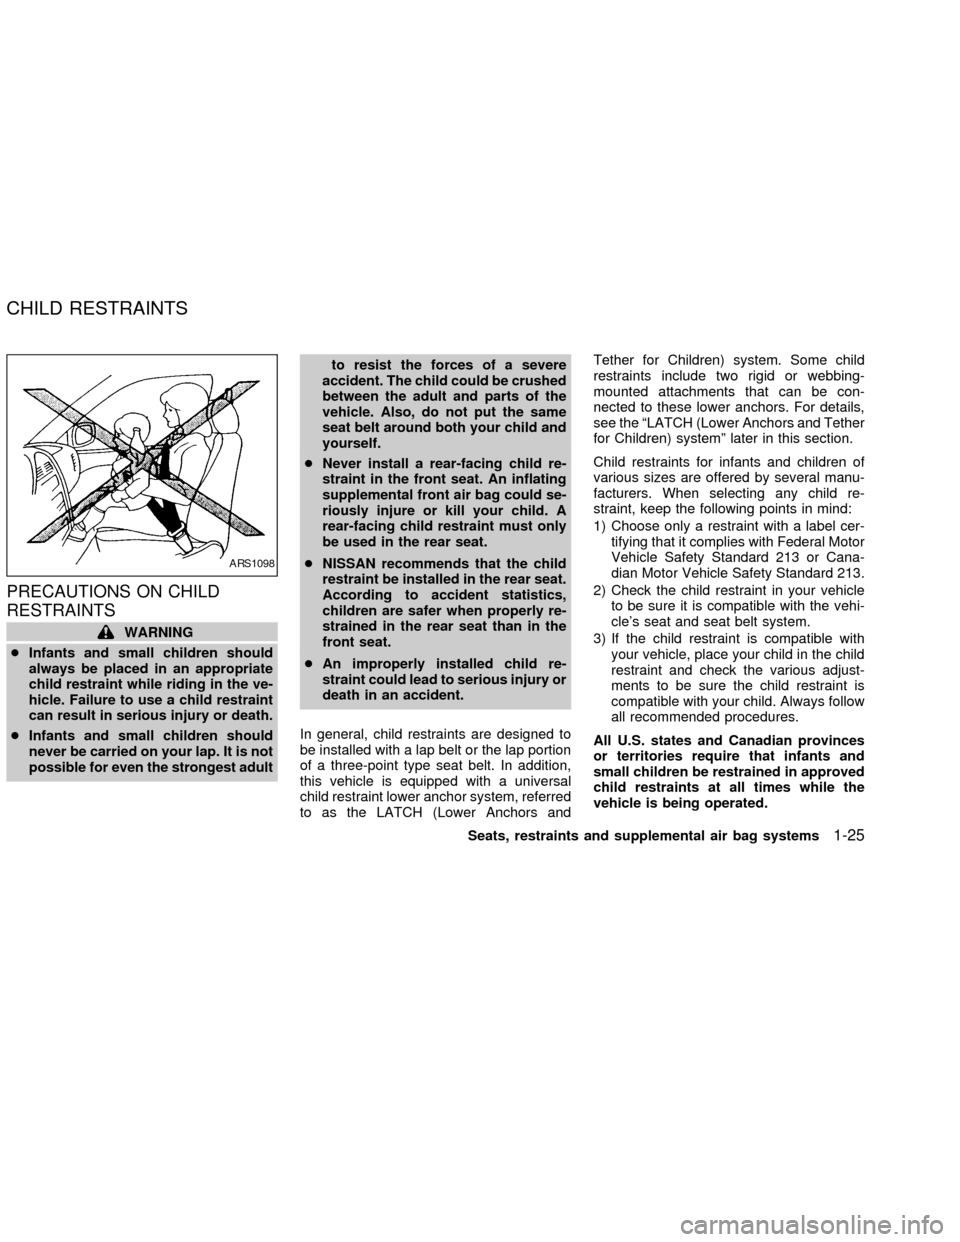
cNever install a rear-facing child re-
straint in the front seat. An inflating
supplemental front air bag could se-
riously injure or kill your child. A
rear-facing child restraint must only
be used in the rear seat.
cNISSAN recommends that the child
restraint be installed in the rear seat.
According to accident statistics,
children are safer when properly re-
strained in the rear seat than in the
front seat.
cAn improperly installed child re-
straint could lead to serious injury or
death in an accident.
In general, child restraints are designed to
be installed with a lap belt or the lap portion
of a three-point type seat belt. In addition,
this vehicle is equipped with a universal
child restraint lower anchor system, referred
to as the LATCH (Lower Anchors andTether for Children) system. Some child
restraints include two rigid or webbing-
mounted attachments that can be con-
nected to these lower anchors. For details,
see the ªLATCH (Lower Anchors and Tether
for Children) systemº later in this section.
Child restraints for infants and children of
various sizes are offered by several manu-
facturers. When selecting any child re-
straint, keep the following points in mind:
1) Choose only a restraint with a label cer-
tifying that it complies with Federal Motor
Vehicle Safety Standard 213 or Cana-
dian Motor Vehicle Safety Standard 213.
2) Check the child restraint in your vehicle
to be sure it is compatible with the vehi-
cle's seat and seat belt system.
3) If the child restraint is compatible with
your vehicle, place your child in the child
restraint and check the various adjust-
ments to be sure the child restraint is
compatible with your child. Always follow
all recommended procedures.
All U.S. states and Canadian provinces
or territories require that infants and
small children be restrained in approved
child restraints at all times while the
vehicle is being operated.
ARS1098
CHILD RESTRAINTS
Seats, restraints and supplemental air bag systems1-25
ZX
Page 33 of 235

WARNING
cImproper use of a child restraint can
result in increased injuries for both
the infant or child and other occu-
pants in the vehicle.
cFollow all of the child restraint manu-
facturer's instructions for installa-
tion and use. When purchasing a
child restraint, be sure to select one
which will fit your child and vehicle.
It may not be possible to properly
install some types of child restraints
in your vehicle.
cIf the child restraint is not anchored
properly, the risk of a child being
injured in a collision or a sudden
stop greatly increases.
cAdjustable seatbacks should be po-
sitioned to fit the child restraint, but
as upright as possible.
c
After attaching the child restraint,
test it before you place the child in it.
Tilt it from side to side. Try to tug it
forward and check to see if the belt
holds the restraint in place. If the
restraint is not secure, tighten thebelt as necessary, or put the re-
straint in another seat and test it
again.
cFor a front-facing child restraint, if
the seat position where it is installed
has a three-point type lap/shoulder
belt, check to make sure the shoulder
belt does not go in front of the child's
face or neck. If it does, put the shoul-
der belt behind the child restraint. If
you must install a front-facing child
restraint in the front seat, see ``Instal-
lation on front passenger seat'' later
in this section for details.
cWhen your child restraint is not in
use, keep it secured with a seat belt
to prevent it from being thrown
around in case of a sudden stop or
accident.
CAUTION
Remember that a child restraint left in a
closed vehicle can become very hot.
Check the seating surface and buckles
before placing your child in the child
restraint.
INSTALLATION ON REAR SEAT
CENTER OR OUTBOARD POSI-
TIONS
WARNING
cThe three-point belt in your vehicle
is equipped with a locking mode re-
tractor which must be used when
installing a child restraint.
cFailure to use the retractor's locking
mode will result in the child restraint
not being properly secured. The re-
straint could tip over or otherwise be
unsecured and cause injury to the
child in a sudden stop or collision.
1-26Seats, restraints and supplemental air bag systems
ZX
Page 34 of 235
Front facing
When you install a child restraint in the rear
seat, follow these steps:
1. Position the child restraint on the seat. It
can be placed in a front facing direction,
depending on the size of the child. Al-
ways follow the restraint manufacturer's
instructions.2. Route the seat belt tongue through the
child restraint and insert it into the buckle
until you hear and feel the latch engage.
Be sure to follow the child restraint manu-
facturer's instructions for belt routing.
WRS0007WRS0008WRS0036
Seats, restraints and supplemental air bag systems1-27
ZX
Page 35 of 235
3. Pull on the shoulder belt until all of the
belt is fully extended. At this time, the
seat belt retractor is in the automatic
locking mode (child restraint mode). It
reverts back to emergency locking mode
when the seat belt is fully retracted.4. Allow the seat belt to retract. Pull up on
the seat belt to remove any slack in the
belt.5. Before placing the child in the child re-
straint, use force to tilt the child restraint
from side to side, and tug it forward to
make sure that it is securely held in
place.
6. Check that the retractor is in the auto-
matic locking mode by trying to pull more
seat belt out of the retractor. If you can-
not pull any more belt webbing out of the
retractor, the seat belt is in the automatic
locking mode.
7. Check to make sure that the child re-
straint is properly secured prior to each
WRS0037WRS0038WRS0039
1-28Seats, restraints and supplemental air bag systems
ZX
Page 36 of 235
use. If the belt is not locked, repeat steps
three through six.
After the child restraint is removed and the
seat belt is allowed to wind back into the
retractor, the automatic locking mode (child
restraint mode) is canceled.
Rear facing
When you install a child restraint in the rear
seat, follow these steps:
1. Position the child restraint on the seat.
The direction of the child restraint de-
pends on the type of the child restraint
and the size of the child. Always follow
the restraint manufacturer's instructions.
WRS0040WRS0009
Seats, restraints and supplemental air bag systems1-29
ZX
Page 37 of 235
2. Route the seat belt tongue through the
child restraint and insert it into the buckle
until you hear and feel the latch engage.
Be sure to follow the child restraint manu-
facturer's instructions for belt routing.3. Pull on the shoulder belt until all of the
belt is fully extended. At this time, the
seat belt retractor is in the automatic
locking mode (child restraint mode). It
reverts back to emergency locking mode
when the seat belt is fully retracted.4. Allow the seat belt to retract. Pull up on
the seat belt to remove any slack in the
belt.
WRS0041WRS0010WRS0042
1-30Seats, restraints and supplemental air bag systems
ZX
Page 38 of 235
5. Before placing the child in the child re-
straint, use force to tilt the child restraint
from side to side, and tug it forward to
make sure that it is securely held in
place.
6. Check that the retractor is in the auto-
matic locking mode by trying to pull more
seat belt out of the retractor. If you can-
not pull any more belt webbing out of the
retractor, the seat belt is in the automatic
locking mode.
7. Check to make sure that the child re-
straint is properly secured prior to eachuse. If the belt is not locked, repeat steps
three through six.
After the child restraint is removed and the
seat belt is allowed to wind back into the
retractor, the automatic locking mode (child
restraint mode) is canceled.
WRS0043
Seats, restraints and supplemental air bag systems1-31
ZX