Page 225 of 288

CAUTION
Be careful not to burn yourself, as the
engine oil may be hot.
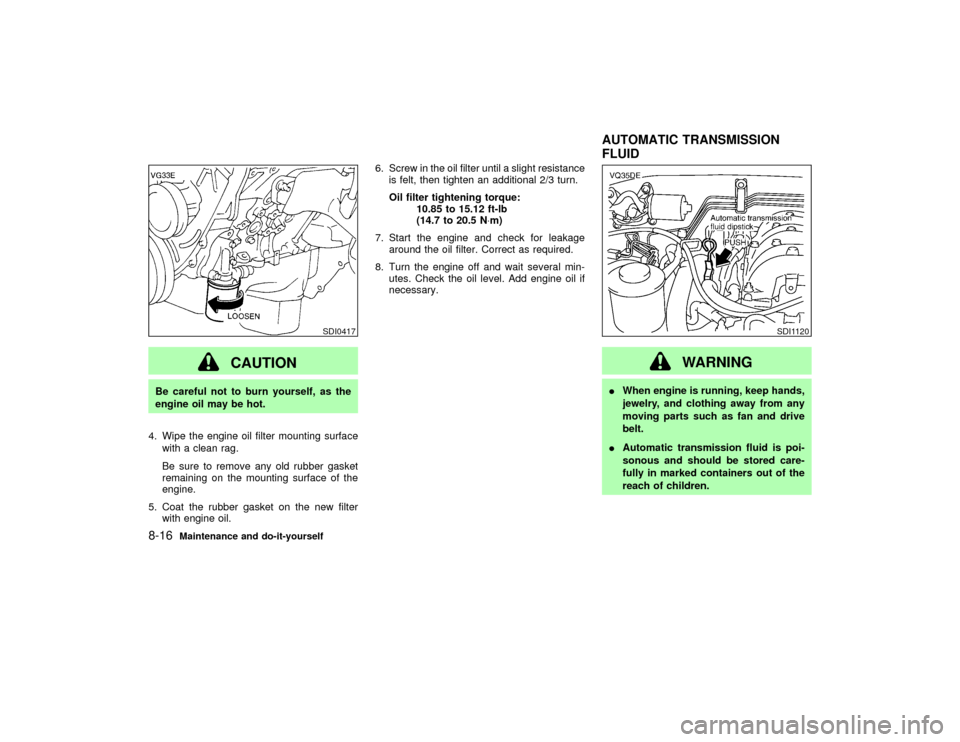
4. Wipe the engine oil filter mounting surface
with a clean rag.
Be sure to remove any old rubber gasket
remaining on the mounting surface of the
engine.
5. Coat the rubber gasket on the new filter
with engine oil.6. Screw in the oil filter until a slight resistance
is felt, then tighten an additional 2/3 turn.
Oil filter tightening torque:
10.85 to 15.12 ft-lb
(14.7 to 20.5 N×m)
7. Start the engine and check for leakage
around the oil filter. Correct as required.
8. Turn the engine off and wait several min-
utes. Check the oil level. Add engine oil if
necessary.
WARNING
IWhen engine is running, keep hands,
jewelry, and clothing away from any
moving parts such as fan and drive
belt.
IAutomatic transmission fluid is poi-
sonous and should be stored care-
fully in marked containers out of the
reach of children.
SDI0417
SDI1120
AUTOMATIC TRANSMISSION
FLUID
8-16
Maintenance and do-it-yourself
Z
01.9.21/R50-D/V5
X
Page 226 of 288

TEMPERATURE CONDITIONS
FOR CHECKINGThe fluid level should be checked using the
HOT range (L & H marks) on the dipstick at
fluid temperatures between 122 and 176ÉF (50
and 80ÉC) after the vehicle has been driven
approximately 5 minutes in urban areas after
the engine is warmed up. The level can be
checked at fluid temperatures between 86 and
122ÉF (30 and 50ÉC) using the COLD range on
the dipstick for reference, after the engine is
warmed up but before driving. However, the
fluid level must be rechecked using the HOT
range.1. Park the vehicle on a level surface and set
the parking brake.
2. Start the engine and then move the selector
lever through each gear range, ending in P.
3. Check the fluid level with the engine idling.
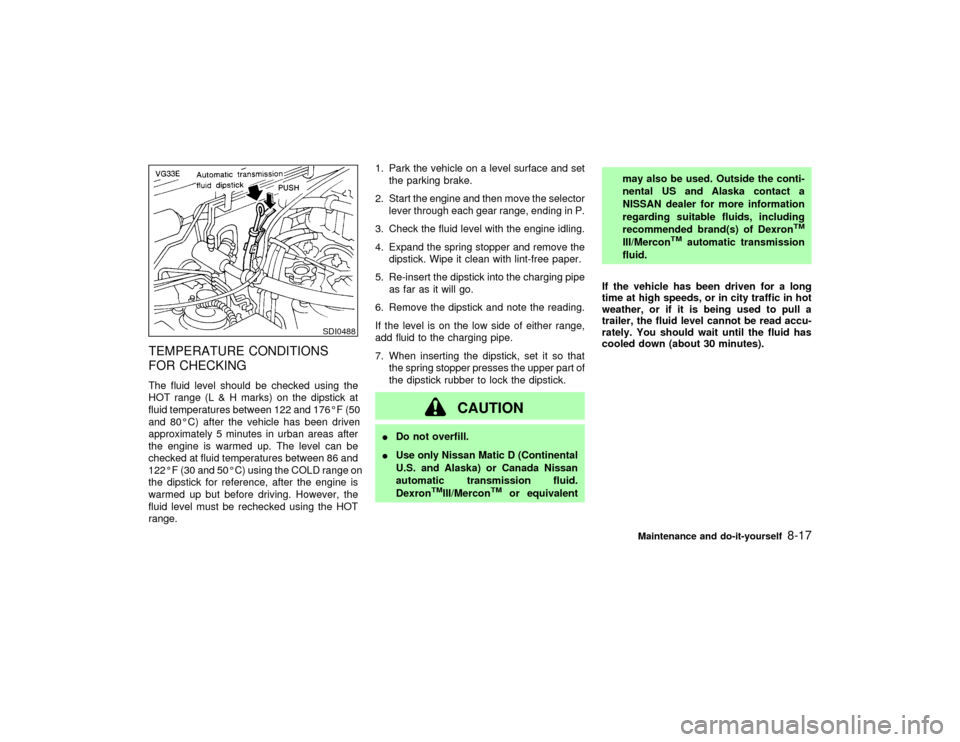
4. Expand the spring stopper and remove the
dipstick. Wipe it clean with lint-free paper.
5. Re-insert the dipstick into the charging pipe
as far as it will go.
6. Remove the dipstick and note the reading.
If the level is on the low side of either range,
add fluid to the charging pipe.
7. When inserting the dipstick, set it so that
the spring stopper presses the upper part of
the dipstick rubber to lock the dipstick.
CAUTION
IDo not overfill.
IUse only Nissan Matic D (Continental
U.S. and Alaska) or Canada Nissan
automatic transmission fluid.
Dexron
TMIII/Mercon
TM
or equivalentmay also be used. Outside the conti-
nental US and Alaska contact a
NISSAN dealer for more information
regarding suitable fluids, including
recommended brand(s) of Dexron
TM
III/Mercon
TM
automatic transmission
fluid.
If the vehicle has been driven for a long
time at high speeds, or in city traffic in hot
weather, or if it is being used to pull a
trailer, the fluid level cannot be read accu-
rately. You should wait until the fluid has
cooled down (about 30 minutes).
SDI0488
Maintenance and do-it-yourself
8-17
Z
01.9.21/R50-D/V5
X
Page 229 of 288
WINDOW WASHER FLUID
RESERVOIR
For USTo check the fluid level, use your finger to plug
the center hole of the cap/tube assembly (as
shown above), then remove it from the tank. If
there is no fluid in the tube, add fluid. Add a
washer solvent to the water for better cleaning.
In the winter season, add a windshield washer
anti-freeze. Follow the manufacturer's instruc-
tions for the mixture ratio.
For CANADAAdd fluid when the low washer fluid warning
light comes on. Add a washer solvent to the
water for better cleaning. In the winter season,
add a windshield washer anti-freeze. Follow
the manufacturer's instructions for the mixture
ratio.
CAUTION
Do not substitute engine anti-freeze
coolant for window washer solution.This may result in damage to the paint.
WARNING
Anti-freeze is poisonous and should be
stored carefully marked containers out
of the reach of children.
SDI0423A
SDI0389
WINDOW WASHER FLUID8-20
Maintenance and do-it-yourself
Z
01.9.21/R50-D/V5
X
Page 230 of 288

IKeep the battery surface clean and dry. Any
corrosion should be washed off with a
solution of baking soda and water.
IMake certain the terminal connections are
clean and securely tightened.
IIf the vehicle is not to be used for 30 days or
longer, disconnect the (Ð) negative battery
terminal cable to prevent discharge.
WARNING
IDo not expose the battery to flames
or electrical sparks. Hydrogen gas
generated by battery action is explo-
sive. Do not allow battery fluid to
contact your skin, eyes, fabrics, or
painted surfaces. After touching a
battery or battery cap, do not touch or
rub your eyes. Thoroughly wash your
hands. If the acid contacts your eyes,
skin or clothing, immediately flush
with water for at least 15 minutes and
seek medical attention.
IWhen working on or near a battery,
always wear suitable eye protection
and remove all jewelry.IBattery posts, terminals and related
accessories contain lead and lead
compounds. Wash hands after han-
dling.
IKeep the battery out of the reach of
children.
IDo not operate the vehicle if the fluid
in the battery is low. Low battery fluid
can cause a higher load on the bat-
tery which can generate heat, reduce
battery life, and in some cases lead to
an explosion.
JUMP STARTINGIf jump starting is necessary, see ªJump start-
ingº in the ª6. In case of emergencyº section. If
the engine does not start by jump starting, the
battery may have to be replaced. Contact your
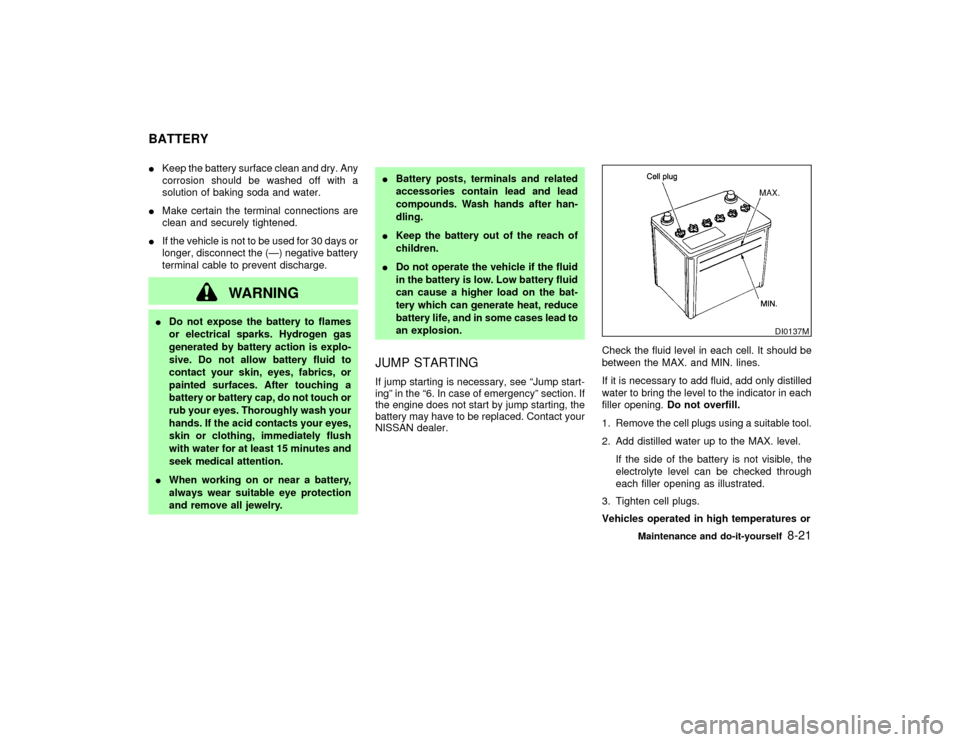
NISSAN dealer.Check the fluid level in each cell. It should be
between the MAX. and MIN. lines.
If it is necessary to add fluid, add only distilled
water to bring the level to the indicator in each
filler opening.Do not overfill.
1. Remove the cell plugs using a suitable tool.
2. Add distilled water up to the MAX. level.
If the side of the battery is not visible, the
electrolyte level can be checked through
each filler opening as illustrated.
3. Tighten cell plugs.
Vehicles operated in high temperatures or
DI0137M
BATTERY
Maintenance and do-it-yourself
8-21
Z
01.9.21/R50-D/V5
X
Page 231 of 288
under severe conditions require frequent
checks of the battery fluid level.
WARNING
Be sure the ignition key is in the OFF or
LOCK position. The engine could rotate
unexpectedly.
1. Visually inspect each belt for signs of un-
usual wear, cuts, fraying oil adhesion or
looseness. If the belt is in poor condition or
loose, have it replaced or adjusted by your
NISSAN dealer.
2. Have the belts checked regularly for condi-tion and tension.
SDI0457
SDI1119
SDI0424
DRIVE BELTS
8-22
Maintenance and do-it-yourself
Z
01.9.21/R50-D/V5
X
Page 235 of 288

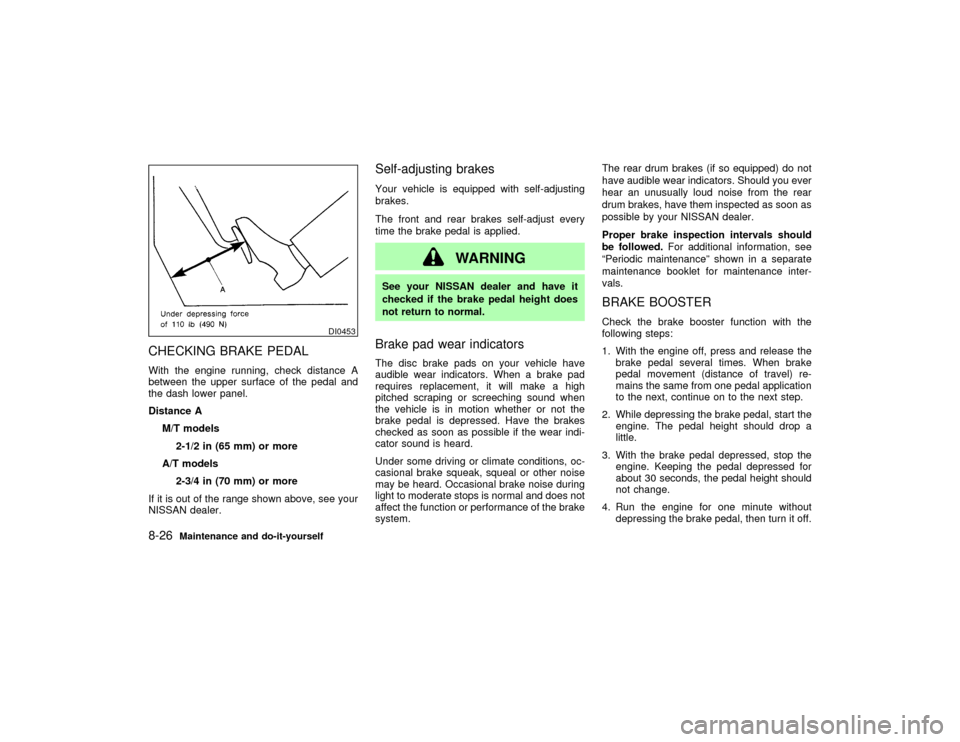
CHECKING BRAKE PEDALWith the engine running, check distance A
between the upper surface of the pedal and
the dash lower panel.
Distance A
M/T models
2-1/2 in (65 mm) or more
A/T models
2-3/4 in (70 mm) or more
If it is out of the range shown above, see your
NISSAN dealer.
Self-adjusting brakesYour vehicle is equipped with self-adjusting
brakes.
The front and rear brakes self-adjust every
time the brake pedal is applied.
WARNING
See your NISSAN dealer and have it
checked if the brake pedal height does
not return to normal.Brake pad wear indicatorsThe disc brake pads on your vehicle have
audible wear indicators. When a brake pad
requires replacement, it will make a high
pitched scraping or screeching sound when
the vehicle is in motion whether or not the
brake pedal is depressed. Have the brakes
checked as soon as possible if the wear indi-
cator sound is heard.
Under some driving or climate conditions, oc-
casional brake squeak, squeal or other noise
may be heard. Occasional brake noise during
light to moderate stops is normal and does not
affect the function or performance of the brake
system.The rear drum brakes (if so equipped) do not
have audible wear indicators. Should you ever
hear an unusually loud noise from the rear
drum brakes, have them inspected as soon as
possible by your NISSAN dealer.
Proper brake inspection intervals should
be followed.For additional information, see
ªPeriodic maintenanceº shown in a separate
maintenance booklet for maintenance inter-
vals.
BRAKE BOOSTERCheck the brake booster function with the
following steps:
1. With the engine off, press and release the
brake pedal several times. When brake
pedal movement (distance of travel) re-
mains the same from one pedal application
to the next, continue on to the next step.
2. While depressing the brake pedal, start the
engine. The pedal height should drop a
little.
3. With the brake pedal depressed, stop the
engine. Keeping the pedal depressed for
about 30 seconds, the pedal height should
not change.
4. Run the engine for one minute without
depressing the brake pedal, then turn it off.
DI0453
8-26
Maintenance and do-it-yourself
Z
01.9.21/R50-D/V5
X
Page 236 of 288
Depress the brake pedal several times. The
pedal travel distance will decrease gradu-
ally with each depression as the vacuum is
released from the booster.
If the brakes do not operate properly, have the
brake checked by your NISSAN dealer.
CHECKING CLUTCH PEDALPress the pedal by hand and be sure the free
travel is within the above limit. If free travel is
out of the range shown above, see your
NISSAN dealer.
ENGINE COMPARTMENT
CAUTION
Never use a fuse of higher amperage
rating than that specified on the fuse
box cover. This could damage the elec-
trical system or cause a fire.
If any electrical equipment does not operate,
check for an open fuse.
1. Be sure the ignition key and the headlight
switch are OFF.
DI0070-B
SDI0395
CLUTCH PEDAL FUSES
Maintenance and do-it-yourself
8-27
Z
01.9.21/R50-D/V5
X
Page 237 of 288
2. Open the engine hood.
3. Remove the fuse box cover.
4. Remove the fuse with the fuse puller.
5. If the fuse is open, replace it with a new
fuse.
6. If a new fuse opens again, have the elec-
trical system checked and repaired by your
NISSAN dealer.Fusible linksIf any electrical equipment does not operate
and fuses are in good condition, check the
fusible links. If any of these fusible links are
melted, replace only with genuine NISSAN
parts.
PASSENGER COMPARTMENTIf any electrical equipment does not operate,
check for an open fuse.
1. Be sure the ignition key and the headlight
switch are OFF.
2. Pull to open the fuse box cover/coin tray.
3. Pull down the fuse box cover/coin tray to
remove it.
4. Remove the fuse with the fuse puller.
5. If the fuse is open, replace it with a new
fuse.6. If a new fuse opens again, have the elec-
trical system checked and repaired by your
NISSAN dealer.
SDI1169
8-28
Maintenance and do-it-yourself
Z
01.9.21/R50-D/V5
X