2002 NISSAN PATHFINDER clock
[x] Cancel search: clockPage 148 of 288

ANTENNA
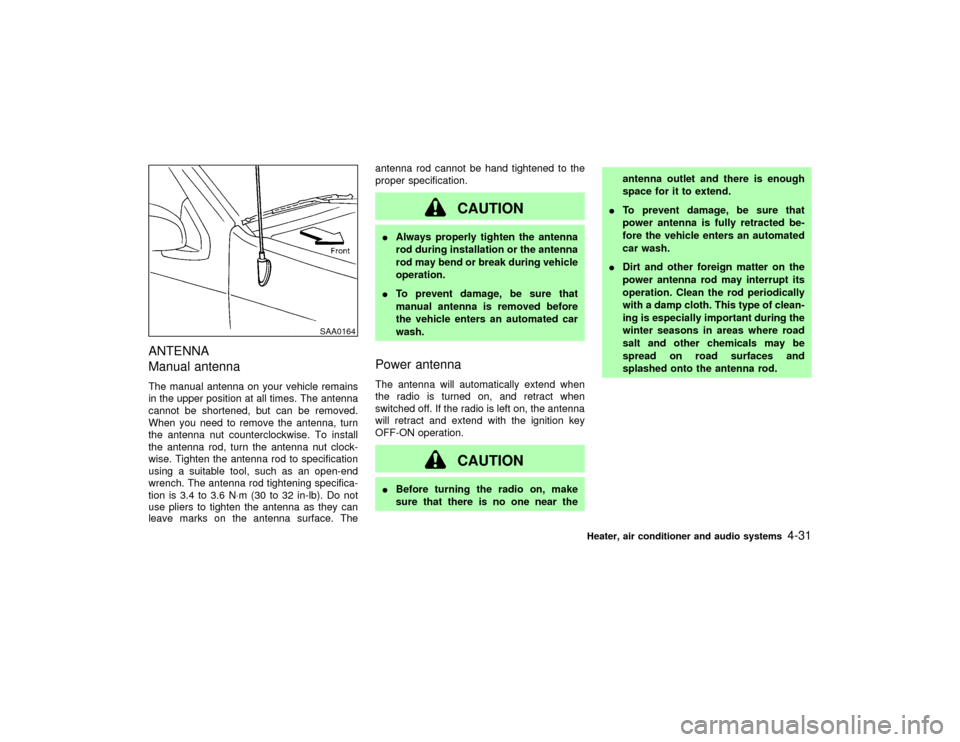
Manual antennaThe manual antenna on your vehicle remains
in the upper position at all times. The antenna
cannot be shortened, but can be removed.
When you need to remove the antenna, turn
the antenna nut counterclockwise. To install
the antenna rod, turn the antenna nut clock-
wise. Tighten the antenna rod to specification
using a suitable tool, such as an open-end
wrench. The antenna rod tightening specifica-
tion is 3.4 to 3.6 N×m (30 to 32 in-lb). Do not
use pliers to tighten the antenna as they can
leave marks on the antenna surface. Theantenna rod cannot be hand tightened to the
proper specification.
CAUTION
IAlways properly tighten the antenna
rod during installation or the antenna
rod may bend or break during vehicle
operation.
ITo prevent damage, be sure that
manual antenna is removed before
the vehicle enters an automated car
wash.Power antennaThe antenna will automatically extend when
the radio is turned on, and retract when
switched off. If the radio is left on, the antenna
will retract and extend with the ignition key
OFF-ON operation.
CAUTION
IBefore turning the radio on, make
sure that there is no one near theantenna outlet and there is enough
space for it to extend.
ITo prevent damage, be sure that
power antenna is fully retracted be-
fore the vehicle enters an automated
car wash.
IDirt and other foreign matter on the
power antenna rod may interrupt its
operation. Clean the rod periodically
with a damp cloth. This type of clean-
ing is especially important during the
winter seasons in areas where road
salt and other chemicals may be
spread on road surfaces and
splashed onto the antenna rod.
SAA0164
Heater, air conditioner and audio systems
4-31
Z
01.9.21/R50-D/V5
X
Page 156 of 288

1) Move the selector lever into the P (Park)
position.
2) Turn the ignition key slightly in the ON
direction.
3) Turn the key toward the LOCK position.
4) Remove the key.
If the key is removed from the ignition switch,
the selector lever cannot be moved from P
(Park).The selector lever can be moved if
the ignition switch is in the ON position and
the foot brake pedal is depressed.
There is an OFF position in between LOCK
and ACC, although it does not show on the
lock cylinder. When the ignition is in OFF the
steering wheel is not locked.
In order for the steering wheel to be locked, it
must be turned about 1/6 of a turn clockwise
from the straight up position.
To lock the steering wheel, turn the key to
the LOCK position. Remove the key. To
unlock the steering wheel, insert the key
and turn it gently while rotating the steer-
ing wheel slightly right and left.
WARNING
Never remove or turn the key to the
LOCK position while driving. The steer-
ing wheel will lock. This may cause the
driver to lose control of the vehicle and
could result in serious vehicle damage
or personal injury.
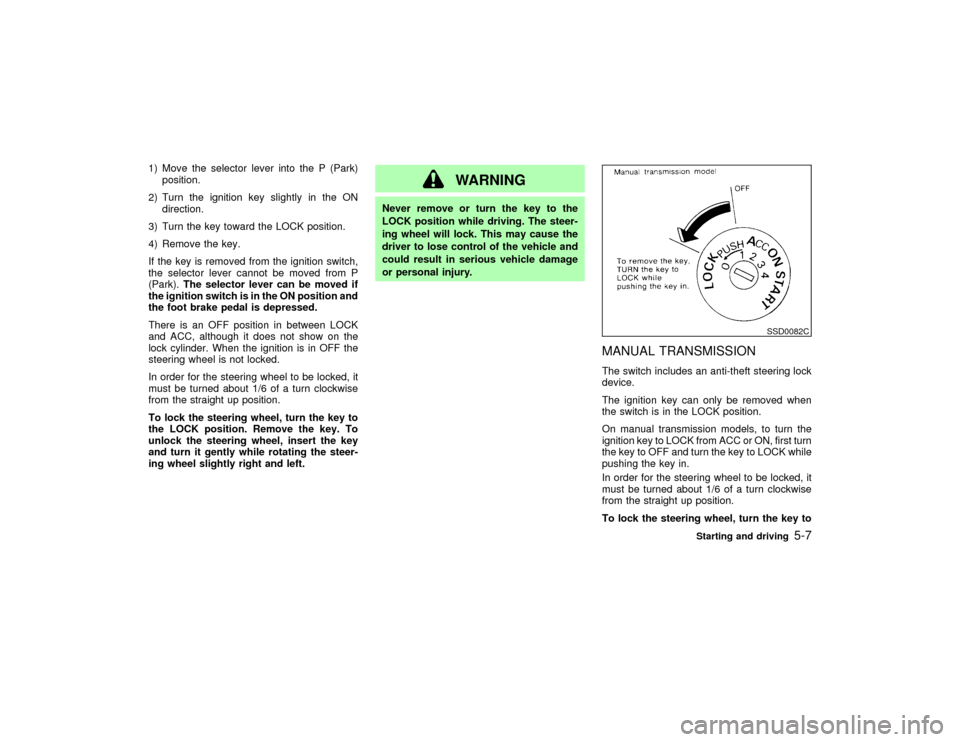
MANUAL TRANSMISSIONThe switch includes an anti-theft steering lock
device.
The ignition key can only be removed when
the switch is in the LOCK position.
On manual transmission models, to turn the
ignition key to LOCK from ACC or ON, first turn
the key to OFF and turn the key to LOCK while
pushing the key in.
In order for the steering wheel to be locked, it
must be turned about 1/6 of a turn clockwise
from the straight up position.
To lock the steering wheel, turn the key to
SSD0082C
Starting and driving
5-7
Z
01.9.21/R50-D/V5
X
Page 160 of 288

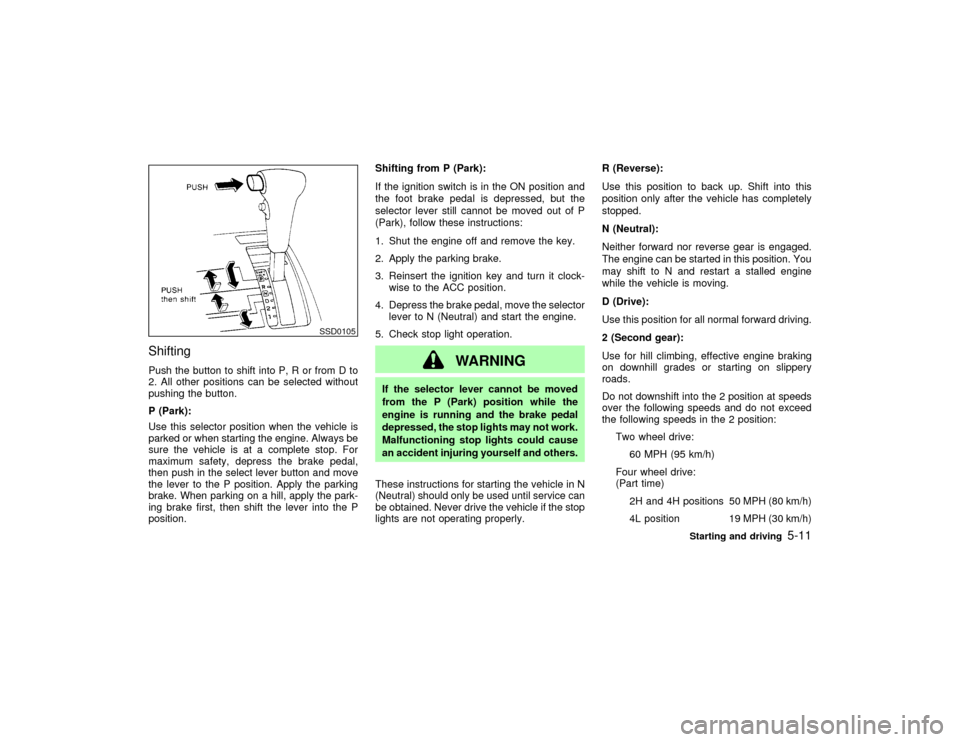
ShiftingPush the button to shift into P, R or from D to
2. All other positions can be selected without
pushing the button.
P (Park):
Use this selector position when the vehicle is
parked or when starting the engine. Always be
sure the vehicle is at a complete stop. For
maximum safety, depress the brake pedal,
then push in the select lever button and move
the lever to the P position. Apply the parking
brake. When parking on a hill, apply the park-
ing brake first, then shift the lever into the P
position.Shifting from P (Park):
If the ignition switch is in the ON position and
the foot brake pedal is depressed, but the
selector lever still cannot be moved out of P
(Park), follow these instructions:
1. Shut the engine off and remove the key.
2. Apply the parking brake.
3. Reinsert the ignition key and turn it clock-
wise to the ACC position.
4. Depress the brake pedal, move the selector
lever to N (Neutral) and start the engine.
5. Check stop light operation.
WARNING
If the selector lever cannot be moved
from the P (Park) position while the
engine is running and the brake pedal
depressed, the stop lights may not work.
Malfunctioning stop lights could cause
an accident injuring yourself and others.
These instructions for starting the vehicle in N
(Neutral) should only be used until service can
be obtained. Never drive the vehicle if the stop
lights are not operating properly.R (Reverse):
Use this position to back up. Shift into this
position only after the vehicle has completely
stopped.
N (Neutral):
Neither forward nor reverse gear is engaged.
The engine can be started in this position. You
may shift to N and restart a stalled engine
while the vehicle is moving.
D (Drive):
Use this position for all normal forward driving.
2 (Second gear):
Use for hill climbing, effective engine braking
on downhill grades or starting on slippery
roads.
Do not downshift into the 2 position at speeds
over the following speeds and do not exceed
the following speeds in the 2 position:
Two wheel drive:
60 MPH (95 km/h)
Four wheel drive:
(Part time)
2H and 4H positions 50 MPH (80 km/h)
4L position 19 MPH (30 km/h)
SSD0105
Starting and driving
5-11
Z
01.9.21/R50-D/V5
X
Page 191 of 288

the vehicle to move. This is especially
true for vehicle with limited slip dif-
ferential carriers.
IDo not allow passengers to stay in
the vehicle while it is on the jack.
Carefully read the following instructions.
1. Place the jack directly under the jack-up
point.
The jack should be used on level firm
ground.
2. Loosen each wheel nut one or two turns by
turning counterclockwise with the wheel nut
wrench.
Do not remove the wheel nuts until the tire
is off the ground.
3. Carefully raise the vehicle until the tire
clears the ground. To lift the vehicle, se-
curely hold the jack lever and rod with both
hands as shown above. Remove the wheel
nuts, and then remove the wheel. Do not
remove the brake drum with the wheel.
Installing the spare tire1. Clean any mud or dirt from the surface
between the wheel and hub.
2. Carefully put the wheel on and tighten the
wheel nuts finger tight.
3. With the wheel nut wrench, tighten wheel
nuts alternately and evenly until they are
tight.
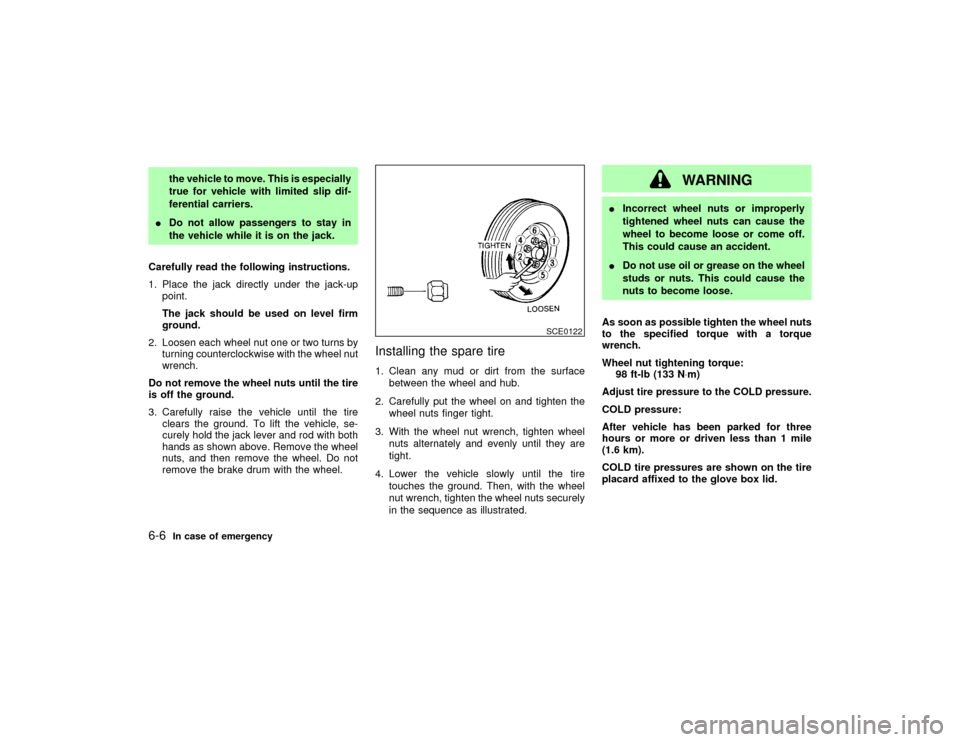
4. Lower the vehicle slowly until the tire
touches the ground. Then, with the wheel
nut wrench, tighten the wheel nuts securely
in the sequence as illustrated.
WARNING
IIncorrect wheel nuts or improperly
tightened wheel nuts can cause the
wheel to become loose or come off.
This could cause an accident.
IDo not use oil or grease on the wheel
studs or nuts. This could cause the
nuts to become loose.
As soon as possible tighten the wheel nuts
to the specified torque with a torque
wrench.
Wheel nut tightening torque:
98 ft-lb (133 N×m)
Adjust tire pressure to the COLD pressure.
COLD pressure:
After vehicle has been parked for three
hours or more or driven less than 1 mile
(1.6 km).
COLD tire pressures are shown on the tire
placard affixed to the glove box lid.
SCE0122
6-6
In case of emergency
Z
01.9.21/R50-D/V5
X
Page 281 of 288

Installation on rear seat center position .... 1-33
Precautions on child restraints .................. 1-31
Top tether strap anchor point locations .... 1-41
With top tether strap.................................. 1-40
Child safety ..................................................... 1-24
Child safety rear door lock................................ 3-4
Chimes, Audible reminders............................. 2-15
Cigarette lighter and ashtray .......................... 2-26
Circuit breaker, Fusible link ............................ 8-28
Cleaning exterior and interior .................... 7-2, 7-3
Clock ............................................................... 2-25
Clutch
Clutch pedal .............................................. 8-27
Fluid ........................................................... 8-18
Clutch housing drain (4x4 only) ...................... 8-40
Cold weather driving ....................................... 5-34
Compact Disc (CD) player (See audio
system) ........................................................... 4-17
Compact spare tire ......................................... 8-39
Compass display .............................................. 2-7
Console box .................................................... 2-30
Controls
Heater and air conditioner controls ............. 4-2
Heater and air conditioner controls
(automatic)................................................... 4-8
Heater and semiautomatic air conditioner .. 4-3
Steering wheel audio controls ................... 4-30
Coolant
Capacities and recommended fuel/
lubricants ..................................................... 9-2
Changing engine coolant .......................... 8-10
Checking engine coolant level .................... 8-9
Corrosion protection ......................................... 7-4
Cover, Tonneau cover .................................... 2-33Cruise control.................................................. 5-17
Cup holders .................................................... 2-28
D
Daytime running light system ......................... 2-21
Defogger switch, Glass hatch and outside mirror
defogger switch............................................... 2-19
Dimensions and weights ................................. 9-11
Door open warning light ................................. 2-11
Drive belts ....................................................... 8-22
Drive positioner, Automatic ............................. 3-16
Driving
Cold weather driving ................................. 5-34
Driving with automatic transmission .. 5-6, 5-10
Driving with manual transmission ...... 5-7, 5-14
On-pavement and offroad driving ............... 5-3
Precautions when starting and driving ........ 5-2
Safety precautions....................................... 5-4
E
Economy, Fuel ................................................ 5-19
Electric sunroof ............................................... 2-36
Emission control information label .................. 9-14
Emission control system warranty .................. 9-22
Engine
Before starting the engine ........................... 5-9
Block heater .............................................. 5-35
Capacities and recommended fuel/
lubricants ..................................................... 9-2
Changing engine coolant .......................... 8-10
Changing engine oil .................................. 8-14Changing engine oil filter .......................... 8-15
Checking engine coolant level .................... 8-9
Checking engine oil level .......................... 8-13
Coolant temperature gauge ........................ 2-4
Engine compartment check locations ......... 8-7
Engine cooling system ................................ 8-9
Engine oil................................................... 8-13
Engine oil and oil filter recommendation..... 9-6
Engine oil viscosity ...................................... 9-6
Engine serial number ................................ 9-13
Engine specifications................................... 9-9
If your vehicle overheats ........................... 6-11
Starting the engine ...................................... 5-9
Exhaust gas (Carbon monoxide) ...................... 5-2
F
F.M.V.S.S. certification label........................... 9-13
Filter, Air cleaner housing filter ....................... 8-23
Flashers (See hazard warning flasher
switch) ............................................................. 2-23
Flat tire .............................................................. 6-2
Floor mat cleaning ............................................ 7-4
Fluid
Automatic transmission fluid (ATF) ........... 8-16
Brake and clutch fluid................................ 8-18
Brake fluid ................................................. 8-18
Capacities and recommended fuel/
lubricants ..................................................... 9-2
Engine coolant............................................. 8-9
Engine oil................................................... 8-13
Power steering fluid................................... 8-18
Window washer fluid ................................. 8-20
Z
01.9.21/R50-D/V5
X
10-2