2002 NISSAN MAXIMA belt
[x] Cancel search: beltPage 179 of 247

Parking brake*:Check that the lever has the
proper travel and make sure that the vehicle is
held securely on a fairly steep hill when only
the parking brake is applied.
Automatic transaxle P (Park) position
mechanism:On a fairly steep hill check that
the vehicle is held securely with the selector
lever in the P (Park) position without applying
any brakes.Under the hood and the vehicleThe maintenance items listed here should be
checked periodically (for example, each time
you check the engine oil or refuel).
Windshield washer fluid*:Check that there
is adequate fluid in the tank.
Engine coolant level*:Check the coolant
level when the engine is cold.
Radiator and hoses:Check the front of the
radiator and clean off any dirt, insects, leaves,
etc., that may have accumulated. Make sure
the hoses have no cracks, deformation, dete-
rioration or loose connections.
Brake and clutch fluid levels*:Make sure
that the brake and clutch fluid levels are be-
tween the MAX and MIN lines on the reservoir.
Battery*:Check the fluid level in each cell. It
should be between the MAX and MIN lines.Vehicles operated in high temperatures or
under severe conditions require frequent
checks of the battery fluid level.
Engine drive belts*:Make sure that no belt is
frayed, worn, cracked or oily.
Engine oil level*:Check the level on the
dipstick after parking the vehicle on a level
spot and turning off the engine.
Power steering fluid level* and lines:Check
the level in the reservoir tank with the engine
off. Check the lines for proper attachment,
leaks, cracks, etc.
Automatic transaxle fluid level*:Check the
level on the dipstick after putting the selector
lever in P (Park) position with the engine idling.
Exhaust system:Make sure there are no
loose supports, cracks or holes. If the sound of
the exhaust seems unusual or there is a smell
of exhaust fumes, immediately locate the
trouble and correct it. (See ªPrecautions when
starting and drivingº in the ª5. Starting and
drivingº section for exhaust gas (carbon mon-
oxide).)
Underbody:The underbody is frequently ex-
posed to corrosive substances such as those
used on icy roads or to control dust. It is very
important to remove these substances, other-
wise rust will form on the floor pan, frame, fuellines and around the exhaust system. At the
end of winter, the underbody should be thor-
oughly flushed with plain water, being careful
to clean those areas where mud and dirt may
accumulate. For additional information, see
ªCleaning exteriorº in the ª7. Appearance and
careº section.
Fluid leaks:Check under the vehicle for fuel,
oil, water or other fluid leaks after the vehicle
has been parked for a while. Water dripping
from the air conditioner after use is normal. If
you should notice any leaks or if gasoline
fumes are evident, check for the cause and
have it corrected immediately.8-4
Maintenance and do-it-yourself
Z
01.9.21/A33-D/V5.0
X
Page 180 of 247
When performing any inspection or mainte-
nance work on your vehicle, always take care
to prevent serious accidental injury to yourself
or damage to the vehicle. The following are
general precautions which should be closely
observed.
WARNING
IPark the vehicle on a level surface,
apply the parking brake securely and
block the wheels to prevent the ve-
hicle from moving. For a manual
transmission, move the shift lever to
N (Neutral) position. For an automatic
transmission, move the selector lever
to P (Park) position.
IBe sure the ignition key is OFF or
LOCK when performing any parts re-
placement or repairs.
IYour vehicle is equipped with an au-
tomatic engine cooling fan. It may
come on at any time without warning,
even if the ignition key is in the OFF
position and the engine is not run-
ning. To avoid injury, always discon-nect the negative battery cable before
working near the fan.
IIf you must work with the engine
running, keep your hands, clothing,
hair and tools away from moving
fans, belts and any other moving
parts.
IIt is advisable to secure or remove
any loose clothing and any jewelry,
such as rings, watches, etc. before
working on your vehicle.
IAlways wear eye protection when-
ever you work on your vehicle.
IIf you must run the engine in an
enclosed space such as a garage, be
sure there is proper ventilation for
exhaust gases to escape.
INever get under the vehicle while it is
supported only by a jack. If it is nec-
essary to work under the vehicle,
support it with safety stands.
IKeep smoking materials, flame and
sparks away from fuel and the bat-tery.
IOn gasoline engine models with the
Multiport Fuel Injection (MFI) System,
the fuel filter or fuel lines should be
serviced by a NISSAN dealer because
the fuel lines are under high pressure
even when the engine is off.
CAUTION
IDo not work under the hood while the
engine is hot. Turn off the engine and
wait until it cools down.
INever connect or disconnect either
the battery or any transistorized com-
ponent connector while the ignition
key is on.
INever leave the engine or the auto-
matic transmission related compo-
nent harness connector discon-
nected while the ignition key is on.
IAvoid direct contact with used engine
oil and coolant. Improperly disposed
MAINTENANCE PRECAUTIONS
Maintenance and do-it-yourself
8-5
Z
01.9.21/A33-D/V5.0
X
Page 184 of 247
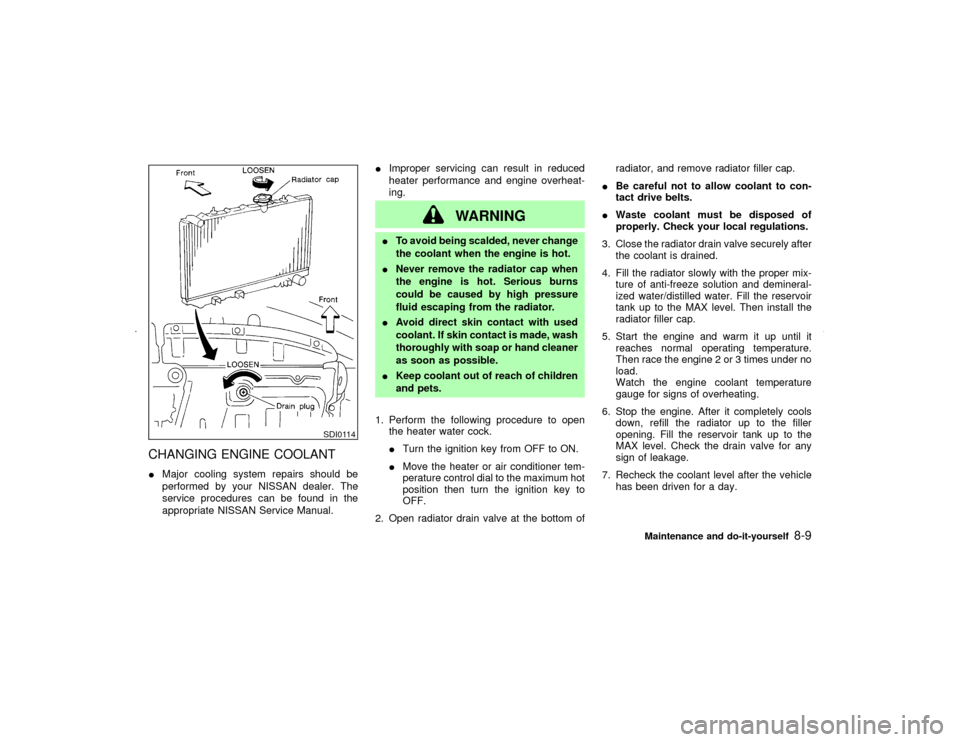
CHANGING ENGINE COOLANTIMajor cooling system repairs should be
performed by your NISSAN dealer. The
service procedures can be found in the
appropriate NISSAN Service Manual.IImproper servicing can result in reduced
heater performance and engine overheat-
ing.
WARNING
ITo avoid being scalded, never change
the coolant when the engine is hot.
INever remove the radiator cap when
the engine is hot. Serious burns
could be caused by high pressure
fluid escaping from the radiator.
IAvoid direct skin contact with used
coolant. If skin contact is made, wash
thoroughly with soap or hand cleaner
as soon as possible.
IKeep coolant out of reach of children
and pets.
1. Perform the following procedure to open
the heater water cock.
ITurn the ignition key from OFF to ON.
IMove the heater or air conditioner tem-
perature control dial to the maximum hot
position then turn the ignition key to
OFF.
2. Open radiator drain valve at the bottom ofradiator, and remove radiator filler cap.
IBe careful not to allow coolant to con-
tact drive belts.
IWaste coolant must be disposed of
properly. Check your local regulations.
3. Close the radiator drain valve securely after
the coolant is drained.
4. Fill the radiator slowly with the proper mix-
ture of anti-freeze solution and demineral-
ized water/distilled water. Fill the reservoir
tank up to the MAX level. Then install the
radiator filler cap.
5. Start the engine and warm it up until it
reaches normal operating temperature.
Then race the engine 2 or 3 times under no
load.
Watch the engine coolant temperature
gauge for signs of overheating.
6. Stop the engine. After it completely cools
down, refill the radiator up to the filler
opening. Fill the reservoir tank up to the
MAX level. Check the drain valve for any
sign of leakage.
7. Recheck the coolant level after the vehicle
has been driven for a day.
SDI0114
Maintenance and do-it-yourself
8-9
Z
01.9.21/A33-D/V5.0
X
Page 187 of 247
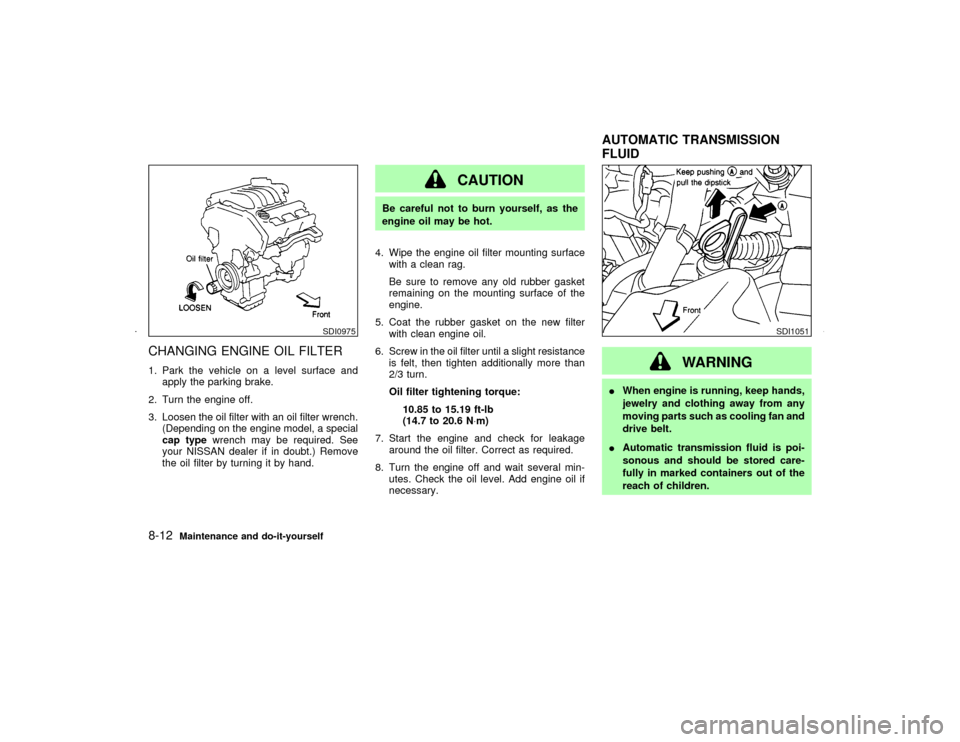
CHANGING ENGINE OIL FILTER1. Park the vehicle on a level surface and
apply the parking brake.
2. Turn the engine off.
3. Loosen the oil filter with an oil filter wrench.
(Depending on the engine model, a special
cap typewrench may be required. See
your NISSAN dealer if in doubt.) Remove
the oil filter by turning it by hand.
CAUTION
Be careful not to burn yourself, as the
engine oil may be hot.
4. Wipe the engine oil filter mounting surface
with a clean rag.
Be sure to remove any old rubber gasket
remaining on the mounting surface of the
engine.
5. Coat the rubber gasket on the new filter
with clean engine oil.
6. Screw in the oil filter until a slight resistance
is felt, then tighten additionally more than
2/3 turn.
Oil filter tightening torque:
10.85 to 15.19 ft-lb
(14.7 to 20.6 N×m)
7. Start the engine and check for leakage
around the oil filter. Correct as required.
8. Turn the engine off and wait several min-
utes. Check the oil level. Add engine oil if
necessary.
WARNING
IWhen engine is running, keep hands,
jewelry and clothing away from any
moving parts such as cooling fan and
drive belt.
IAutomatic transmission fluid is poi-
sonous and should be stored care-
fully in marked containers out of the
reach of children.
SDI0975
SDI1051
AUTOMATIC TRANSMISSION
FLUID
8-12
Maintenance and do-it-yourself
Z
01.9.21/A33-D/V5.0
X
Page 192 of 247
WARNING
Be sure the ignition key is in the OFF or
LOCK position. The engine could rotate
unexpectedly.
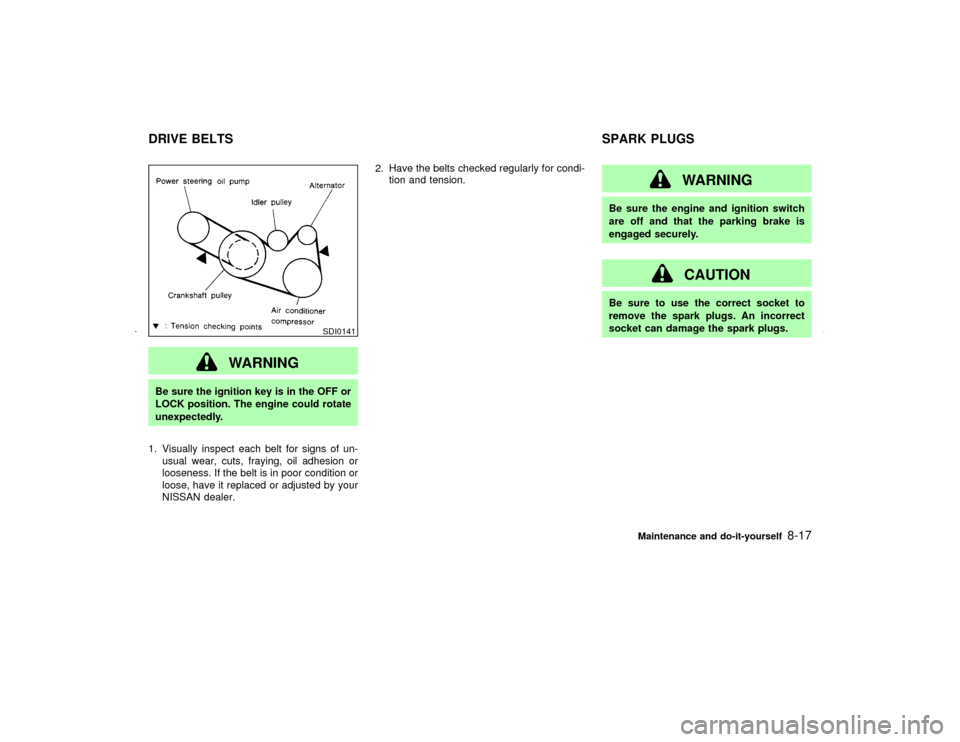
1. Visually inspect each belt for signs of un-
usual wear, cuts, fraying, oil adhesion or
looseness. If the belt is in poor condition or
loose, have it replaced or adjusted by your
NISSAN dealer.2. Have the belts checked regularly for condi-
tion and tension.
WARNING
Be sure the engine and ignition switch
are off and that the parking brake is
engaged securely.
CAUTION
Be sure to use the correct socket to
remove the spark plugs. An incorrect
socket can damage the spark plugs.
SDI0141
DRIVE BELTS SPARK PLUGS
Maintenance and do-it-yourself
8-17
Z
01.9.21/A33-D/V5.0
X
Page 211 of 247
tor is visible, the tire should be re-
placed.
IImproper service for a spare tire may
result in serious personal injury. If it
is necessary to repair the spare tire,
contact your NISSAN dealer.
IFor additional information regarding
tires, refer to ªImportant Tire Safety
Informationº in the Warranty Informa-
tion Booklet (US) or ªTire Safety In-
formationº in the Warranty Informa-
tion booklet (Canada).
Replacing wheels and tiresWhen replacing a tire, use the same size,
speed rating and load carrying capacity as
originally equipped. See ªSpecificationsº in the
ª9. Technical and consumer informationº sec-
tion for recommended types and sizes of tires
and wheels.
WARNING
IThe use of tires other than thoserecommended or the mixed use of
tires of different brands, construction
(bias, bias-belted or radial), or tread
patterns can adversely affect the ride,
braking, handling, ground clearance,
body-to-tire clearance, tire chain
clearance, speedometer calibration,
headlight aim and bumper height.
Some of these effects may lead to
accidents and could result in serious
personal injury.
IIf the wheels are changed for any
reason, always replace with wheels
which have the same offset dimen-
sion. Wheels of a different offset
could cause early tire wear, possibly
degraded vehicle handling character-
istics and/or interference with the
brake discs. Such interference can
lead to decreased braking efficiency
and/or early brake pad wear.
IDo not install a deformed wheel or
tire even if it has been repaired. Such
wheels or tires could have structural
damage and could fail without warn-ing.
IThe use of retread tire is not recom-
mended.
IFor additional information regarding
tires, refer to ªImportant Tire Safety
Informationº in the Warranty Informa-
tion Booklet (US) or ªTire Safety In-
formationº in the Warranty Informa-
tion booklet (Canada).
Wheel balanceUnbalanced wheels may affect vehicle han-
dling and tire life. Even with regular use,
wheels can get out of balance. Therefore, they
should be balanced as required.
Wheel balance service should be performed
with the wheels off the vehicle. Spin balancing
the front wheels on the vehicle could lead to
transmission damage.
For additional information regarding tires, refer
to ªImportant Tire Safety Informationº in the
Warranty Information Booklet.Care of wheelsIWash the wheels when washing the vehicle
8-36
Maintenance and do-it-yourself
Z
01.9.21/A33-D/V5.0
X
Page 226 of 247

ENGINE SERIAL NUMBERThe number is stamped on the engine as
shown.
F.M.V.S.S. CERTIFICATION LABELThe Federal Motor Vehicle Safety Standards
(F.M.V.S.S.) certification label is affixed as
shown. This label contains valuable vehicle
information, such as: Gross Vehicle Weight
Ratings (GVWR), Gross Axle Weight Rating
(GAWR), month and year of manufacture,
Vehicle Identification Number, (VIN), etc. Re-
view it carefully.
EMISSION CONTROL
INFORMATION LABELThe emission control information label is at-
tached as shown.
STI0047
STI0186
STI0188
Technical and consumer information
9-11
Z
01.9.21/A33-D/V5.0
X
Page 227 of 247

TIRE PLACARDThe cold tire pressure is shown on the tire
placard affixed to the console box lid.
AIR CONDITIONER
SPECIFICATION LABELThe air conditioner specification label is affixed
inside of the hood as shown.
STI0206
STI0292
9-12
Technical and consumer information
Z
01.9.21/A33-D/V5.0
X