2002 NISSAN MAXIMA seats
[x] Cancel search: seatsPage 45 of 247

2 Instruments and controlsInstrument panel ....................................................... 2-2
Meters and gauges ................................................... 2-3
Speedometer and odometer ................................ 2-4
Tachometer .......................................................... 2-4
Engine coolant temperature gauge ...................... 2-5
Fuel gauge ........................................................... 2-5
Warning/indicator lights and audible reminders ........ 2-7
Checking bulbs ..................................................... 2-7
Warning lights....................................................... 2-7
Indicator lights .................................................... 2-10
Audible reminders .............................................. 2-11
Security systems ..................................................... 2-12
Vehivle security system ...................................... 2-12
Nissan Vehicle Immobilizer System .................. 2-13
Windshield wiper and washer switch ...................... 2-14
Rear window and outside mirror (if so equipped)
defogger switch ....................................................... 2-15
Headlight and turn signal switch ............................. 2-16
Xenon headlights................................................ 2-16
Headlight switch ................................................. 2-17
Turn signal switch .............................................. 2-19
Fog light switch (if so equipped) ............................. 2-19
Hazard warning flasher switch ................................ 2-19
Horn......................................................................... 2-20Heated seats (if so equipped) ................................. 2-20
Heated steering wheel (if so equipped) .................. 2-21
Traction control system (TCS) cancel switch
(if so equipped) ....................................................... 2-22
Power outlet ............................................................ 2-22
Cigarette lighter and ashtray (accessory) ............... 2-23
Storage .................................................................... 2-23
Trays................................................................... 2-23
Glasses case ...................................................... 2-24
Cup holder .......................................................... 2-24
Glove box ........................................................... 2-25
Console box ....................................................... 2-26
Cargo net (if so equipped) ................................. 2-26
Windows .................................................................. 2-27
Power windows .................................................. 2-27
Sunroof (if so equipped) ......................................... 2-29
Automatic sunroof .............................................. 2-29
Clock ....................................................................... 2-30
Adjusting the time............................................... 2-30
Trip computer .......................................................... 2-30
Interior light ............................................................. 2-32
Ceiling................................................................. 2-32
Personal light .......................................................... 2-33
Vanity mirror light (if so equipped) .......................... 2-34
Z
01.9.21/A33-D/V5.0
X
Page 54 of 247
oilº in the ª8. Maintenance and do-it-yourselfº
section.
CAUTION
Running the engine with the oil pressure
warning light on could cause serious
damage to the engine almost immedi-
ately. Turn off the engine as soon as it is
safe to do so.
Low fuel warning light
This light comes on when the fuel in the tank is
getting low. Refuel as soon as it is convenient,
preferably before the fuel gauge reaches E.
There will be a small reserve of fuel remain-
ing in the tank when the fuel gauge needle
reaches E.
Low washer fluid warning
light (if so equipped)
This light comes on when the washer tank fluid
is at a low level. Add washer fluid as neces-
sary. See ªWindow washer fluidº in the ª8.
Maintenance and do-it-yourselfº section.
Seat belt warning light and
chime
The light and chime remind you to fasten seat
belts. The light illuminates whenever the igni-
tion key is turned to ON, and will remain
illuminated until the driver's seat belt is fas-
tened. At the same time, the chime will sound
for about 6 seconds unless the driver's seat
belt is securely fastened.
See ªSeat beltsº in the ª1. Seats, restraints and
supplemental air bag systemsº section for pre-
cautions on seat belt usage.
Stop/tail warning light
If the light comes on with the engine running
when the light switch is on or the brake pedal
is depressed, one or more stop/tail light bulbs
are burned out. Replace the stop/tail light bulb.
Supplemental air bag warning
light
After turning the ignition key to the ON posi-
tion, the supplemental air bag warning light will
illuminate. The supplemental air bag warning
light will turn off after about 7 seconds if the
system is operational.
If any of the following conditions occur, the
supplemental front air bag, supplemental sideair bag (if so equipped) and pre-tensioner seat
belt needs servicing and your vehicle must be
taken to your nearest authorized NISSAN
dealer.
IThe supplemental air bag warning light
remains on after approximately 7 seconds.
IThe supplemental air bag warning light
flashes intermittently.
IThe supplemental air bag warning light
does not come on at all.
Unless checked and repaired, the Supplemen-
tal Restraint System and/or the pre-tensioner
seat belt may not function properly. For addi-
tional information, see ªSupplemental restraint
systemº in the ª1. Seats, restraints and supple-
mental air bag systemsº section.
WARNING
If the supplemental air bag warning light
is on, it could mean that the supplemen-
tal air bag system, supplemental side air
bag system (if so equipped) and/or pre-
tensioner seat belt system will not oper-
ate in an accident.
Instruments and controls
2-9
Z
01.9.21/A33-D/V5.0
X
Page 65 of 247
IDo not use the hazard warning flash-
ers while moving on the highway un-
less unusual circumstances force
you to drive so slowly that your ve-
hicle might become a hazard to other
traffic.
ITurn signals do not work when the
hazard warning flasher lights are on.
The flasher can be actuated with the ignition
switch either off or on.
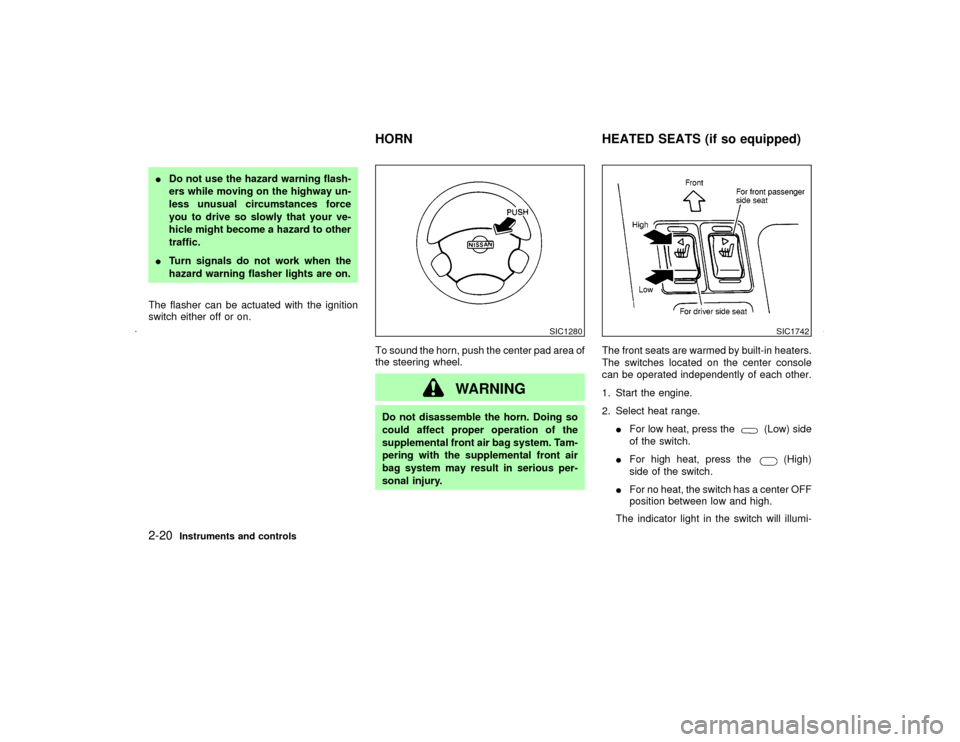
To sound the horn, push the center pad area of
the steering wheel.
WARNING
Do not disassemble the horn. Doing so
could affect proper operation of the
supplemental front air bag system. Tam-
pering with the supplemental front air
bag system may result in serious per-
sonal injury.The front seats are warmed by built-in heaters.
The switches located on the center console
can be operated independently of each other.
1. Start the engine.
2. Select heat range.
IFor low heat, press the
(Low) side
of the switch.
IFor high heat, press the
(High)
side of the switch.
IFor no heat, the switch has a center OFF
position between low and high.
The indicator light in the switch will illumi-
SIC1280
SIC1742
HORN HEATED SEATS (if so equipped)
2-20
Instruments and controls
Z
01.9.21/A33-D/V5.0
X
Page 102 of 247

PROCEDURE FOR STORING
MEMORYTwo positions can be stored in the automatic
driver's seat positioner memory.Follow these
procedures to use the memory system.
1. A/T models:
Set the automatic transmission selector
lever to the P (Park) position.
M/T models:
Apply the parking brake securely when the
vehicle is stopped.
2. Turn the ignition ON.
3. Adjust the driver's seat and steering column
to the desired positions by manually oper-
ating each adjusting switch. For additional
information, see ªSeatsº in the ª1. Seats,
restraints and supplemental air bag sys-
temsº section and ªSteering wheelº earlier
in this section.During this step, do not turn the ignition to
any positions other than ON.
4. Push the SET switch and, within 5 seconds,
push the memory switch 1 or 2 fully for at
least 1 second.
The indicator light for the pushed memory
switch will come on and stay on for approxi-
mately 5 seconds after pushing the switch.
After the indicator light goes off, the se-
lected positions are stored in the selected
memory (1 or 2).
If memory is stored in the same memory
switch, the previous memory will be de-
leted.
Confirming memory storageITurn the ignition ON and push the SET
switch. If the main memory has not been
stored, the indicator light will come on for
approximately 0.5 seconds. When the
memory has stored the position, the indica-
tor light will stay on for approximately 5
seconds.
IIf the battery cable is disconnected, or if the
fuse blows, the memory will be canceled. In
such a case, reset the desired positions
using the following procedures.
1. Open and close the driver's door more than
SPA1385
Pre-driving checks and adjustments
3-17
Z
01.9.21/A33-D/V5.0
X
Page 138 of 247
d. You have had an accident involv-
ing damage to the exhaust system,
underbody, or rear of the vehicle.
THREE WAY CATALYSTThe three way catalyst is an emission control
device installed in the exhaust system. Ex-
haust gases in the converter are burned at
high temperatures to help reduce pollutants.
WARNING
IThe exhaust gas and the exhaust sys-
tem are very hot. Keep people, ani-
mals or flammable materials away
from the exhaust system compo-
nents.
IDo not stop or park the vehicle over
flammable materials such as dry
grass, waste paper or rags. They may
ignite and cause a fire.
CAUTION
IDo not use leaded gasoline. Deposits
from leaded gasoline seriously re-
duce the three way catalyst's ability
to help reduce exhaust pollutants.
IKeep your engine tuned up. Malfunc-
tions in the ignition, fuel injection, or
electrical systems can cause over-
rich fuel flow into the three way cata-
lyst, causing it to overheat. Do not
keep driving if the engine misfires, or
if noticeable loss of performance or
other unusual operating conditions
are detected. Have the vehicle in-
spected promptly by an authorized
NISSAN dealer.
IAvoid driving with an extremely low
fuel level. Running out of fuel could
cause the engine to misfire, damag-
ing the three way catalyst.
IDo not race the engine while warming
it up.
IDo not push or tow your vehicle to
start the engine.
AVOIDING COLLISION AND
ROLLOVER
WARNING
Failure to operate this vehicle in a safe
and prudent manner may result in loss
of control or an accident.
Be alert and drive defensively at all times.
Obey all traffic regulations. Avoid excessive
speed, high speed cornering, or sudden steer-
ing maneuvers, because these driving prac-
tices could cause you to lose control of your
vehicle.As with any vehicle, a loss of con-
trol could result in a collision with other
vehicles or objects, or cause the vehicle to
rollover, particularly if the loss of control
causes the vehicle to slide sideways.Be
attentive at all times, and avoid driving when
tired. Never drive when under the influence of
alcohol or drugs (including prescription or
over-the-counter drugs which may cause
drowsiness). Always wear your seat belt. See
ªSeat Beltsº in the ª1. Seats, restraints and
supplemental air bag systemsº section. Also
instruct your passengers to do so.
Starting and driving
5-3
Z
01.9.21/A33-D/V5.0
X
Page 173 of 247
and a soft cloth will easily remove this film.
CAUTION
When cleaning the inside of the window,
do not use sharp-edged tools, abrasive
cleaners or chlorine based disinfectant
cleaners. They could damage the elec-
trical conductors, radio antenna ele-
ments or rear window defogger ele-
ments.ALUMINUM ALLOY WHEELSWash regularly, especially during winter
months in areas where road salt is used. Salt
could discolor the wheel if not removed.CHROME PARTSClean all chrome parts regularly with a non-
abrasive chrome polish to maintain the finish.Occasionally remove loose dust from the inte-
rior trim, plastic parts and seats using a
vacuum cleaner or soft brush. Wipe the vinyl
and leather surfaces with a clean, soft cloth
dampened in mild soap solution, then wipe
clean with a dry soft cloth. Before using any
fabric protector, read the manufacturer's rec-
ommendations. Some fabric protectors con-
tain chemicals that may stain or bleach the
seat material.
Use a cloth dampened only with water, to
clean the meter and gauge lens.
CAUTION
INever use gasoline, thinner, or any
similar material.
IThe leather seats should be regularly
coated with a leather wax like saddle
soap. Never use car wax.
INever use fabric protectors unless
recommended by the manufacturer.
IDo not use glass or plastic cleaner on
meter or gauge lens covers. It may
damage the lens cover.
FLOOR MATSThe use of Genuine Nissan floor mats can
extend the life of your vehicle carpet and make
it easier to clean the interior.No matter what
mats are used, be sure they are fitted for
your vehicle and are properly positioned in
the footwell to prevent interference with
pedal operation.Mats should be maintained
with regular cleaning and replaced if they
become excessively worn.
CLEANING INTERIOR
7-4
Appearance and care
Z
01.9.21/A33-D/V5.0
X
Page 178 of 247

Tire rotation*:Tires should be rotated every
7,500 miles (12,000 km).
Wheel alignment and balance:If the vehicle
pulls to either side while driving on a straight
and level road, or if you detect uneven or
abnormal tire wear, there may be a need for
wheel alignment.
If the steering wheel or seat vibrates at normal
highway speeds, wheel balancing may be
needed.
For additional information regarding tires, refer
to ªImportant Tire Safety Informationº in the
Warranty Information Booklet (US) or ªTire
Safety Informationº in the Warranty and Road-
side Assistance Information booklet (Canada).
Windshield:Clean the windshield on a regu-
lar basis. Check the windshield at least every
six months for cracks or other damage. Have a
damaged windshield repaired by a qualified
repair facility.
Windshield wiper blades*:Check for cracks
or wear if they do not wipe properly.
Doors and engine hood:Check that all doors
and the engine hood operate smoothly as well
as the trunk lid or back hatch. Also make sure
that all latches lock securely. Lubricate if nec-
essary. Make sure that the secondary latchkeeps the hood from opening when the pri-
mary latch is released.
When driving in areas using road salt or other
corrosive materials, check lubrication fre-
quently.
Lights*:Clean the headlights on a regular
basis. Make sure that the headlights, stop
lights, tail lights, turn signal lights, and other
lights are all operating properly and installed
securely. Also check headlight aim.
Inside the vehicleThe maintenance items listed here should be
checked on a regular basis, such as when
performing periodic maintenance, cleaning the
vehicle, etc.
Warning lights and chimes:Make sure that
all warning lights and chimes are operating
properly.
Windshield wiper and washer*:Check that
the wipers and washer operate properly and
that the wipers do not streak.
Windshield defroster:Check that the air
comes out of the defroster outlets properly and
in good quantity when operating the heater or
air conditioner.
Steering wheel:Check for changes in the
steering conditions, such as excessive freeplay, hard steering or strange noises.
Seats:Check seat position controls such as
seat adjusters, seatback recliner, etc. to en-
sure they operate smoothly and that all latches
lock securely in every position. Check that the
head restraints move up and down smoothly
and that the locks (if equipped) hold securely
in all latched positions.
Seat belts:Check that all parts of the seat belt
system (for example, buckles, anchors, adjust-
ers and retractors) operate properly and
smoothly, and are installed securely. Check
the belt webbing for cuts, fraying, wear or
damage.
Accelerator pedal:Check the pedal for
smooth operation and make sure the pedal
does not catch or require uneven effort. Keep
the floor mats away from the pedal.
Clutch pedal*:Make sure the pedal operates
smoothly and check that it has the proper free
play.
Brakes:Check that the brakes do not pull the
vehicle to one side when applied.
Brake pedal and booster*:Check the pedal
for smooth operation and make sure it has the
proper distance under it when depressed fully.
Check the brake booster function. Be sure to
keep floor mats away from the pedal.
Maintenance and do-it-yourself
8-3
Z
01.9.21/A33-D/V5.0
X
Page 229 of 247
before placing the license plate bracket on
the fascia.
7. Install the license plate bracket with screws.
8. Install the license plate with bolts that are
no longer than 0.55 in (14 mm).
WARNING
IIt is extremely dangerous to ride in a
cargo area inside of a vehicle. In a
collision, people riding in these areas
are more likely to be seriously injured
or killed
IDo not allow people to ride in any
area of your vehicle that is not
equipped with seats and seat belts.
IBe sure everyone in your vehicle is in
a seat and using a seat belt properly.TERMSIt is important to familiarize yourself with the
following terms before loading your vehicle:
ICurb Weight (actual weight of your vehicle)
- vehicle weight including: standard and
optional equipment, fluids, emergency
tools, and spare tire assembly. This weight
does notinclude passengers and cargo.
IGVW (Gross Vehicle Weight) - curb weight
plus the combined weight of passengers
and cargo.IGVWR (Gross Vehicle Weight Rating) -
maximum total weight (load) limit specified
for the vehicle.
IGAWR (Gross Axle Weight Rating) - maxi-
mum weight (load) limit specified for the
front or rear axle.
DETERMINING VEHICLE LOAD
CAPACITYThe load capacity of this vehicle is determined
by weight, not by available cargo space. For
example, a luggage rack, bike carrier, cartop
carrier or similar equipment does not increase
load carrying capacity of your vehicle.
To determine vehicle load capacity:
Vehicle weight can be determined by using a
commercial-grade scale, found at places such
as a truck stop, gravel quarry, grain elevator,
or a scrap metal recycling facility.
1. Determine the curb weight of your vehicle.
2. Compare the curb weight amount to the
GVWR specified for your vehicle to deter-
mine how much more weight your vehicle
can carry.
3. After loading (cargo and passengers), re-
weigh your vehicle to determine if either
GVWR or GAWR for your vehicle is ex-
VEHICLE LOADING
INFORMATION
9-14
Technical and consumer information
Z
01.9.21/A33-D/V5.0
X