2002 NISSAN MAXIMA ignition
[x] Cancel search: ignitionPage 58 of 247

comes on. The SECURITY indicator light
glows for about 30 seconds and then blinks.
The system is now activated. If, during this
30 second time period, the door is unlocked
by the key or the keyfob, or the ignition key
is turned to ACC or ON, the system will not
activate.
IIf the key is turned slowly toward the
front of the vehicle when locking the
door, the system may not activate. If the
key is returned beyond the vertical po-
sition toward the rear of the vehicle to
remove the key, the system may be
deactivated. If the indicator light fails to
glow for 30 seconds, unlock the door
once and lock it again.
IEven when the driver and/or passengers
are in the vehicle, the system will acti-
vate with all doors, hood and trunk lid
locked and ignition key off. Turn the
ignition key to ACC to turn the system
off.
Vehicle security system operationThe security system will give the following
alarm:
IThe headlights blink and the horn sounds
intermittently.
IThe alarm automatically turns off after ap-proximately 1 minute. However, the alarm
reactivates if the vehicle is tampered with
again. The alarm can be shut off by unlock-
ing a door or trunk lid with the key, or by
pressing the UNLOCK button on the key-
fob.
The alarm is activated by:
IOpening the door without using the key or
keyfob.
IOpening the trunk lid without using the key
or keyfob.
IOpening the hood.
How to stop alarmThe alarm will stop only by unlocking a door or
trunk lid with the key, or by pressing the
UNLOCK button on keyfob. The alarm will not
stop if the ignition switch is turned to ACC or
ON.
If the system does not operate as de-
scribed above, have it checked by your
NISSAN dealer.NISSAN VEHICLE IMMOBILIZER
SYSTEMThe Nissan Vehicle Immobilizer System will
not allow the engine to start without the use ofthe registered Nissan Vehicle Immobilizer Sys-
tem key.
If the engine fails to start using the registered
Nissan Vehicle Immobilizer System key, it may
be due to interference caused by another
Nissan Vehicle Immobilizer System key, an
automated toll road device or automated pay-
ment device on the key ring. Restart the en-
gine using the following procedures:
1. Leave the ignition switch in the ON position
for approximately 5 seconds.
2. Turn the ignition switch to the OFF or LOCK
position and wait approximately 10 sec-
onds.
3. Repeat step 1 and 2 again.
4. Restart the engine while holding the device
(which may have caused the interference)
separate from the registered Nissan Ve-
hicle Immobilizer System key.
If this procedure allows the engine to start,
NISSAN recommends placing the regis-
tered Nissan Vehicle Immobilizer System
key on a separate key ring to avoid inter-
ference from other devices.
Statement related to section 15 of FCC
rules for Nissan Vehicle Immobilizer Sys-
tem (CONT ASSY-IMMOBILIZER)
Instruments and controls
2-13
Z
01.9.21/A33-D/V5.0
X
Page 59 of 247

This device complies with part 15 of the
FCC Rules. Operation is subject to the
following two conditions;
(1) This device may not cause harmful
interference, and (2) this device must ac-
cept any interference received, including
interference that may cause undesired op-
eration.
Security indicator lightIf Nissan Vehicle Immobilizer System is mal-
functioning, this light will remain on while the
ignition key is in the ON position.
If the light still remains on and/or the en-
gine will not start, see your NISSAN dealer
for Nissan Vehicle Immobilizer System ser-
vice as soon as possible. Please bring all
Nissan Vehicle Immobilizer System keys
that you have when visiting your NISSAN
dealer for service.The windshield wiper and washer operates
when the ignition key is in the ON position.
Push the lever down to operate the wiper.
Intermittent operation can be adjusted from 2
to 13 seconds by turning the knob.
Pull the lever toward you to operate the
washer. Then the wiper will also operate sev-
eral times.
SIC1228
SIC1739
WINDSHIELD WIPER AND
WASHER SWITCH
2-14
Instruments and controls
Z
01.9.21/A33-D/V5.0
X
Page 62 of 247

IThe life of xenon headlights will be
shortened by frequent on-off operation.
It is generally desirable not to turn off
the headlights for short intervals, (for
example, when the vehicle stops at a
traffic signal). Even when the daytime
running lights are active (Canada only),
the xenon headlights do not turn on.
This way the life of the xenon headlights
is not reduced.
IIf the xenon headlight bulb is close to
burning out, the brightness will drasti-
cally decrease, the light will start blink-
ing, or the color of the light will become
reddish. If one or more of the above
signs appear, contact a NISSAN dealer.HEADLIGHT SWITCH
LightingTurn the switch to the AUTO position:
When the ignition key is in the ON position, the
tail light, headlight, instrument light and other
lights turn on automatically, depending on the
brightness of the surroundings. The headlight
will automatically turn off 5 minutes after the
ignition switch is turned to the OFF position
and the driver's or front passenger's door is
opened.The headlight will also automatically turn off 45
seconds after a front door is opened and
closed.
When the light switch is turned to the
po-
sition, the headlight low or high beam will turn
off.
Turn the switch to the
position:
The front clearance, side marker, tail, license
plate and instrument lights will come on.
Turn the switch to theposition:
Headlights will come on and all the other lights
remain on.
Be sure not to put anything on top of the
photo sensor located on the top left-hand
side of the instrument panel. The photo
sensor controls the autolamp; if it is cov-
ered, the photo sensor reacts as if it is dark
and the headlights will illuminate.
Battery saver systemIWhen the headlight switch is in the
or
position while the ignition switch is in
the ON position, the lights (including the
front fog light) will automatically turn off 5
minutes after the ignition switch has been
turned to the OFF position.
SIC1230
Instruments and controls
2-17
Z
01.9.21/A33-D/V5.0
X
Page 63 of 247
IWhen the headlight switch remains in the
or
position after the lights auto-
matically turn off, the lights will turn on for 5
minutes when the headlight switch is turned
to the OFF position and turn to the
or
position.
CAUTION
IWhen you turn on the headlight
switch after the lights automatically
turn off, the lights will not turn off
automatically. Be sure to turn the
light switch to the OFF position when
you leave the vehicle for extended
periods of time, otherwise the battery
will go dead.
INever leave the light switch on when
the engine is not running for ex-
tended periods of time even if the
headlights turn off automatically.
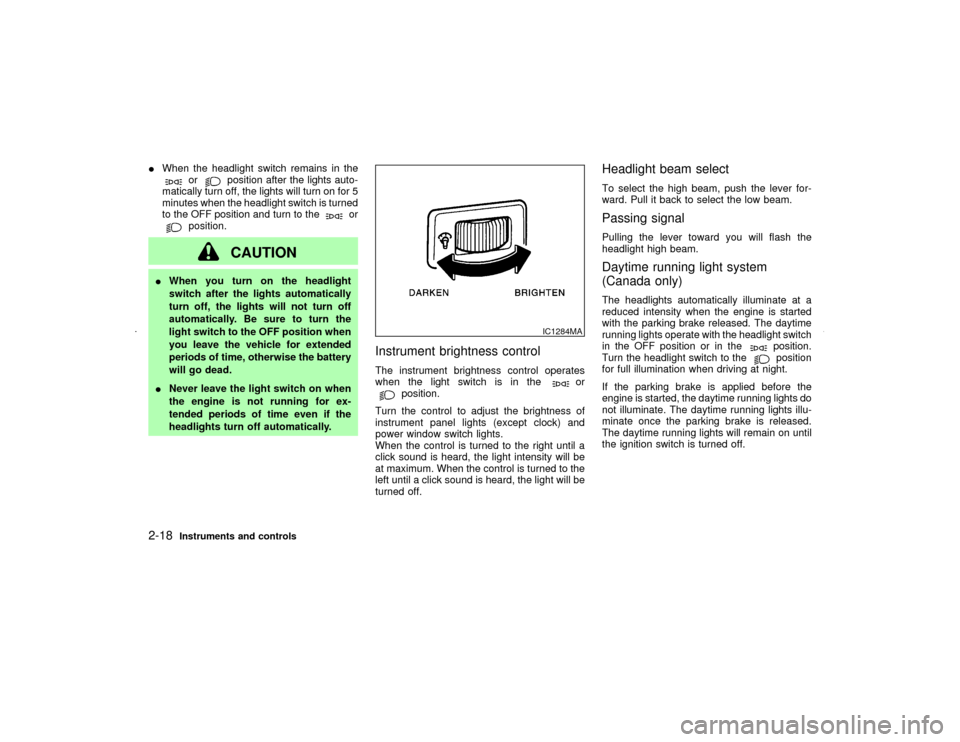
Instrument brightness controlThe instrument brightness control operates
when the light switch is in the
or
position.
Turn the control to adjust the brightness of
instrument panel lights (except clock) and
power window switch lights.
When the control is turned to the right until a
click sound is heard, the light intensity will be
at maximum. When the control is turned to the
left until a click sound is heard, the light will be
turned off.
Headlight beam selectTo select the high beam, push the lever for-
ward. Pull it back to select the low beam.Passing signalPulling the lever toward you will flash the
headlight high beam.Daytime running light system
(Canada only)The headlights automatically illuminate at a
reduced intensity when the engine is started
with the parking brake released. The daytime
running lights operate with the headlight switch
in the OFF position or in the
position.
Turn the headlight switch to theposition
for full illumination when driving at night.
If the parking brake is applied before the
engine is started, the daytime running lights do
not illuminate. The daytime running lights illu-
minate once the parking brake is released.
The daytime running lights will remain on until
the ignition switch is turned off.
IC1284MA
2-18
Instruments and controls
Z
01.9.21/A33-D/V5.0
X
Page 65 of 247
IDo not use the hazard warning flash-
ers while moving on the highway un-
less unusual circumstances force
you to drive so slowly that your ve-
hicle might become a hazard to other
traffic.
ITurn signals do not work when the
hazard warning flasher lights are on.
The flasher can be actuated with the ignition
switch either off or on.
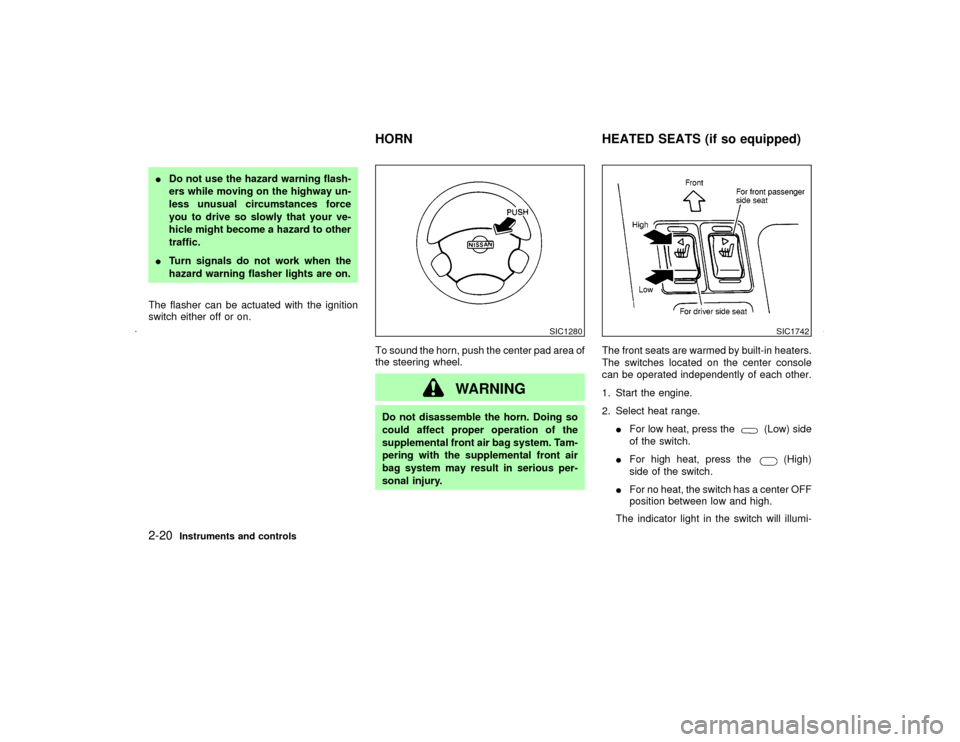
To sound the horn, push the center pad area of
the steering wheel.
WARNING
Do not disassemble the horn. Doing so
could affect proper operation of the
supplemental front air bag system. Tam-
pering with the supplemental front air
bag system may result in serious per-
sonal injury.The front seats are warmed by built-in heaters.
The switches located on the center console
can be operated independently of each other.
1. Start the engine.
2. Select heat range.
IFor low heat, press the
(Low) side
of the switch.
IFor high heat, press the
(High)
side of the switch.
IFor no heat, the switch has a center OFF
position between low and high.
The indicator light in the switch will illumi-
SIC1280
SIC1742
HORN HEATED SEATS (if so equipped)
2-20
Instruments and controls
Z
01.9.21/A33-D/V5.0
X
Page 72 of 247
WARNING
IProperly secure all cargo to help pre-
vent it from sliding or shifting.
IBe sure to secure hooks into the
retainers. The cargo restrained in the
net must not exceed 30 lb (13.6 kg) or
the net may not stay secured.
POWER WINDOWS
WARNING
IMake sure that all passengers have
their hands, etc. inside the vehicle
before closing the windows. Use the
window lock switch to prevent unex-
pected use of the power windows.
IDo not leave children unattended in-
side the vehicle. They could unknow-
ingly activate switches or controlsand become trapped in a window.
Unattended children could become
involved in serious accidents.
The power windows operate when the ignition
key is in the ON position and for about 45
seconds, after the ignition key is turned to the
OFF position. If the driver's door or the front
passenger's door is opened during this period
of about 45 seconds, power to the windows is
canceled.
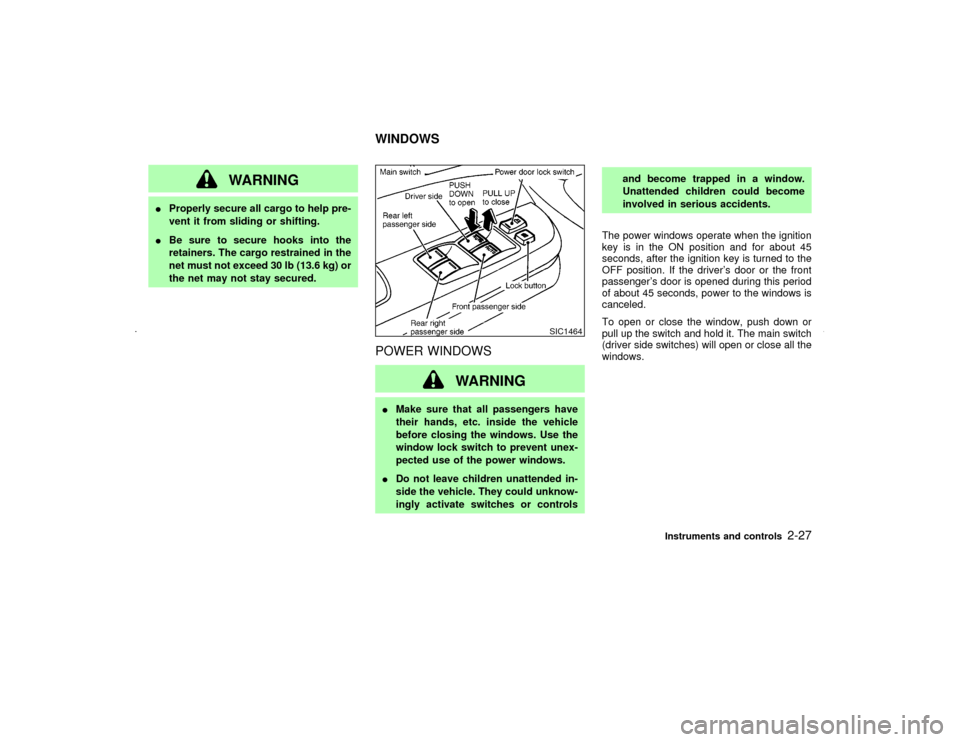
To open or close the window, push down or
pull up the switch and hold it. The main switch
(driver side switches) will open or close all the
windows.
SIC1464
WINDOWS
Instruments and controls
2-27
Z
01.9.21/A33-D/V5.0
X
Page 73 of 247
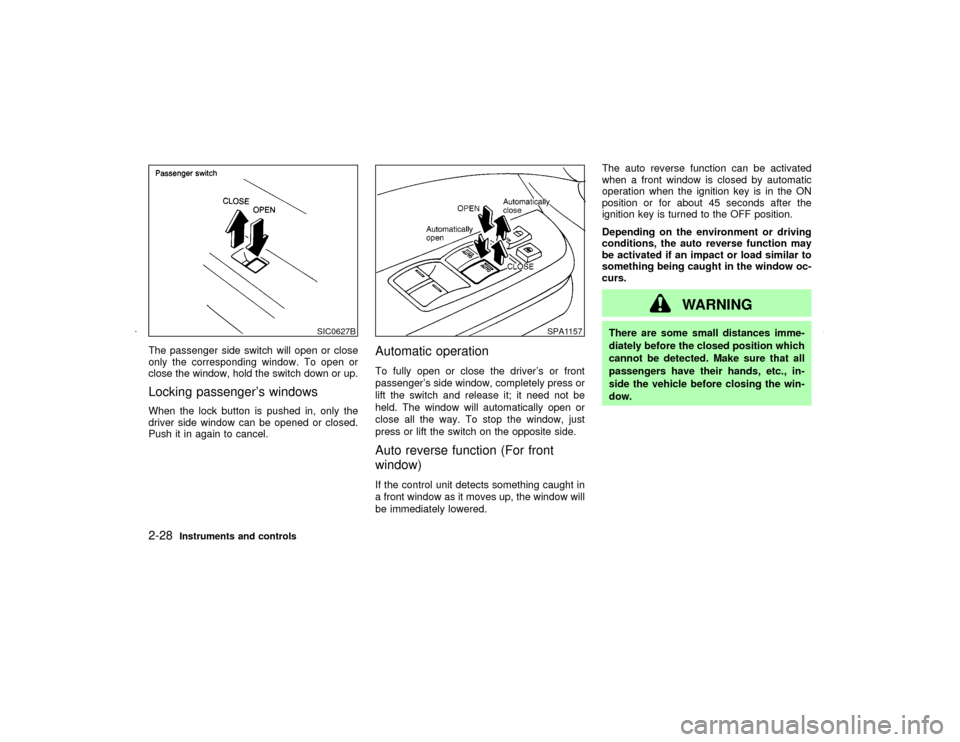
The passenger side switch will open or close
only the corresponding window. To open or
close the window, hold the switch down or up.Locking passenger's windowsWhen the lock button is pushed in, only the
driver side window can be opened or closed.
Push it in again to cancel.
Automatic operationTo fully open or close the driver's or front
passenger's side window, completely press or
lift the switch and release it; it need not be
held. The window will automatically open or
close all the way. To stop the window, just
press or lift the switch on the opposite side.Auto reverse function (For front
window)If the control unit detects something caught in
a front window as it moves up, the window will
be immediately lowered.The auto reverse function can be activated
when a front window is closed by automatic
operation when the ignition key is in the ON
position or for about 45 seconds after the
ignition key is turned to the OFF position.
Depending on the environment or driving
conditions, the auto reverse function may
be activated if an impact or load similar to
something being caught in the window oc-
curs.
WARNING
There are some small distances imme-
diately before the closed position which
cannot be detected. Make sure that all
passengers have their hands, etc., in-
side the vehicle before closing the win-
dow.
SIC0627B
SPA1157
2-28
Instruments and controls
Z
01.9.21/A33-D/V5.0
X
Page 74 of 247
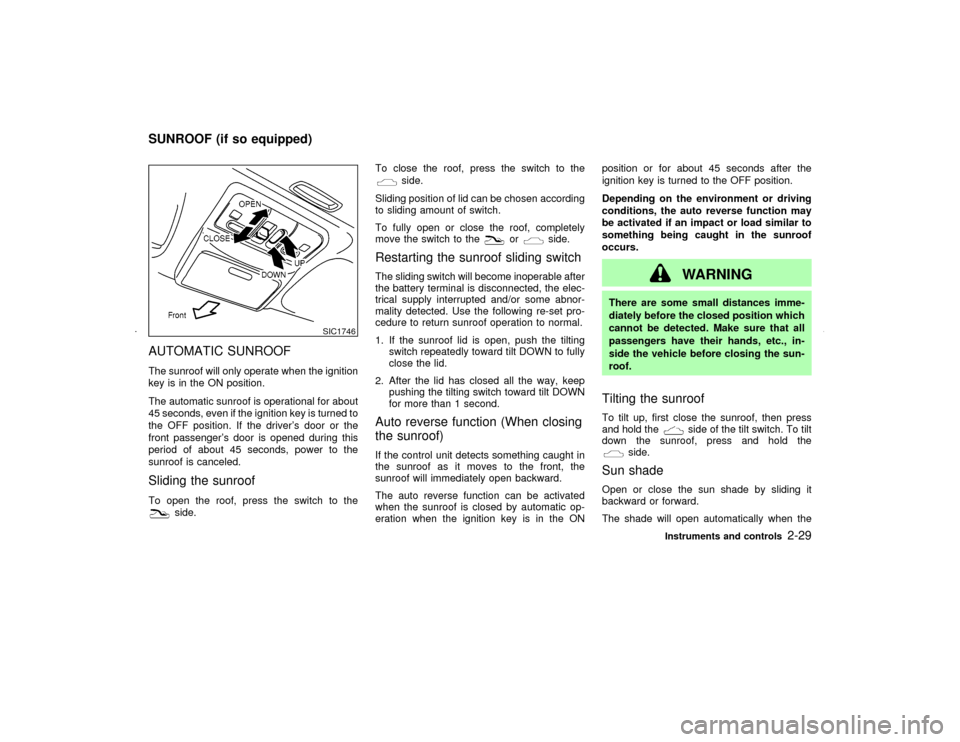
AUTOMATIC SUNROOFThe sunroof will only operate when the ignition
key is in the ON position.
The automatic sunroof is operational for about
45 seconds, even if the ignition key is turned to
the OFF position. If the driver's door or the
front passenger's door is opened during this
period of about 45 seconds, power to the
sunroof is canceled.Sliding the sunroofTo open the roof, press the switch to the
side.To close the roof, press the switch to the
side.
Sliding position of lid can be chosen according
to sliding amount of switch.
To fully open or close the roof, completely
move the switch to the
or
side.
Restarting the sunroof sliding switchThe sliding switch will become inoperable after
the battery terminal is disconnected, the elec-
trical supply interrupted and/or some abnor-
mality detected. Use the following re-set pro-
cedure to return sunroof operation to normal.
1. If the sunroof lid is open, push the tilting
switch repeatedly toward tilt DOWN to fully
close the lid.
2. After the lid has closed all the way, keep
pushing the tilting switch toward tilt DOWN
for more than 1 second.Auto reverse function (When closing
the sunroof)If the control unit detects something caught in
the sunroof as it moves to the front, the
sunroof will immediately open backward.
The auto reverse function can be activated
when the sunroof is closed by automatic op-
eration when the ignition key is in the ONposition or for about 45 seconds after the
ignition key is turned to the OFF position.
Depending on the environment or driving
conditions, the auto reverse function may
be activated if an impact or load similar to
something being caught in the sunroof
occurs.
WARNING
There are some small distances imme-
diately before the closed position which
cannot be detected. Make sure that all
passengers have their hands, etc., in-
side the vehicle before closing the sun-
roof.Tilting the sunroofTo tilt up, first close the sunroof, then press
and hold the
side of the tilt switch. To tilt
down the sunroof, press and hold the
side.
Sun shadeOpen or close the sun shade by sliding it
backward or forward.
The shade will open automatically when the
SIC1746
SUNROOF (if so equipped)
Instruments and controls
2-29
Z
01.9.21/A33-D/V5.0
X