2002 NISSAN MAXIMA Transmission
[x] Cancel search: TransmissionPage 152 of 247
WARNING
ISafe parking procedures require that
both the parking brake be set and the
transmission placed into P (Park) for
automatic transmission models or in
an appropriate gear for manual trans-
mission models. Failure to do so
could cause the vehicle to move un-
expectedly or roll away and result in
an accident.
IMake sure the automatic transmis-
sion selector lever has been pushed
as far forward as it can go and cannot
be moved without depressing the
button at the end of the lever.
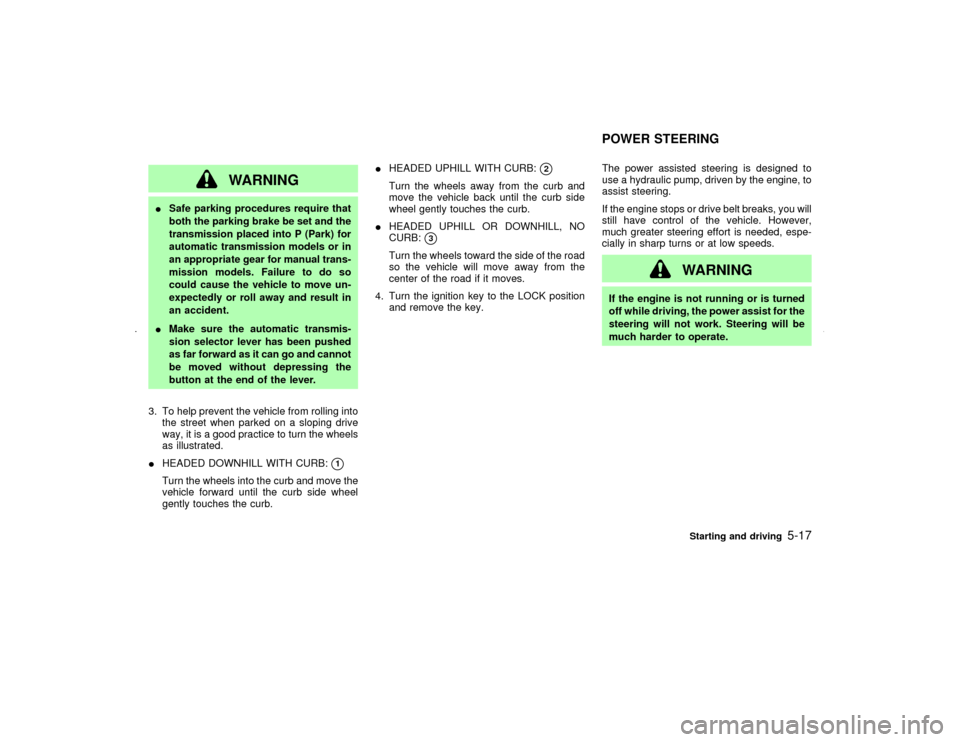
3. To help prevent the vehicle from rolling into
the street when parked on a sloping drive
way, it is a good practice to turn the wheels
as illustrated.
IHEADED DOWNHILL WITH CURB:
q1
Turn the wheels into the curb and move the
vehicle forward until the curb side wheel
gently touches the curb.IHEADED UPHILL WITH CURB:
q2
Turn the wheels away from the curb and
move the vehicle back until the curb side
wheel gently touches the curb.
IHEADED UPHILL OR DOWNHILL, NO
CURB:
q3
Turn the wheels toward the side of the road
so the vehicle will move away from the
center of the road if it moves.
4. Turn the ignition key to the LOCK position
and remove the key.The power assisted steering is designed to
use a hydraulic pump, driven by the engine, to
assist steering.
If the engine stops or drive belt breaks, you will
still have control of the vehicle. However,
much greater steering effort is needed, espe-
cially in sharp turns or at low speeds.
WARNING
If the engine is not running or is turned
off while driving, the power assist for the
steering will not work. Steering will be
much harder to operate.POWER STEERING
Starting and driving
5-17
Z
01.9.21/A33-D/V5.0
X
Page 154 of 247
conditions are hazardous and extra care is
required while driving.Self-test featureThe anti-lock brake system consists of elec-
tronic sensors, electric pumps, and hydraulic
solenoids controlled by a computer. The com-
puter has a built-in diagnostic feature that tests
the system each time you start the engine and
move the vehicle at a low speed in forward or
reverse. When the self-test occurs, you may
hear a clunk noise and/or feel a pulsation in
the brake pedal. This is normal and is not an
indication of any malfunction. If the computer
senses any malfunction, it switches the anti-
lock brake system OFF and turns on the ABS
warning light in the dashboard. The brake
system will then behave normally, but without
anti-lock assistance.
If the light comes on during the self check, or
while you are driving, you should take your
vehicle to your NISSAN dealer for repair at
your earliest convenience.
WARNING
The anti-lock brake system is a sophis-
ticated device, but it cannot prevent ac-cidents resulting from careless or dan-
gerous driving techniques. It can help
maintain vehicle control during braking
on slippery surfaces, but remember that
the stopping distance on slippery sur-
faces will be longer than on normal
surfaces, even with the anti-lock sys-
tem. Stopping distances may also be
longer on rough, gravel or snow covered
roads, or if you are using tire chains.
Always maintain a safe distance from
the vehicle in front of you. Ultimately,
the responsibility for safety of self and
others rests in the hands of the driver.
Tire type and condition of tires may also
affect braking effectiveness.
IWhen replacing tires, install the
specified size of tires on all four
wheels.
IWhen installing a spare tire, make
sure it is the proper size and type as
specified on the tire placard. See ªVe-
hicle identificationº in the ª10. Tech-
nical and consumer informationº sec-
tion for tire placard location.On slippery surfaces such as wet asphalt
roads, vehicle wheels may spin when the
vehicle is accelerated. This wheel spin re-
duces acceleration, or causes the vehicle to
swerve, thus decreasing vehicle stability.
The traction control system helps limit wheel
spin on slippery roads. The system operates
only if it senses one or both of the front wheels
spinning or beginning to lose traction. When
this happens, the system reduces engine
power and may also upshift the transmission
to help limit wheel spin.
IIndicator light
If a malfunction occurs in the traction con-
trol system, the SLIP and
indicator
lights come on in the meter panel.
As long as these warning lights are on, the
traction control function is canceled. The
vehicle will behaves like a model without
the traction control system.
CAUTION
IThe traction control system is most
effective when the transmission gear
selector is in the D position.
IIf you drive in gear 1 or 2 with the TCSTRACTION CONTROL SYSTEM (if
so equipped)
Starting and driving
5-19
Z
01.9.21/A33-D/V5.0
X
Page 159 of 247
CHANGING A FLAT TIREIf you have a flat tire, follow the instructions
below.Stopping the vehicle1. Safely move the vehicle off the road away
from traffic.
2. Turn on the hazard warning flashers.
3. Park on a level surface and apply the
parking brake. Shift the manual transmis-
sion into R (Reverse) position (automatic
transmission in P (Park) position).
4. Turn off the engine.
5. Raise the hood to warn other traffic, and to
signal professional road assistance person-
nel that you need assistance.
6. Have all passengers get out of the vehicle
and stand in a safe place, away from traffic
and clear of the vehicle.
WARNING
IMake sure that the parking brake is
securely applied and the manual
transmission is shifted into R (Re-verse), or the automatic transmission
into P (Park).
INever change tires when the vehicle
is on a slope, ice or slippery areas.
This is hazardous.
INever change tires if oncoming traffic
is close to your vehicle. Wait for pro-
fessional road assistance.
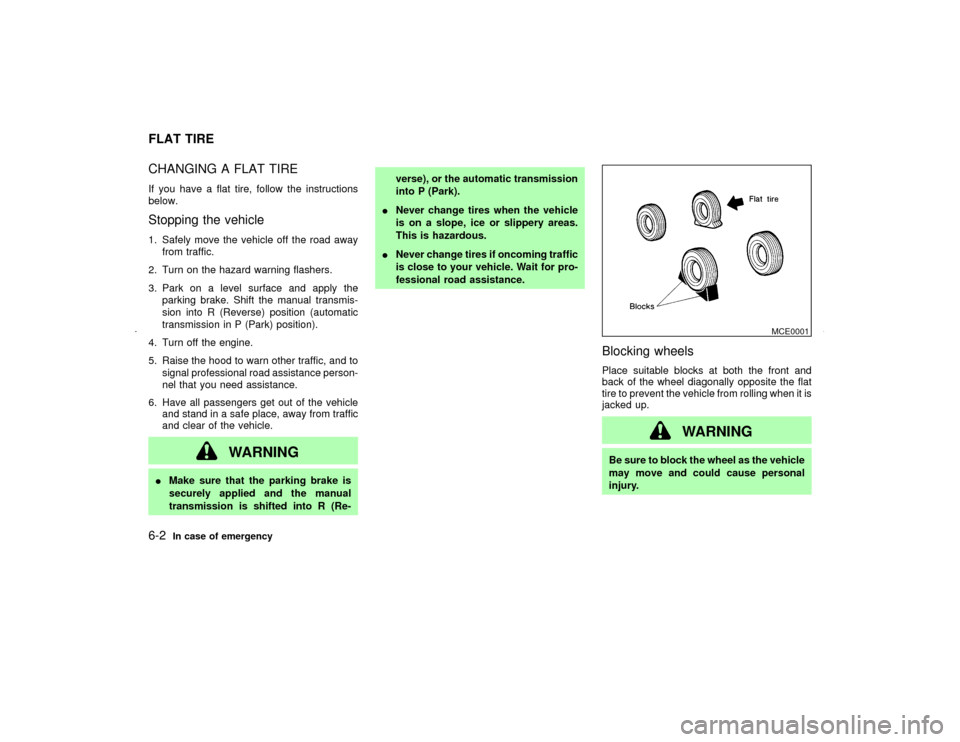
Blocking wheelsPlace suitable blocks at both the front and
back of the wheel diagonally opposite the flat
tire to prevent the vehicle from rolling when it is
jacked up.
WARNING
Be sure to block the wheel as the vehicle
may move and could cause personal
injury.
MCE0001
FLAT TIRE6-2
In case of emergency
Z
01.9.21/A33-D/V5.0
X
Page 164 of 247
IThe booster battery must be rated at
12 volts. Use of an improperly rated
battery can damage your vehicle.
IWhenever working on or near a bat-
tery, always wear suitable eye protec-
tors (for example, goggles or indus-
trial safety spectacles) and remove
rings, metal bands, or any other jew-
elry. Do not lean over the battery
when jump starting.
IDo not attempt to jump start a frozen
battery. It could explode and cause
serious injury.
IYour vehicle has an automatic engine
cooling fan. It could come on at any
time. Keep hands and other objects
away from it.
WARNING
Always follow the instructions below.
Failure to do so could result in damage
to the charging system and cause per-
sonal injury.
1. If the booster battery is in another vehicle,
position the two vehicles to bring their bat-
teries into close proximity to each other.
Do not allow the two vehicles to touch.
2. Apply parking brake. Move the shift lever tothe N (Neutral) position (On automatic
transmission models, move the selector
lever to the P (Park) position). Switch off all
unnecessary electrical systems (light,
heater, air conditioner, etc.).
3. Remove vent caps on the battery (if so
equipped). Cover the battery with an old
cloth to reduce explosion hazard.
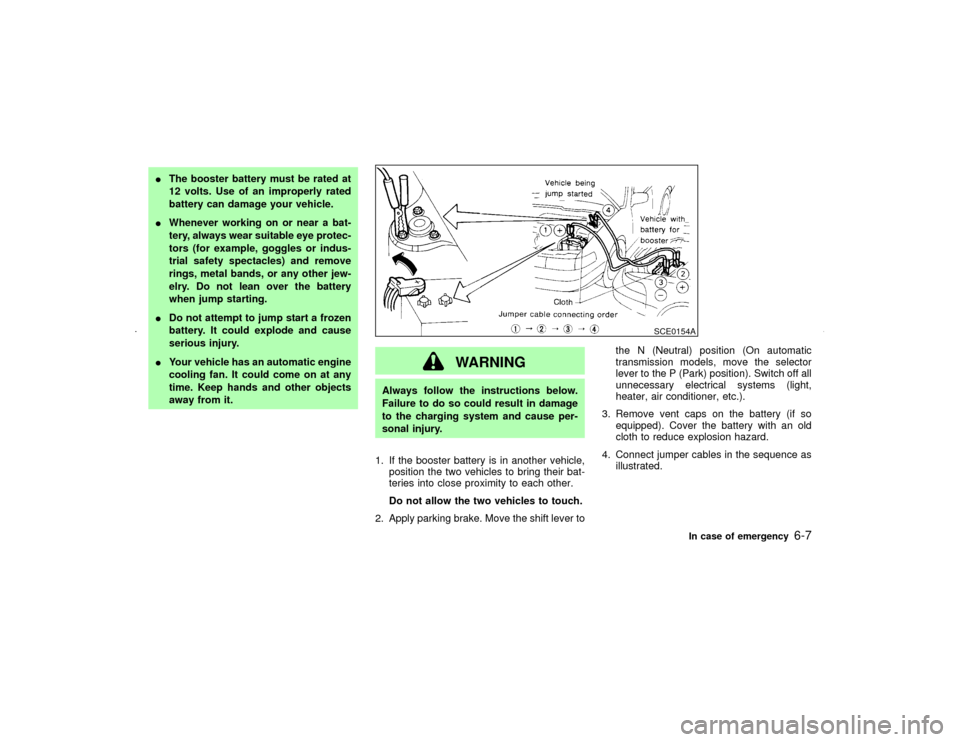
4. Connect jumper cables in the sequence as
illustrated.
SCE0154A
In case of emergency
6-7
Z
01.9.21/A33-D/V5.0
X
Page 165 of 247
CAUTION
IAlways connect positive (+) to posi-
tive (+) and negative (þ) to body
ground (for example, strut mounting
bolt, etc. Ð not to the battery).
IMake sure that cables do not touch
moving parts in the engine compart-
ment and that clamps do not contact
any other metal.
5. Start the engine of the other vehicle and let
it run for a few minutes.
6. Keep the engine speed of the other vehicle
at about 2,000 rpm, and start your engine in
the normal manner.
CAUTION
Do not keep starter motor engaged for
more than 10 seconds. If the engine
does not start right away, turn the key
off and wait 3 to 4 seconds before trying
again.7. After starting your engine, carefully discon-
nect the negative cable and then the posi-
tive cable.
8. Replace the vent caps (if so equipped). Be
sure to dispose of the cloth used to cover
the vent holes as it may be contaminated
with corrosive acid.Do not start the engine by pushing.
CAUTION
IAutomatic transmission models can-
not be push started. This may cause
transmission damage.
IThree way catalyst equipped models
should not be started by pushing
since the three way catalyst may be
damaged.
INever try to start the vehicle by tow-
ing it; when the engine starts, the
forward surge could cause the ve-
hicle to collide with the tow vehicle.PUSH STARTING
6-8
In case of emergency
Z
01.9.21/A33-D/V5.0
X
Page 167 of 247
When towing your vehicle, all State (Provincial
in Canada) and local regulations for towing
must be followed. Incorrect towing equipment
could damage your vehicle. Towing instruc-
tions are available from an authorized NISSAN
dealer. Local service operators are generally
familiar with the applicable laws and proce-
dures for towing. To assure proper towing and
to prevent accidental damage to your vehicle,
NISSAN recommends having a service opera-
tor tow your vehicle. It is advisable to have the
service operator carefully read the following
precautions.
WARNING
INever ride in a vehicle that is being
towed.
INever get under your vehicle after it
has been lifted by a tow truck.
CAUTION
IWhen towing, make sure that the
transmission, axles, steering systemand powertrain are in working condi-
tion. If any unit is damaged, dollies
must be used.
IAlways attach safety chains before
towing.
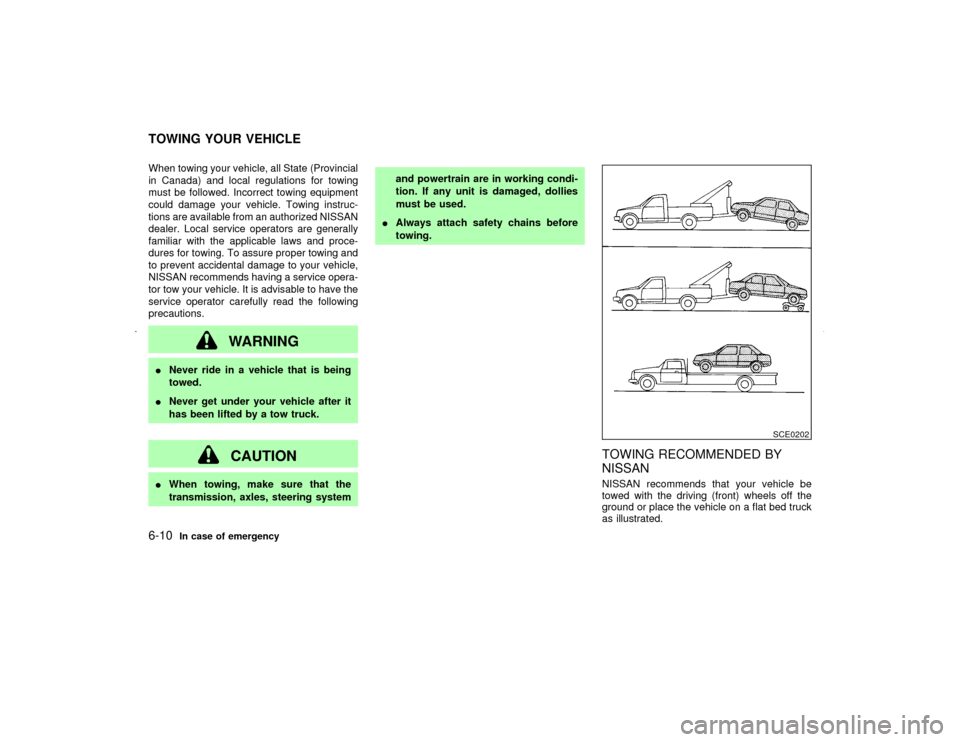
TOWING RECOMMENDED BY
NISSANNISSAN recommends that your vehicle be
towed with the driving (front) wheels off the
ground or place the vehicle on a flat bed truck
as illustrated.
SCE0202
TOWING YOUR VEHICLE6-10
In case of emergency
Z
01.9.21/A33-D/V5.0
X
Page 168 of 247
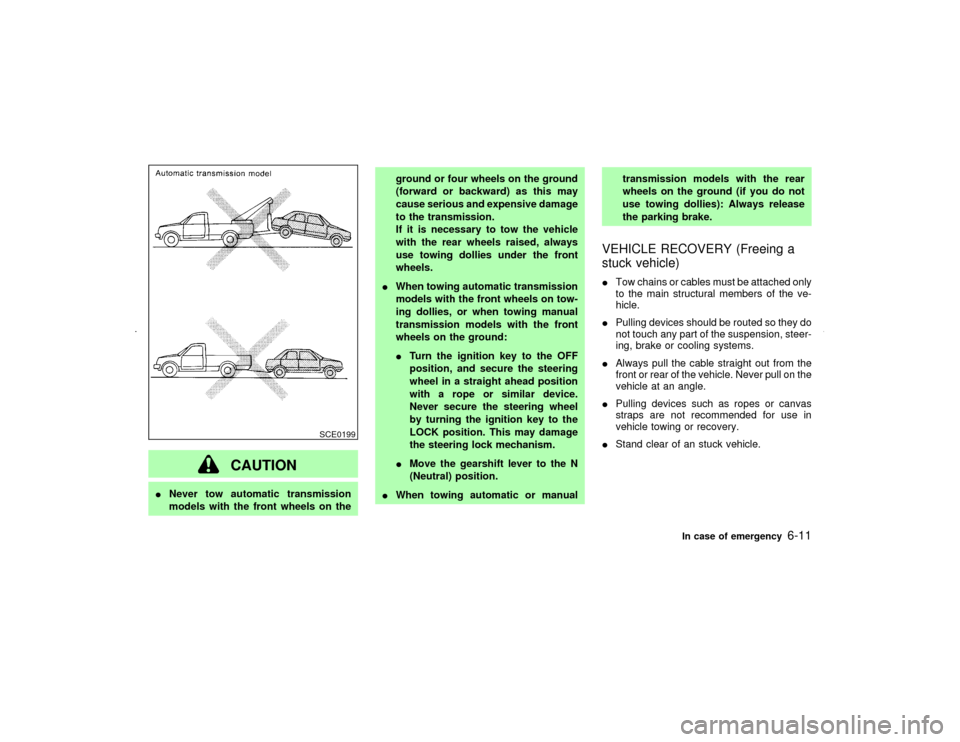
CAUTION
INever tow automatic transmission
models with the front wheels on theground or four wheels on the ground
(forward or backward) as this may
cause serious and expensive damage
to the transmission.
If it is necessary to tow the vehicle
with the rear wheels raised, always
use towing dollies under the front
wheels.
IWhen towing automatic transmission
models with the front wheels on tow-
ing dollies, or when towing manual
transmission models with the front
wheels on the ground:
ITurn the ignition key to the OFF
position, and secure the steering
wheel in a straight ahead position
with a rope or similar device.
Never secure the steering wheel
by turning the ignition key to the
LOCK position. This may damage
the steering lock mechanism.
IMove the gearshift lever to the N
(Neutral) position.
IWhen towing automatic or manualtransmission models with the rear
wheels on the ground (if you do not
use towing dollies): Always release
the parking brake.
VEHICLE RECOVERY (Freeing a
stuck vehicle)ITow chains or cables must be attached only
to the main structural members of the ve-
hicle.
IPulling devices should be routed so they do
not touch any part of the suspension, steer-
ing, brake or cooling systems.
IAlways pull the cable straight out from the
front or rear of the vehicle. Never pull on the
vehicle at an angle.
IPulling devices such as ropes or canvas
straps are not recommended for use in
vehicle towing or recovery.
IStand clear of an stuck vehicle.
SCE0199
In case of emergency
6-11
Z
01.9.21/A33-D/V5.0
X
Page 176 of 247

8 Maintenance and do-it-yourselfMaintenance requirements ........................................ 8-2
General maintenance ................................................ 8-2
Explanation of general maintenance items .......... 8-2
Maintenance precautions .......................................... 8-5
Engine compartment check locations ....................... 8-7
Engine cooling system .............................................. 8-8
Checking engine coolant level ............................. 8-8
Changing engine coolant ..................................... 8-9
Engine oil ................................................................ 8-10
Checking engine oil level ................................... 8-10
Changing engine oil ........................................... 8-11
Changing engine oil filter ................................... 8-12
Automatic transmission fluid ................................... 8-12
Temperature conditions for checking ................. 8-13
Power steering fluid ................................................ 8-14
Brake and clutch fluid ............................................. 8-14
Window washer fluid ............................................... 8-15
Battery ..................................................................... 8-15
Drive belts ............................................................... 8-17
Spark plugs ............................................................. 8-17
Replacing spark plugs ........................................ 8-18Air cleaner ............................................................... 8-18
Windshield wiper blades ......................................... 8-19
Cleaning ............................................................. 8-19
Replacing............................................................ 8-20
Parking brake and brake pedal ............................... 8-21
Checking parking brake ..................................... 8-21
Checking brake pedal ........................................ 8-21
Brake booster ..................................................... 8-22
Clutch pedal ............................................................ 8-22
Fuses....................................................................... 8-22
Engine compartment .......................................... 8-23
Passenger compartment .................................... 8-24
Keyfob battery replacement .................................... 8-24
Lights ....................................................................... 8-26
Headlights........................................................... 8-27
Exterior and interior lights .................................. 8-28
Wheels and tires ..................................................... 8-33
Tire pressure ...................................................... 8-33
Types of tires...................................................... 8-33
Tire chains .......................................................... 8-34
Changing wheels and tires ................................. 8-35
Z
01.9.21/A33-D/V5.0
X