2002 NISSAN MAXIMA brake fluid
[x] Cancel search: brake fluidPage 52 of 247

or
Anti-lock brake warning light
Low washer fluid warning light
High beam indicator light (Blue)
A/T check warning light (A/T models)
Seat belt warning light
Malfunction indicator lamp (MIL)
or
Brake warning light
Stop/tail warning light
Slip indicator light
Charge warning light
Supplemental air bag warning light
Traction control system indicator light
Door open warning light
Trunk lid open warning light
Turn signal/hazard indicator lights
Engine oil pressure warning light
Cruise main switch indicator light
Low fuel warning light
Cruise set indicator light
CHECKING BULBSApply the parking brake and turn the ignition
key to ON without starting the engine. The
following lights will come on:
,
or
,
,
The following lights come on briefly and then
go off:
,
or
,
,
,
If any light fails to come on, it may indicate a
burned-out bulb or an open circuit in the elec-trical system. Have the system repaired
promptly.
WARNING LIGHTS
or
Anti-lock brake
warning light
After turning the ignition key to the ON posi-
tion, the light will illuminate. The light will turn
off after about 2 seconds if the system is
operational.
If the light comes on while the engine isrunning, it may indicate that the anti-lock brake
system is not functioning properly. Have the
system checked by your NISSAN dealer.
If an abnormality occurs in the system, the
anti-lock function will cease but the ordinary
brakes will continue to operate normally.
If the light comes on while you are driving,
contact your NISSAN dealer for repair.
WARNING/INDICATOR LIGHTS
AND AUDIBLE REMINDERS
Instruments and controls
2-7
Z
01.9.21/A33-D/V5.0
X
Page 53 of 247
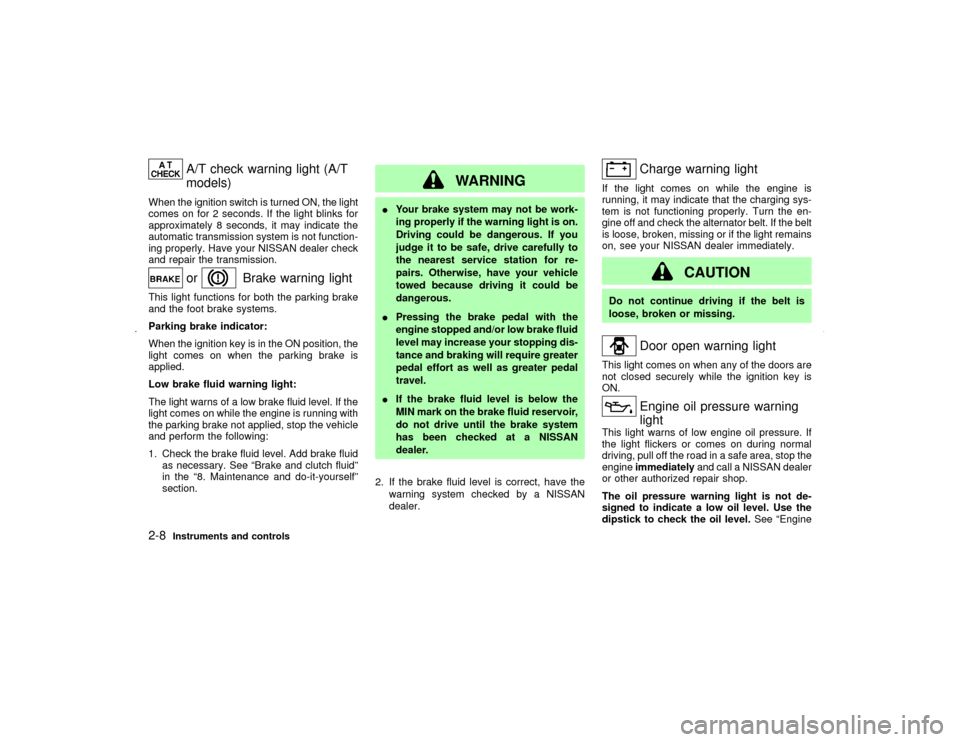
A/T check warning light (A/T
models)
When the ignition switch is turned ON, the light
comes on for 2 seconds. If the light blinks for
approximately 8 seconds, it may indicate the
automatic transmission system is not function-
ing properly. Have your NISSAN dealer check
and repair the transmission.
or
Brake warning light
This light functions for both the parking brake
and the foot brake systems.
Parking brake indicator:
When the ignition key is in the ON position, the
light comes on when the parking brake is
applied.
Low brake fluid warning light:
The light warns of a low brake fluid level. If the
light comes on while the engine is running with
the parking brake not applied, stop the vehicle
and perform the following:
1. Check the brake fluid level. Add brake fluid
as necessary. See ªBrake and clutch fluidº
in the ª8. Maintenance and do-it-yourselfº
section.
WARNING
IYour brake system may not be work-
ing properly if the warning light is on.
Driving could be dangerous. If you
judge it to be safe, drive carefully to
the nearest service station for re-
pairs. Otherwise, have your vehicle
towed because driving it could be
dangerous.
IPressing the brake pedal with the
engine stopped and/or low brake fluid
level may increase your stopping dis-
tance and braking will require greater
pedal effort as well as greater pedal
travel.
IIf the brake fluid level is below the
MIN mark on the brake fluid reservoir,
do not drive until the brake system
has been checked at a NISSAN
dealer.
2. If the brake fluid level is correct, have the
warning system checked by a NISSAN
dealer.
Charge warning light
If the light comes on while the engine is
running, it may indicate that the charging sys-
tem is not functioning properly. Turn the en-
gine off and check the alternator belt. If the belt
is loose, broken, missing or if the light remains
on, see your NISSAN dealer immediately.
CAUTION
Do not continue driving if the belt is
loose, broken or missing.
Door open warning light
This light comes on when any of the doors are
not closed securely while the ignition key is
ON.
Engine oil pressure warning
light
This light warns of low engine oil pressure. If
the light flickers or comes on during normal
driving, pull off the road in a safe area, stop the
engineimmediatelyand call a NISSAN dealer
or other authorized repair shop.
The oil pressure warning light is not de-
signed to indicate a low oil level. Use the
dipstick to check the oil level.See ªEngine
2-8
Instruments and controls
Z
01.9.21/A33-D/V5.0
X
Page 54 of 247
oilº in the ª8. Maintenance and do-it-yourselfº
section.
CAUTION
Running the engine with the oil pressure
warning light on could cause serious
damage to the engine almost immedi-
ately. Turn off the engine as soon as it is
safe to do so.
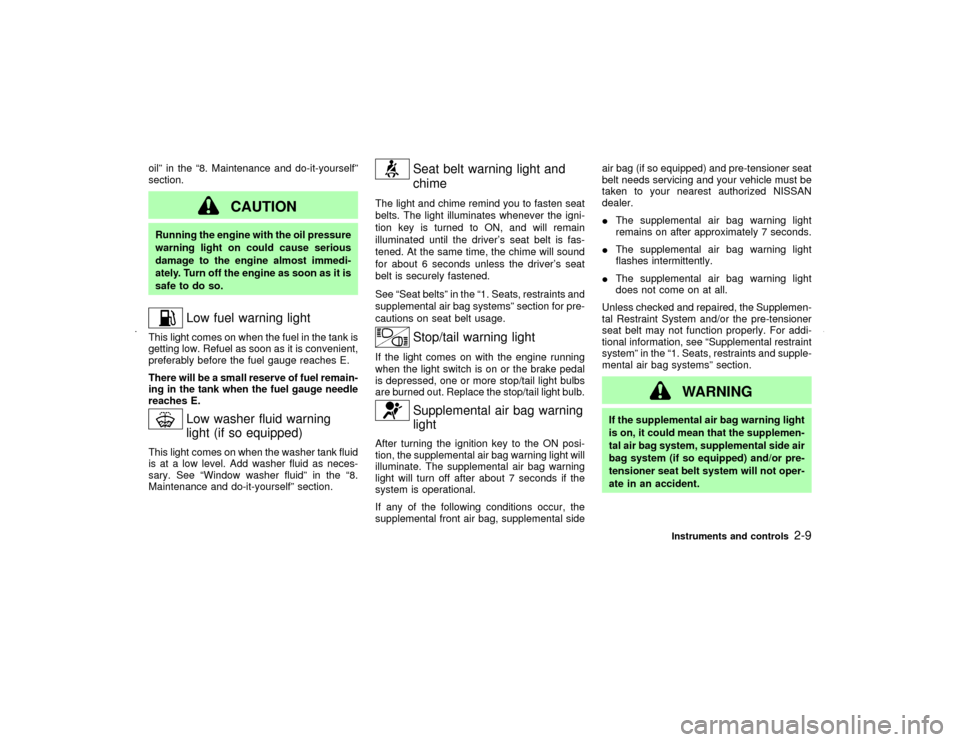
Low fuel warning light
This light comes on when the fuel in the tank is
getting low. Refuel as soon as it is convenient,
preferably before the fuel gauge reaches E.
There will be a small reserve of fuel remain-
ing in the tank when the fuel gauge needle
reaches E.
Low washer fluid warning
light (if so equipped)
This light comes on when the washer tank fluid
is at a low level. Add washer fluid as neces-
sary. See ªWindow washer fluidº in the ª8.
Maintenance and do-it-yourselfº section.
Seat belt warning light and
chime
The light and chime remind you to fasten seat
belts. The light illuminates whenever the igni-
tion key is turned to ON, and will remain
illuminated until the driver's seat belt is fas-
tened. At the same time, the chime will sound
for about 6 seconds unless the driver's seat
belt is securely fastened.
See ªSeat beltsº in the ª1. Seats, restraints and
supplemental air bag systemsº section for pre-
cautions on seat belt usage.
Stop/tail warning light
If the light comes on with the engine running
when the light switch is on or the brake pedal
is depressed, one or more stop/tail light bulbs
are burned out. Replace the stop/tail light bulb.
Supplemental air bag warning
light
After turning the ignition key to the ON posi-
tion, the supplemental air bag warning light will
illuminate. The supplemental air bag warning
light will turn off after about 7 seconds if the
system is operational.
If any of the following conditions occur, the
supplemental front air bag, supplemental sideair bag (if so equipped) and pre-tensioner seat
belt needs servicing and your vehicle must be
taken to your nearest authorized NISSAN
dealer.
IThe supplemental air bag warning light
remains on after approximately 7 seconds.
IThe supplemental air bag warning light
flashes intermittently.
IThe supplemental air bag warning light
does not come on at all.
Unless checked and repaired, the Supplemen-
tal Restraint System and/or the pre-tensioner
seat belt may not function properly. For addi-
tional information, see ªSupplemental restraint
systemº in the ª1. Seats, restraints and supple-
mental air bag systemsº section.
WARNING
If the supplemental air bag warning light
is on, it could mean that the supplemen-
tal air bag system, supplemental side air
bag system (if so equipped) and/or pre-
tensioner seat belt system will not oper-
ate in an accident.
Instruments and controls
2-9
Z
01.9.21/A33-D/V5.0
X
Page 153 of 247
BRAKING PRECAUTIONSThe brake system has two separate hydraulic
circuits. If one circuit malfunctions, you will still
have braking at two wheels.
Vacuum assisted brake
The brake booster aids braking by using en-
gine vacuum. If the engine stops, you can stop
the vehicle by depressing the brake pedal.
However, greater foot pressure on the brake
pedal will be required to stop the vehicle and
the stopping distance will be longer.
Wet brakes
When the vehicle is washed or driven through
water, the brakes may get wet. As a result,
your braking distance will be longer and the
vehicle may pull to one side during braking.
To dry brakes, drive the vehicle at a safe
speed while lightly pressing the brake pedal to
heat-up the brakes. Do this until the brakes
return to normal. Avoid driving the vehicle at
high speeds until the brakes function correctly.
Using the brakes
Avoid resting your foot on the brake pedal
while driving. This overheats the brakes, in-
creases wear on the brake linings and pads,
and reduces gas mileage.To help save the brakes and to prevent the
brakes from overheating, reduce speed and
downshift to a lower gear before going down a
slope or long grade. Overheated brakes may
reduce braking performance and could result
in loss of vehicle control.
WARNING
IWhile driving on a slippery surface,
be careful when braking, accelerating
or downshifting. Abrupt braking or
accelerating could cause the wheels
to skid and result in an accident.
IIf the engine is not running or is
turned off while driving, the power
assist for the brakes will not work.
Braking will be harder.ANTI-LOCK BRAKE SYSTEM (ABS)The anti-lock brake system controls the brakes
at each wheel so the wheels will not lock when
braking abruptly or when braking on slippery
surfaces. The system detects the rotation
speed at each wheel and varies the brake fluid
pressure to prevent each wheel from locking
and sliding. By preventing wheel lockup, thesystem helps the driver maintain steering con-
trol and helps to minimize swerving and spin-
ning on slippery surfaces.
Using the systemDepress the brake pedal and hold it down.
WARNING
Do not pump the brake pedal. Doing so
may result in increased stopping dis-
tances.Normal operationThe anti-lock brake system will not operate at
speeds below 3 to 6 MPH (5 to 10 km/h) to
completely stop the vehicle. (The speeds will
vary according to road conditions.) When the
anti-lock system senses that one or more
wheels are close to locking up, the actuator
(under the hood) rapidly applies and releases
hydraulic pressure (like pumping the brakes
very quickly). While the actuator is working,
you may feel a pulsation in the brake pedal
and hear a noise or vibration from the actuator
under the hood. This is normal and indicates
that the anti-lock system is working properly.
However, the pulsation may indicate that road
BRAKE SYSTEM5-18
Starting and driving
Z
01.9.21/A33-D/V5.0
X
Page 156 of 247
chains, make sure they are of proper size
for the tires on your vehicle and are in-
stalled according to the chain manufactur-
er's suggestions.Use only SAE Class S
chains.Other types may damage your
vehicle. Use chain tensioners when recom-
mended by the tire chain manufacturer to
ensure a tight fit. Loose end links of the tire
chain must be secured or removed to pre-
vent the possibility of whipping action dam-
age to the fenders or underbody. If pos-
sible, avoid fully loading your vehicle when
using tire chains. In addition, drive at a
reduced speed. Otherwise, your vehicle
may be damaged and/or vehicle handling
and performance may be adversely af-
fected.
Never install tire chains on a T-type spare
tire. Do not use tire chains on dry roads.
SPECIAL WINTER EQUIPMENTIt is recommended that the following items be
carried in the vehicle during winter:
Ia scraper and stiff-bristled brush to remove
ice and snow from the windows and wiper
blades.
Ia sturdy, flat board to be placed under the
jack to give it firm support.Ia shovel to dig the vehicle out of snow-
drifts.
Iextra window washer fluid to refill the res-
ervoir tank.
DRIVING ON SNOW OR ICE
WARNING
IWet ice (32ÉF, 0ÉC and freezing rain),
very cold snow or ice can be slick and
very hard to drive on. The vehicle will
have a lot less traction or grip under
these conditions. Try to avoid driving
on wet ice until the road is salted or
sanded.
IWhatever the condition, drive with
caution. Accelerate and slow down
with care. If accelerating or down-
shifting too fast, the drive wheels will
lose even more traction.
IAllow more stopping distance under
these conditions. Braking should be
started sooner than on dry pavement.
IAllow greater following distances on
slippery roads.IWatch for slippery spots (glare ice).
These may appear on an otherwise
clear road in shaded areas. If a patch
of ice is seen ahead, brake before
reaching it. Try not to brake while
actually on the ice, and avoid any
sudden steering maneuvers.
IDo not use cruise control on slippery
roads.
ISnow can trap dangerous exhaust
gases under your vehicle. Keep snow
clear of the exhaust pipe and from
around your vehicle.
ENGINE BLOCK HEATER (if so
equipped)An engine block heater to assist extreme cold
temperature starting is available through your
NISSAN dealer.
WARNING
Do not use your heater with an un-
grounded electrical system or two-
Starting and driving
5-21
Z
01.9.21/A33-D/V5.0
X
Page 176 of 247

8 Maintenance and do-it-yourselfMaintenance requirements ........................................ 8-2
General maintenance ................................................ 8-2
Explanation of general maintenance items .......... 8-2
Maintenance precautions .......................................... 8-5
Engine compartment check locations ....................... 8-7
Engine cooling system .............................................. 8-8
Checking engine coolant level ............................. 8-8
Changing engine coolant ..................................... 8-9
Engine oil ................................................................ 8-10
Checking engine oil level ................................... 8-10
Changing engine oil ........................................... 8-11
Changing engine oil filter ................................... 8-12
Automatic transmission fluid ................................... 8-12
Temperature conditions for checking ................. 8-13
Power steering fluid ................................................ 8-14
Brake and clutch fluid ............................................. 8-14
Window washer fluid ............................................... 8-15
Battery ..................................................................... 8-15
Drive belts ............................................................... 8-17
Spark plugs ............................................................. 8-17
Replacing spark plugs ........................................ 8-18Air cleaner ............................................................... 8-18
Windshield wiper blades ......................................... 8-19
Cleaning ............................................................. 8-19
Replacing............................................................ 8-20
Parking brake and brake pedal ............................... 8-21
Checking parking brake ..................................... 8-21
Checking brake pedal ........................................ 8-21
Brake booster ..................................................... 8-22
Clutch pedal ............................................................ 8-22
Fuses....................................................................... 8-22
Engine compartment .......................................... 8-23
Passenger compartment .................................... 8-24
Keyfob battery replacement .................................... 8-24
Lights ....................................................................... 8-26
Headlights........................................................... 8-27
Exterior and interior lights .................................. 8-28
Wheels and tires ..................................................... 8-33
Tire pressure ...................................................... 8-33
Types of tires...................................................... 8-33
Tire chains .......................................................... 8-34
Changing wheels and tires ................................. 8-35
Z
01.9.21/A33-D/V5.0
X
Page 179 of 247

Parking brake*:Check that the lever has the
proper travel and make sure that the vehicle is
held securely on a fairly steep hill when only
the parking brake is applied.
Automatic transaxle P (Park) position
mechanism:On a fairly steep hill check that
the vehicle is held securely with the selector
lever in the P (Park) position without applying
any brakes.Under the hood and the vehicleThe maintenance items listed here should be
checked periodically (for example, each time
you check the engine oil or refuel).
Windshield washer fluid*:Check that there
is adequate fluid in the tank.
Engine coolant level*:Check the coolant
level when the engine is cold.
Radiator and hoses:Check the front of the
radiator and clean off any dirt, insects, leaves,
etc., that may have accumulated. Make sure
the hoses have no cracks, deformation, dete-
rioration or loose connections.
Brake and clutch fluid levels*:Make sure
that the brake and clutch fluid levels are be-
tween the MAX and MIN lines on the reservoir.
Battery*:Check the fluid level in each cell. It
should be between the MAX and MIN lines.Vehicles operated in high temperatures or
under severe conditions require frequent
checks of the battery fluid level.
Engine drive belts*:Make sure that no belt is
frayed, worn, cracked or oily.
Engine oil level*:Check the level on the
dipstick after parking the vehicle on a level
spot and turning off the engine.
Power steering fluid level* and lines:Check
the level in the reservoir tank with the engine
off. Check the lines for proper attachment,
leaks, cracks, etc.
Automatic transaxle fluid level*:Check the
level on the dipstick after putting the selector
lever in P (Park) position with the engine idling.
Exhaust system:Make sure there are no
loose supports, cracks or holes. If the sound of
the exhaust seems unusual or there is a smell
of exhaust fumes, immediately locate the
trouble and correct it. (See ªPrecautions when
starting and drivingº in the ª5. Starting and
drivingº section for exhaust gas (carbon mon-
oxide).)
Underbody:The underbody is frequently ex-
posed to corrosive substances such as those
used on icy roads or to control dust. It is very
important to remove these substances, other-
wise rust will form on the floor pan, frame, fuellines and around the exhaust system. At the
end of winter, the underbody should be thor-
oughly flushed with plain water, being careful
to clean those areas where mud and dirt may
accumulate. For additional information, see
ªCleaning exteriorº in the ª7. Appearance and
careº section.
Fluid leaks:Check under the vehicle for fuel,
oil, water or other fluid leaks after the vehicle
has been parked for a while. Water dripping
from the air conditioner after use is normal. If
you should notice any leaks or if gasoline
fumes are evident, check for the cause and
have it corrected immediately.8-4
Maintenance and do-it-yourself
Z
01.9.21/A33-D/V5.0
X
Page 187 of 247
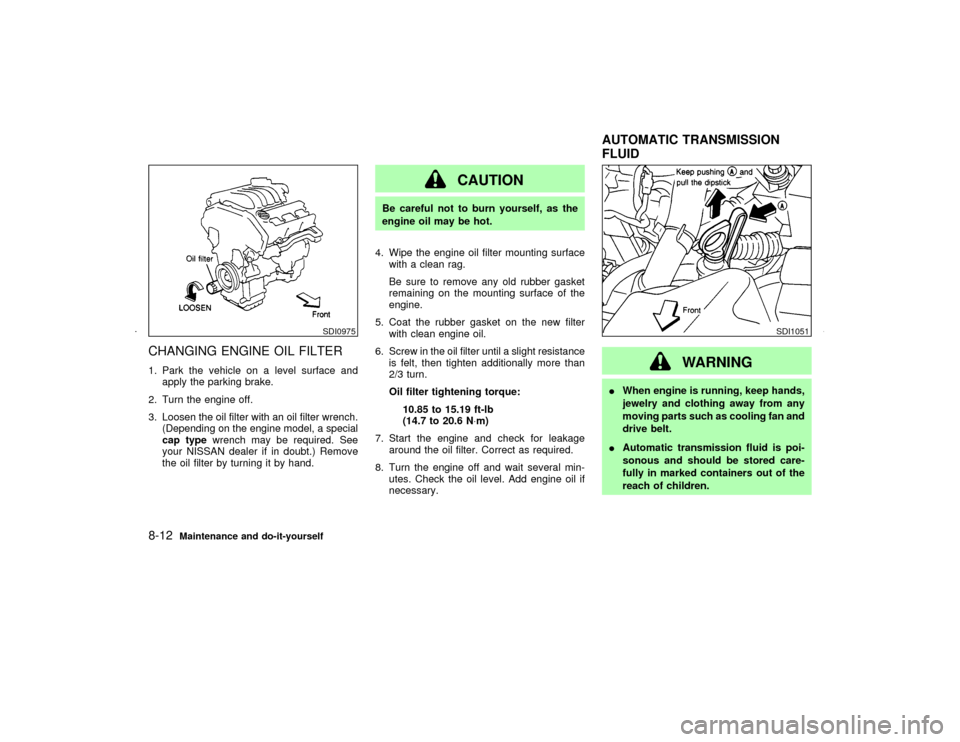
CHANGING ENGINE OIL FILTER1. Park the vehicle on a level surface and
apply the parking brake.
2. Turn the engine off.
3. Loosen the oil filter with an oil filter wrench.
(Depending on the engine model, a special
cap typewrench may be required. See
your NISSAN dealer if in doubt.) Remove
the oil filter by turning it by hand.
CAUTION
Be careful not to burn yourself, as the
engine oil may be hot.
4. Wipe the engine oil filter mounting surface
with a clean rag.
Be sure to remove any old rubber gasket
remaining on the mounting surface of the
engine.
5. Coat the rubber gasket on the new filter
with clean engine oil.
6. Screw in the oil filter until a slight resistance
is felt, then tighten additionally more than
2/3 turn.
Oil filter tightening torque:
10.85 to 15.19 ft-lb
(14.7 to 20.6 N×m)
7. Start the engine and check for leakage
around the oil filter. Correct as required.
8. Turn the engine off and wait several min-
utes. Check the oil level. Add engine oil if
necessary.
WARNING
IWhen engine is running, keep hands,
jewelry and clothing away from any
moving parts such as cooling fan and
drive belt.
IAutomatic transmission fluid is poi-
sonous and should be stored care-
fully in marked containers out of the
reach of children.
SDI0975
SDI1051
AUTOMATIC TRANSMISSION
FLUID
8-12
Maintenance and do-it-yourself
Z
01.9.21/A33-D/V5.0
X