2002 NISSAN FRONTIER seats
[x] Cancel search: seatsPage 47 of 273
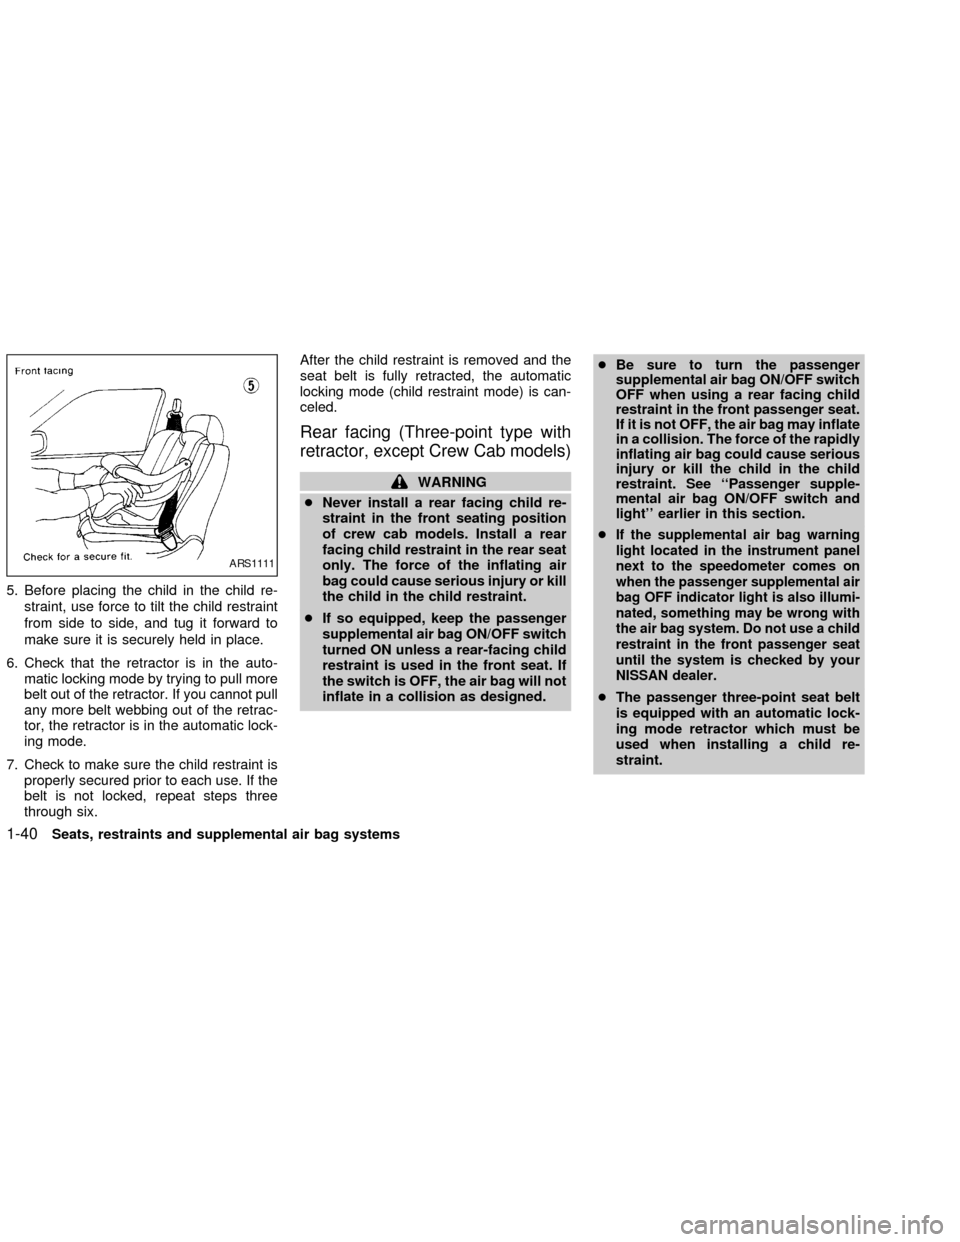
5. Before placing the child in the child re-
straint, use force to tilt the child restraint
from side to side, and tug it forward to
make sure it is securely held in place.
6. Check that the retractor is in the auto-
matic locking mode by trying to pull more
belt out of the retractor. If you cannot pull
any more belt webbing out of the retrac-
tor, the retractor is in the automatic lock-
ing mode.
7. Check to make sure the child restraint is
properly secured prior to each use. If the
belt is not locked, repeat steps three
through six.After the child restraint is removed and the
seat belt is fully retracted, the automatic
locking mode (child restraint mode) is can-
celed.
Rear facing (Three-point type with
retractor, except Crew Cab models)
WARNING
cNever install a rear facing child re-
straint in the front seating position
of crew cab models. Install a rear
facing child restraint in the rear seat
only. The force of the inflating air
bag could cause serious injury or kill
the child in the child restraint.
cIf so equipped, keep the passenger
supplemental air bag ON/OFF switch
turned ON unless a rear-facing child
restraint is used in the front seat. If
the switch is OFF, the air bag will not
inflate in a collision as designed.cBe sure to turn the passenger
supplemental air bag ON/OFF switch
OFF when using a rear facing child
restraint in the front passenger seat.
If it is not OFF, the air bag may inflate
in a collision. The force of the rapidly
inflating air bag could cause serious
injury or kill the child in the child
restraint. See ``Passenger supple-
mental air bag ON/OFF switch and
light'' earlier in this section.
c
If the supplemental air bag warning
light located in the instrument panel
next to the speedometer comes on
when the passenger supplemental air
bag OFF indicator light is also illumi-
nated, something may be wrong with
the air bag system. Do not use a child
restraint in the front passenger seat
until the system is checked by your
NISSAN dealer.
cThe passenger three-point seat belt
is equipped with an automatic lock-
ing mode retractor which must be
used when installing a child re-
straint.
ARS1111
1-40Seats, restraints and supplemental air bag systems
ZX
Page 48 of 273
cFailure to use the automatic locking
mode will result in the child restraint
not being properly secured. The re-
straint could tip over or otherwise be
unsecured and cause injury to the
child in a sudden stop or collision.
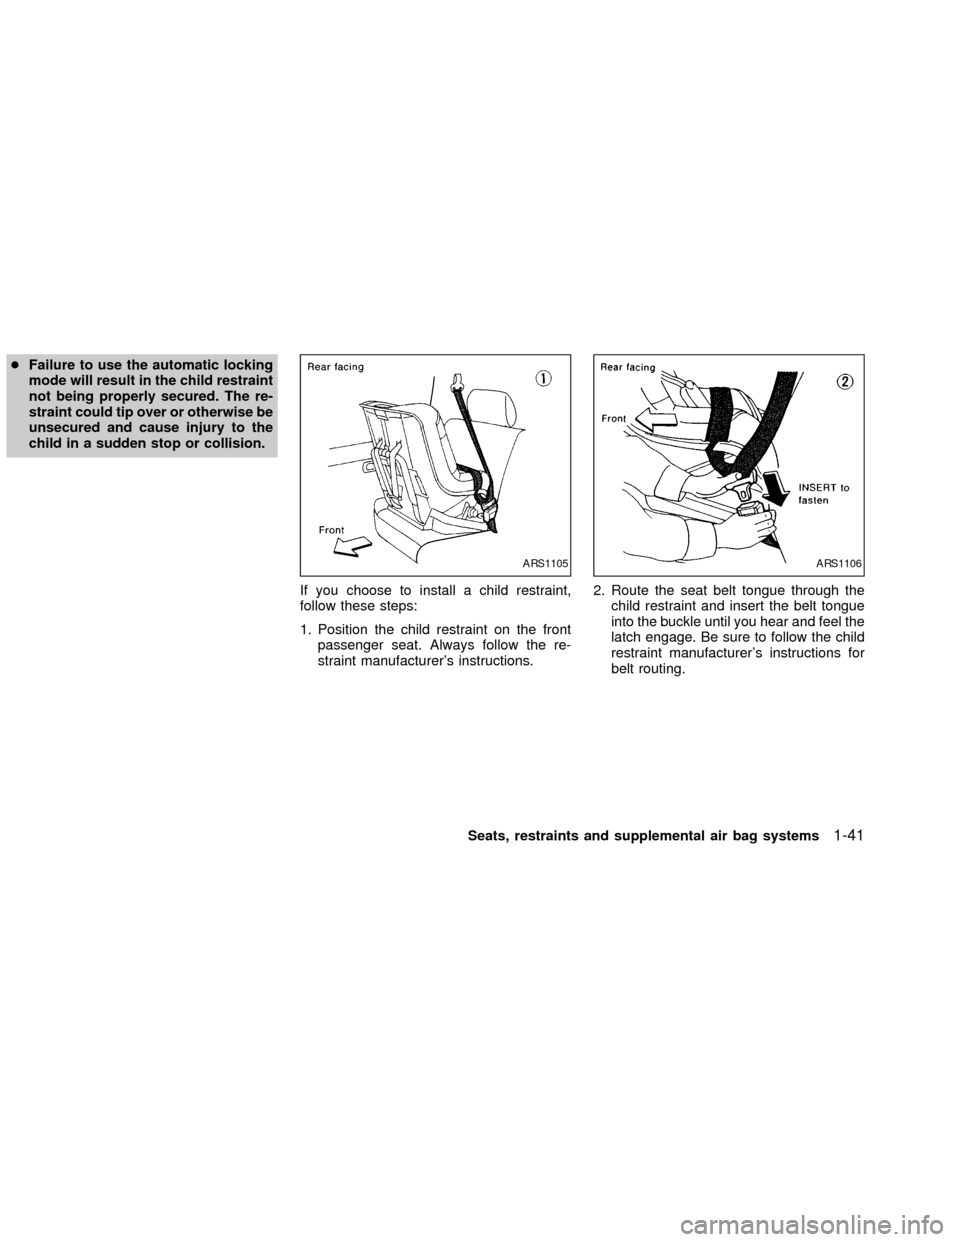
If you choose to install a child restraint,
follow these steps:
1. Position the child restraint on the front
passenger seat. Always follow the re-
straint manufacturer's instructions.2. Route the seat belt tongue through the
child restraint and insert the belt tongue
into the buckle until you hear and feel the
latch engage. Be sure to follow the child
restraint manufacturer's instructions for
belt routing.
ARS1105ARS1106
Seats, restraints and supplemental air bag systems1-41
ZX
Page 49 of 273

3. Pull on the shoulder belt until all of the
belt is fully extended. At this time, the belt
retractor is in the automatic locking mode
(child restraint mode). It reverts back to
emergency locking mode when the belt is
fully retracted.4. Allow the belt to retract. Pull up on the
belt to remove any slack in the belt.5. Before placing the child in the child re-
straint, use force to tilt the child restraint
from side to side, and tug it forward to
make sure it is securly held in place.
6. Ensure the retractor is in the automatic
locking mode by trying to pull more belt
out of the retractor. If you cannot pull any
more belt webbing out of the retractor,
the retractor is in the automatic locking
mode.
7. Check to make sure the child restraint is
properly secured prior to each use. If the
lap belt is not locked, repeat steps three
through six.
ARS1092ARS1107ARS1108
1-42Seats, restraints and supplemental air bag systems
ZX
Page 50 of 273

After the child restraint is removed and the
seat belt is fully retracted the automatic
locking mode (child restraint mode) is can-
celed.
Seats, restraints and supplemental air bag systems
1-43
ZX
Page 64 of 273
necessary. See ``Window washer fluid'' in
the ``Maintenance and do-it-yourself'' sec-
tion of this manual.
Seat belt warning light and
chime
The light and chime remind you to fasten
your seat belts. The light illuminates when-
ever the ignition key is turned to ON or
START, and remains illuminated until the
driver's seat belt is fastened. At the same
time, the chime sounds for about seven
seconds unless the driver seat belt is se-
curely fastened.
Refer to ªSeat beltsº in the ªSeats, restraints
and supplemental air bag systemsº section
for precautions on seat belt usage.
Supplemental air bag
warning light
When the ignition key is in the ON or START
position, the supplemental air bag warning
light illuminates for about 7 seconds and
then turns off. This means the system is
operational.
If any of the following conditions occur, the
supplemental air bag and pre-tensionerseat belt systems need servicing and your
vehicle must be taken to an authorized
authorized NISSAN dealer:
cThe supplemental air bag warning light
remains on after approximately 7 sec-
onds.
cThe supplemental air bag warning light
flashes intermittently.
cThe supplemental air bag warning light
does not come on at all.
Unless checked and repaired, the supplemen-
tal air bag system and/or the pre-tensioner
seat belts may not function properly. For
additional details, see the ``Seats, restraints
and supplemental air bag systems'' section of
this manual.
WARNING
If the supplemental air bag warning
light is on, it could mean that the
supplemental air bag or pre-tensioner
seat belt system will not operate in an
accident.
Passenger supplemental air
bag OFF indicator light (ex-
cept Crew Cab models)
The passenger supplemental air bag is
equipped with an ON/OFF switch. The
switch is located in the center of the instru-
ment panel. When the switch is turned to
the ON position, the passenger supplemen-
tal air bag is enabled and could inflate in a
frontal collision. When the switch is turned
to the OFF position, the passenger supple-
mental air bag is disabled and will not inflate
in a frontal collision. The passenger supple-
mental air bag OFF indicator light on the
instrument panel illuminates when the pas-
senger supplemental air bag ON/OFF
switch is turned to the OFF position. The
driver's side supplemental air bag always
remains enabled and is not affected by the
passenger supplemental air bag ON/OFF
switch. The key for the passenger supple-
mental air bag ON/OFF switch should not
be left in the switch. Remove the key after
turning the switch in the desired position. Do
not leave a key in the switch. See ªPassen-
ger supplemental air bag ON/OFF switch
and lightº in the9Seats, restraints and
Instruments and controls
2-13
ZX
Page 101 of 273
WARNING
cIt is extremely dangerous to ride in a
cargo area inside a vehicle. In a
collision, people riding in these ar-
eas are more likely to be seriously
injured or killed.
cDo not allow people to ride in any
area of your vehicle that is not
equipped with seats and seat belts.
cBe sure everyone in your vehicle is
in a seat and using a seat belt
properly.
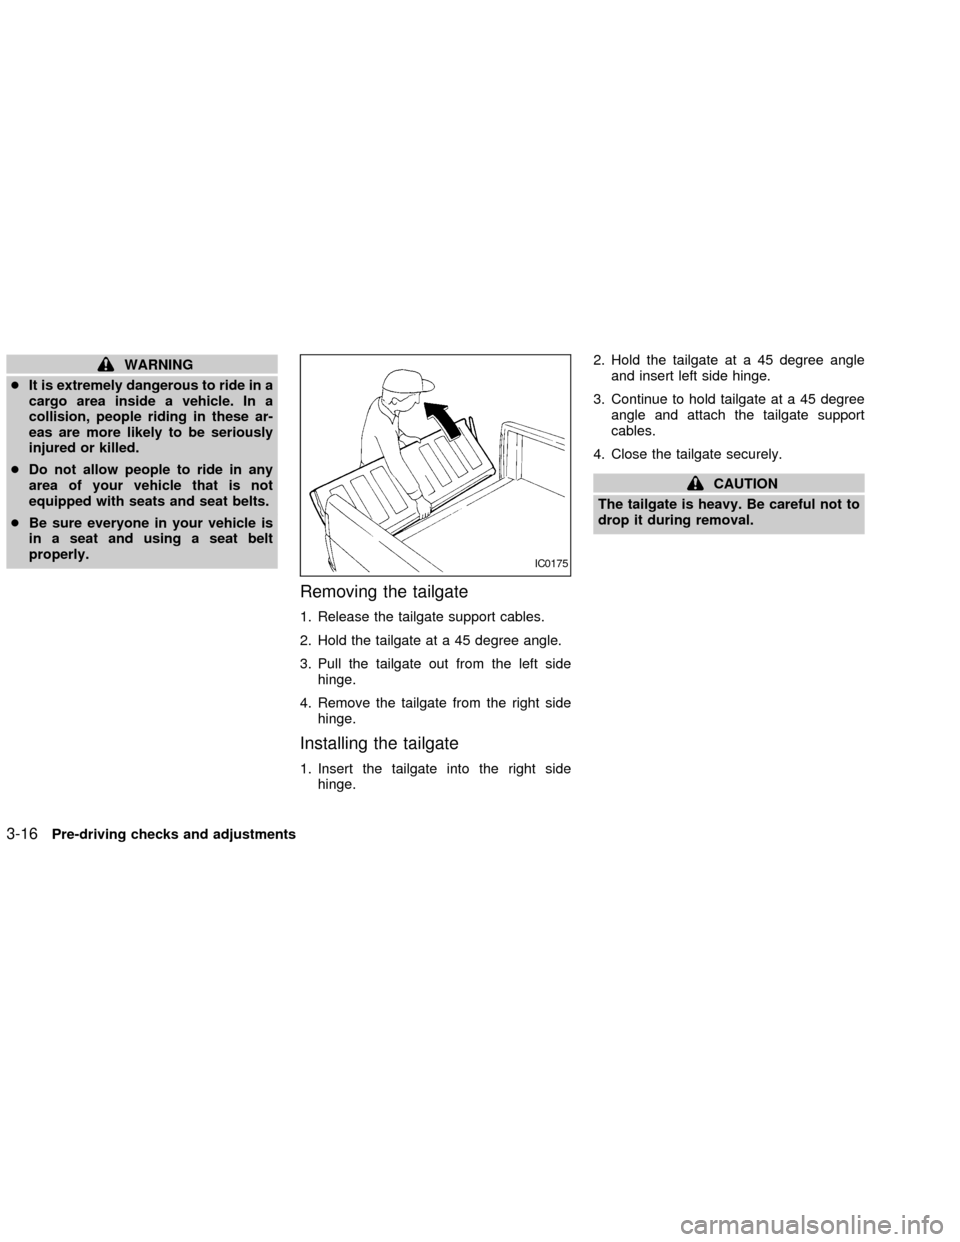
Removing the tailgate
1. Release the tailgate support cables.
2. Hold the tailgate at a 45 degree angle.
3. Pull the tailgate out from the left side
hinge.
4. Remove the tailgate from the right side
hinge.
Installing the tailgate
1. Insert the tailgate into the right side
hinge.2. Hold the tailgate at a 45 degree angle
and insert left side hinge.
3. Continue to hold tailgate at a 45 degree
angle and attach the tailgate support
cables.
4. Close the tailgate securely.
CAUTION
The tailgate is heavy. Be careful not to
drop it during removal.
IC0175
3-16Pre-driving checks and adjustments
ZX
Page 140 of 273
CAUTION
cDo not use leaded gasoline. Depos-
its from leaded gasoline seriously
reduce the three-way catalyst's abil-
ity to help reduce exhaust pollut-
ants.
cKeep your engine tuned up. Malfunc-
tions in the ignition, fuel injection, or
electrical systems can cause over-
rich fuel flow into the three-way cata-
lyst, causing it to overheat. Do not
keep driving if the engine misfires,
or if noticeable loss of performance
or other unusual operating condi-
tions are detected. Have the vehicle
inspected promptly by an authorized
NISSAN dealer.
cAvoid driving with an extremely low
fuel level. Running out of fuel could
cause the engine to misfire, damag-
ing the three-way catalyst.
cDo not race the engine while warm-
ing it up.
cDo not push or tow your vehicle to
start the engine.ON-PAVEMENT AND OFFROAD
DRIVING PRECAUTIONS
Utility vehicles have a significantly
higher rollover rate than other types of
vehicles.
They have higher ground clearance than
passenger cars to make them capable of
performing in a variety of on-pavement and
off-road applications. This gives them a
higher center of gravity than ordinary cars.
An advantage of higher ground clearance is
a better view of the road, allowing you to
anticipate problems. However, they are not
designed for cornering at the same speeds
as conventional two-wheel drive vehicles
any more than low-slung sports cars are
designed to perform satisfactorily under off-
road conditions. If at all possible, avoid
sharp turns or abrupt maneuvers particu-
larly at high speeds. As with other vehicles
of this type, failure to operate this vehicle
correctly may result in loss of control or
vehicle rollover.
Be sure to read the driving safety precau-
tions later in this section.
AVOIDING COLLISION AND
ROLLOVER
WARNING
Failure to operate this vehicle in a safe
and prudent manner may result in loss
of control or an accident.
Be alert and drive defensively at all times.
Obey all traffic regulations. Avoid excessive
speed, high speed cornering, or sudden
steering maneuvers, because these driving
practices could cause you to lose control of
your vehicle.As with any vehicle, a loss
of control could result in a collision with
other vehicles or objects, or cause the
vehicle to rollover, particularly if the loss
of control causes the vehicle to slide
sideways.Be attentive at all times, and
avoid driving when tired. Never drive when
under the influence of alcohol or drugs
(including prescription or over-the-counter
drugs which may cause drowsiness). Al-
ways wear your seat belt as outlined in the
9Seats, restraints and supplemental air bag
systems9section of this manual, and also
instruct your passengers to do so.
Seat belts help reduce the risk of injury in
Starting and driving
5-3
ZX
Page 185 of 273
Occasionally remove loose dust from the
interior trim, plastic parts and seats using a
vacuum cleaner or soft brush. Wipe the
vinyl and leather surfaces with a clean, soft
cloth dampened in mild soap solution, then
wipe clean with a dry soft cloth. Before
using any fabric protector, read the manu-
facturer's recommendations. Some fabric
protectors contain chemicals that stain or
bleach the seat material.
Use a cloth dampened only with water, to
clean the meter and gauge lens.
CAUTION
cNever use benzine, thinner or any
similar material.
cThe leather seats should be regu-
larly coated with a leather wax like
saddle soap. Never use car wax.
cNever use fabric protectors unless
recommended by the manufacturer.
cDo not use glass or plastic cleaner
on meter or gauge lens covers. It
may damage the lens cover.
FLOOR MATS
The use of genuine NISSAN floor mats can
extend the life of your vehicle carpet and
make it easier to clean the interior.No
matter what mats are used, be sure they
are fitted for your vehicle and are prop-
erly positioned in the footwell to prevent
interference with pedal operation.Mats
should be maintained with regular cleaning
and replaced if they become excessively
worn.
Floor mat positioning aid
(Driver side only)
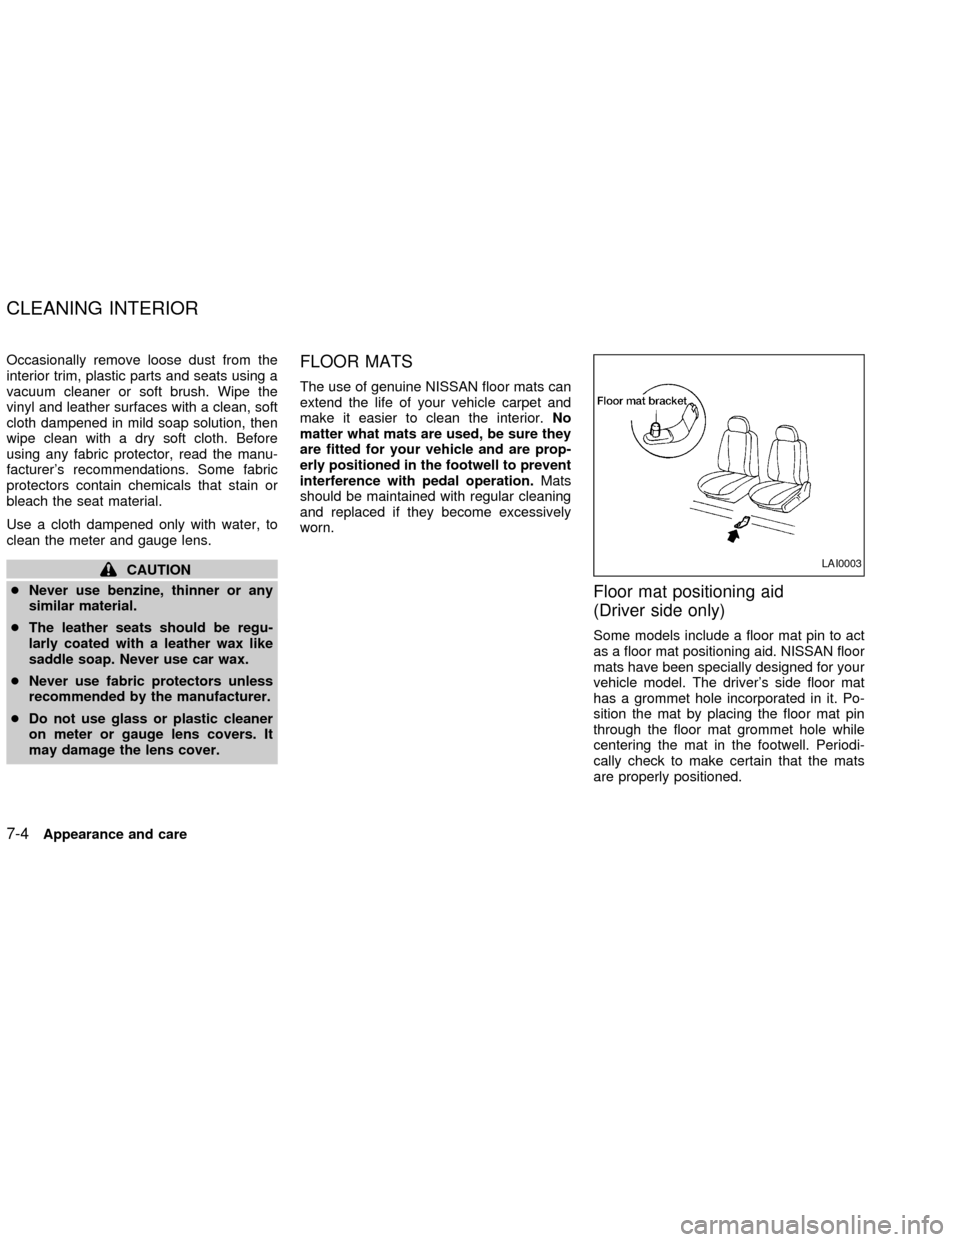
Some models include a floor mat pin to act
as a floor mat positioning aid. NISSAN floor
mats have been specially designed for your
vehicle model. The driver's side floor mat
has a grommet hole incorporated in it. Po-
sition the mat by placing the floor mat pin
through the floor mat grommet hole while
centering the mat in the footwell. Periodi-
cally check to make certain that the mats
are properly positioned.
LAI0003
CLEANING INTERIOR
7-4Appearance and care
ZX