2002 NISSAN FRONTIER wheel
[x] Cancel search: wheelPage 142 of 273
(manual transmission vehicles), us-
ing only the brake, as this could
cause loss of control.
cHeavy braking going down a hill
could cause your brakes to overheat
and fade, resulting in loss of control
and an accident. Apply brakes lightly
and use a low gear to control your
speed.
cUnsecured cargo can be thrown
around when driving over rough ter-
rain. Properly secure all cargo so it
will not be thrown forward and cause
injury to you or your passengers.
cTo avoid raising the center of gravity
excessively, do not exceed the rated
capacity of the roof rack (if so
equipped) and evenly distribute the
load. Secure heavy loads in the
cargo area as far forward and as low
as possible. Do not equip the vehicle
with tires larger than specified in this
manual. This could cause your ve-
hicle to roll over.
cDo not grip the inside or spokes of
the steering wheel when driving off-
road. The steering wheel could movesuddenly and injure your hands. In-
stead drive with your fingers and
thumbs on the outside of the rim.
cBefore operating the vehicle, ensure
that the driver and all passengers
have their seat belts fastened.
cAlways drive with the floor mats in
place as the floor may become hot.
cLower your speed when encounter-
ing strong crosswinds. With a higher
center of gravity, your NISSAN is
more affected by strong side winds.
Slower speeds ensure better vehicle
control.
cDo not drive beyond the perfor-
mance of the tires, even with 4WD
engaged.
cAccelerating quickly, sharp steering
maneuvers or sudden braking may
cause loss of control.
cIf at all possible, avoid sharp turning
maneuvers, particularly at high
speeds. Your NISSAN four-wheel
drive vehicle has a higher center of
gravity than a two-wheel drive veh-icle. The vehicle is not designed for
cornering at the same speeds as
conventional two-wheel drive ve-
hicles. Failure to operate this vehicle
correctly could result in loss of con-
trol and/or a roll over accident.
cAlways use tires of the same type,
size, brand, construction (bias, bias-
belted, or radial), and tread pattern
on all four wheels. Install tire chains
on the rear wheels when driving on
slippery roads and drive carefully.
cBe sure to check the brakes immedi-
ately after driving in mud or water.
See(Brake system(later in this sec-
tion for(Wet brakes(.
cAvoid parking your vehicle on steep
hills. If you get out of the vehicle and
it rolls forward, backward or side-
ways, you could be injured.
cWhenever you drive off-road
through sand, mud or water as deep
as the wheel hub, more frequent-
maintenance may be required. See
(Periodic maintenance(in the(Main-
tenance and do-it-yourself(section
of this manual.
Starting and driving
5-5
ZX
Page 143 of 273
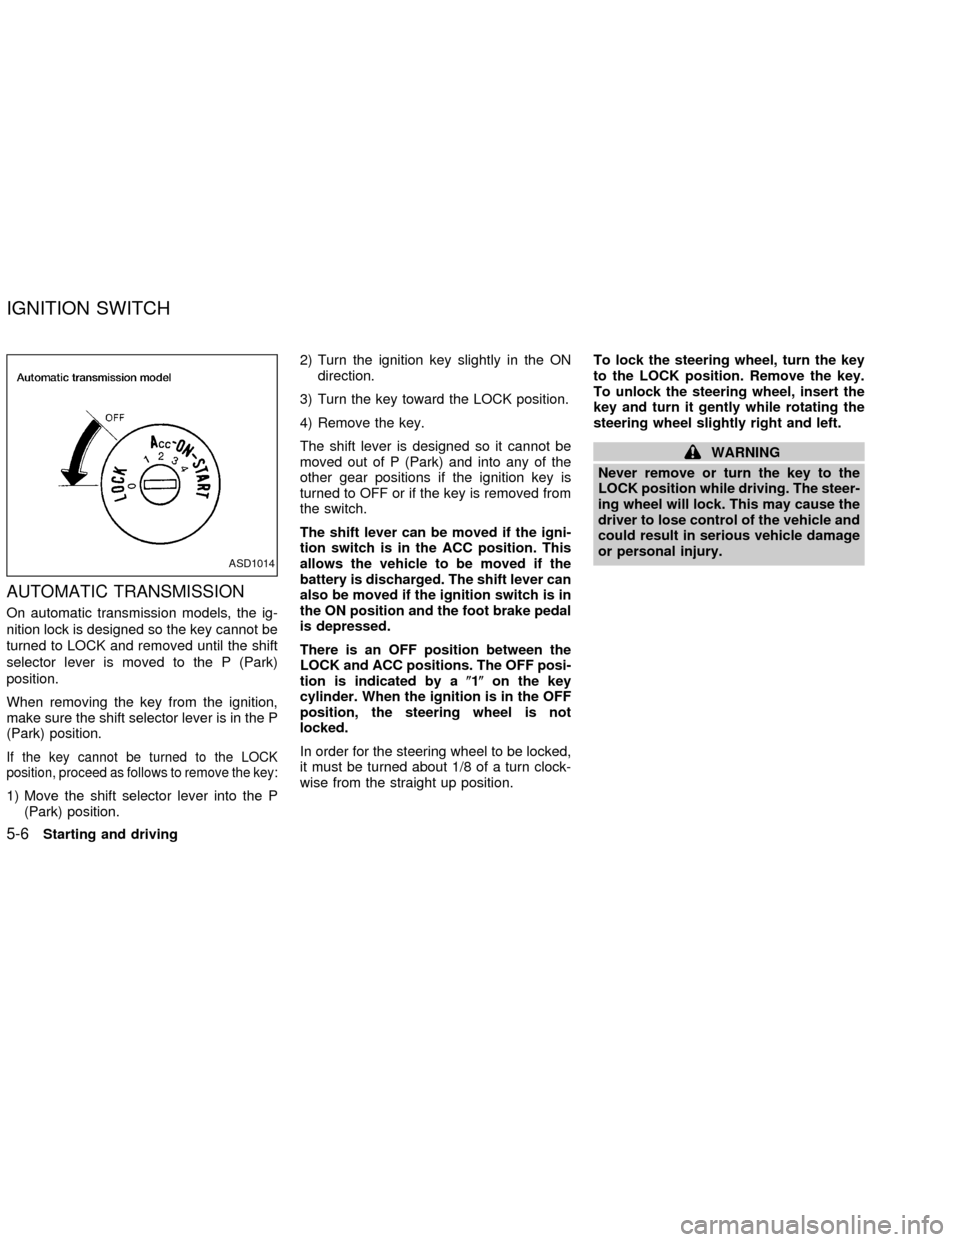
AUTOMATIC TRANSMISSION
On automatic transmission models, the ig-
nition lock is designed so the key cannot be
turned to LOCK and removed until the shift
selector lever is moved to the P (Park)
position.
When removing the key from the ignition,
make sure the shift selector lever is in the P
(Park) position.
If the key cannot be turned to the LOCK
position, proceed as follows to remove the key:
1) Move the shift selector lever into the P
(Park) position.2) Turn the ignition key slightly in the ON
direction.
3) Turn the key toward the LOCK position.
4) Remove the key.
The shift lever is designed so it cannot be
moved out of P (Park) and into any of the
other gear positions if the ignition key is
turned to OFF or if the key is removed from
the switch.
The shift lever can be moved if the igni-
tion switch is in the ACC position. This
allows the vehicle to be moved if the
battery is discharged. The shift lever can
also be moved if the ignition switch is in
the ON position and the foot brake pedal
is depressed.
There is an OFF position between the
LOCK and ACC positions. The OFF posi-
tion is indicated by a(1(on the key
cylinder. When the ignition is in the OFF
position, the steering wheel is not
locked.
In order for the steering wheel to be locked,
it must be turned about 1/8 of a turn clock-
wise from the straight up position.To lock the steering wheel, turn the key
to the LOCK position. Remove the key.
To unlock the steering wheel, insert the
key and turn it gently while rotating the
steering wheel slightly right and left.
WARNING
Never remove or turn the key to the
LOCK position while driving. The steer-
ing wheel will lock. This may cause the
driver to lose control of the vehicle and
could result in serious vehicle damage
or personal injury.
ASD1014
IGNITION SWITCH
5-6Starting and driving
ZX
Page 144 of 273
MANUAL TRANSMISSION
The ignition switch includes an anti-theft
steering lock device.
The key can only be removed when the
ignition switch is in the LOCK position.
On manual transmission models, to turn the
ignition key to LOCK from ACC or ON, turn
the key to OFF, push the key in, then turn
the key to LOCK.
In order for the steering wheel to be locked,
it must be turned about 1/8 of a turn clock-
wise from the straight up position.To lock the steering wheel, turn the key
to the LOCK position. Remove the key.
To unlock the steering wheel, insert the
key and turn it gently while rotating the
steering wheel slightly right and left.
WARNING
Never remove or turn the key to the
LOCK position while driving. The steer-
ing wheel will lock. This may cause the
driver to lose control of the vehicle and
could result in serious vehicle damage
or personal injury.
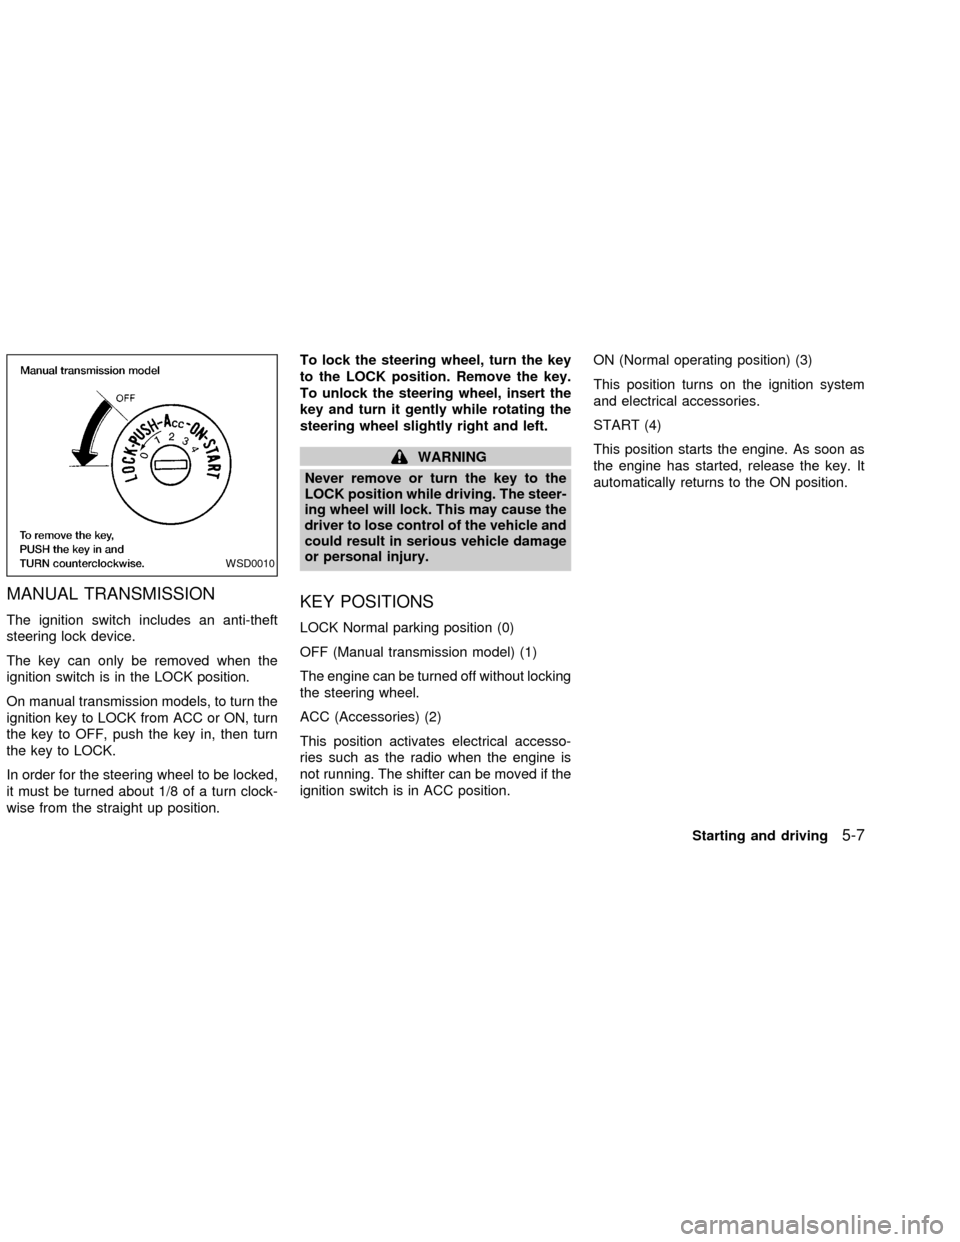
KEY POSITIONS
LOCK Normal parking position (0)
OFF (Manual transmission model) (1)
The engine can be turned off without locking
the steering wheel.
ACC (Accessories) (2)
This position activates electrical accesso-
ries such as the radio when the engine is
not running. The shifter can be moved if the
ignition switch is in ACC position.ON (Normal operating position) (3)
This position turns on the ignition system
and electrical accessories.
START (4)
This position starts the engine. As soon as
the engine has started, release the key. It
automatically returns to the ON position.
WSD0010
Starting and driving5-7
ZX
Page 153 of 273
If your vehicle is equipped with 4-wheel
drive, see ``
Transfer case shifting pro-
cedures for four-wheel drive vehicles'' later
in this section.
Suggested up-shift speeds
The following table provides suggested speed
ranges for shifting into a higher gear. These
suggestions relate to fuel economy and vehicle
performance. Actual shift ranges should be
adjusted for specific road conditions, weather
conditions and individual driving habits.
cTwo-wheel drive models and four-wheel
drive models (2H and 4H position):
Shift from MPH (km/h)
1st to 2nd 15 (24)
2nd to 3rd 25 (40)
3rd to 4th 40 (64)
4th to 5th 45 (72)
c4-wheel drive model (4L position):
Shift from MPH (km/h)
1st to 2nd 8 (13)
2nd to 3rd 12 (19)
3rd to 4th 20 (32)
4th to 5th 22 (35)
Suggested maximum speed in each
gear
Downshift to a lower gear if the engine is not
running smoothly, or if you need to accelerate.
Do not exceed the maximum suggested speed
(shown below) in any gear. For level road
driving, use the highest gear suggested for that
speed. Always observe posted speed limits,
and drive according to the road conditions,
which will ensure safe operation.
Allowable maximum speed in each gear:
2-wheel drive models MPH (km/h)
1st 30 (48)
2nd 55 (88)
3rd 80 (129)
4th & 5th þ (þ)
4-wheel drive models MPH (km/h)
2H/4H position
1st 25 (40)
2nd 43 (69)
3rd 68 (109)
4th & 5th þ (þ)
4L position
1st 12 (19)
2nd 22 (35)
3rd 30 (48)
4th & 5th þ (þ)
WARNING
cBe sure the parking brake is fully
released before driving. Failure to do
so can cause brake failure and lead
to an accident.
cDo not release the parking brake
from outside the vehicle.
cDo not use the gear shift in place of
the parking brake. When parking, be
sure the parking brake is fully en-
gaged.
c
Do not leave children unattended in a
vehicle. They could release the park-
ing brake and cause an accident.
PARKING BRAKE
5-16Starting and driving
ZX
Page 155 of 273
COAST/SET, or CANCEL switch (lo-
cated on the steering wheel). To properly
use the cruise control system, use the
following procedures.
WARNING
Do not use the cruise control when
driving under the following conditions.
cWhen it is not possible to keep the
vehicle at a set speed.
cIn heavy traffic or in traffic that var-
ies in speed.
cOn winding or hilly roads.
c
On slippery roads (rain, snow, ice, etc.).
cIn very windy areas.
Doing so could cause a loss of vehicle
control and result in an accident.
CAUTION
On manual transmission models, do
not shift into N (Neutral) without de-
pressing the clutch pedal when the
cruise control is set. Should this occur,
depress the clutch pedal and turn the-
main switch off immediately. Failure to
do so may cause engine damage.
CRUISE CONTROL OPERA-
TIONS
The cruise control allows driving at a speed
between 25 to 90 MPH (40 to 144 km/h)
without keeping your foot on the accelerator
pedal.
To turn on the cruise control,push the
main switch. The CRUISE indicator light in
the instrument panel comes on.
To set cruising speed,accelerate the ve-
hicle to the desired speed, push the
COAST/SET switch and release it. The SET
light in the instrument cluster comes on.
Take your foot off the accelerator pedal.
Your vehicle maintains the set speed.
cTo pass another vehicle,depress the
accelerator pedal. When you release the
pedal, the vehicle returns to the previ-
ously set speed.
c
The vehicle may not maintain the set speed
when going up or down steep hills. If this
happens, drive without the cruise control.
To cancel the preset speed,use one of
the following three methods:
a) Push the CANCEL button; the SET light
in the instrument cluster goes out.b) Tap the brake pedal; the SET light goes
out.
c) Turn the main switch off. Both the
CRUISE indicator on the main switch and
SET light in the instrument cluster go out.
The cruise control is automatically can-
celled and the SET light in the instrument
panel goes out if:
cyou depress the brake or clutch pedal
while pushing the RES/ACCEL or
COAST/SET switch.
cthe vehicle slows down more than 8 MPH
(13 km/h) below the set speed.
cyou depress the clutch pedal (manual
transmission), or move the shift selector
lever to N (Neutral) (automatic transmis-
sion).
To reset at a faster cruising speed,use
one of the following three methods.
a) Depress the accelerator pedal. When the
vehicle attains the desired speed, push
and release the COAST/SET switch.
b) Push and hold the RES/ACCEL switch.
When the vehicle attains the speed you
desire, release the switch.
5-18Starting and driving
ZX
Page 157 of 273
cKeep your engine tuned up.
cFollow the recommended periodic main-
tenance schedule.
cKeep the tires inflated to the correct
pressure. Low tire pressure increases
tire wear and wastes fuel.
cKeep the front wheels in correct align-
ment. Improper alignment increases tire
wear and lowers fuel economy.
cAir conditioner operation lowers fuel
economy. Use the air conditioner only
when necessary.
cWhen cruising at highway speeds, it is
more economical to use the air condi-
tioner and leave the windows closed to
reduce drag.
c
Use 4H or 4L position only when neces-
sary. Four-wheel drive operation lowers
fuel economy.
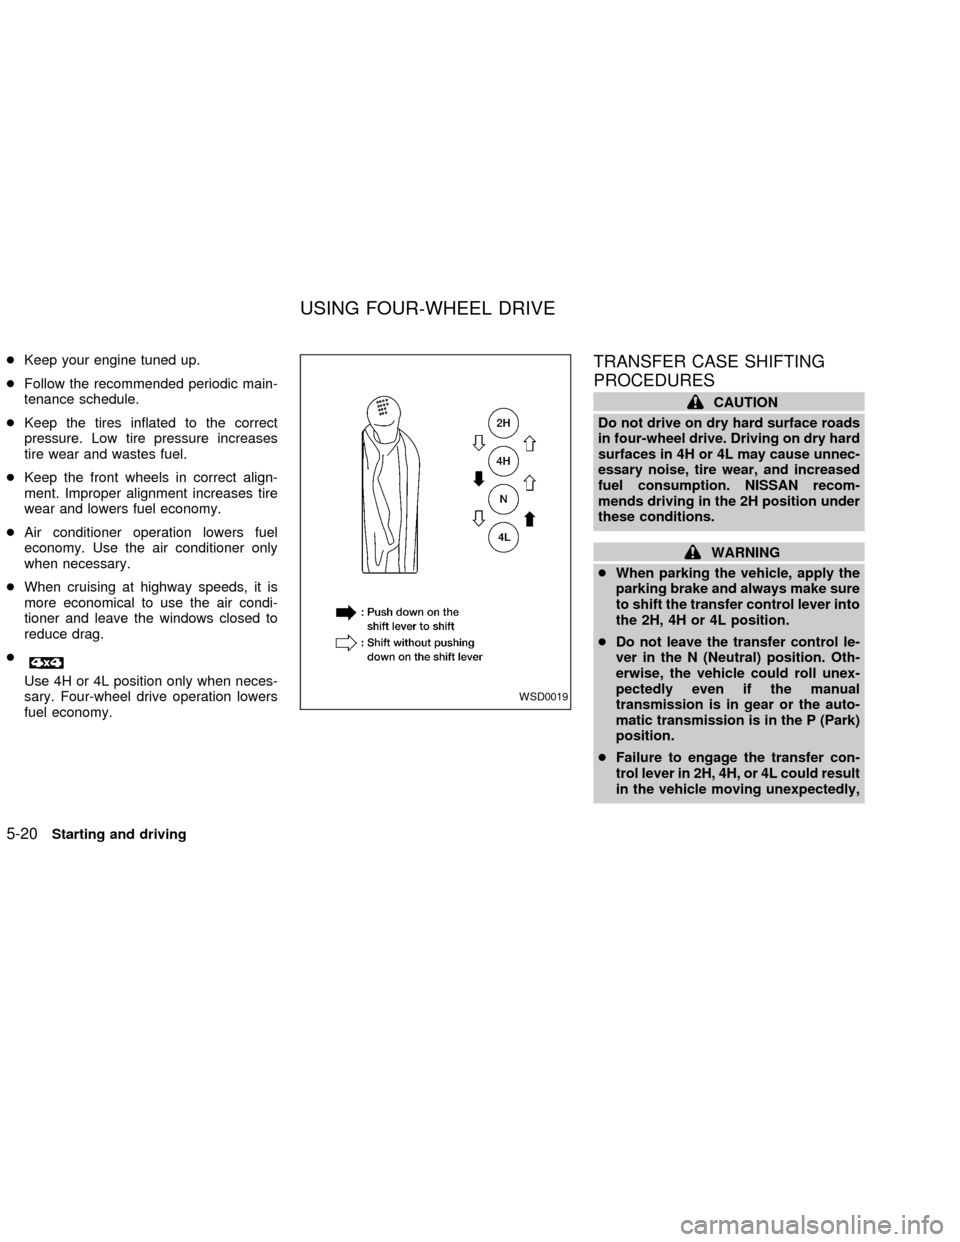
TRANSFER CASE SHIFTING
PROCEDURES
CAUTION
Do not drive on dry hard surface roads
in four-wheel drive. Driving on dry hard
surfaces in 4H or 4L may cause unnec-
essary noise, tire wear, and increased
fuel consumption. NISSAN recom-
mends driving in the 2H position under
these conditions.
WARNING
cWhen parking the vehicle, apply the
parking brake and always make sure
to shift the transfer control lever into
the 2H, 4H or 4L position.
cDo not leave the transfer control le-
ver in the N (Neutral) position. Oth-
erwise, the vehicle could roll unex-
pectedly even if the manual
transmission is in gear or the auto-
matic transmission is in the P (Park)
position.
cFailure to engage the transfer con-
trol lever in 2H, 4H, or 4L could result
in the vehicle moving unexpectedly,
WSD0019
USING FOUR-WHEEL DRIVE
5-20Starting and driving
ZX
Page 158 of 273
resulting in serious personal injury
or property damage.
2HÐ (2WD, high range) Only the rear
wheels are driven. Use for driving under the
same conditions as standard 2WD vehicles
or state dynamometer I/M testing.
4HÐ (4WD, high range) Four wheels are
driven. Use when driving on roads where it
is difficult to drive in the 2H position (i.e.,
driving at normal speeds on snow covered,
icy, wet, muddy or sandy roads).
4LÐ (4WD, low range) Four wheels are
driven. Use when climbing or descending
steep hills, or during hard driving in sand,
mud or deep snow. The 4L position pro-
vides maximum power and traction. Avoid
raising vehicle speed excessively, as the
maximum speed is approximately 30 MPH
(48 km/h).
NÐ No wheels are driven. Always keep the
transfer lever out of the N (Neutral) position.
Shift the lever quickly and smoothly when
moving across the N (Neutral) position with
the vehicle stopped.
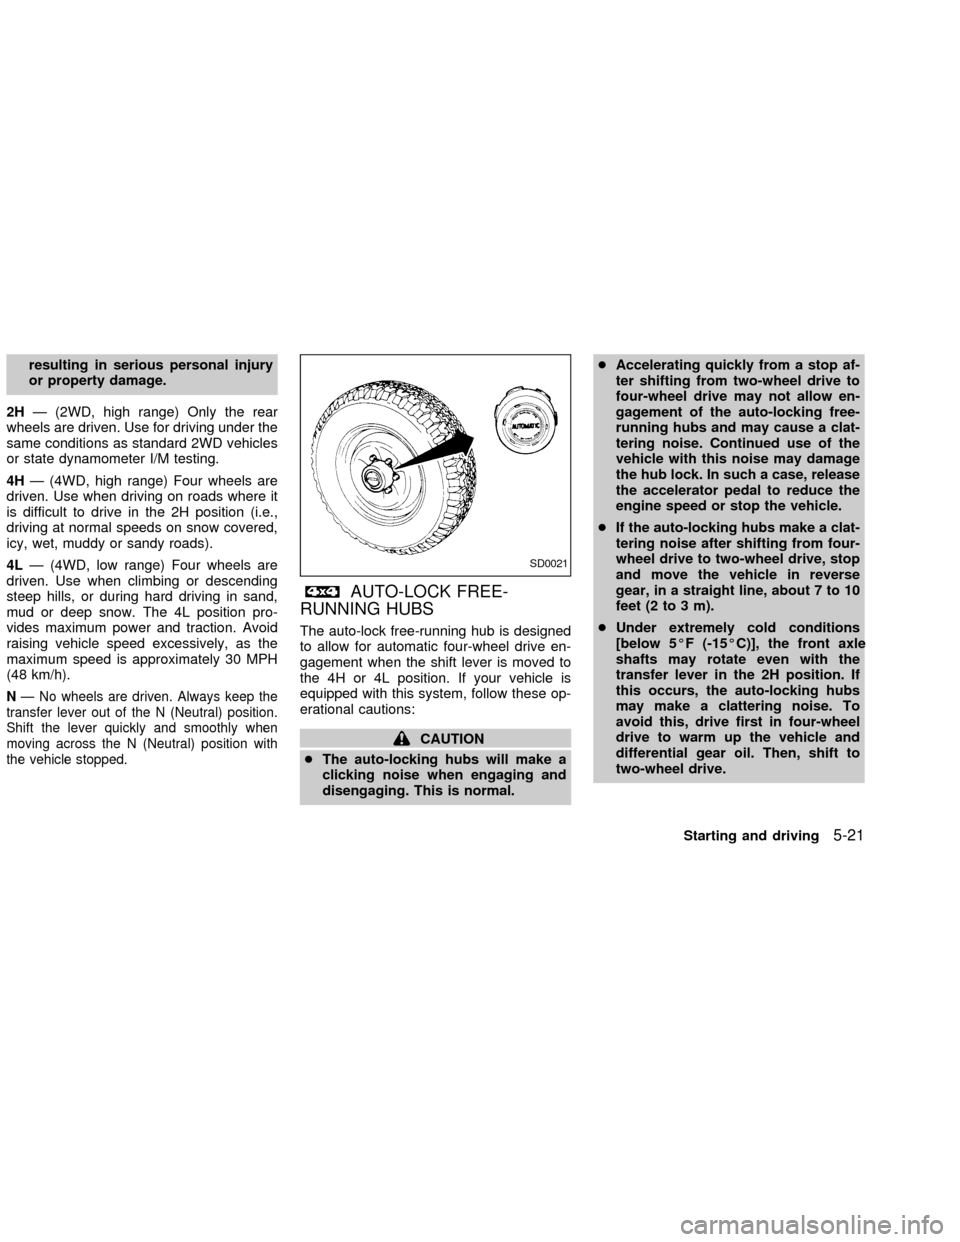
AUTO-LOCK FREE-
RUNNING HUBS
The auto-lock free-running hub is designed
to allow for automatic four-wheel drive en-
gagement when the shift lever is moved to
the 4H or 4L position. If your vehicle is
equipped with this system, follow these op-
erational cautions:
CAUTION
cThe auto-locking hubs will make a
clicking noise when engaging and
disengaging. This is normal.cAccelerating quickly from a stop af-
ter shifting from two-wheel drive to
four-wheel drive may not allow en-
gagement of the auto-locking free-
running hubs and may cause a clat-
tering noise. Continued use of the
vehicle with this noise may damage
the hub lock. In such a case, release
the accelerator pedal to reduce the
engine speed or stop the vehicle.
cIf the auto-locking hubs make a clat-
tering noise after shifting from four-
wheel drive to two-wheel drive, stop
and move the vehicle in reverse
gear, in a straight line, about 7 to 10
feet (2 to 3 m).
cUnder extremely cold conditions
[below 5ÉF (-15ÉC)], the front axle
shafts may rotate even with the
transfer lever in the 2H position. If
this occurs, the auto-locking hubs
may make a clattering noise. To
avoid this, drive first in four-wheel
drive to warm up the vehicle and
differential gear oil. Then, shift to
two-wheel drive.
SD0021
Starting and driving5-21
ZX
Page 159 of 273
cIn cold weather, it may be necessary
to reduce speed or stop the vehicle
in order to shift from two-wheel drive
to four-wheel drive.
cWhen shifting into or out of four-
wheel drive while driving, do not
stop shift lever movement midway.
An incomplete shift may cause a
clattering noise from the auto-
locking hubs. Continued use of the
vehicle with this noise may damage
the hub lock. Drive in four-wheel
drive to stop the noise. Shift to two-
wheel drive as described.
5-22Starting and driving
ZX