2002 NISSAN FRONTIER spare tire
[x] Cancel search: spare tirePage 227 of 273
If you have a flat tire, see the ``In case of
emergency'' section of this manual.
TIRE PRESSURE
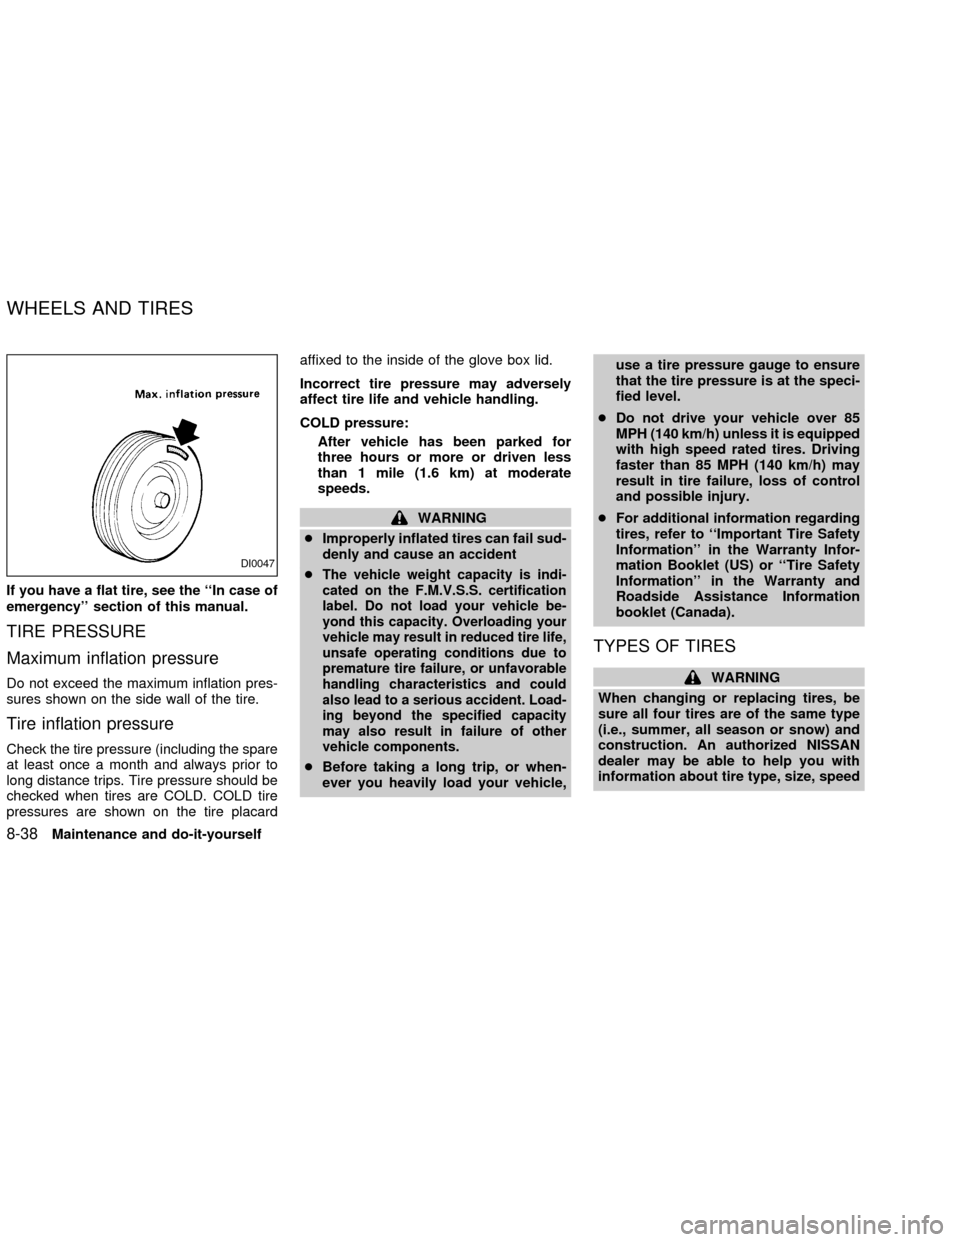
Maximum inflation pressure
Do not exceed the maximum inflation pres-
sures shown on the side wall of the tire.
Tire inflation pressure
Check the tire pressure (including the spare
at least once a month and always prior to
long distance trips. Tire pressure should be
checked when tires are COLD. COLD tire
pressures are shown on the tire placardaffixed to the inside of the glove box lid.
Incorrect tire pressure may adversely
affect tire life and vehicle handling.
COLD pressure:
After vehicle has been parked for
three hours or more or driven less
than 1 mile (1.6 km) at moderate
speeds.
WARNING
cImproperly inflated tires can fail sud-
denly and cause an accident
c
The vehicle weight capacity is indi-
cated on the F.M.V.S.S. certification
label. Do not load your vehicle be-
yond this capacity. Overloading your
vehicle may result in reduced tire life,
unsafe operating conditions due to
premature tire failure, or unfavorable
handling characteristics and could
also lead to a serious accident. Load-
ing beyond the specified capacity
may also result in failure of other
vehicle components.
cBefore taking a long trip, or when-
ever you heavily load your vehicle,use a tire pressure gauge to ensure
that the tire pressure is at the speci-
fied level.
cDo not drive your vehicle over 85
MPH (140 km/h) unless it is equipped
with high speed rated tires. Driving
faster than 85 MPH (140 km/h) may
result in tire failure, loss of control
and possible injury.
cFor additional information regarding
tires, refer to ``Important Tire Safety
Information'' in the Warranty Infor-
mation Booklet (US) or ``Tire Safety
Information'' in the Warranty and
Roadside Assistance Information
booklet (Canada).
TYPES OF TIRES
WARNING
When changing or replacing tires, be
sure all four tires are of the same type
(i.e., summer, all season or snow) and
construction. An authorized NISSAN
dealer may be able to help you with
information about tire type, size, speed
DI0047
WHEELS AND TIRES
8-38Maintenance and do-it-yourself
ZX
Page 228 of 273
rating and availability. Replacement
tires may have a lower speed rating
than the factory equipped tires, and
may not match the potential maxi-
mum vehicle speed. Never exceed
the maximum speed rating of the
tire.
cFor additional information regarding
tires, refer to ``Important Tire Safety
Information'' in the Warranty Infor-
mation Booklet (US) or ``Tire Safety
Information'' in the Warranty and
Roadside Assistance Information
booklet (Canada).
All season tires
NISSAN specifies All Season tires on some
models to provide good performance for
use all year around, including snowy and icy
road conditions. All Season Tires are iden-
tified by ``ALL SEASON'' and/or ``M&S'' on
the tire sidewall. Snow tires have better
snow traction than All Season tires and may
be more appropriate in some areas.
Summer tires
NISSAN specifies summer tires on some
models to provide superior performance ondry roads. Summer tire performance in
snow and ice will be substantially reduced.
Summer tires do not have the tire traction
rating ``M&S'' on the tire sidewall.
If you plan to operate your vehicle in snowy
or icy conditions, NISSAN recommends the
use of ``SNOW'' or ``ALL SEASON'' tires on
all four wheels.
Snow tires
If snow tires are needed, it is necessary to
select tires equivalent in size and load rating
to the original equipment tires. If you do not,
it can adversely affect the safety and han-
dling of your vehicle.
If you install snow tires, they must be the
same size, brand, construction and tread
pattern on all four wheels.
Generally, snow tires will have lower speed
ratings than factory equipped tires and may
not match the potential maximum vehicle
speed. Never exceed the maximum speed
rating of the tire.
For additional traction on icy roads, studded
tires may be used. However, some U.S.
States and Canadian provinces prohibit
their use. Check local, state and provinciallaws before installing studded tires. Skid
and traction capabilities of studded snow
tires on wet or dry surfaces may be poorer
than that of non-studded snow tires.
TIRE CHAINS
Use of tire chains may be prohibited accord-
ing to location. Check the local laws before
installing tire chains. When installing tire
chains, make sure they are the proper size
for the tires on your vehicle and are installed
according to the chain manufacturer's sug-
gestions.Use only SAE class ``S'' chains.
Other types may damage your vehicle. Use
chain tensioners when recommended by
the tire chain manufacturer to ensure a tight
fit. Loose end links of the tire chain must be
secured or removed to prevent the possibil-
ity of whipping action damage to the fenders
or undercarriage. If possible, avoid fully
loading your vehicle when using tire chains.
In addition, drive at a reduced speed. Oth-
erwise, your vehicle may be damaged
and/or vehicle handling and performance
may be adversely affected.
Never install tire chains on a TEMPORARY
USE ONLY spare tire.
Maintenance and do-it-yourself
8-39
ZX
Page 229 of 273
Tire chains must be installed only on the
rear wheels and not on the front wheels.
Do not use tire chains on dry roads. Driving
with chains in such conditions can cause
damage to the various mechanisms of the
vehicle due to some overstress. When driv-
ing on clear paved roads, be sure to change
to 2WD.
CHANGING WHEELS AND TIRES
Tire rotation
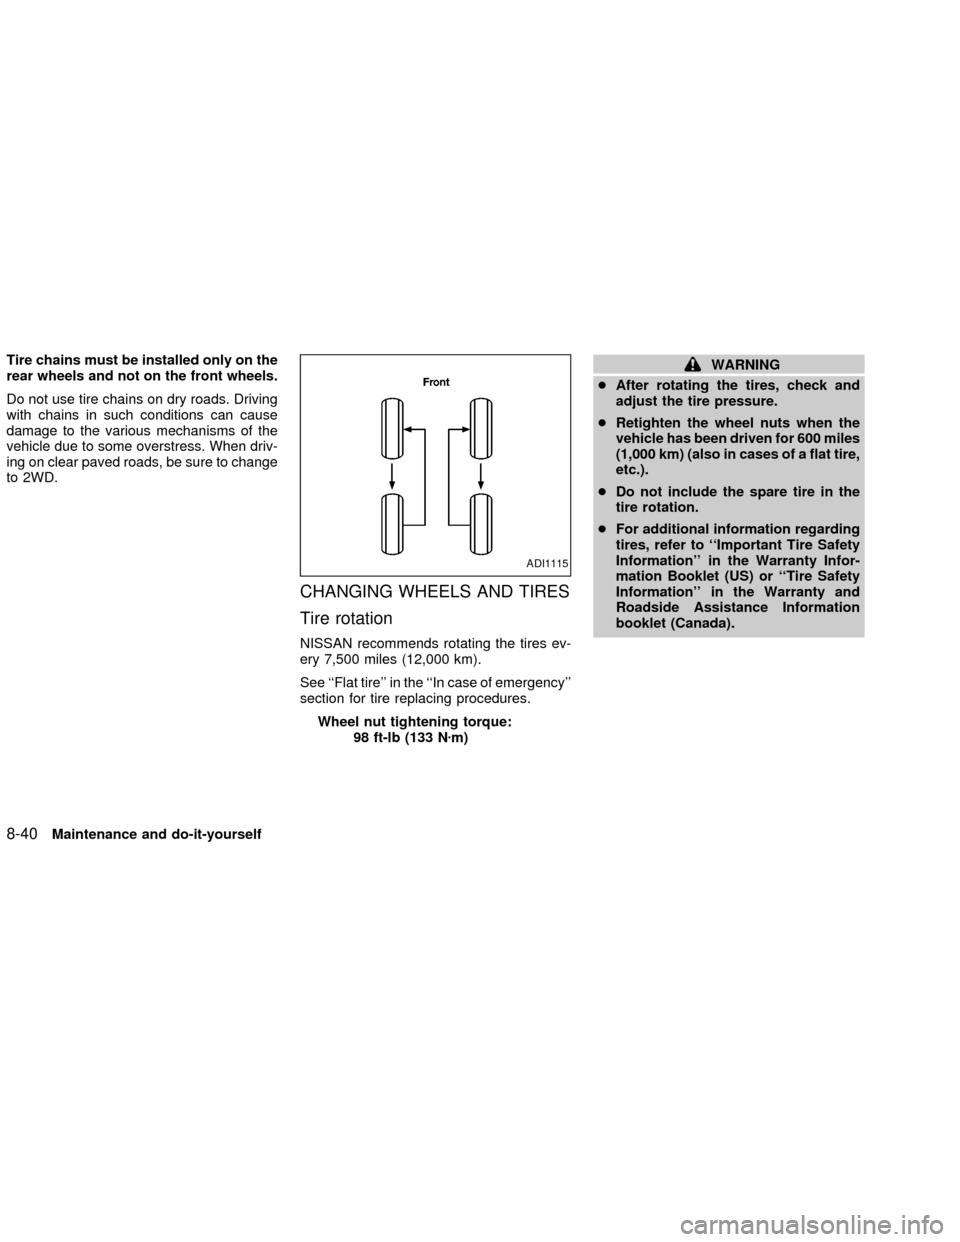
NISSAN recommends rotating the tires ev-
ery 7,500 miles (12,000 km).
See ``Flat tire'' in the ``In case of emergency''
section for tire replacing procedures.
Wheel nut tightening torque:
98 ft-lb (133 Nzm)
WARNING
cAfter rotating the tires, check and
adjust the tire pressure.
cRetighten the wheel nuts when the
vehicle has been driven for 600 miles
(1,000 km) (also in cases of a flat tire,
etc.).
cDo not include the spare tire in the
tire rotation.
cFor additional information regarding
tires, refer to ``Important Tire Safety
Information'' in the Warranty Infor-
mation Booklet (US) or ``Tire Safety
Information'' in the Warranty and
Roadside Assistance Information
booklet (Canada).
ADI1115
8-40Maintenance and do-it-yourself
ZX
Page 230 of 273
Tire wear and damage
WARNING
cTires should be periodically in-
spected for wear, cracking, bulging
or objects caught in the tread. If
excessive wear, cracks, bulging or
deep cuts are found, the tire(s)
should be replaced.
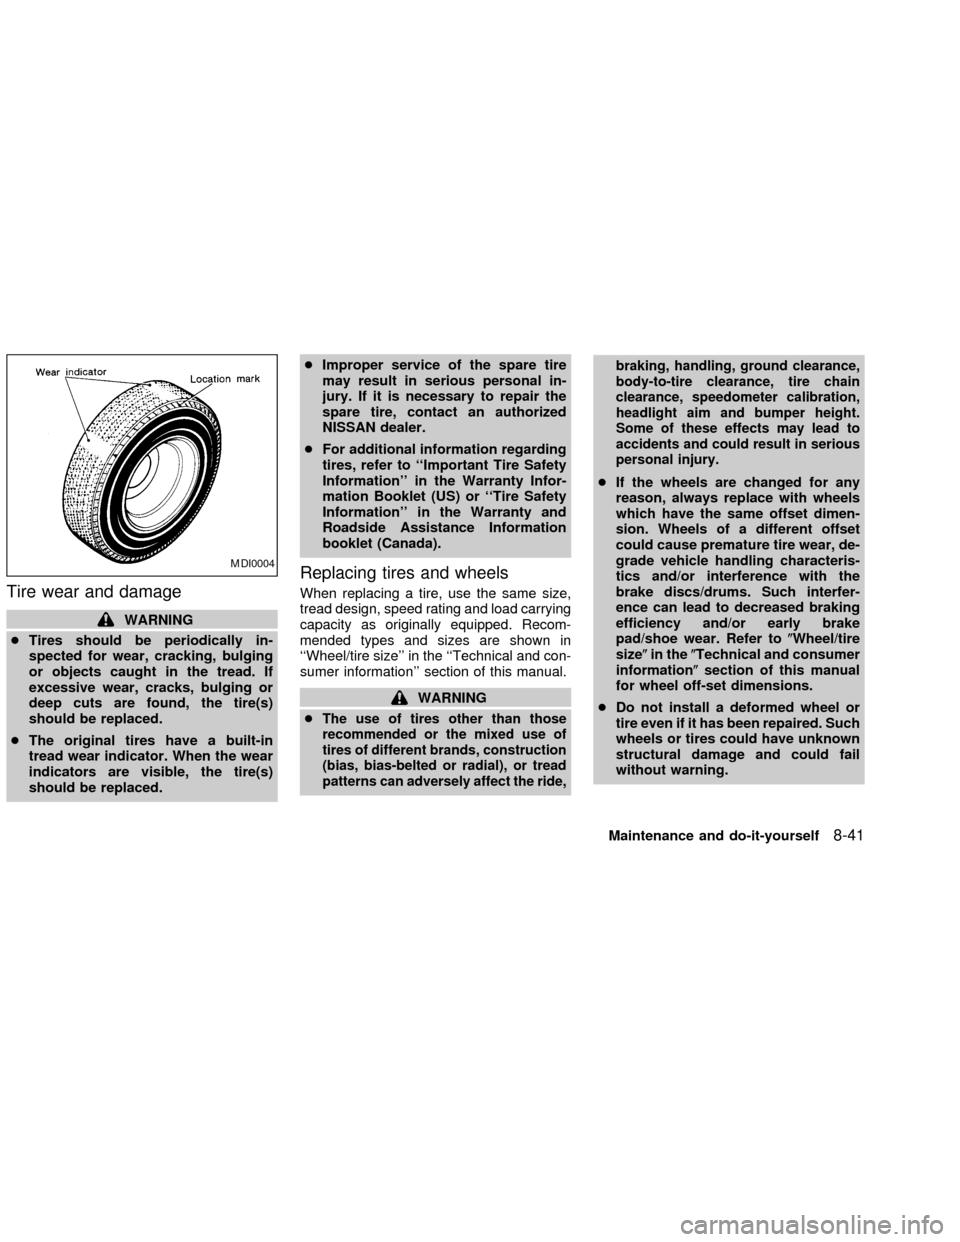
cThe original tires have a built-in
tread wear indicator. When the wear
indicators are visible, the tire(s)
should be replaced.cImproper service of the spare tire
may result in serious personal in-
jury. If it is necessary to repair the
spare tire, contact an authorized
NISSAN dealer.
cFor additional information regarding
tires, refer to ``Important Tire Safety
Information'' in the Warranty Infor-
mation Booklet (US) or ``Tire Safety
Information'' in the Warranty and
Roadside Assistance Information
booklet (Canada).
Replacing tires and wheels
When replacing a tire, use the same size,
tread design, speed rating and load carrying
capacity as originally equipped. Recom-
mended types and sizes are shown in
``Wheel/tire size'' in the ``Technical and con-
sumer information'' section of this manual.
WARNING
c
The use of tires other than those
recommended or the mixed use of
tires of different brands, construction
(bias, bias-belted or radial), or tread
patterns can adversely affect the ride,braking, handling, ground clearance,
body-to-tire clearance, tire chain
clearance, speedometer calibration,
headlight aim and bumper height.
Some of these effects may lead to
accidents and could result in serious
personal injury.
cIf the wheels are changed for any
reason, always replace with wheels
which have the same offset dimen-
sion. Wheels of a different offset
could cause premature tire wear, de-
grade vehicle handling characteris-
tics and/or interference with the
brake discs/drums. Such interfer-
ence can lead to decreased braking
efficiency and/or early brake
pad/shoe wear. Refer to(Wheel/tire
size(in the(Technical and consumer
information(section of this manual
for wheel off-set dimensions.
cDo not install a deformed wheel or
tire even if it has been repaired. Such
wheels or tires could have unknown
structural damage and could fail
without warning.
MDI0004
Maintenance and do-it-yourself8-41
ZX
Page 231 of 273
cThe use of retread tires is not recom-
mended.
cFor additional information regarding
tires, refer to ``Important Tire Safety
Information'' in the Warranty Infor-
mation Booklet (US) or ``Tire Safety
Information'' in the Warranty and
Roadside Assistance Information
booklet (Canada).
Four-wheel drive models
CAUTION
Always use tires of the same size,
brand, construction (bias, bias-belted
or radial), and tread pattern on all four
wheels. Failure to do so may result in a
circumference difference between tires
on the front and rear axles which will
cause excessive tire wear and may
damage the transmission, transfer
case and differential gears.
If excessive tire wear is found, it is recom-
mended that all four tires be replaced with
tires of the same size, brand, construction
and tread pattern. The tire pressure andwheel alignment should also be checked
and corrected as necessary. Contact an
authorized NISSAN dealer.
Wheel balance
Unbalanced wheels may affect vehicle han-
dling and tire life. Even with regular use,
wheels can get out of balance. Therefore,
they should be balanced as required.
Wheel balance service should be performed
with the wheels off the vehicle. Spin balanc-
ing the front wheels on the vehicle could
lead to transmission damage.
cFor additional information regarding tires,
refer to ``Important Tire Safety Informa-
tion'' in the Warranty Information Booklet
(US) or ``Tire Safety Information'' in the
Warranty and Roadside Assistance Infor-
mation booklet (Canada).
Care of wheels
cWash the wheels when washing the ve-
hicle to maintain their appearance.
cClean the inner side of the wheels when
the wheel is changed or the underside of
the vehicle is washed.cDo not use abrasive cleaners when
washing the wheels.
cInspect wheel rims regularly for dents or
corrosion. This may cause loss of pres-
sure or damage the tire bead.
cNISSAN recommends waxing the road
wheels to protect against road salt in
areas where it is used during winter.
Spare tire (TEMPORARY USE
ONLY)
Your vehicle may be equipped with a TEM-
PORARY USE ONLY spare tire.
To avoid property damage or personal injury
when using the TEMPORARY USE ONLY
spare tire, observe the following cautions:
WARNING
cThe spare tire should be used for
emergency use only. It should be
replaced with the standard tire at the
first opportunity to avoid possible
tire or differential damage.
cDrive carefully while the TEMPO-
RARY USE ONLY spare tire is in-
stalled. Avoid sharp turns and
abrupt braking while driving.
8-42Maintenance and do-it-yourself
ZX
Page 232 of 273
cPeriodically check spare tire infla-
tion pressure. Always keep the pres-
sure of the TEMPORARY USE ONLY
spare tire at 60 psi (420 kPa, 4.2 bar).
Always keep the pressure of the full
size spare tire (if so equipped) at the
recommended pressure for standard
tires, as indicated on the tire placard.
For tire placard location, see(Tire
placard(in the index of this manual .
cWith the TEMPORARY USE ONLY
spare tire installed do not drive the
vehicle at speeds faster than 50 MPH
(80 km/h).
c
When driving on roads covered with
snow or ice, the TEMPORARY USE
ONLY spare tire should be used on
the front wheels and the original tire
used on the rear wheels (drive
wheels). Use tire chains only on the
two rear original tires.
cTire tread of the TEMPORARY USE
ONLY spare tire will wear at a faster
rate than the standard tire. Replace
the spare tire as soon as the tread
wear indicators appear.cDo not use the spare tire on other
vehicles.
cDo not use more than one spare tire
at the same time.
cDo not tow a trailer when the TEM-
PORARY USE ONLY spare tire is
installed.
CAUTION
c
With the spare tire installed the
transfer control lever must be in the
2H position to prevent the transfer
case and differential gears from be-
ing damaged.
cDo not use tire chains on a TEMPO-
RARY USE ONLY spare tire. Tire
chains will not fit properly and may
cause damage to the vehicle.
c
Because the TEMPORARY USE ONLY
spare tire is smaller than the original
tire, ground clearance is reduced. To
avoid damage to the vehicle, do not
drive over obstacles. Also, do not
drive the vehicle through an automatic
car wash since it might get caught.
Maintenance and do-it-yourself8-43
ZX
Page 243 of 273

WHEELS AND TIRES
Road wheel/offset in (mm) Tire Spare tire size
4X2 King Cab: XE 15X6JJ/1.18 (30) Steel
15X7JJ/0.79 (20) Alloy
15X7JJ/1.18 (30) Steel*
15X7JJ/1.57 (40) Alloy*P225/70R15
P225/70R15
P265/70R15*
P265/70R15*T135/90D16
T135/90D16
P265/70R15*
P265/70R15*
SE 16X7JJ/1.57 (40) Alloy P255/65R16 P255/65R16
SC 17X7JJ/1.57 (40) Alloy P265/55R17 P265/55R17
Crew Cab XE 15X7JJ/1.18 (30) Alloy
15X7JJ/1.57 (40) AlloyP265/70R15
P265/70R15P265/70R15
P265/70R15
SE 16X7JJ/1.57 (40) Alloy P255/65R16 P255/65R16
SC 17X7JJ/1.57 (40) Alloy P265/55R17 P265/55R17
4X4 King Cab: XE 15X7JJ/1.18 (30) Steel
15X7JJ/1.57 (40) AlloyP265/70R15
P265/70R15P265/70R15
P265/70R15
SE 16X7JJ/1.57 (40) Alloy P265/70R16 P265/70R16
SC 17X7JJ/1.57 (40) Alloy P265/65R17 P265/55R17
Crew Cab: XE 15X7JJ/1.18 (30) Alloy
15X7JJ/1.57 (40) AlloyP265/70R15
P265/70R15P265/70R15
P265/70R15
SE 16X7JJ/1.57 (40) Alloy P265/70R16 P265/70R16
SC 17X7JJ/1.57 (40) Alloy P265/65R17 P265/55R17
* Not available with KA24DE engine.
9-10Technical and consumer information
ZX
Page 248 of 273
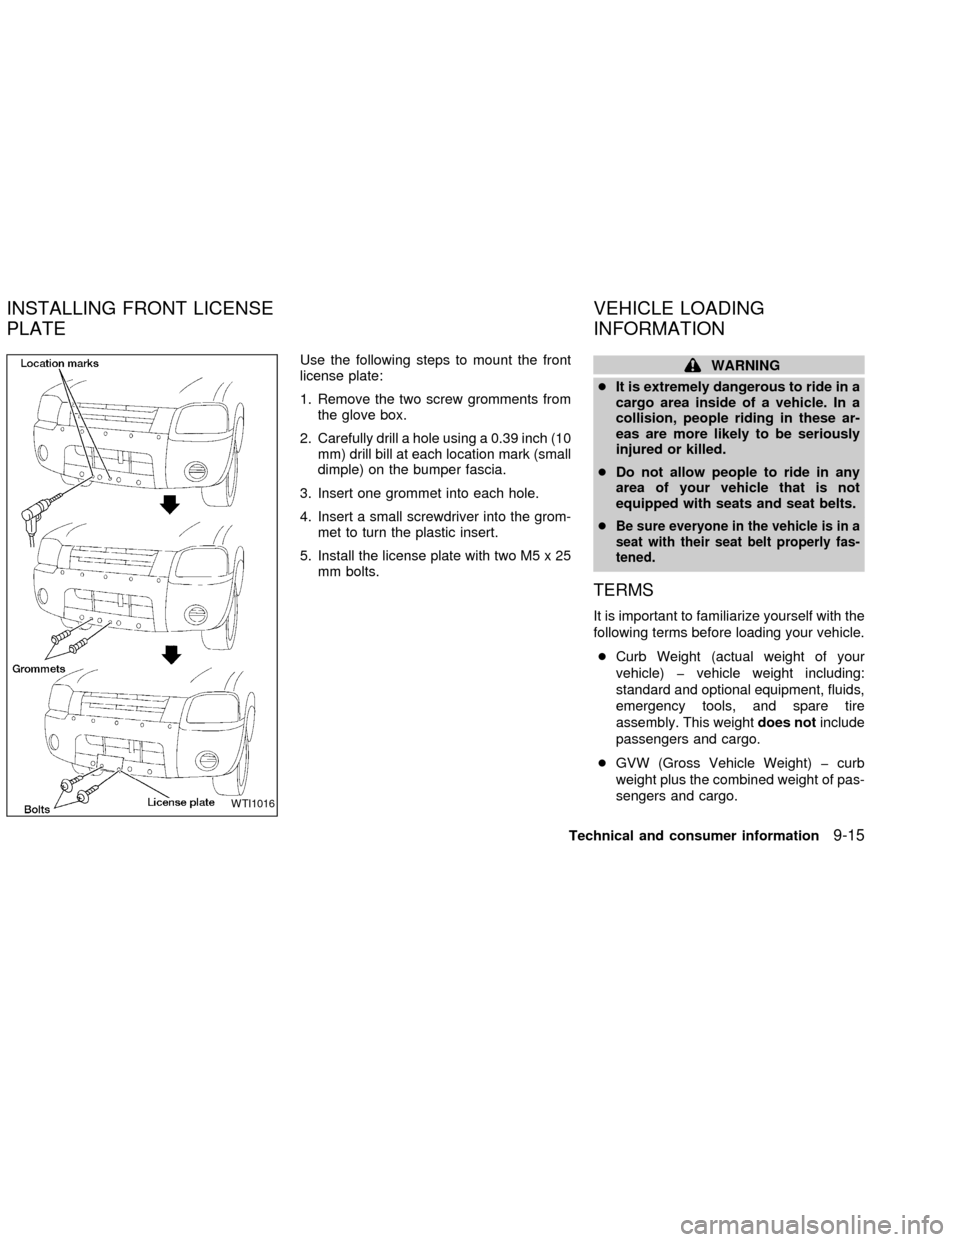
Use the following steps to mount the front
license plate:
1. Remove the two screw gromments from
the glove box.
2. Carefully drill a hole using a 0.39 inch (10
mm) drill bill at each location mark (small
dimple) on the bumper fascia.
3. Insert one grommet into each hole.
4. Insert a small screwdriver into the grom-
met to turn the plastic insert.
5. Install the license plate with two M5 x 25
mm bolts.WARNING
cIt is extremely dangerous to ride in a
cargo area inside of a vehicle. In a
collision, people riding in these ar-
eas are more likely to be seriously
injured or killed.
cDo not allow people to ride in any
area of your vehicle that is not
equipped with seats and seat belts.
c
Be sure everyone in the vehicle is in a
seat with their seat belt properly fas-
tened.
TERMS
It is important to familiarize yourself with the
following terms before loading your vehicle.
cCurb Weight (actual weight of your
vehicle) þ vehicle weight including:
standard and optional equipment, fluids,
emergency tools, and spare tire
assembly. This weightdoes notinclude
passengers and cargo.
cGVW (Gross Vehicle Weight) þ curb
weight plus the combined weight of pas-
sengers and cargo.
WTI1016
INSTALLING FRONT LICENSE
PLATEVEHICLE LOADING
INFORMATION
Technical and consumer information9-15
ZX