2002 NISSAN FRONTIER tire pressure
[x] Cancel search: tire pressurePage 157 of 273
cKeep your engine tuned up.
cFollow the recommended periodic main-
tenance schedule.
cKeep the tires inflated to the correct
pressure. Low tire pressure increases
tire wear and wastes fuel.
cKeep the front wheels in correct align-
ment. Improper alignment increases tire
wear and lowers fuel economy.
cAir conditioner operation lowers fuel
economy. Use the air conditioner only
when necessary.
cWhen cruising at highway speeds, it is
more economical to use the air condi-
tioner and leave the windows closed to
reduce drag.
c
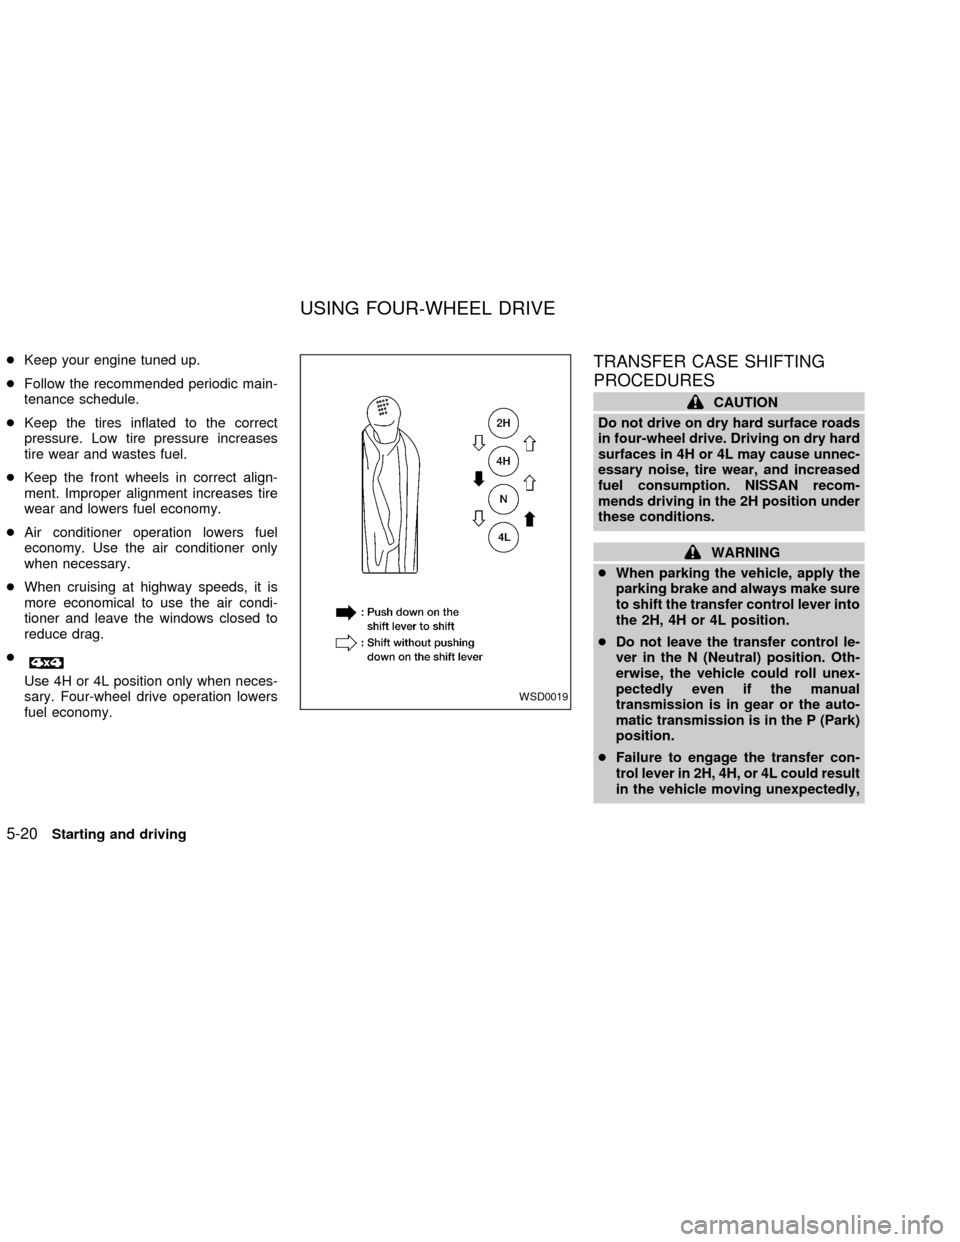
Use 4H or 4L position only when neces-
sary. Four-wheel drive operation lowers
fuel economy.
TRANSFER CASE SHIFTING
PROCEDURES
CAUTION
Do not drive on dry hard surface roads
in four-wheel drive. Driving on dry hard
surfaces in 4H or 4L may cause unnec-
essary noise, tire wear, and increased
fuel consumption. NISSAN recom-
mends driving in the 2H position under
these conditions.
WARNING
cWhen parking the vehicle, apply the
parking brake and always make sure
to shift the transfer control lever into
the 2H, 4H or 4L position.
cDo not leave the transfer control le-
ver in the N (Neutral) position. Oth-
erwise, the vehicle could roll unex-
pectedly even if the manual
transmission is in gear or the auto-
matic transmission is in the P (Park)
position.
cFailure to engage the transfer con-
trol lever in 2H, 4H, or 4L could result
in the vehicle moving unexpectedly,
WSD0019
USING FOUR-WHEEL DRIVE
5-20Starting and driving
ZX
Page 170 of 273

For King Cab models:
a. Move the driver's seatback fully forward.
b. Remove the jack and wheel nut wrench
from the tool case located behind the
driver's seat and below the jump seat.
c. Remove the jack rod located behind the
driver's seat.For Crew Cab models:
a. Tilt the rear bench seat forward
b. Remove the jack, jack rod, and tool case
located behind the rear bench seat.
2. Fit the square end of the jack rod into the
square hole of the wheel nut wrench to
form a handle.
3. Find the oval-shaped opening under the
middle of the tailgate. Pass the T-shaped
end of the jack rod through the opening
and direct it towards the spare tire winch,
located directly above the spare tire.4. Seat the T-shaped end of the jack rod
into the T-shaped opening of the spare
tire winch. Apply pressure to keep the
jack rod engaged in the spare tire winch
and turn the jack rod counterclockwise to
lower the spare tire.
ACE1017ACE1039
WCE0013
In case of emergency6-3
ZX
Page 174 of 273
tenance and do-it-yourself'' section of
this owner's manual.
1. Clean any mud or dirt from the surface
between the wheel and hub.
2. Carefully put the spare tire on and tighten
the wheel nuts finger tight.
3. With the wheel nut wrench, tighten the
wheel nuts alternately and evenly until
they are tight.
4. Lower the vehicle slowly until the tire
touches the ground. Then, with the wheel
nut wrench, tighten the wheel nuts se-
curely in the sequence as illustrated.
Lower the vehicle completely.
As soon as possible, tighten the wheel
nuts to the specified torque with a torque
wrench.
Wheel nut tightening torque:
98 ft-lb (133 Nzm)
The wheel nuts must be kept tightened to
specification at all times. It is recom-
mended that wheel nuts be tightened to
specification at each lubrication interval.
Adjust tire pressure to the COLD pres-
sure.COLD pressure:
After vehicle has been parked for three
hours or more or driven less than 1 mile
(1.6 km).
COLD tire pressures are shown on the
tire placard affixed to the inside of the
glove box lid.
cRetighten the wheel nuts when the
vehicle has been driven for 600 miles
(1,000 km) (also in cases of a flat tire,
etc.).
5. Securely store the flat tire and jacking
equipment in the vehicle.
WARNING
cAlways make sure that the spare tire
and jacking equipment are properly
secured after use. Such items can
become dangerous projectiles in an
accident or sudden stop.
cThe spare tire is designed for emer-
gency use. See specific instructions
under the heading ``Wheels and
tires'' in the ``Maintenance and do-it-
yourself'' section of this manual.
CAUTION
Be sure to center the spare tire sus-
pending plate on the wheel and then lift
the spare tire.
In case of emergency
6-7
ZX
Page 190 of 273

Fog lights (if so equipped)...............................8-34
Exterior and interior lights ...............................8-35
Wheels and tires ..................................................8-38
Tire pressure ...................................................8-38Types of tires ...................................................8-38
Tire chains .......................................................8-39
Changing wheels and tires ..............................8-40
ZX
Page 192 of 273

During the normal day-to-day operation of
the vehicle, general maintenance should be
performed regularly as prescribed in this
section. If you detect any unusual sounds,
vibrations or smells, be sure to check for the
cause or have an authorized NISSAN
dealer do it promptly. In addition, you should
notify an authorized NISSAN dealer if you
think that repairs are required.
When performing any checks or mainte-
nance work, closely observe the precau-
tions in this ``Maintenance and do-it-
yourself'' section of this manual.
EXPLANATION OF GENERAL
MAINTENANCE ITEMS
Additional information on the following
items with an ``*'' is found later in this
section.
EXTERIOR MAINTENANCE
Outside the vehicle
The maintenance items listed here should
be performed from time to time, unless
otherwise specified.
Tires*Check the pressure with a gauge at
least once a month and always prior to longdistance trips, including the spare, and ad-
just to the specified pressure if necessary.
Check carefully for damage, cuts or exces-
sive wear.
Wheel nuts*When checking the tires, make
sure no wheel nuts are missing, and check for
any loose wheel nuts. Tighten if necessary.
Tire rotation*Tires should be rotated every
7,500 miles (12,000 km).
Wheel alignment and balanceIf the ve-
hicle should pull to either side while driving
on a straight and level road, or if you detect
uneven or abnormal tire wear, there may be
a need for wheel alignment.
If the steering wheel or seat vibrates at
normal highway speeds, wheel balancing
may be needed.
For additional information regarding tires,
refer to ``Important Tire Safety Information''
in the Warranty Information Booklet (US) or
``Tire Safety Information'' in the Warranty
and Roadside Assistance Information book-
let (Canada).
WindshieldClean the windshield on a
regular basis. Check the windshield every
six months for cracks or other damage.Have a damaged windshield repaired by a
qualified repair facility.
Windshield wiper blades*Check for
cracks or wear if they do not wipe properly.
Doors, hood and tailgateCheck that the
doors, hood and tailgate operate properly.
Also ensure that all latches lock securely.
Lubricate hinges, latches, latch pins, rollers
and links as necessary. Make sure that the
secondary latch keeps the hood from open-
ing when the primary latch is released.
When driving in areas using road salt or
other corrosive materials, check lubrication
frequently.
Lights*Clean the headlights on a regular
basis. Make sure that the headlights, stop
lights, tail lights, turn signal lights, and other
lights are all operating properly and installed
securely. Also check headlight aim.
INTERIOR MAINTENANCE
The maintenance items listed here should
be checked on a regular basis, such as
when performing periodic maintenance,
cleaning the vehicle, etc.
GENERAL MAINTENANCE
Maintenance and do-it-yourself8-3
ZX
Page 221 of 273
cAiming is not necessary after replac-
ing the bulb. When aiming adjust-
ment is necessary, contact an autho-
rized NISSAN dealer.
cDo not leave the bulb out of the
headlight reflector for a long period
of time as dust, moisture, and smoke
may enter the headlight body and
affect the performance of the head-
light.
Replacing the headlight bulb
1. Open the hood.
2. Disconnect the negative (2) battery
cable.
3 Disconnect the electrical connector from
the rear end of the bulb.
4. Turn the bulb retaining ring counterclock-
wise until it is free from the headlamp
reflector and then remove it.
5. Carefully remove the headlight bulb. Do
not shake or rotate the bulb when remov-
ing it.
DO NOT TOUCH THE BULB.6. Install the new bulb in the reverse order
of removal.
cBe sure the lip of the bulb socket
contacts the headlight body.
Adjusting the headlight aim
Before performing aiming adjustment, make
sure of the following:
a. Use an aiming wall screen.
b. Keep all of the tires inflated to the correct
pressure.
c. Place the vehicle and screen on level
ground.
d. See that the vehicle is unloaded (except
for full levels of coolant, engine oil and
fuel, and that the spare tire, jack, and
tools are stored). Have the driver or an
equivalent weight placed in the driver's
seat.
1. Open the hood. Turn headlight low beam
on.
2. Adjust the vertical aim by turning the
adjustment screw.cCover the opposite headlight and ensure
the fog lights (if so equipped) are turned
off.
cAdjust beam pattern until cutoff line is
positioned at the same height off ground
as bulb center (on H-line).
8-32Maintenance and do-it-yourself
ZX
Page 227 of 273
If you have a flat tire, see the ``In case of
emergency'' section of this manual.
TIRE PRESSURE
Maximum inflation pressure
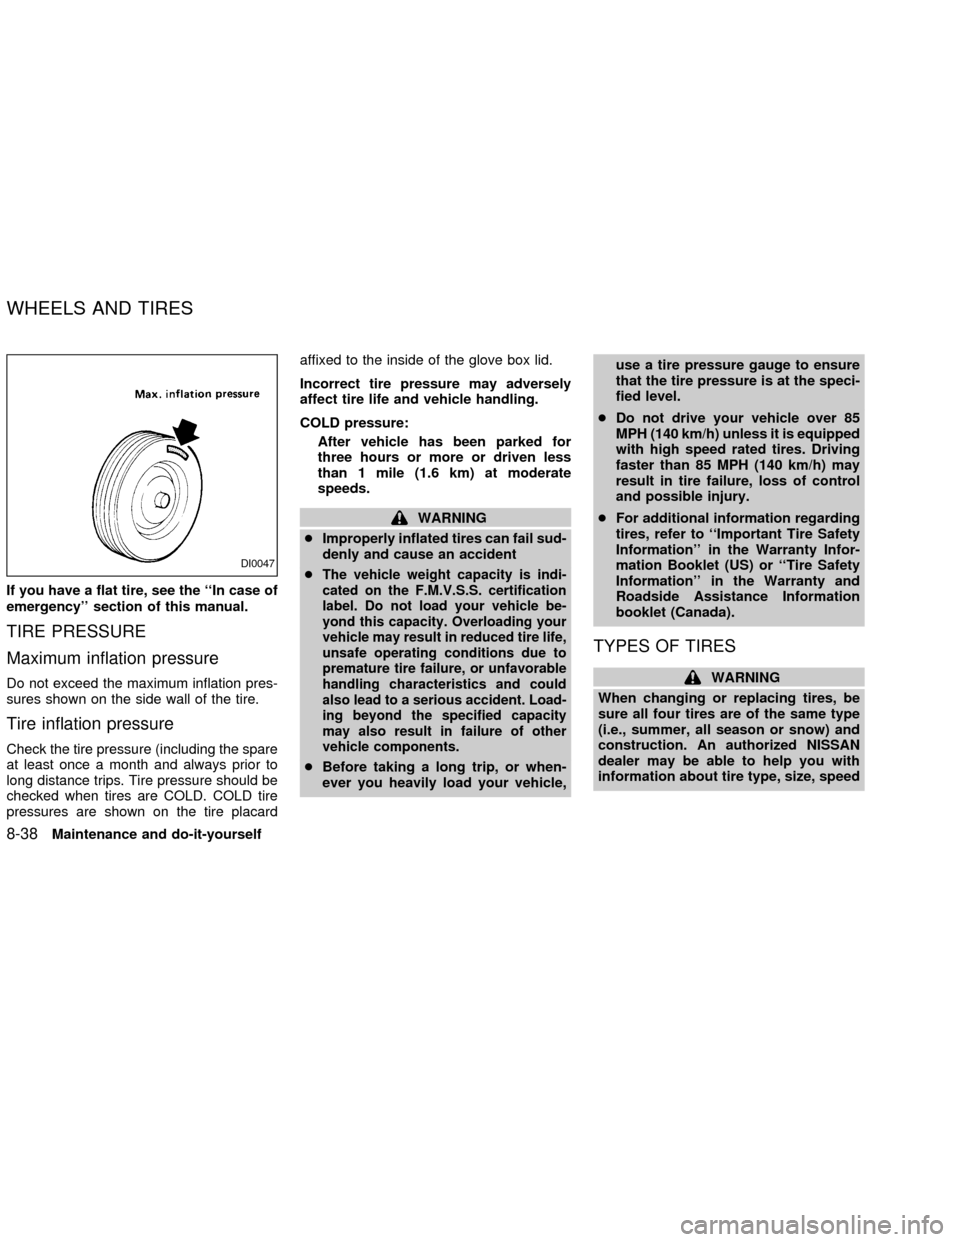
Do not exceed the maximum inflation pres-
sures shown on the side wall of the tire.
Tire inflation pressure
Check the tire pressure (including the spare
at least once a month and always prior to
long distance trips. Tire pressure should be
checked when tires are COLD. COLD tire
pressures are shown on the tire placardaffixed to the inside of the glove box lid.
Incorrect tire pressure may adversely
affect tire life and vehicle handling.
COLD pressure:
After vehicle has been parked for
three hours or more or driven less
than 1 mile (1.6 km) at moderate
speeds.
WARNING
cImproperly inflated tires can fail sud-
denly and cause an accident
c
The vehicle weight capacity is indi-
cated on the F.M.V.S.S. certification
label. Do not load your vehicle be-
yond this capacity. Overloading your
vehicle may result in reduced tire life,
unsafe operating conditions due to
premature tire failure, or unfavorable
handling characteristics and could
also lead to a serious accident. Load-
ing beyond the specified capacity
may also result in failure of other
vehicle components.
cBefore taking a long trip, or when-
ever you heavily load your vehicle,use a tire pressure gauge to ensure
that the tire pressure is at the speci-
fied level.
cDo not drive your vehicle over 85
MPH (140 km/h) unless it is equipped
with high speed rated tires. Driving
faster than 85 MPH (140 km/h) may
result in tire failure, loss of control
and possible injury.
cFor additional information regarding
tires, refer to ``Important Tire Safety
Information'' in the Warranty Infor-
mation Booklet (US) or ``Tire Safety
Information'' in the Warranty and
Roadside Assistance Information
booklet (Canada).
TYPES OF TIRES
WARNING
When changing or replacing tires, be
sure all four tires are of the same type
(i.e., summer, all season or snow) and
construction. An authorized NISSAN
dealer may be able to help you with
information about tire type, size, speed
DI0047
WHEELS AND TIRES
8-38Maintenance and do-it-yourself
ZX
Page 229 of 273
Tire chains must be installed only on the
rear wheels and not on the front wheels.
Do not use tire chains on dry roads. Driving
with chains in such conditions can cause
damage to the various mechanisms of the
vehicle due to some overstress. When driv-
ing on clear paved roads, be sure to change
to 2WD.
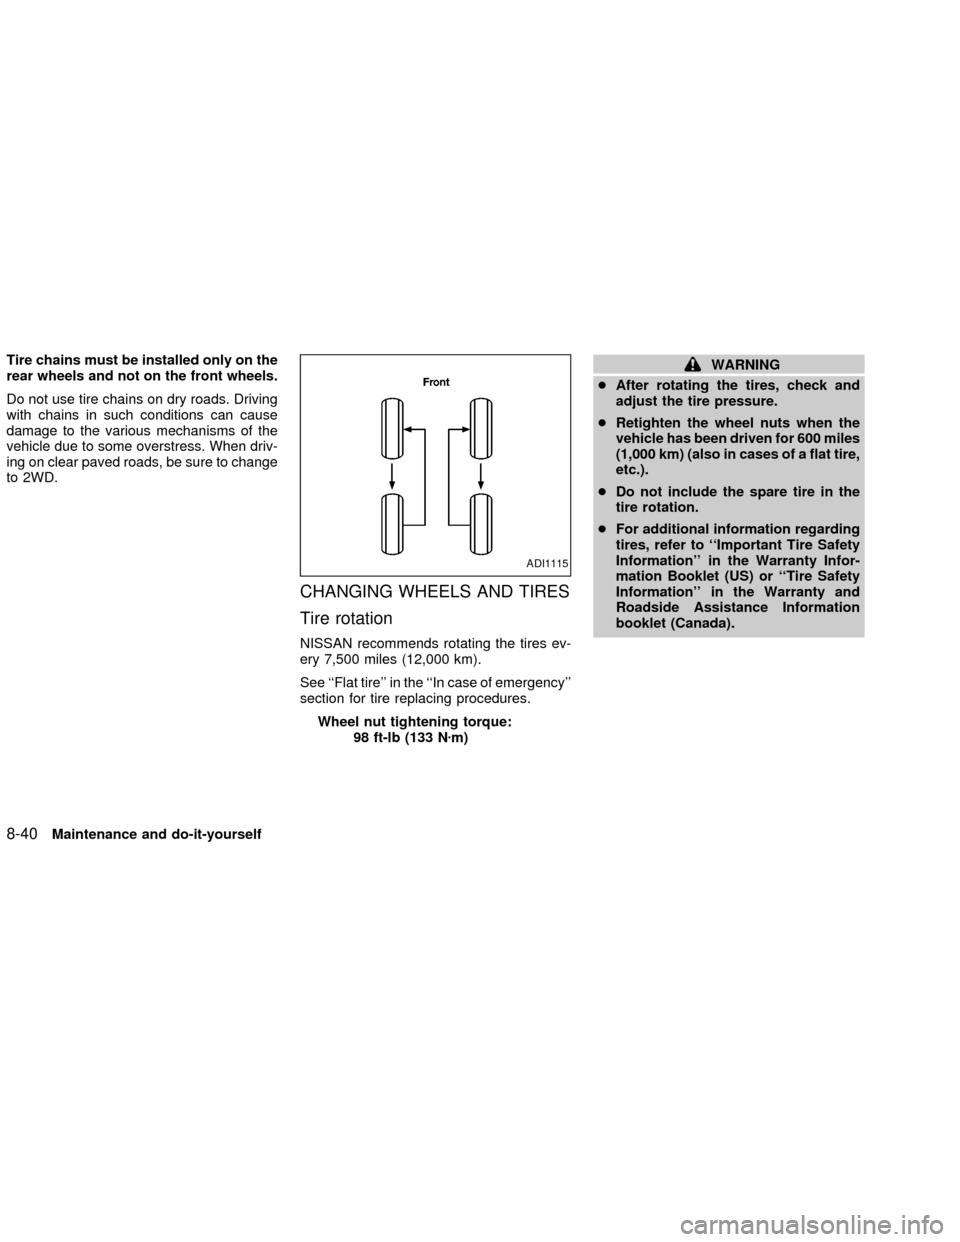
CHANGING WHEELS AND TIRES
Tire rotation
NISSAN recommends rotating the tires ev-
ery 7,500 miles (12,000 km).
See ``Flat tire'' in the ``In case of emergency''
section for tire replacing procedures.
Wheel nut tightening torque:
98 ft-lb (133 Nzm)
WARNING
cAfter rotating the tires, check and
adjust the tire pressure.
cRetighten the wheel nuts when the
vehicle has been driven for 600 miles
(1,000 km) (also in cases of a flat tire,
etc.).
cDo not include the spare tire in the
tire rotation.
cFor additional information regarding
tires, refer to ``Important Tire Safety
Information'' in the Warranty Infor-
mation Booklet (US) or ``Tire Safety
Information'' in the Warranty and
Roadside Assistance Information
booklet (Canada).
ADI1115
8-40Maintenance and do-it-yourself
ZX