2002 NISSAN ALTIMA light
[x] Cancel search: lightPage 116 of 249

power lines, electric signs and even traffic
lights.
AUDIO OPERATION PRECAU-
TIONS
Compact Disc (CD) Player
cOnly use high quality 4.7 inches (12
cm) round discs that have the ``COM-
PACT disc DIGITAL AUDIO'' logo on
the disc or packaging.cDuring cold weather or rainy days, the
player may malfunction due to the
humidity. If this occurs, remove the
CD and dehumidify or ventilate the
player completely.
cThe player may skip while driving on
rough roads.
cThe CD player sometimes cannot
function when the compartment tem-
perature is extremely high. Decrease
the temperature before use.
cDo not expose the CD to direct sun-
light.
cCDs that are of poor quality, dirty,
scratched, covered with fingerprints,
or that have pin holes may not work
properly.
cDo not use the following CDs as they
may cause the CD player to malfunc-
tion:
c8 cm (3.1 in) discs with an adapter
cRecordable compact discs (CD-R)
cRewritable compact discs (CD-RW)
cCDs that are not round
LHA0099
Heater, air conditioner and audio systems4-13
ZX
Page 132 of 249
TUNING
Memory change (radio):
Push the tuning switch ``
'' or ``''
for less than 1.5 seconds to change to the
next preset station in memory.
Seek tuning (radio):
Push the tuning switch ``
'' or ``''
for more than 1.5 seconds to seek the next
or previous radio station.
Next/Previous Track (CD):
Push the tuning switch ``
'' or ``''
for less than 1.5 seconds to return to the
beginning of the present track or skip to the
next track. Push several times to skip back
or skip through tracks.
This system searches for the blank intervals
between selections. If there is a blank inter-
val within one program or there is no interval
between programs, the system may not
stop in the desired or expected location.
Change Disc (CD) (if so equipped):
Push the tuning switch ``
'' or ``''
for more than 1.5 seconds to change the
playing disc up or down.
ANTENNA
Window antenna
The antenna pattern is printed inside the
rear window.
CAUTION
cDo not place metalized film near the
rear window glass or attach any
metal parts to it. This may cause
poor reception or noise.
cWhen cleaning the inside of the rear
window, be careful not to scratch or
damage the rear window antenna.
Lightly wipe along the antenna with
a dampened soft cloth.When installing a CB, ham radio or car
phone in your NISSAN, be sure to observe
the following cautions, otherwise the new
equipment may adversely affect the MFI
(Multiport Fuel Injection) system and other
electronic parts.WARNING
cA cellular telephone should not be
used while driving so full attention
may be given to vehicle operation.
Some jurisdictions prohibit the use
of cellular telephones while driving.
cIf you must make a call while your
vehicle is in motion, the hands free
cellular phone operational mode (if
so equipped) is highly recom-
mended. Exercise extreme caution
at all times so full attention may be
given to vehicle operation.
cIf a conversation in a moving vehicle
requires you to take notes, pull off
the road to a safe location and stop
your vehicle before doing so.
CAR PHONE OR CB RADIO
Heater, air conditioner and audio systems4-29
ZX
Page 137 of 249
DRINKING ALCOHOL/DRUGS
AND DRIVING
WARNING
Never drive under the influence of alco-
hol or drugs. Alcohol in the bloodstream
reduces coordination, delays reaction
time and impairs judgement. Driving after
drinking alcohol increases the likelihood
of being involved in an accident injuring
yourself and others. Additionally, if you
are injured in an accident, alcohol can
increase the severity of the injury.
NISSAN is committed to safe driving. How-
ever, you must choose not to drive under
the influence of alcohol. Every year thou-
sands of people are injured or killed in
alcohol related accidents. Although the local
laws vary on what is considered to be
legally intoxicated, the fact is that alcohol
affects all people differently and most
people underestimate the effects of alcohol.
Remember, drinking and driving don't mix!
And that's true for drugs, too (over the
counter, prescription, and illegal drugs).
Don't drive if your ability to operate your
vehicle is impaired by alcohol, drugs, or
some other physical condition.AUTOMATIC TRANSMISSION
On automatic transmission models, the ig-
nition lock is designed so the key cannot be
turned to LOCK and removed until the shift
selector lever is moved to the P (Park)
position.
When removing the key from the ignition,
make sure the shift selector lever is in the P
(Park) position.
If the key cannot be turned to the LOCK
position, proceed as follows to remove the
key.1) Move the shift selector lever into the P
(Park) position.
2) Turn the ignition key slightly toward the
ON position.
3) Turn the key to the LOCK position.
4) Remove the key.
The shift lever is designed so it cannot be
moved out of P (Park) and into any of the
other gear positions, if the ignition key is
turned to OFF or if the key is removed from
the switch.
The shift selector lever can be moved if
the ignition switch is in the ACC posi-
tion. This allows the vehicle to be moved
if the battery is discharged. The shift
selector lever can also be moved if the
ignition switch is in the ON position and
the foot brake pedal is depressed.
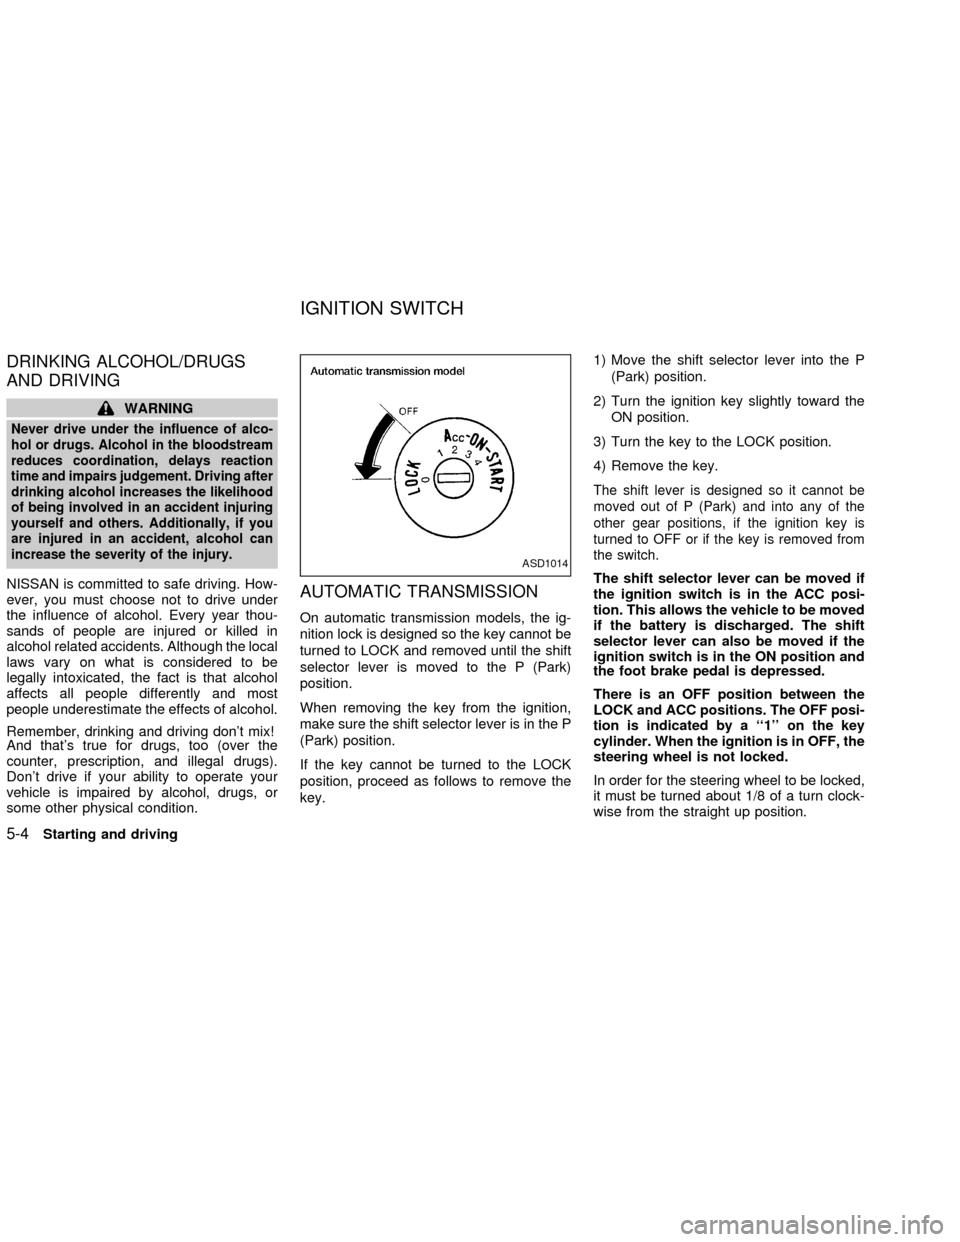
There is an OFF position between the
LOCK and ACC positions. The OFF posi-
tion is indicated by a ``1'' on the key
cylinder. When the ignition is in OFF, the
steering wheel is not locked.
In order for the steering wheel to be locked,
it must be turned about 1/8 of a turn clock-
wise from the straight up position.
ASD1014
IGNITION SWITCH
5-4Starting and driving
ZX
Page 138 of 249
To lock the steering wheel, turn the key
to the LOCK position. Remove the key.
To unlock the steering wheel, insert the
key and turn it gently while rotating the
steering wheel slightly right and left.
WARNING
Never remove or turn the key to the
LOCK position while driving. The steer-
ing wheel will lock. This may cause the
driver to lose control of the vehicle and
could result in serious vehicle damage
or personal injury.
MANUAL TRANSMISSION
The ignition switch includes an anti-theft
steering lock device.
The key can only be removed when the
ignition switch is in the LOCK position.
On manual transmission models, to turn the
ignition key to LOCK from ACC or ON, turn
the key to OFF, push the key in, then turn
the key to LOCK.
In order for the steering wheel to be locked,
it must be turned about 1/8 of a turn clock-
wise from the straight up position.To lock the steering wheel, turn the key
to the LOCK position. Remove the key.
To unlock the steering wheel, insert the
key and turn it gently while rotating the
steering wheel slightly right and left.
WARNING
Never remove or turn the key to the
LOCK position while driving. The steer-
ing wheel will lock. This may cause the
driver to lose control of the vehicle and
could result in serious vehicle damage
or personal injury.
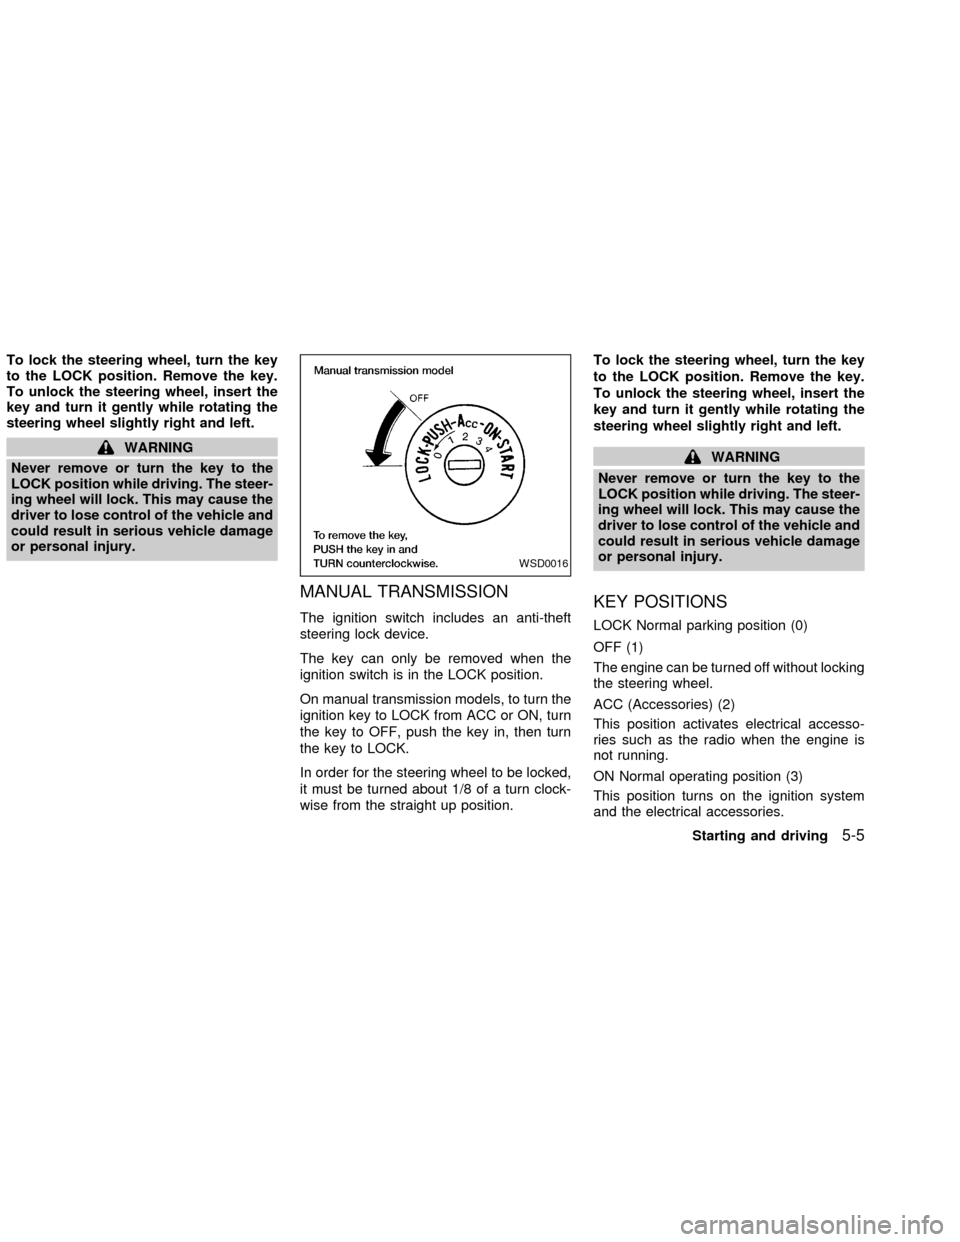
KEY POSITIONS
LOCK Normal parking position (0)
OFF (1)
The engine can be turned off without locking
the steering wheel.
ACC (Accessories) (2)
This position activates electrical accesso-
ries such as the radio when the engine is
not running.
ON Normal operating position (3)
This position turns on the ignition system
and the electrical accessories.
WSD0016
Starting and driving5-5
ZX
Page 139 of 249

START (4)
This position activates the starter motor,
which starts the engine.
NISSAN VEHICLE IMMOBILIZER
SYSTEM (NVIS)
The Nissan Vehicle Immobilizer System
(NVIS) will not allow the engine to run
without the use of the registered NVIS key.
If the engine fails to run using the registered
NVIS key, it may be due to interference
caused by another NVIS key, an automated
toll road device or automated payment de-
vice on the key ring. Restart the engine
using the following procedures:
1. Leave the ignition switch in the ON posi-
tion for approximately 5 seconds.
2. Turn the ignition switch to the OFF or
LOCK position and wait approximately 5
seconds.
3. Repeat step 1 and 2 again.
4. Restart the engine while holding the de-
vice (which may have caused the inter-
ference) separate from the registered
NVIS key.If this procedure allows the engine to run,
NISSAN recommends placing the regis-
tered NVIS key on a separate key ring to
avoid interference from other devices.cMake sure the area around the vehicle is
clear.
cMaintenance items listed here should be
checked periodically, for example, each
time you check engine oil.
cCheck that all windows and lights are
clean.
cVisually inspect tires for their appearance
and condition. Also check tires for proper
inflation.
cLock all doors.
cPosition seat and adjust head restraints.
cAdjust inside and outside mirrors.
cFasten seat belts and ask all passengers
to do likewise.
cCheck the operation of warning lights
when key is turned to the ON (3) position.
See ``Warning/Indicator lights and au-
dible reminders'' in the ``Instruments and
controls'' section.
BEFORE STARTING THE
ENGINE
5-6Starting and driving
ZX
Page 141 of 249
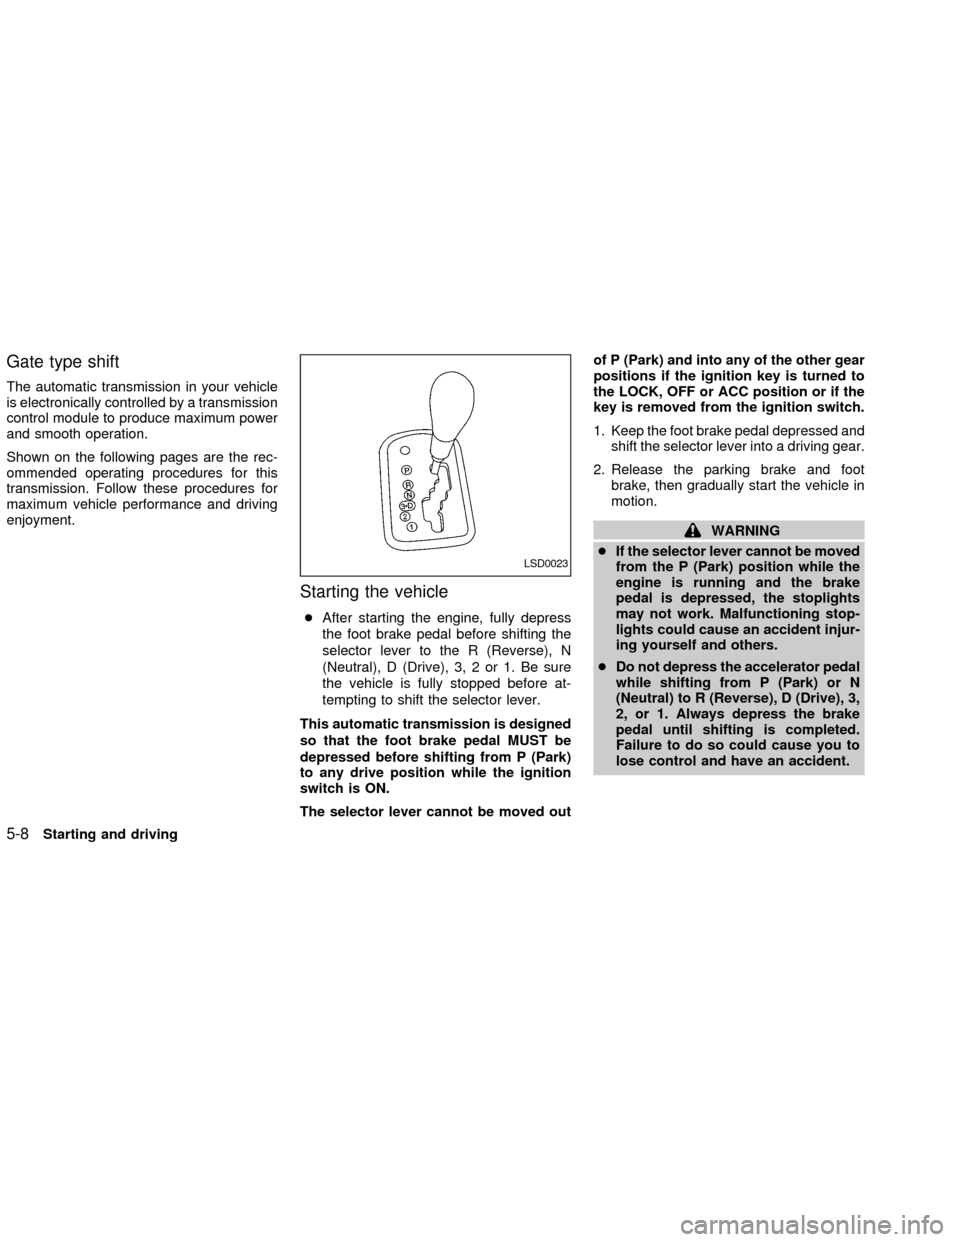
Gate type shift
The automatic transmission in your vehicle
is electronically controlled by a transmission
control module to produce maximum power
and smooth operation.
Shown on the following pages are the rec-
ommended operating procedures for this
transmission. Follow these procedures for
maximum vehicle performance and driving
enjoyment.
Starting the vehicle
cAfter starting the engine, fully depress
the foot brake pedal before shifting the
selector lever to the R (Reverse), N
(Neutral), D (Drive), 3, 2 or 1. Be sure
the vehicle is fully stopped before at-
tempting to shift the selector lever.
This automatic transmission is designed
so that the foot brake pedal MUST be
depressed before shifting from P (Park)
to any drive position while the ignition
switch is ON.
The selector lever cannot be moved outof P (Park) and into any of the other gear
positions if the ignition key is turned to
the LOCK, OFF or ACC position or if the
key is removed from the ignition switch.
1. Keep the foot brake pedal depressed and
shift the selector lever into a driving gear.
2. Release the parking brake and foot
brake, then gradually start the vehicle in
motion.
WARNING
cIf the selector lever cannot be moved
from the P (Park) position while the
engine is running and the brake
pedal is depressed, the stoplights
may not work. Malfunctioning stop-
lights could cause an accident injur-
ing yourself and others.
cDo not depress the accelerator pedal
while shifting from P (Park) or N
(Neutral) to R (Reverse), D (Drive), 3,
2, or 1. Always depress the brake
pedal until shifting is completed.
Failure to do so could cause you to
lose control and have an accident.
LSD0023
5-8Starting and driving
ZX
Page 144 of 249
form the following procedure.
1. Turn the ignition key to the LOCK posi-
tion and remove the key.
2. Apply the parking brake.
3. Remove the shift lock release cover as
shown.
4. Insert a small screwdriver in the shift lock
release slot and push down.
5. Move the shift selector lever to the N
(neutral) position while holding down the
shift lock release.
6. Turn the key to the ON position to unlock
the steering wheel.
Now the vehicle may be moved to the
desired location.
If the lever cannot be moved out of P (Park),
have your authorized NISSAN dealer check
the automatic transmission system as soon
as possible.WARNING
If the selector lever cannot be moved
from the P (Park) position while the
engine is running and the brake pedal
is depressed, the stop lights may not
work. Malfunctioning stop lights could
cause an accident injuring yourself and
others.
Accelerator downshift Ð In D posi-
tion Ð
For passing or hill climbing, fully depress
the accelerator pedal to the floor. This shifts
the transmission down into second gear or
first gear, depending on the vehicle speed.
Fail-safe
When the fail-safe operation occurs, the
next time the key is turned to the ON
position, the light in the instrument cluster of
the selected shift position will blink for ap-
proximately 8 seconds after the ignition is
turned ON. While the vehicle can be driven
under these circumstances, please note
that the gears in the automatic transmission
will be locked in third gear.
If the vehicle is driven under extremeconditions, such as excessive wheel
spinning and subsequent hard braking,
the fail-safe system may be activated.
This will occur even if all electrical cir-
cuits are functioning properly. In this
case, turn the ignition key OFF and wait
for 3 seconds. Then turn the key back to
the ON position. The vehicle should re-
turn to its normal operating condition. If
it does not return to its normal operating
condition, have your NISSAN retailer
check the transmission and repair if nec-
essary.
MANUAL TRANSMISSION
WARNING
cDo not downshift abruptly on slip-
pery roads. This may cause a loss of
control.
cDo not over-rev the engine when
shifting to a lower gear. This may
cause a loss of control or engine
damage.
Starting and driving
5-11
ZX
Page 145 of 249
CAUTION
cDo not rest your foot on the clutch
pedal while driving. This may cause
clutch damage.
cStop your vehicle completely before
shifting into R (Reverse).
cWhen the vehicle is stopped with the
engine running (for example at a
stop light), shift to N (Neutral) and
release the clutch pedal with the foot
brake applied.
Shifting
To change gears, or when upshifting or
downshifting, depress the clutch pedal fully,
shift into the appropriate gear, then release
the clutch slowly and smoothly.
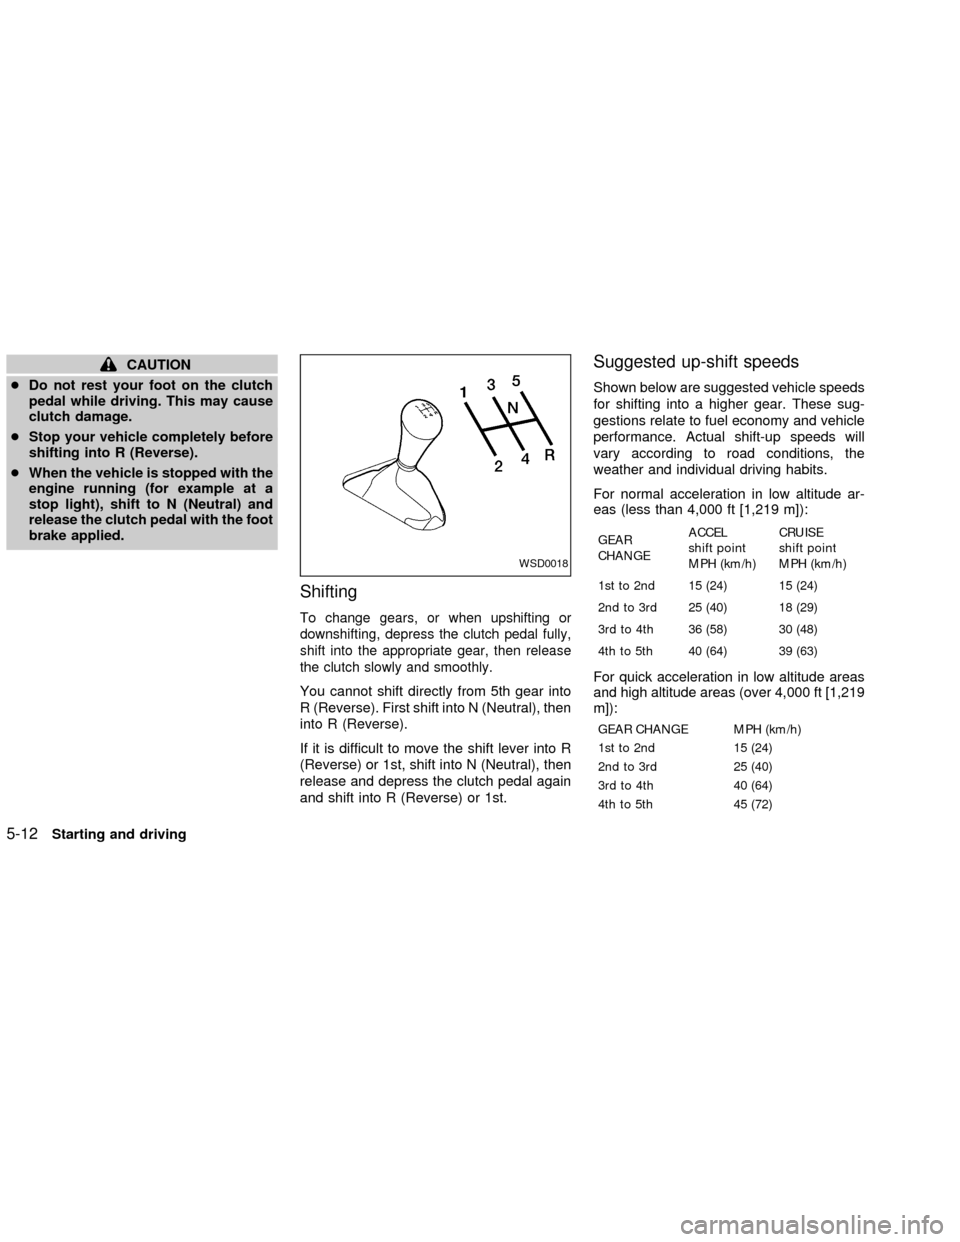
You cannot shift directly from 5th gear into
R (Reverse). First shift into N (Neutral), then
into R (Reverse).
If it is difficult to move the shift lever into R
(Reverse) or 1st, shift into N (Neutral), then
release and depress the clutch pedal again
and shift into R (Reverse) or 1st.
Suggested up-shift speeds
Shown below are suggested vehicle speeds
for shifting into a higher gear. These sug-
gestions relate to fuel economy and vehicle
performance. Actual shift-up speeds will
vary according to road conditions, the
weather and individual driving habits.
For normal acceleration in low altitude ar-
eas (less than 4,000 ft [1,219 m]):
GEAR
CHANGEACCEL
shift point
MPH (km/h)CRUISE
shift point
MPH (km/h)
1st to 2nd 15 (24) 15 (24)
2nd to 3rd 25 (40) 18 (29)
3rd to 4th 36 (58) 30 (48)
4th to 5th 40 (64) 39 (63)
For quick acceleration in low altitude areas
and high altitude areas (over 4,000 ft [1,219
m]):
GEAR CHANGE MPH (km/h)
1st to 2nd 15 (24)
2nd to 3rd 25 (40)
3rd to 4th 40 (64)
4th to 5th 45 (72)
WSD0018
5-12Starting and driving
ZX