2002 Mercury Mountaineer heater
[x] Cancel search: heaterPage 19 of 312

Compasscalibrationadjustment
Perform this adjustment in an open area free from steel structures and
high voltage lines:
For optimum calibration, turn off all electrical accessories (heater/air
conditioning, wipers, etc.) and make sure all vehicle doors are shut.
1. Start the vehicle.
2. Locate compass sensor mounted at base of mirror.
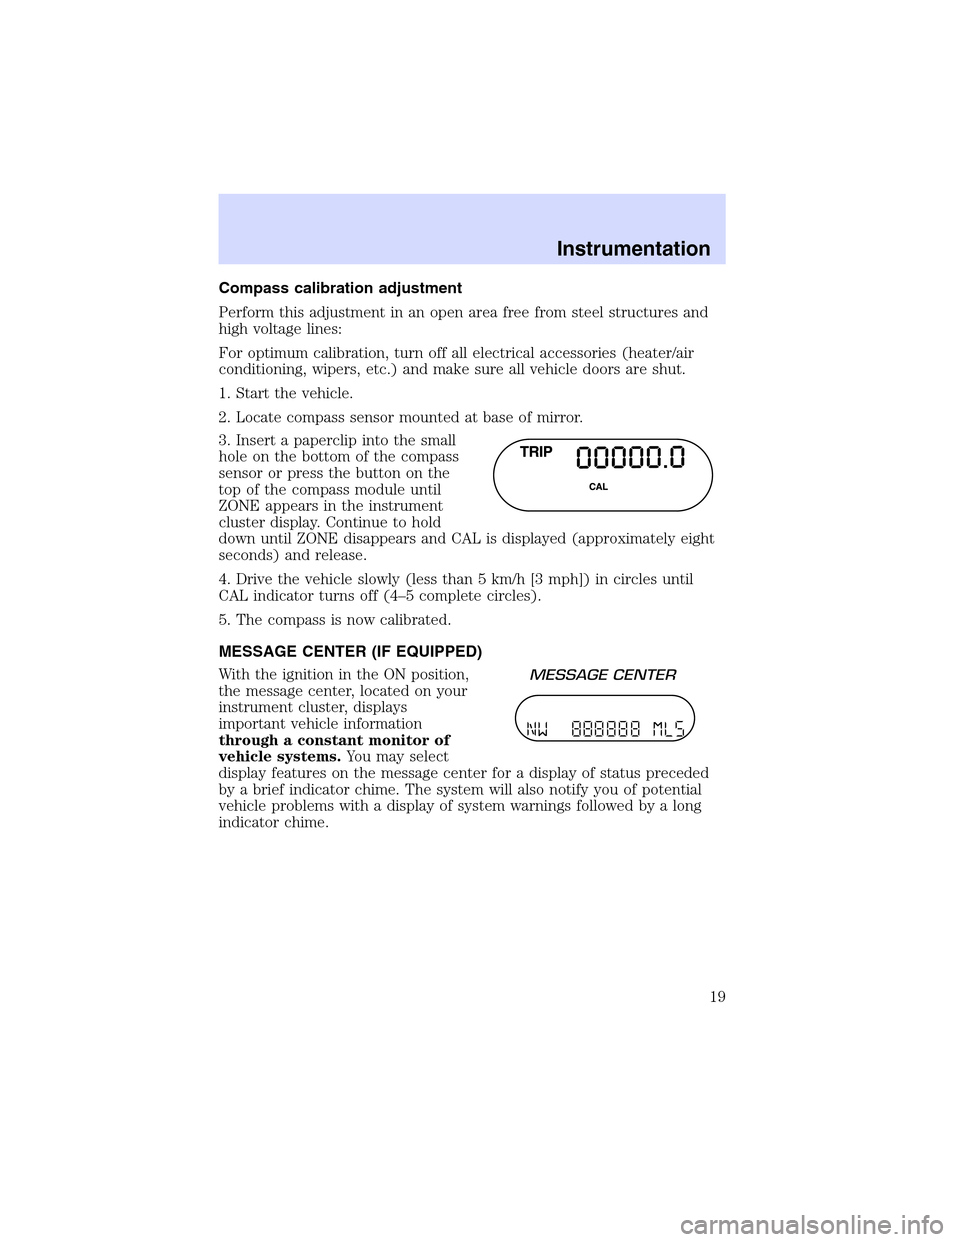
3. Insert a paperclip into the small
hole on the bottom of the compass
sensor or press the button on the
top of the compass module until
ZONE appears in the instrument
cluster display. Continue to hold
down until ZONE disappears and CAL is displayed (approximately eight
seconds) and release.
4. Drive the vehicle slowly (less than 5 km/h [3 mph]) in circles until
CAL indicator turns off (4–5 complete circles).
5. The compass is now calibrated.
MESSAGE CENTER (IF EQUIPPED)
With the ignition in the ON position,
the message center, located on your
instrument cluster, displays
important vehicle information
through a constant monitor of
vehicle systems.You may select
display features on the message center for a display of status preceded
by a brief indicator chime. The system will also notify you of potential
vehicle problems with a display of system warnings followed by a long
indicator chime.
Instrumentation
19
Page 21 of 312

degreesbetweenadjacent zones and will become noticeable as the
vehicle crosses multiple zones. A correct zone setting will eliminate this
error. Refer toCompass zone/calibration adjustment.
Compass zone/calibration adjustment
Perform this adjustment in an open area free from steel structures and
high voltage lines.
For optimum calibration, turn off all electrical accessories (heater/air
conditioning, wipers, etc.) and make sure all vehicle doors are shut.
1. Turn ignition to the ON position.
2. Start the engine.
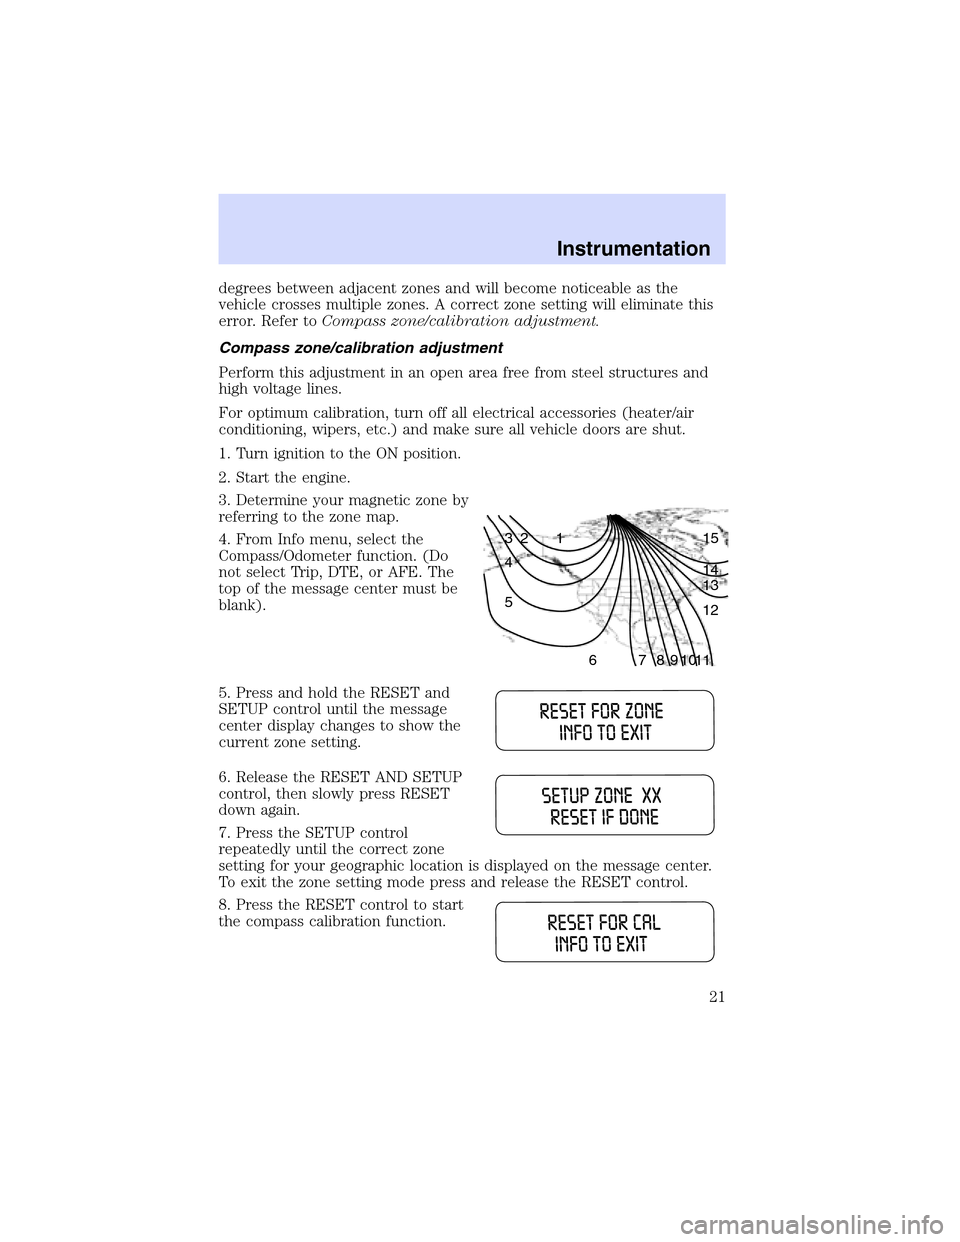
3. Determine your magnetic zone by
referring to the zone map.
4. From Info menu, select the
Compass/Odometer function. (Do
not select Trip, DTE, or AFE. The
top of the message center must be
blank).
5. Press and hold the RESET and
SETUP control until the message
center display changes to show the
current zone setting.
6. Release the RESET AND SETUP
control, then slowly press RESET
down again.
7. Press the SETUP control
repeatedly until the correct zone
setting for your geographic location is displayed on the message center.
To exit the zone setting mode press and release the RESET control.
8. Press the RESET control to start
the compass calibration function.
1 2 3
4
5
6 7 8 9 101112 13 14 15
Instrumentation
21
Page 172 of 312

summer grade ethanol is used in cold weather conditions, you may
experience increased cranking times, rough idle or hesitation until the
engine has warmed up. Consult your fuel distributor for the availability of
winter grade ethanol.
Do not crank the engine for more than 30 seconds at a time as starter
damage may occur. If the engine fails to start, turn the key to OFF and
wait 30 seconds before trying again.
Do not use starting fluid such as ether in the air intake system (see Air
Cleaner decal). Such fluid could cause immediate explosive damage to
the engine and possible personal injury.
If you should experience cold weather starting problems on E
85ethanol,
and neither an alternative brand of E
85ethanol nor an engine block
heater is available, the addition of unleaded gasoline to your tank will
improve cold starting performance. Your vehicle is designed to operate
on E
85ethanol alone, unleaded gasoline alone, or any mixture of the two.
SeeChoosing the right fuelin theMaintenance and carechapter for
more information on ethanol.
If the engine fails to start using the preceding instructions
1. Press the accelerator pedal 1/3 to 1/2 way to floor and hold.
2. Turn the key to START position.
3. When the engine starts, release the key, then release the accelerator
pedal gradually as the engine speeds up.
4. If the engine still fails to start, repeat steps one through three.
5. After the engine starts, hold your foot on the brake pedal, put the
gearshift lever in gear and release the parking brake. Slowly release the
brake pedal and drive away in a normal manner.
Using the engine block heater (if equipped)
An engine block heater warms the engine coolant, which improves
starting, warms up the engine faster and allows the heater-defroster
system to respond quickly. Use of an engine block heater is strongly
recommended if you live in a region where temperatures reach -23°C
(-10°F) or below.
For best results, plug the heater in at least three hours before starting
the vehicle. Using the heater for longer than three hours will not harm
the engine, so the heater can be plugged in the night before starting the
vehicle.
Starting
172
Page 173 of 312

To prevent electrical shock, do not use your heater with
ungrounded electrical systems or two-pronged (cheater)
adapters.
Guarding against exhaust fumes
Although odorless and colorless, carbon monoxide is present in exhaust
fumes. Take precautions to avoid its dangerous effects.
If you ever smell exhaust fumes of any kind inside your vehicle,
have your dealer inspect and fix your vehicle immediately. Do
not drive if you smell exhaust fumes. These fumes are harmful and
could kill you.
Have the exhaust and body ventilation systems checked whenever:
•the vehicle is raised for service.
•the sound of the exhaust system changes.
•the vehicle has been damaged in a collision.
WARNING:Engine exhaust, some of its constituents, and
certain vehicle components contain or emit chemicals known to
the State of California to cause cancer and birth defects or other
reproductive harm. In addition, certain fluids contained in vehicles and
certain products of component wear contain or emit chemicals known
to the State of California to cause cancer and birth defects or other
reproductive harm.
Important ventilating information
If the engine is idling while the vehicle is stopped in an open area for
long periods of time, open the windows at least 2.5 cm (one inch).
Adjust the heating or air conditioning (if equipped) to bring in fresh air.
Improve vehicle ventilation by keeping all air inlet vents clear of snow,
leaves and other debris.
Starting
173
Page 223 of 312

4. Check all battery terminals and remove any excessive corrosion before
you attach the battery cables. Ensure that vent caps are tight and level.
5. Turn the heater fan on in both vehicles to protect any electrical
surges. Turn all other accessories off.
Connecting the jumper cables
1. Connect the positive (+) booster cable to the positive (+) terminal of
the discharged battery.
Note:In the illustrations,lightning boltsare used to designate the
assisting (boosting) battery.
2. Connect the other end of the positive (+) cable to the positive (+)
terminal of the assisting battery.
+–+–
+–+–
Roadside emergencies
223
Page 299 of 312

Vehicle Security
Styled wheel locks
Vehicle security systems
Comfort and convenience
Cargo net
Cargo organizer
Cargo shade
Cargo tray
Engine block heaters
Home link visor
Tire step
Travel equipment
Ash cup
Cargo organizer
Cargo tray
Cellular phone holder
Daytime running lamps
Dog guard
Engine block heater
Factory luggage rack adaptors (bike and ski)
First aid kit
Fog lamps
Highway safety kit
Hitch step
Interior mirror, electrochromic with compass (with and without
temperature display)
Luggage/Cargo basket
Moon roof deflector
Original equipment luggage rack cross bars
Raised cross-bars (for luggage rack rails)
Remote start systems
Customer assistance
299
Page 304 of 312

A
ABS(see Brakes) .....................174
Accessory delay ..........................94
Air bag supplemental restraint
system ........................149–150, 154
and child safety seats ............152
description ......................150, 154
disposal ....................................157
driver air bag ..................152, 155
indicator light ...........10, 154, 157
operation .........................152, 155
passenger air bag ...........152, 155
Air cleaner filter .......................282
Air conditioning ..........................36
automatic temperature
control system ..........................40
auxiliary heater and air
conditioner ................................49
rear seat controls .....................51
All Wheel Drive (AWD),
driving off road .........................186
Ambulance packages ....................3
Antifreeze (see Engine
coolant) .....................................240
Anti-lock brake system
(see Brakes) ......................174–175
Anti-theft system ......................113
arming the system ..................114
disarming a triggered
system .....................................115
Audio system (see Radio) ...54, 63
Automatic transmission
driving an automatic
overdrive .................................183
fluid, adding ............................247
fluid, checking ........................247
fluid, refill capacities ..............282fluid, specification ..................287
Auxiliary power point .................98
Axle
lubricant specifications ..285, 287
refill capacities ........................282
B
Battery .......................................248
acid, treating emergencies .....248
charging system warning
light ............................................12
jumping a disabled battery ....222
maintenance-free ....................248
replacement, specifications ...282
servicing ..................................248
voltage gauge ............................16
BeltMinder .................................143
Brakes ........................................174
anti-lock ...........................174–175
anti-lock brake system (ABS)
warning light .....................11, 175
brake warning light ..................10
fluid, checking and adding ....239
fluid, refill capacities ..............282
fluid, specifications .........285, 287
lubricant specifications ..285, 287
parking ....................................176
pedals (see Power adjustable
foot pedals) ...............................33
shift interlock ..........................181
Break-in period .............................3
Bulbs ..........................................268
C
Capacities for refilling fluids ....282
Cargo cover ...............................100
CD-single premium .....................54
Certification Label ....................289
Index
304
Page 306 of 312

Emergencies, roadside
jump-starting ..........................222
Emission control system ..........266
Engine ........................................287
check engine/service engine
soon light ....................................9
cleaning ...................................277
coolant .....................................240
fail-safe coolant ......................244
idle speed control ...................248
lubrication
specifications ..................285, 287
refill capacities ........................282
service points ..................232–233
starting after a collision .........205
Engine block heater .................172
Engine oil ..................................233
checking and adding ..............233
dipstick ....................................233
filter, specifications ........237, 282
recommendations ...................237
refill capacities ........................282
specifications ..................285, 287
Exhaust fumes ..........................173
F
Fail safe cooling ........................244
Flexible Fuel Vehicle (FFV) ....257
Floor mats ...................................99
Fluid capacities .........................282
Foglamps .....................................31
Four-Wheel Drive vehicles
driving off road .......................186
preparing to drive your
vehicle .....................................180
Fuel ............................................257calculating fuel
economy ............................22, 262
cap .....................................10, 261
capacity ...................................282
choosing the right fuel ...........259
comparisons with EPA fuel
economy estimates .................266
detergent in fuel .....................261
filling your vehicle with
fuel ...........................257, 261, 263
filter, specifications ........262, 282
fuel pump shut-off switch .....205
gauge .........................................17
improving fuel economy ........262
octane rating ...................260, 287
quality ......................................260
running out of fuel .................261
safety information relating to
automotive fuels .....................257
Fuel - flex fuel vehicle
(FFV) .........................257, 259–260
Fuses ..................................206–207
G
Garage door opener ..............86, 88
Gas cap (see Fuel cap) ......10, 261
Gas mileage (see Fuel
economy) ...................................262
Gauges .........................................14
battery voltage gauge ...............16
engine coolant temperature
gauge .........................................15
engine oil pressure gauge ........17
fuel gauge ..................................17
odometer ...................................15
speedometer .............................14
tachometer ................................16
trip odometer ............................16
Index
306