Page 32 of 290

29 Central locking system
Te ch n i c a l
data Instruments
and controlsOperationDrivingInstrument
cluster displayPractical hints Car care Index When you lock the vehicle, both door lock buttons
should move down. If any one stays up, the respective
door is not properly closed.
You should then unlock the vehicle, open and reclose
this door, and lock the vehicle again. Each individual
door can be locked with the respective door lock button
– the driver’s door can only be locked when it is closed.
If the vehicle has previously been locked from the
outside, only the door being opened from the inside will
unlock, and the alarm will come on. The other door, the
trunk, the storage compartment in armrest, and fuel
filler flap remain locked.Notes:
In case of a malfunction in the central locking system
the doors can be locked and unlocked individually.
To lock, turn key in driver’s door lock to position 3 or
push down lock buttons.
To unlock, turn key in driver’s door lock to position 2 or
pull inside door handles.
Page 39 of 290

36 Antitheft alarm system
Te ch n i c a l
data Instruments
and controlsOperationDrivingInstrument
cluster displayPractical hints Car care Index
The antitheft alarm is automatically armed or disarmed
with the remote control or any of your vehicle’s keys by
locking or unlocking the vehicle.
The antitheft alarm is armed within approximately
10 seconds after locking the vehicle.
A blinking lamp (1) indicates that the alarm is armed.
Operation:
Once the alarm system has been armed, the exterior
vehicle lamps will flash and an alarm will sound when
someone:
•opens a door,
•opens the trunk,
•opens the hood,
•opens the glove box,
•attempts to raise the vehicle.The alarm will last approximately 3 minutes in form of
flashing exterior lamps. At the same time an alarm will
sound for 30 seconds. The alarm will stay on even if the
activating element (a door, for example) is immediately
closed. If the alarm stays on for more than 20 seconds,
an emergency call is initiated automatically. See Tele
Aid on page 132.
Note:
We recommend that you carry the flat key with you and
keep it in a safe place (e.g. your wallet) so that it is
always handy. Never leave the flat key in the vehicle.
When you unlock the driver’s door with the mechanical
key, the exterior lamps will flash and the alarm will
sound.
To cancel the alarm, insert the key in the steering lock
or press transmit buttonŒ or‹ on the key.
Page 40 of 290

37 Tow-away alarm
Te ch n i c a l
data Instruments
and controlsOperationDrivingInstrument
cluster displayPractical hints Car care Index Tow-away alarm
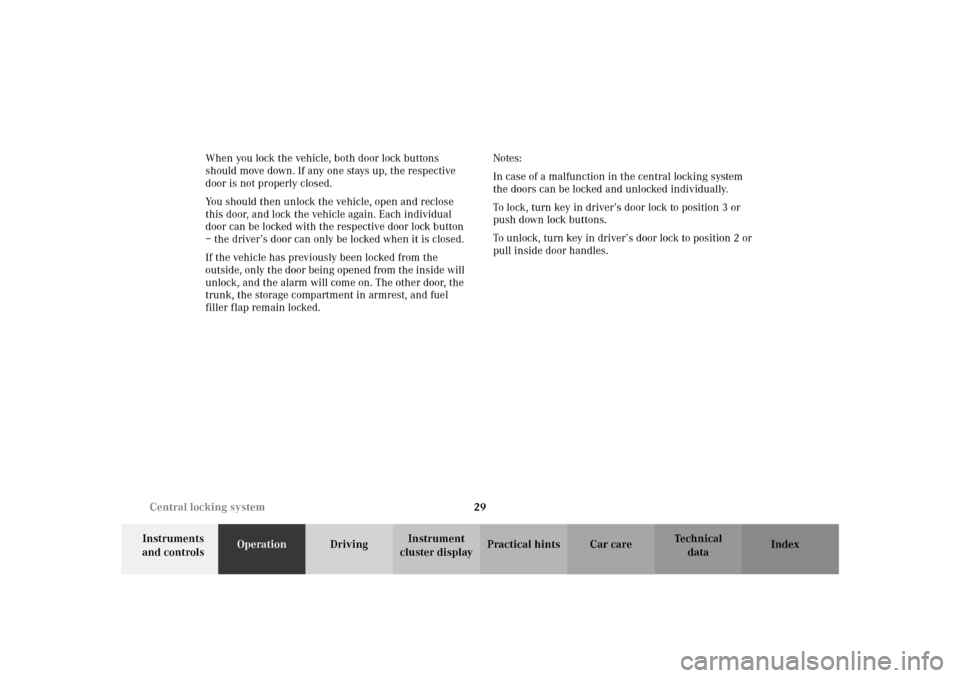
The switch is located on the center console.
1Press to switch off
2Indicator lamp
Once the alarm system has been armed, the exterior
vehicle lamps will flash and an alarm will sound when
someone attempts to raise the vehicle.The alarm will last approximately 3 minutes in form of
flashing exterior lamps. At the same time an alarm will
sound for 30 seconds. The alarm will stay on even if the
vehicle is immediately lowered. To cancel the alarm,
insert the key in the steering lock or press transmit
buttonŒ or‹ on the key.
If the alarm stays on for more than 20 seconds, an
emergency call is initiated automatically. See Tele Aid
on page 132.
To prevent triggering the tow-away alarm feature, switch
off t he tow-away alarm b efor e towin g the vehic le, or
when parking on a surface subject to movement, such
as a ferry or auto train.
To do so, turn key in steering lock to position 0 or 1, or
remove key from steering lock. Press tow-away alarm
switch (1). The indicator lamp (2) illuminates briefly.
Exit vehicle, and lock vehicle with key or remote
control.
The tow-away alarm remains switched off until the
vehicle is locked again with key or remote control, at
which time it is automatically reactivated.
1
2P54.25-2227-26
Page 43 of 290

40 Seats
Te ch n i c a l
data Instruments
and controlsOperationDrivingInstrument
cluster displayPractical hints Car care Index
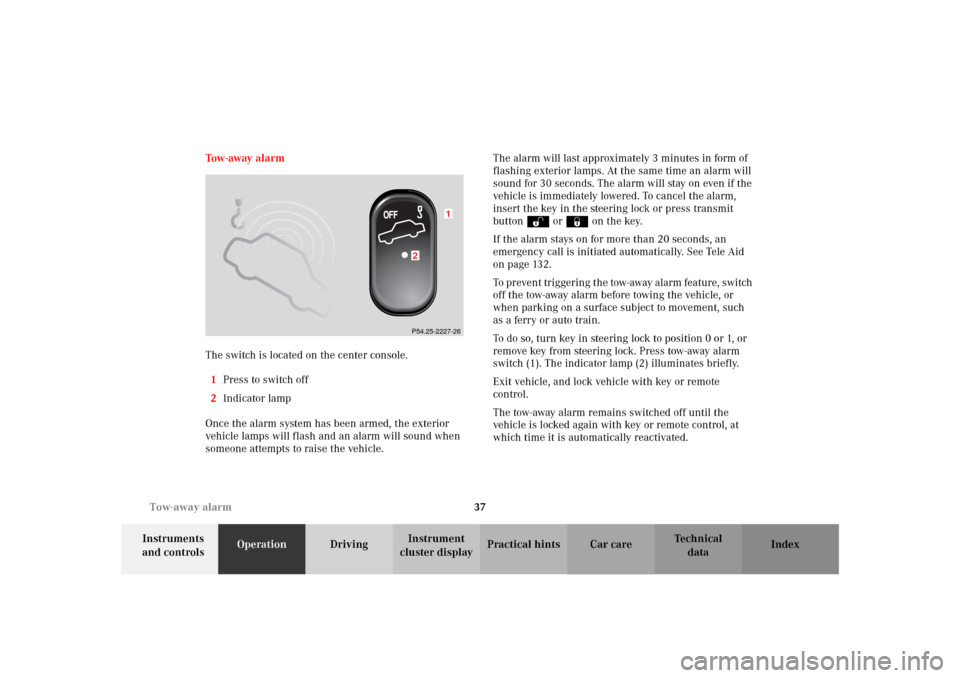
5Head restraint height
6Head restraint release
Head restraint height
Raising:
Pull up on head restraint.
Lowering:
Push down on head restraint.
Adjust head restraint to support the back of the head
approximately at ear level.For removal or installation of head restraint, first open
the roof.
Removal:
Pull head restraint to its highest position. Push
button (6) and pull head restraint out.
Installation:
Insert the head restraint and push it down to the stop.
Adjust head restraint to the desired position.
Caution!
Do not remove head restraints except when mounting
seat covers. Whenever restraints have been removed be
sure to reinstall them before driving.
P91.16-2052-26
6
5
Wa r n i n g !
For your protection, drive only with properly
positioned head restraints.Adjust head restraint to support the back of the
head approximately at ear level.Do not drive the vehicle without the seat head
restraints. Head restraints are intended to help
reduce injuries during an accident.
Page 49 of 290
46 Restraint systems
Te ch n i c a l
data Instruments
and controlsOperationDrivingInstrument
cluster displayPractical hints Car care Index
Fastening of seat belts
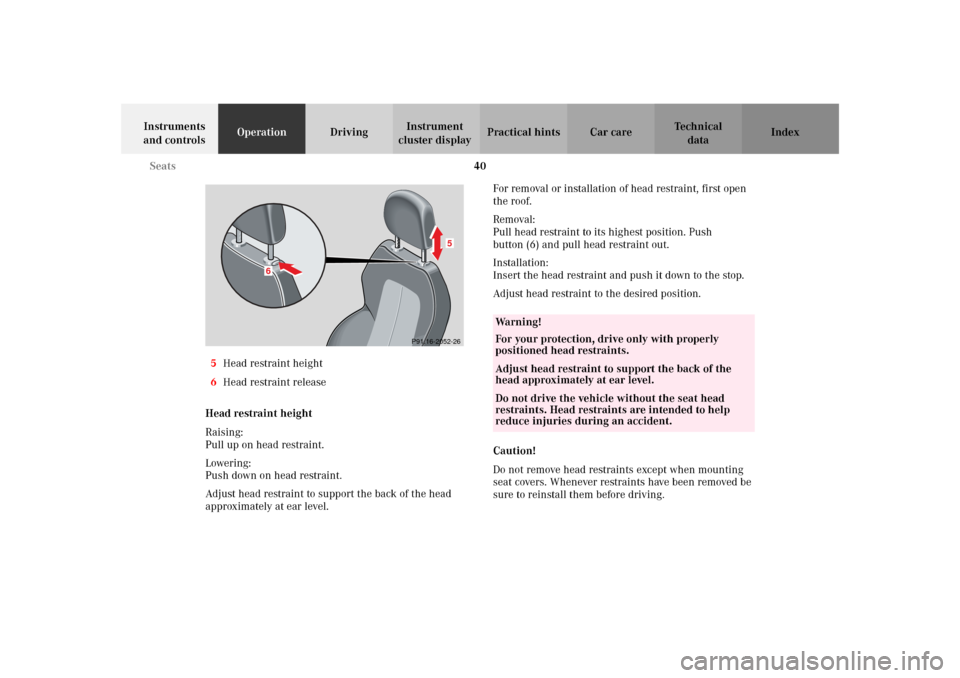
1Latch plate
2Buckle
3Release buttonPush latch plate (1) into buckle (2) until it clicks. Do not
twist the belt. A twisted seat belt may cause injury.
To help avoid severe or fatal injuries, the lap belt should
be positioned as low as possible on your hips and not
across the abdomen.
P91.40-2058-26
1
3
2
Wa r n i n g !
Always fasten your seat belt before driving off.
Always make sure your passenger is properly
restrained.
Page 51 of 290

48 Restraint systems
Te ch n i c a l
data Instruments
and controlsOperationDrivingInstrument
cluster displayPractical hints Car care Index
Unfastening of seat belts
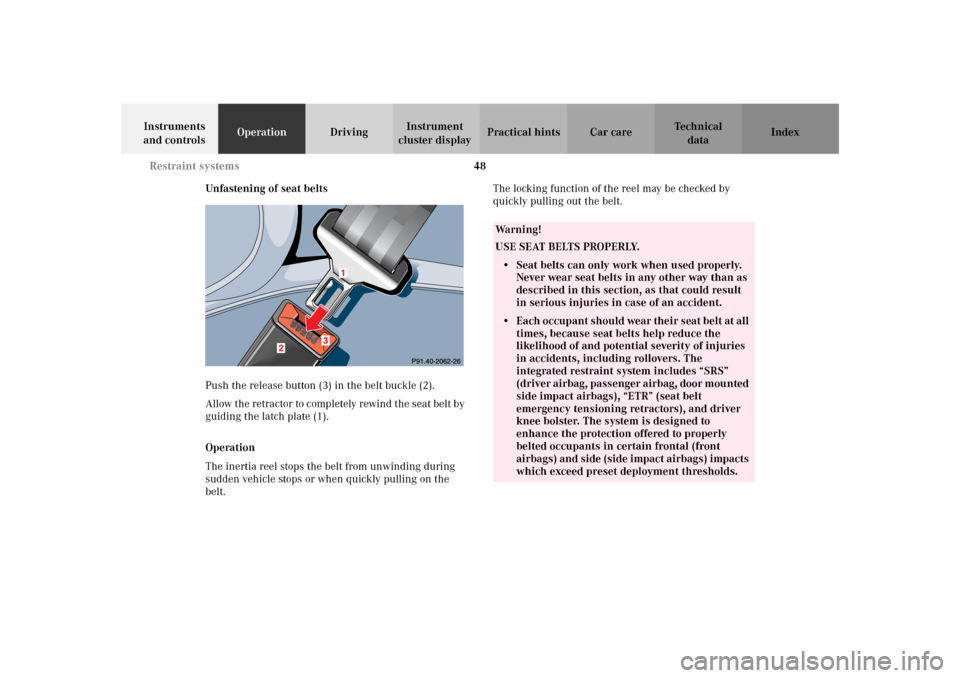
Push the release button (3) in the belt buckle (2).
Allow t he retractor to completely rewind t he seat belt by
guiding the latch plate (1).
Operation
The inertia reel stops the belt from unwinding during
sudden vehicle stops or when quickly pulling on the
belt.The locking function of the reel may be checked by
quickly pulling out the belt.
Wa r n i n g !
USE SEAT BELTS PROPERLY.• Seat belts can only work when used properly.
Never wear seat belts in any other way than as
described in this section, as that could result
in serious injuries in case of an accident.• Each occupant should wear their seat belt at all
times, because seat belts help reduce the
likelihood of and potential severity of injuries
in accidents, including rollovers. The
integrated restraint system includes “SRS”
(driver airbag, passenger airbag, door mounted
side impact airbags), “ETR” (seat belt
emergency tensioning retractors), and driver
knee bolster. The system is designed to
enhance the protection offered to properly
belted occupants in certain frontal (front
airbags) and side (side impact airbags) impacts
which exceed preset deployment thresholds.
Page 74 of 290

71 Instrument cluster
Te ch n i c a l
data Instruments
and controlsOperationDrivingInstrument
cluster displayPractical hints Car care Index 1Coolant temperature gauge, see page 75
2Fuel gauge with reserve and fuel cap placement
warning lamp, see page 185
3Outside temperature indicator, see page 75
4Push button for activating the instrument cluster,
intensity of instrument lamps, for trip odometer, and
for Flexible service system (FSS) indicator, see
pages 74, 76 and 77
5Left turn signal indicator lamp, see combination
switch on page 83
6Electronic stability program (ESP) warning lamp,
system is adjusting to road conditions, see page 1857Right turn signal indicator lamp, see combination
switch on page 83
8Speedometer
9Trip odometer, see page 76
10Main odometer, Flexible service system (FSS)
indicator, see page 77
11Push button for setting clock, see page 76
12Tachometer, see page 76
13Clock, see page 76
14Gear range indicator display, see selector lever
position, page 150
Notes:
Indicator lamps in the instrument cluster,
see page 72
Page 77 of 290
74 Instrument cluster
Te ch n i c a l
data Instruments
and controlsOperationDrivingInstrument
cluster displayPractical hints Car care Index
Activating the instrument cluster
The instrument cluster is activated by:
•Opening the door.
•Pressing button (1) on the instrument cluster.
•Turning the key in steering lock to position 2.Instrument lamps
Rotate adjusting knob (1) to vary intensity of instrument
lamps.
Display illumination
Press adjusting knob (1) to briefly illuminate the display
(with key removed or in steering lock position 0 or 1).
P54.30-4499-26
1