2002 MERCEDES-BENZ SL500 seat adjustment
[x] Cancel search: seat adjustmentPage 7 of 302

4 Contents
ABS control ................................. 191
Electronic Stability Program
(ESP) ........................................... 192
Synchronizing ESP .................... 193
ESP Control Switch .................... 194
Level control system ...................... 196
Level control
switch positions .......................... 196
Normal Level ............................... 197
Wheel Change Switch ............... 198
Adaptive Damping System
(ADS) ........................................... 199
Adaptive damping system
adjustment .................................. 199
What you should know
at the gas station .......................200
Fuel supply ..................................200
Fuel ...............................................200
Check regularly and
before a long trip .......................202
Instrument cluster display Malfunction and indicator
lamps in the
instrument cluster .................... 204
On-board
diagnostic system ...................... 204
Check engine malfunction
indicator lamp ............................ 204
Brake warning lamp .................. 205
Brake pad wear
indicator lamp ............................ 205
Seat belt warning lamp ............. 206
Supplemental
restraint system
(SRS) indicator lamp ................. 206
Fuel reserve and fuel cap
placement warning ................... 207
Electronic stability program
(ESP)- warning lamp ................. 207
BAS/ESP malfunction
indicator lamp ............................ 207
ABS malfunction
indicator lamp ............................ 208Low engine coolant
level warning lamp ....................209
Low windshield and
headlamp washer
system fluid level
warning lamp .............................. 210
Low engine oil level
warning lamp .............................. 210
Charge indicator lamp ............... 211
Exterior lamp failure
indicator lamp ............................. 211
Roll bar warning lamp ............... 212
ADS indicator lamp .................... 212
High beam
indicator lamp ............................. 213
Additional function
indicator lamps
(in the odometer display) .......... 213
Malfunction and
indicator lamp
(in the dashboard) .................... 213
Passenger airbag
indicator lamp ............................. 213
Page 23 of 302
20 Instruments and controls
Te ch n ica l
data Instruments
and controlsOperation DrivingInstrument
cluster displayPractical hints Car care Index
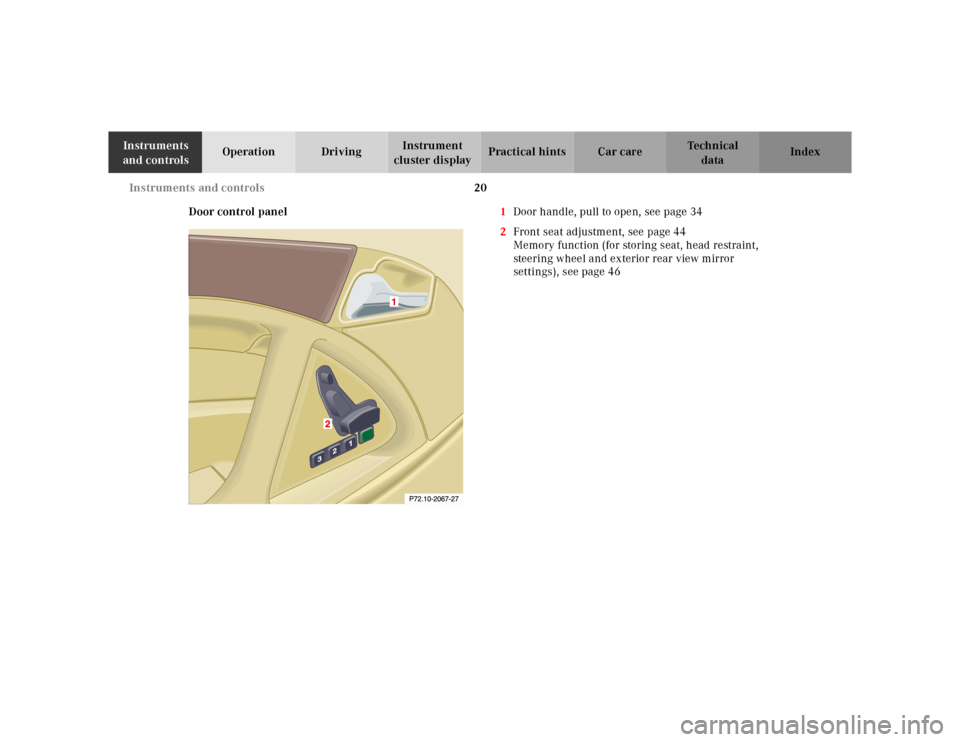
Door control panel1Door handle, pull to open, see page 34
2Front seat adjustment, see page 44
Memory function (for storing seat, head restraint,
steering wheel and exterior rear view mirror
settings), see page 46
Page 27 of 302
24 Instruments and controls
Te ch n ica l
data Instruments
and controlsOperation DrivingInstrument
cluster displayPractical hints Car care Index
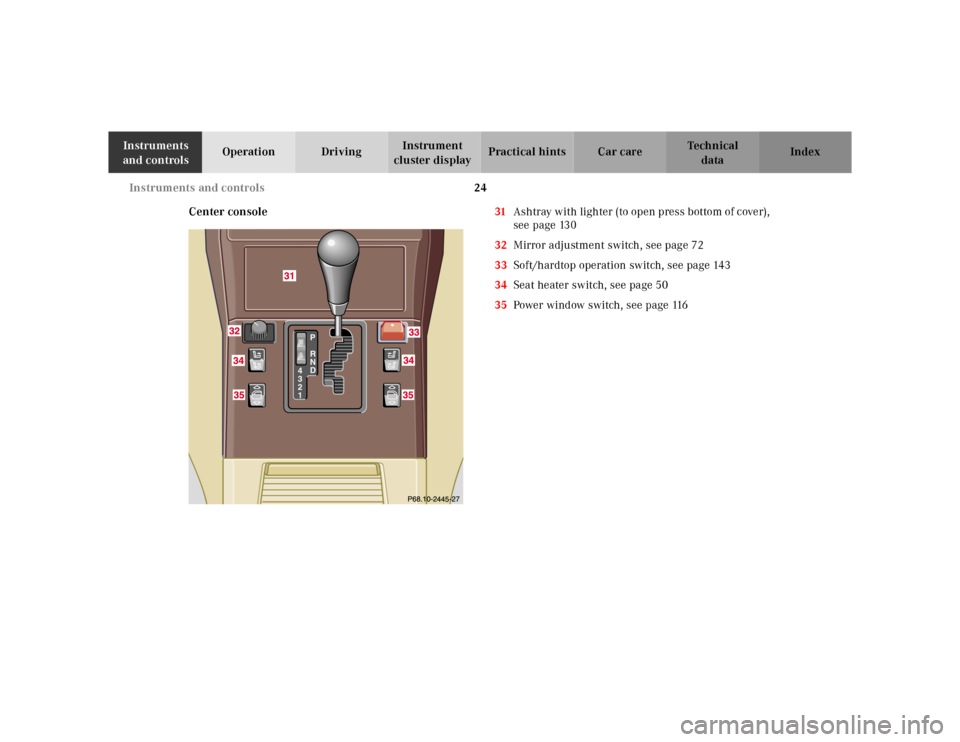
Center console31Ashtray with lighter (to open press bottom of cover),
see page 130
32Mirror adjustment switch, see page 72
33Soft/hardtop operation switch, see page 143
34Seat heater switch, see page 50
35Power window switch, see page 116
Page 48 of 302
44 Seats
Te ch n ica l
data Instruments
and controlsOperationDrivingInstrument
cluster displayPractical hints Car care Index
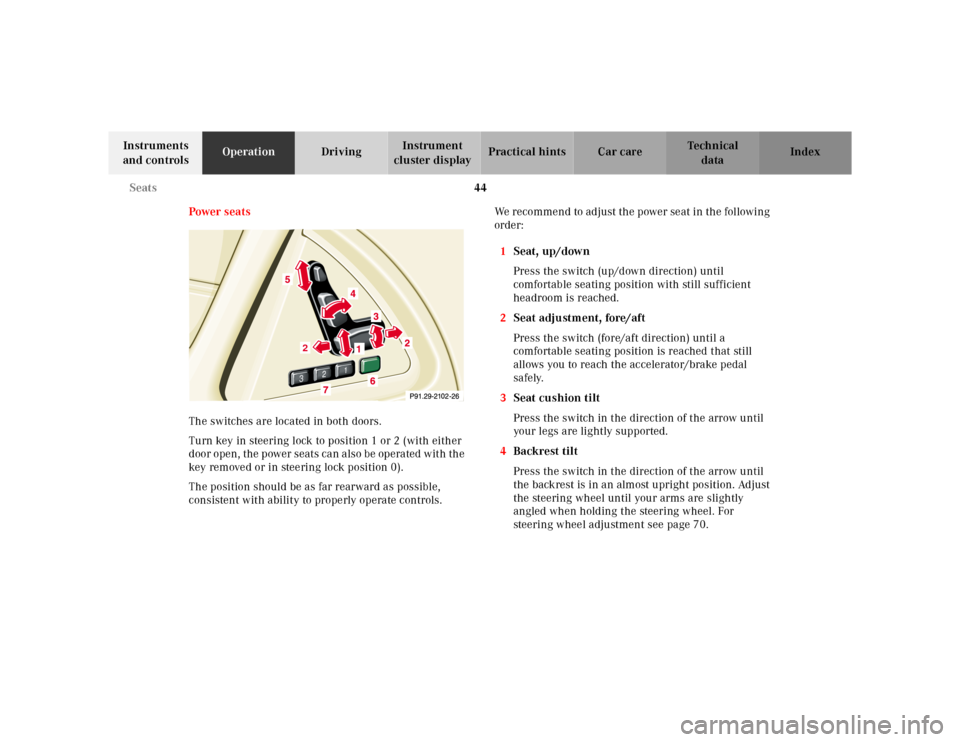
Power seats
The switches are located in both doors.
Turn key in steering lock to position 1 or 2 (with either
door open, the power seats can also be operated with the
key removed or in steering lock position 0).
The position should be as far rearward as possible,
consistent with ability to properly operate controls.We recommend to adjust the power seat in the following
order:
1Seat, up/down
Press the switch (up/down direction) until
comfortable seating position with still sufficient
headroom is reached.
2Seat adjustment, fore/aft
Press the switch (fore/aft direction) until a
comfortable seating position is reached that still
allows you to reach the accelerator/brake pedal
safely.
3Seat cushion tilt
Press the switch in the direction of the arrow until
your legs are lightly supported.
4Backrest tilt
Press the switch in the direction of the arrow until
the backrest is in an almost upright position. Adjust
the steering wheel until your arms are slightly
angled when holding the steering wheel. For
steering wheel adjustment see page 70.
3
2
1
2
1
2
Page 49 of 302
45 Seats
Te ch n ica l
data Instruments
and controlsOperationDrivingInstrument
cluster displayPractical hints Car care Index 5Head restraint
(with shoulder belt height adjustment)
Adjust the head restraint so that the upper portion
of the shoulder belt is located as close as possible to
the middle of the shoulder. The head restraint can
be tilted forward by hand.
Note:
To prevent the backrest from touching the soft top
storage compartment cover when the seat is moved
back, the backrest will automatically move to a more
upright position.
When reclining the backrest, the seat will automatically
move forward to prevent the backrest from touching the
soft top storage compartment cover.
Wa r n i n g !
When leaving the vehicle always remove the key
from the steering lock, and lock the vehicle.The power seats can also be operated with a door
open. Do not leave children unattended in the
vehicle, or with access to an unlocked vehicle.
Unsupervised use of vehicle equipment may cause
serious personal injury.
Do not adjust the driver’s seat while driving.
Adjusting the seat while driving could cause the
driver to lose control of the vehicle.Never ride in a moving vehicle with the backrest
reclined.
Sitting in an excessively reclined position can be
dangerous. You could slide under the seat belt in a
collision. If you slide under it, the belt would apply
force at the abdomen or neck. That could cause
serious or even fatal injuries. The backrest and seat
belt provide the best restraint when the wearer is
in an upright position and the belt is properly
positioned on the body.The rear storage area should never be occupied by
passengers since the vehicle is a 2 seater.
Furthermore, there is a risk of injury in the rear by
adjusting the power assisted front seats.Never place hands under seat or near any moving
parts while a seat is being adjusted.
Page 51 of 302
47 Seats
Te ch n ica l
data Instruments
and controlsOperationDrivingInstrument
cluster displayPractical hints Car care Index Important!
Prior to operating the vehicle, the driver should adjust
the seat height for proper vision as well as fore/aft
placement and backrest angle to insure adequate
control, reach, operation, and comfort. The head
restraint should also be adjusted for proper height.
Adjust head restraint to support the back of the head
approximately at ear level. See also airbag section for
proper seat positioning on page 60.
In addition, also adjust the steering wheel to ensure
adequate control, reach, operation and comfort.
Both the inside and outside rear view mirrors should be
adjusted for adequate rearward vision.
Fasten seat belts. Infants and small children should be
seated in a properly secured restraint system that
complies with U.S. Federal Motor Vehicle Safety
Standard 213 and Canadian Motor Vehicle Safety
Standard 213.
All seat, head restraint, rear view mirror, and steering
wheel adjustments as well as fastening of seat belts
should be done before the vehicle is put into motion.
Wa r n i n g !
Children 12 years old and under must never ride in
this vehicle, except in a Mercedes-Benz authorized
BabySmart
TM compatible child seat, which operates
with the BabySmart
TM system installed in the
vehicle to deactivate the passenger side front
airbag when it is properly installed.
Otherwise they will be struck by the airbag when it
inflates in a crash. If this happens, serious or fatal
injury will result.Infants and small children must be seated in an
appropriate infant or child restraint system, which
is properly secured with the vehicle’s seat belt,
fully in accordance with the child seat
manufacturer’s instructions.A child’s risk of serious or fatal injuries is
significantly increased if the child restraints are
not properly secured in the vehicle and the child is
not properly secured in the child restraint.
Page 53 of 302
49 Seats
Te ch n ica l
data Instruments
and controlsOperationDrivingInstrument
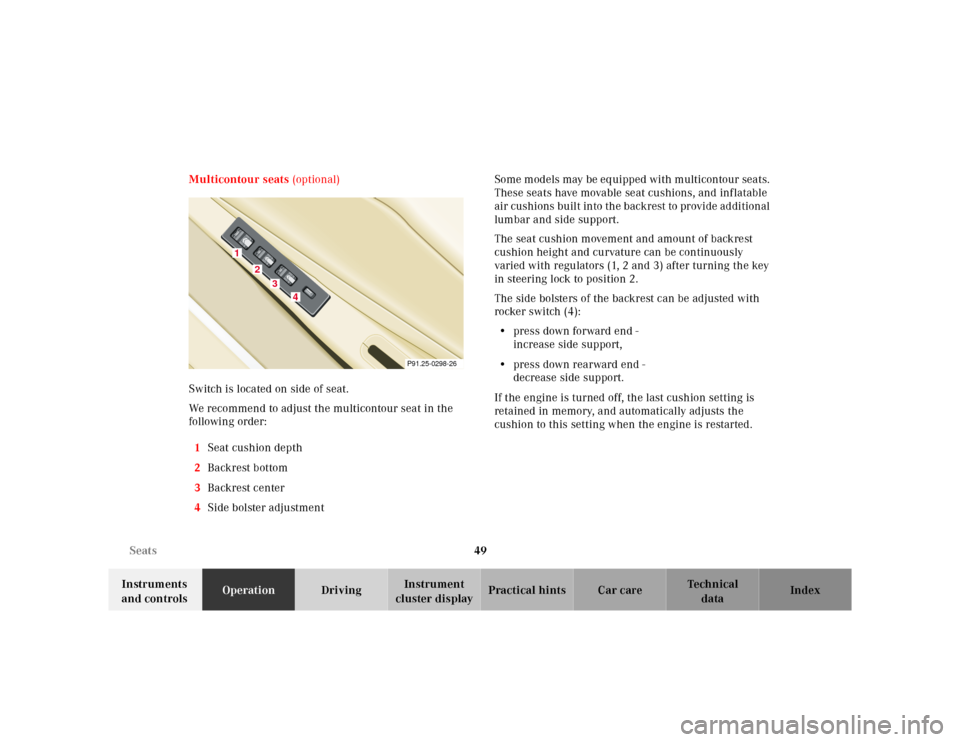
cluster displayPractical hints Car care Index Multicontour seats (optional)
Switch is located on side of seat.
We recommend to adjust the multicontour seat in the
following order:
1Seat cushion depth
2Backrest bottom
3Backrest center
4Side bolster adjustmentSome m od els may be eq uipped with m ulticontour sea ts.
These seats have movable seat cushions, and inflatable
air cushions built into the backrest to provide additional
lumbar and side support.
The seat cushion movement and amount of backrest
cushion height and curvature can be continuously
varied with regulators (1, 2 and 3) after turning the key
in steering lock to position 2.
The side bolsters of the backrest can be adjusted with
rocker switch (4):
• press down forward end -
increase side support,
• press down rearward end -
decrease side support.
If the engine is turned off, the last cushion setting is
retained in memory, and automatically adjusts the
cushion to this setting when the engine is restarted.
P91.25-0298-26
1
2
3
4
Page 68 of 302
64 Restraint systems
Te ch n ica l
data Instruments
and controlsOperationDrivingInstrument
cluster displayPractical hints Car care Index
To reduce the risk of injury when the front airbags
inflate, it is very important for the driver and front
passenger to always be in a properly seated
position and to wear their seat belts.
For maximum protection in the event of a collision
always be in normal seated position w ith your back
against the backrest. Fasten your seat belt and
ensure that it is properly positioned on your body.For unobstructive inflation of door side impact
airbags, keep door pocket lids closed.Since the airbag inflates with considerable speed
and force, a proper seating and hands on steering
wheel position will help to keep you at a safe
distance from the airbag.
Occupants who are unbelted, out of position or too
close to the airbag can be seriously injured by an
airbag as it inflates with great force in the blink of
an eye:• Sit properly belted in an upright position with
your back against the backrest.
• Adjust the driver’s seat as far as possible
rearward, still permitting proper operation of
vehicle controls. Adjust the driver’s seat as far
as possible rearward, still permitting proper
operation of vehicle controls. The distance
from the center of the driver’s breastbone to
the center of the airbag cover on the steering
wheel must be at least ten inches (25 cm) or
more. You should be able to accomplish this by
a combination of adjustments to the seat and
steering wheel. If you have any problems,
please see your authorized Mercedes-Benz
Center.• Do not lean with your head or chest close to the
steering wheel or dashboard.• Keep hands on the outside of steering wheel
rim. Placing hands and arms inside the rim
can increase the risk and potential severity of
hand/arm injury when the driver front airbag
inflates.• Do not lean against doors.