2002 MERCEDES-BENZ S500 selector
[x] Cancel search: selectorPage 262 of 430

259 Driving systems
Te ch n i c a l
data Instruments
and controlsOperationDrivingInstrument
cluster displayPractical hints Car care Index 3Canceling
To cancel the cruise control, briefly push lever to
position 3.
When you step on the brake pedal or the vehicle
speed drops below approximately 19 mph
(30 km / h), for example when driving upgrade, the
cruise control will be canceled.
If the cruise control cancels by itself and remains
inoperative until the engine is restarted, have the
system checked at your authorized Mercedes-Benz
Center as soon as possible.4Resume
If the lever is briefly pushed to position 4 when
driving at a speed exceeding approximately 19 mph
(30 km / h), the vehicle resumes the speed which
was set prior to the cancellation of the cruise
control.
The selected speed is shown for approximately
5 seconds in the multifunction display, and the
corresponding speedometer segments from the
selected speed to the vehicle maximum speed are
illuminated.
The last memorized speed is canceled when the
electronic key in the starter switch is turned to
position 1 or 0.
Important!
Moving gear selector lever to position “N” switches the
cruise control off.
Page 263 of 430
260 Driving systems
Te ch n i c a l
data Instruments
and controlsOperationDrivingInstrument
cluster displayPractical hints Car care Index
Notes:
If the engine does not brake the vehicle sufficiently
while driving on a downgrade, the speed you set on the
cruise control may be exceeded. In this case the
automatic transmission shifts down (max. to 3rd gear)
to maintain the set cruise control speed by using the
engine’s braking power.
As soon as the grade eases, the automatic transmission
shifts up again dependent on the selector lever position.
Nevertheless, in some cases you may have to step on the
brake pedal to slow down. In this case the cruise control
is switched off.
Use the lever to resume the previously set speed.
The “CRUISE CONTROL - - -” message is displayed on
the multifunction display when any attempt is made to
store speeds below 19 mph (30 km / h) or when an
attempt is made to recall a speed when no speed has
been stored – the cruise control remains switched off.
See malfunction and warning messages on page 325 if
the cruise control has a malfunction.
Wa r n i n g !
Only use the cruise control if the traffic and
weather conditions make it advisable to travel at a
steady speed.• The use of cruise control can be dangerous on
winding roads or in heavy traffic because
conditions do not allow safe driving at a steady
speed.
• The use of cruise control can be dangerous on
slippery roads. Rapid changes in tire adhesion
can result in wheel spin and loss of control.The “Resume” function should only be operated if
the driver is fully aware of the previously set speed
and wishes to resume this particular preset speed.
Page 268 of 430
265 Driving systems
Te ch n i c a l
data Instruments
and controlsOperationDrivingInstrument
cluster displayPractical hints Car care Index •For a more precise setting the speed can be
increased in increments of 1 mph (Canada: 1 km/h)
by briefly pulling the control lever in direction (4).
Caution!
If the driver’s foot is not fully removed from the
accelerator pedal, the message “DISTRONIC OVERRIDE”
is displayed while the Distronic control system is being
overridden and it will not regulate the preset vehicle
speed and following distance. The vehicle speed and
following distance will be determined only by the
accelerator pedal position.Invalid attempts to activate
The multifunction display will show “––– MPH” during
invalid attempts to activate Distronic. Distronic will not
activate in the following situations:
•below a speed of approx. 25 mph
(Canada: 40 km/h),
•while the electronic stability program (ESP) is
switched off – ESP warning lampv in
speedometer dial is illuminated, see page 112,
•by moving the distronic control lever in “RESUME”
direction (4) when no speed is stored in memory,
•during the initialization and self-test phase after the
engine is started – this can take up to 2 minutes,
•while depressing the service brake pedal,
•while the parking brake is set – check ;warning
lamp (Canada: !) in instrument cluster, see
page 112,
•with the gear selector lever in position “P”, “R”
or “N” – check gear range indicator display in
instrument cluster, see page 112.
See page 332 for malfunction and warning messages if
the Distronic is malfunctioning.
Wa r n i n g !
Distronic brakes (up to 20% of vehicle braking
power) the vehicle to restore the preset distance or
to maintain the speed. The brake pedal is
automatically applied as this happens.Keep driver’s foot area clear at all times, including
the area under the brake pedal. Objects stored in
this area may impair pedal movement which could
interfere with the braking ability of the Distronic
system.Do not place your foot under the brake pedal – your
foot could become caught.
Page 269 of 430
266 Driving systems
Te ch n i c a l
data Instruments
and controlsOperationDrivingInstrument
cluster displayPractical hints Car care Index
Deactivation of Distronic
Briefly move the distronic control lever in “OFF”
direction (3) – the stored speed remains in the memory
until the electronic key in the starter switch is turned to
position 1 or 0.
Distronic is also deactivated if:
•the service brake pedal is depressed,
•the parking brake is activated,
•the vehicle decelerates to less than approximately
25 mph (Canada: 40 km/h), e.g. while maintaining
the distance to the vehicle ahead,•the gear selector lever is moved to position “N”,
•the electronic stability program (ESP) is active,
•the electronic stability program (ESP) is switched off
manually.
Note:
A signal sounds and the message “DISTRONIC OFF”
appears for 5 seconds in the multifunction display
everytime Distronic is deactivated (except when moving
distronic control lever in “OFF” direction).
Wa r n i n g !
The Distronic switches off and releases the brakes
when the vehicle decelerates below the minimum
speed of 25 mph (Canada: 40 km/h) by operation of
the system. At that time, the driver must apply the
brakes in order to reduce vehicle speed further or
bring it to a stop.
Page 294 of 430

291 Parking system
Te ch n i c a l
data Instruments
and controlsOperationDrivingInstrument
cluster displayPractical hints Car care Index Parking assist (Parktronic)
(optional, standard on model S 600)
The Parktronic system assists the driver during parking
maneuvers. It visually and audibly indicates the relative
distance between the vehicle and an obstacle.
The front area of the vehicle is monitored when driving
forward. When reversing or with the gear selector lever
in position “N”, the front as well as the rear areas are
monitored.
With the electronic key in starter switch position 2,
Parktronic engages automatically at speeds up to
approximately 10 mph (15 km / h) and deactivates
during higher speeds.
Parktronic can be switched off by a control switch
located in the center console. It engages automatically
again when starting the engine.
See page 295 for Parktronic switch.
Wa r n i n g !
Parktronic is a supplemental system. It is not
intended to nor does it replace the need for extreme
care. The responsibility during parking and other
critical maneuvers rests always with the driver.Special attention must be paid to objects having
smooth surfaces or low silhouettes (e.g. trailer
couplings, painted posts, or street curbs). Such
objects may not be detected by the system and can
damage the vehicle.The operational function of the Parktronic can be
affected by dirty sensors, especially at times of
snow and ice. See page 386 for notes on cleaning
the parktronic system sensors.Interference caused by other ultrasonic signals
(e.g. working jackhammers or the air brakes of
trucks) can cause the system to send erratic
indications, and should be taken into
consideration.
Page 304 of 430

301 Contents – Instrument cluster display
Te ch n i c a l
data Instruments
and controlsOperation DrivingInstrument
cluster displayPractical hints Car care Index
Instrument cluster displayMalfunction and indicator
lamps in the
instrument cluster ....................302
On-board diagnostic
system ..........................................302
Check engine malfunction
indicator lamp .............................302
Brake warning lamp ..................304
Supplemental restraint system
(SRS) indicator lamp ..................305
Fuel reserve warning .................305
ABS malfunction
indicator lamp .............................306
Electronic stability program
(ESP) — warning lamp ...............307
Distronic (DTR) –
warning lamp ..............................307
Seat belt nonusage
warning lamp ..............................308Malfunction and indicator
lamp in the
center console ........................... 308
AIRBAG OFF indicator lamp .... 308
Malfunction and warning
messages in the
multifunction display .............. 309
DISPLAY DEFECTIVE ................. 310
BATTERY/ALTERNATOR ........... 311
ENTRANCE POSITION ...............312
BRAKE ASSIST ............................312
BRAKE LINING WEAR ............... 313
BRAKE FLUID ............................. 313
PARKING BRAKE ........................ 314
TRUNK OPEN .............................. 314
ELEC. STABIL. PROG.
(Electronic stability
program) ...................................... 315
COOLANT
(coolant level) .............................. 316
COOLANT
(coolant temperature) ................ 317LIGHTING SYSTEM .................... 318
LIGHT SENSOR ...........................320
ACTIVE BODY CONTROL
(ABC) ............................................320
TIRE PRESSURE .........................322
ENGINE OIL LEVEL ...................324
CRUISE CONTROL .....................325
KEY ...............................................325
DOOR ...........................................326
HOOD ...........................................326
TELE AID .....................................327
CHIP-CARD
(KEYLESS-GO) ............................328
SELECTOR LEVER ......................329
TELEPHONE – FUNCTION .......329
WASHER FLUID .........................330
AIR SPRING (AirMatic) ............. 331
DISTRONIC (DTR) ......................332
AIR CLEANER .............................333
Page 332 of 430
329 Malfunction and warning messages
Te ch n i c a l
data Instruments
and controlsOperation DrivingInstrument
cluster displayPractical hints Car care Index SELECTOR LEVER
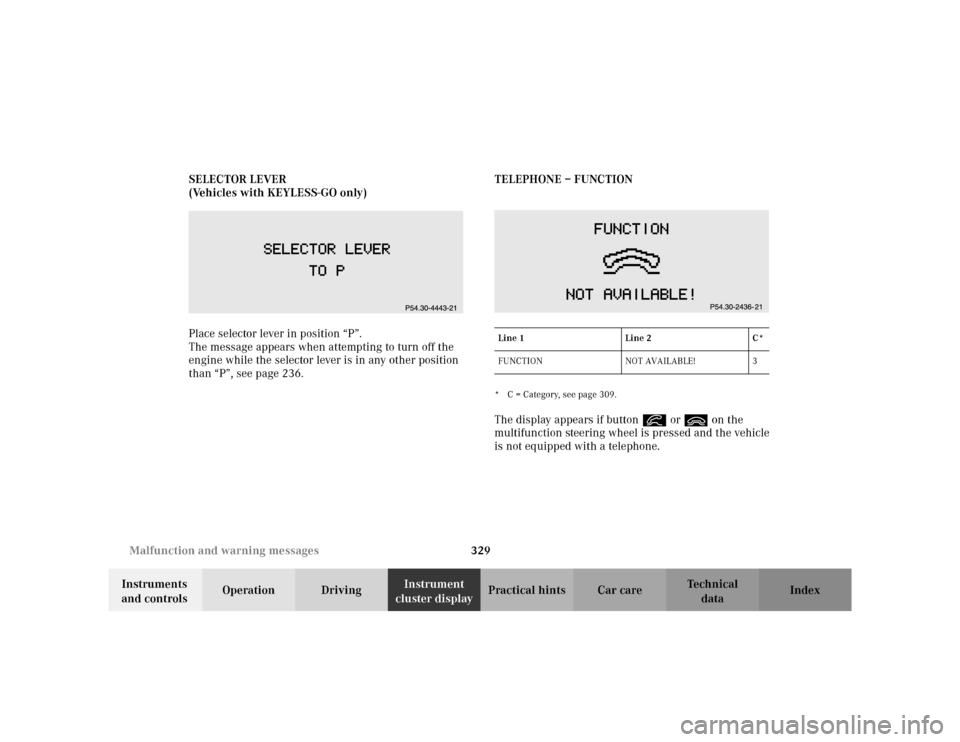
(Vehicles with KEYLESS-GO only)
Place selector lever in position “P”.
The message appears when attempting to turn off the
engine while the selector lever is in any other position
than “P”, see page 236.TELEPHONE – FUNCTION
* C = Category, see page 309.The display appears if button í or ì on the
multifunction steering wheel is pressed and the vehicle
is not equipped with a telephone.Line 1 Line 2 C*
FUNCTION NOT AVAILABLE! 3
Page 354 of 430
351 Tires, Wheels
Te ch n i c a l
data Instruments
and controlsOperation DrivingInstrument
cluster displayPractical hintsCar care Index Changing wheelsMove vehicle to a level area which is a safe distance
from the roadway.
1. Set parking brake and turn on hazard warning
flasher.
2. Move selector lever to position “P” and turn off
engine.
3. Prevent vehicle from rolling away by blocking
wheels with wheel chocks (not supplied with
vehicle) or sizable wood block or stone. When
changing a wheel on a hill, place chocks on the
downhill side blocking both wheels of the other
axle. On an level road, place one chock in front of
and one behind the wheel that is diagonally
opposite to the wheel being changed.
Wa r n i n g !
The jack is designed exclusively for jacking up the
vehicle at the jack tubes built into either side of the
vehicle. To help avoid personal injury, use the jack
only to lift the vehicle during a wheel change.
Never get beneath the vehicle while it is supported
by the jack. Keep hands and feet away from the area
under the lifted vehicle. Always firmly set parking
brake and block wheels before raising vehicle with
jack.Do not disengage parking brake while the vehicle is
raised. Be certain that the jack is always vertical
when in use, especially on hills. Always try to use
the jack on level surface. Be sure that the jack arm
is fully inserted in the jack tube. Always lower the
vehicle onto sufficient capacity jackstands before
working under the vehicle.