2002 MERCEDES-BENZ S500 keyless go
[x] Cancel search: keyless goPage 114 of 430
111 Memory function
Te ch n i c a l
data Instruments
and controlsOperationDrivingInstrument
cluster displayPractical hints Car care Index Key dependent memory settings
The setting of the automatic climate control and the
memory settings are stored together for each individual
electronic key or for both KEYLESS-GO-cards (vehicles
with KEYLESS-GO) when the electronic key is removed
from the starter switch or when the vehicle is locked
using the KEYLESS-GO-card.
The stored settings are activated when the electronic
key is inserted into the starter switch or when the
vehicle is unlocked using the KEYLESS-GO-card
(vehicles with KEYLESS-GO). See page 108 for memory
function and page 166 for automatic climate control.
Page 172 of 430

169 Automatic climate control
Te ch n i c a l
data Instruments
and controlsOperationDrivingInstrument
cluster displayPractical hints Car care Index Automatic climate control
The system is always at operational readiness, except
when manually switched off.
The automatic climate control only operates with the
engine running.
The temperature selector should be left at the desired
temperature setting. The temperature selected is
reached as quickly as possible.
The system will not heat or cool any quicker by setting a
higher or lower temperature.
The desired interior temperature and air distribution
can be selected separately for the left and right side of
the passenger compartment. Adjust the temperature
settings in small increments.
The automatic climate control removes considerable
moisture from the air during operation in the cooling
mode. It is normal for water to drip on the ground
through ducts in the underbody.
The air conditioning will not engage (no cooling) if the
economy mode AC
OFF
is selected, see page 176. Notes:
The current settings (Temperature, Air volume, AC
OFF,
Activated charcoal filter, ON / OFF) are stored for each
electronic key before the electronic key is removed from
the starter switch or when the vehicle is locked using
the KEYLESS-GO-card (vehicles with keyless-go), see
key dependent memory settings on page 111.
Do not obstruct the air flow by placing objects on the air
flow-through exhaust slots below the rear window.
Also keep the air intake grill in front of the windshield
free of snow and debris.
The storage compartment between the front seats can be
ventilated. See page 178 for notes on ventilating the
storage space under the armrest in the center console.
The air conditioner switches itself off for its own
protection if refrigerant is lost. No cooling will then take
place. Economy mode AC
OFF
cannot be switched off.
Have the air conditioner checked by a Mercedes-Benz
Center should this happen.
If the vehicle interior has been heated by direct sunlight
and is very hot, ventilate the interior (open door or
windows for a short period) before driving off.
Page 188 of 430
185 Interior equipment
Te ch n i c a l
data Instruments
and controlsOperationDrivingInstrument
cluster displayPractical hints Car care Index Express opening and closing of windows
Press k or j on the switch past resistance point
and release – window opens or closes completely.
To interrupt procedure, briefly press j or k.
If the upward movement of the window is blocked
during the closing procedure, the window will stop
during the last few inches before closure and open
slightly.
When pressing and holding the switch j to close the
window, and upward movement of the window is
blocked during the last few inches before closure, it will
stop but not
open slightly.
Note:
The power windows can also be opened and closed
using the summer opening / convenience feature, see
page 43, or pressing button O or e in the control
panel of the automatic climate control, see page 174
and 175.
Wa r n i n g !
When closing the windows, be sure that there is no
danger of anyone being harmed by the closing
procedure.In case of obstruction, the automatic reversal will
not operate if a door window is being closed by
pressing the switch to its resistance point and
holding it there, or when using the electronic key.The closing procedure of door windows can be
immediately reversed by either pressing the switch
or pressing buttonŒon the electronic key and
holding it, or (vehicle with KEYLESS-GO) when
carrying the KEYLESS-GO-card, pull and hold a
door handle.When leaving the vehicle, always remove the
electronic key from starter switch, take the
KEYLESS-GO-card (if so equipped) with you, and
lock the vehicle. Do not leave children unattended
in the vehicle, or with access to an unlocked
vehicle. Unsupervised use of vehicle equipment
can cause serious personal injury.
Page 190 of 430
187 Interior equipment
Te ch n i c a l
data Instruments
and controlsOperationDrivingInstrument
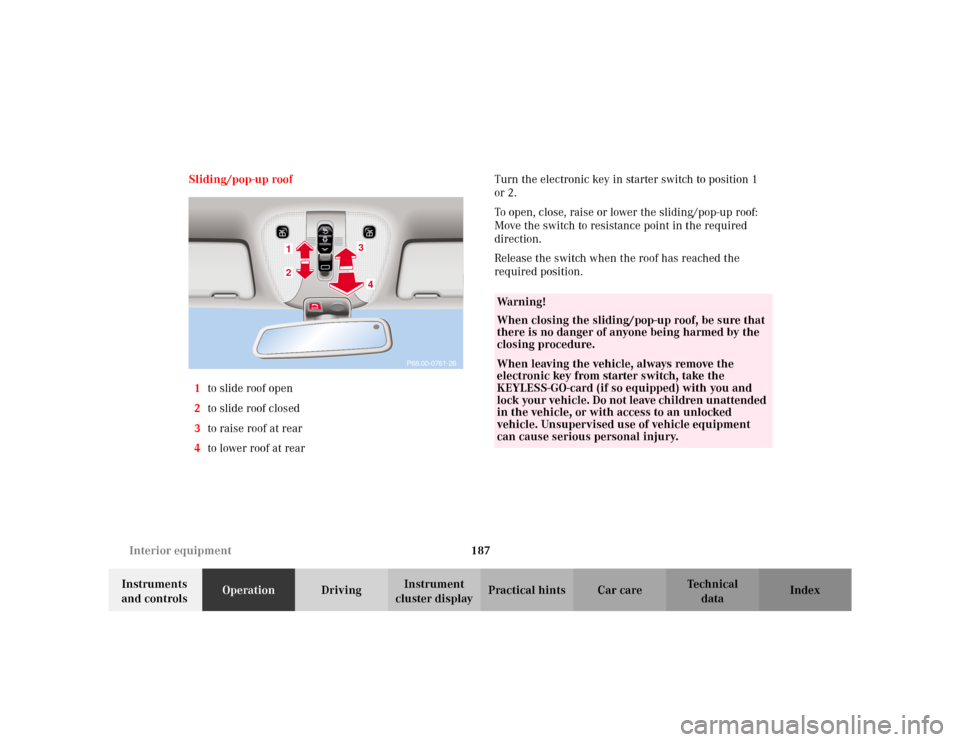
cluster displayPractical hints Car care Index Sliding/pop-up roof
1to slide roof open
2to slide roof closed
3to raise roof at rear
4to lower roof at rearTurn the electronic key in starter switch to position 1
or 2.
To open, close, raise or lower the sliding/pop-up roof:
Move the switch to resistance point in the required
direction.
Release the switch when the roof has reached the
required position.
P68.00-0761-26
34
12
Wa r n i n g !
When closing the sliding/pop-up roof, be sure that
there is no danger of anyone being harmed by the
closing procedure.When leaving the vehicle, always remove the
electronic key from starter switch, take the
KEYLESS-GO-card (if so equipped) with you and
lock your vehicle. Do not leave children unattended
in the vehicle, or with access to an unlocked
vehicle. Unsupervised use of vehicle equipment
can cause serious personal injury.
Page 191 of 430
188 Interior equipment
Te ch n i c a l
data Instruments
and controlsOperationDrivingInstrument
cluster displayPractical hints Car care Index
Opening the sliding / pop-up roof automatically
To select a sliding / pop-up roof opening position, press
the switch to resistance point and release it when the
sliding / pop-up roof has reached the required position.
The sliding / pop-up roof now opens to the position set if
the switch is pressed past resistance point in the “open”
direction.
If you wish to change the opening position of the
sliding / pop-up roof, move the switch to resistance point
in the direction you require.
Stopping the sliding / pop-up roof:
Move the switch in any direction.
Note:
Opening the sliding / pop-up roof automatically almost
fully (less approximately 1 inch [3 cm]), the sliding /
pop-up roof must have been opened first by pressing the
switch to resistance point and releasing it when the
sliding / pop-up roof has reached an almost fully open
position.
Wa r n i n g !
When closing the sliding / pop-up roof, be sure that
there is no danger of anyone being harmed by the
closing procedure.If the automatic closing operation of the sliding /
pop-up roof is blocked while attempting to lower
the roof, the roof cannot be re-opened
automatically. In this case, the roof must be opened
manually.When closing the sliding / pop-up roof with the
convenience feature and the closing procedure is
blocked, the sliding / pop-up roof will not open
automatically.The closing procedure of the sliding / pop-up roof
can be immediately reversed by either moving the
switch in any direction, or pressing buttonŒon
the electronic key and holding it; or (vehicles with
KEYLESS-GO) when carrying the KEYLESS-GO-
card, pull and hold a door handle.When leaving the vehicle, always remove the
electronic key from starter switch, take the
KEYLESS-GO-card (if so equipped) with you and
lock your vehicle. Do not leave children unattended
in the vehicle, or with access to an unlocked
vehicle. Unsupervised use of vehicle equipment
can cause serious personal injury.
Page 218 of 430
215 Contents – Driving
Te ch n i c a l
data Instruments
and controlsOperationDrivingInstrument
cluster displayPractical hints Car care Index
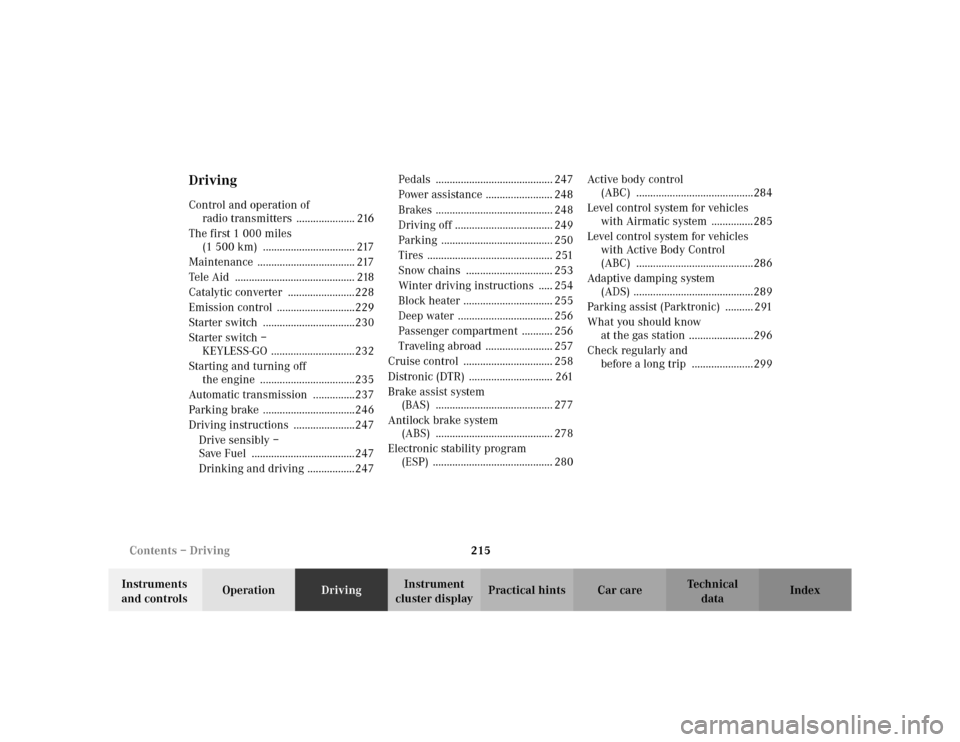
DrivingControl and operation of
radio transmitters ..................... 216
The first 1 000 miles
(1 500 km) ................................. 217
Maintenance ................................... 217
Tele Aid ........................................... 218
Catalytic converter ........................228
Emission control ............................229
Starter switch .................................230
Starter switch –
KEYLESS-GO ..............................232
Starting and turning off
the engine ..................................235
Automatic transmission ...............237
Parking brake .................................246
Driving instructions ......................247
Drive sensibly –
Save Fuel .....................................247
Drinking and driving .................247Pedals .......................................... 247
Power assistance ........................ 248
Brakes .......................................... 248
Driving off ................................... 249
Parking ........................................ 250
Tires ............................................. 251
Snow chains ............................... 253
Winter driving instructions ..... 254
Block heater ................................ 255
Deep water .................................. 256
Passenger compartment ........... 256
Traveling abroad ........................ 257
Cruise control ................................ 258
Distronic (DTR) .............................. 261
Brake assist system
(BAS) .......................................... 277
Antilock brake system
(ABS) .......................................... 278
Electronic stability program
(ESP) ........................................... 280Active body control
(ABC) ..........................................284
Level control system for vehicles
with Airmatic system ...............285
Level control system for vehicles
with Active Body Control
(ABC) ..........................................286
Adaptive damping system
(ADS) ...........................................289
Parking assist (Parktronic) .......... 291
What you should know
at the gas station .......................296
Check regularly and
before a long trip ......................299
Page 221 of 430
218 Tele Aid
Te ch n i c a l
data Instruments
and controlsOperationDrivingInstrument
cluster displayPractical hints Car care Index
Tele Aid
Important!
The initial activation of the Tele Aid system may only be
performed by completing the subscriber agreement and
placing an acquaintance call using the “SOS” button.
Failure to complete either of these steps will result in a
system that is not activated. If the system is not
activated the indicator lamp in the “SOS” button stays
on after turning electronic key in starter switch to
position 2 (vehicles with KEYLESS-GO:
operating position, see page 232) and the message
“TELE AID – NOT ACTIVATED” will be shown in the
multifunction display for approx. 10 seconds.
If you have any questions regarding activation, please
call the Response Center at 1-800-756-9018 (in the USA)
or 1-888-923-8367 (in Canada).
(Te l ematic Alarm Identification on Demand)
The Tele Aid system consists of three types of response;
automatic and manual emergency, roadside assistance
and information.
The Tele Aid system is operational providing that the
vehicle’s battery is charged, properly connected, not
damaged and cellular and GPS coverage is available.The speaker volume of a Tele Aid call can be adjusted
when using the volume control on the multifunction
steering wheel, for raising press buttonæand for
lowering press buttonç.
To activate, press the “SOS” button, the Roadside
Assistance button• or the Information button¡,
depending on the type of response required.
Shortly after the completion of your Acquaintance Call,
you will receive a user ID and password via first call
mail. By visiting www.mbusa.com and selecting
“Tele Aid” (USA only), you will have access to account
information, remote door unlock, Info Services
* profile
and more.
* Optional System self-check
Initially, after turning the electronic key in starter
switch to position 2, malfunctions are detected and
indicated (the indicator lamps in the “SOS” button, the
Roadside Assistance button• and the Information
button¡ stay on longer than 10 seconds or do not
come on). The message “TELE AID – VISIT
WORKSHOP” appears for approx. 10 seconds in the
multifunction display.
Page 233 of 430
230 Starter switch
Te ch n i c a l
data Instruments
and controlsOperationDrivingInstrument
cluster displayPractical hints Car care Index
Starter switch
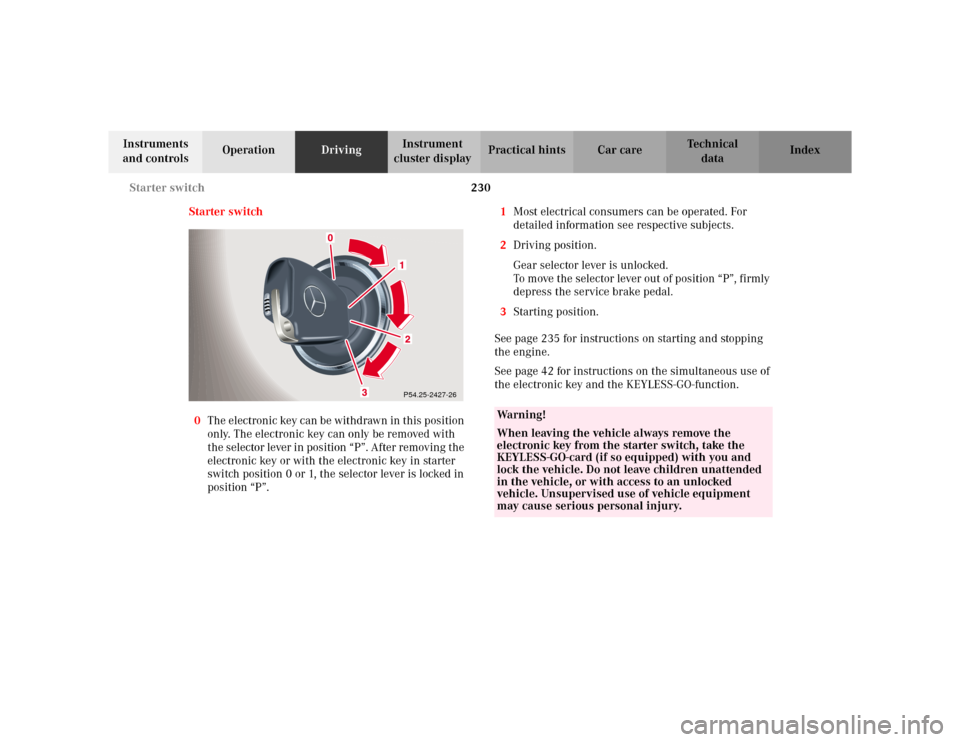
0The electronic key can be withdrawn in this position
only. The electronic key can only be removed with
the selector lever in position “P”. After removing the
electronic key or with the electronic key in starter
switch position 0 or 1, the selector lever is locked in
position “P”.1Most electrical consumers can be operated. For
detailed information see respective subjects.
2Driving position.
Gear selector lever is unlocked.
To move the selector lever out of position “P”, firmly
depress the service brake pedal.
3Starting position.
See page 235 for instructions on starting and stopping
the engine.
See page 42 for instructions on the simultaneous use of
the electronic key and the KEYLESS-GO-function.
P54.25-2427-26
Wa r n i n g !
When leaving the vehicle always remove the
electronic key from the starter switch, take the
KEYLESS-GO-card (if so equipped) with you and
lock the vehicle. Do not leave children unattended
in the vehicle, or with access to an unlocked
vehicle. Unsupervised use of vehicle equipment
may cause serious personal injury.