Page 70 of 342
67 Restraint systems
Te ch n i c a l
data Instruments
and controlsOperationDrivingInstrument
cluster displayPractical hints Car care IndexWhen you sell the vehicle we strongly urge you to give
notice to the subsequent owner that it is equipped with
an “SRS” by alerting him to the applicable section in the
Operator’s Manual.
• In addition, through improper work there is
the risk of rendering the “SRS” inoperative or
causing unintended airbag deployment. Work
on the “SRS” must therefore only be performed
by an authorized Mercedes-Benz Light Truck
Center.• For your protection and the protection of
others, when scrapping the airbag unit or
emergency tensioning retractor, our safety
instructions must be followed. These
instructions are available at your authorized
Mercedes-Benz Light Truck Center.
• Given the considerable deployment speed and
the textile structure of the airbags, there is the
possibility of abrasions or other injuries
resulting from airbag deployment.
Page 79 of 342

76 Rear view mirrors
Te ch n i c a l
data Instruments
and controlsOperationDrivingInstrument
cluster displayPractical hints Car care Index
Automatic (optional on ML 320):
With the key in steering lock position 2 and the
automatic antiglare function activated, the mirror
reflection brightness responds to changes in light
sensitivity.
To a c ti va te :
Press button (1). The green indicator lamp in the inside
rear view mirror lights up.To d e a c t i va t e :
Press button (1) again. The indicator lamp in the inside
rear view mirror goes out. The mirror brightness does
not respond to changes in light sensitivity.
Notes:
With gear selector lever in position “R”, or with the
interior lamps (except cargo compartment lamp)
switched on, the mirror brightness does not respond to
changes in light sensitivity.
The automatic antiglare function does not react, if
incoming light is not aimed directly at sensors in the
inside rear view mirror.
The antiglare function will not react for example, if the
cargo area is fully loaded.
Wa r n i n g !
In the case of an accident liquid electrolyte may
escape the mirror housing when the mirror glass
breaks.Electrolyte has an irritating effect. Do not allow the
liquid come into contact with eyes, skin, clothing,
or respiratory system. In cases it does, immediately
flush affected area with water, and seek medical
help if necessary.
Page 83 of 342
80 Rear view mirrors
Te ch n i c a l
data Instruments
and controlsOperationDrivingInstrument
cluster displayPractical hints Car care Index
Driver’s side exterior rear view mirror, antiglare
mode (optional on ML 320)
Antiglare mode:
With the key in steering lock position 2, the mirror
reflection brightness responds to changes in light
sensitivity.
With the gear selector lever in position “R”, or with the
interior light switched on, the mirror brightness does
not respond to changes in light sensitivity.Note:
The automatic antiglare function does not react, if
incoming light is not aimed directly at sensors in the
inside rear view mirror.
The antiglare function will not react for example, if the
cargo area is fully loaded.
Page 95 of 342

92 Trip computer
Te ch n i c a l
data Instruments
and controlsOperationDrivingInstrument
cluster displayPractical hints Car care Index
To calibrate the compass:
If the vehicle was exposed to a significant magnetic
zone, such as high voltage power lines, the compass
may have to be calibrated.
Calibration of the compass should be done in an area
free of steel superstructures and power lines. All
electrical consumers (e.g. exterior lamps, climate
control, rear window defroster etc.) should be switched
off, doors and liftgate closed. Do not open or close the
roof. An open liftgate triggers the display “–––”.
1. Start and run the engine.
2. Press MODE key repeatedly until the compass
display appears in the trip computer display.
3. Press RESET key and afterwards press MODE key,
“CAL–” appears in the display.4. Press and hold RESET key for a minimum of
2 seconds, to access the calibration mode.
The display shows “CAL”.
5. Without interruption drive two full circles at a speed
between 3 mph (5 km / h) and 7 mph (10 km / h).
The message “CAL” goes out after a short time.
6. The calibration of the compass is now complete.
Note:
If “CAL” remains in the display, calibration was not
successfully completed. To recalibrate, remove key from
the steering lock. Insert key, start the vehicle and start
the calibration procedure.
We recommend that you have the compass calibrated at
a Mercedes-Benz Light Truck Center.
Page 98 of 342

95 Flexible service system
Te ch n i c a l
data Instruments
and controlsOperationDrivingInstrument
cluster displayPractical hints Car care Index Important!
The FSS indicator is not an engine oil level indicator.
See page 96 for engine oil level indicator.
Notes:
When disconnecting vehicle battery for one or more
days at a time, such days will not be counted. Any such
days not counted by the FSS can be added by your
Mercedes-Benz Light Truck Center.
The interval between services is determined by the type
of driving for which the vehicle is used. For example,
driving at extreme speeds, and cold starts combined
with short distance driving in which the engine does not
reach normal operating temperature, reduce the interval
between services.
Following a completed A or B service the Mercedes-
Benz Light Truck Center sets the counter mileage to
10 000 miles (Canada: 15 000 km).
The counter can also be set by any individual. To do so:
1. Turn the key in steering lock to position 2.
2. Immediately press button (1) twice within one
second.3. The present status for days or distance is displayed.
Within 10 seconds turn key in steering lock to
position 0.
4. Press and hold button (1), while turning key in
steering lock to position 2 again. The present status
for days or distance is displayed once more.
Continue to hold button (1).
After approximately 10 seconds a signal sounds, and
the display shows 10 000 miles (Canada: 15 000 km)
for approximately 10 seconds.
5. Release button (1).
If the FSS counter was inadvertently reset, have it
corrected at a Mercedes-Benz Light Truck Center.
Note:
However you choose to set your reference numbers, the
scheduled services as posted in the Service Booklet
must be followed to properly care for your vehicle.
Page 99 of 342

96 Engine oil level indicator
Te ch n i c a l
data Instruments
and controlsOperationDrivingInstrument
cluster displayPractical hints Car care Index
Engine oil level indicator
To check the engine oil level, park vehicle on level
ground, with engine at normal operational temperature.
Check oil level approximately 5 minutes after turning
off the engine, allowing for the oil to return to the oil
pan.
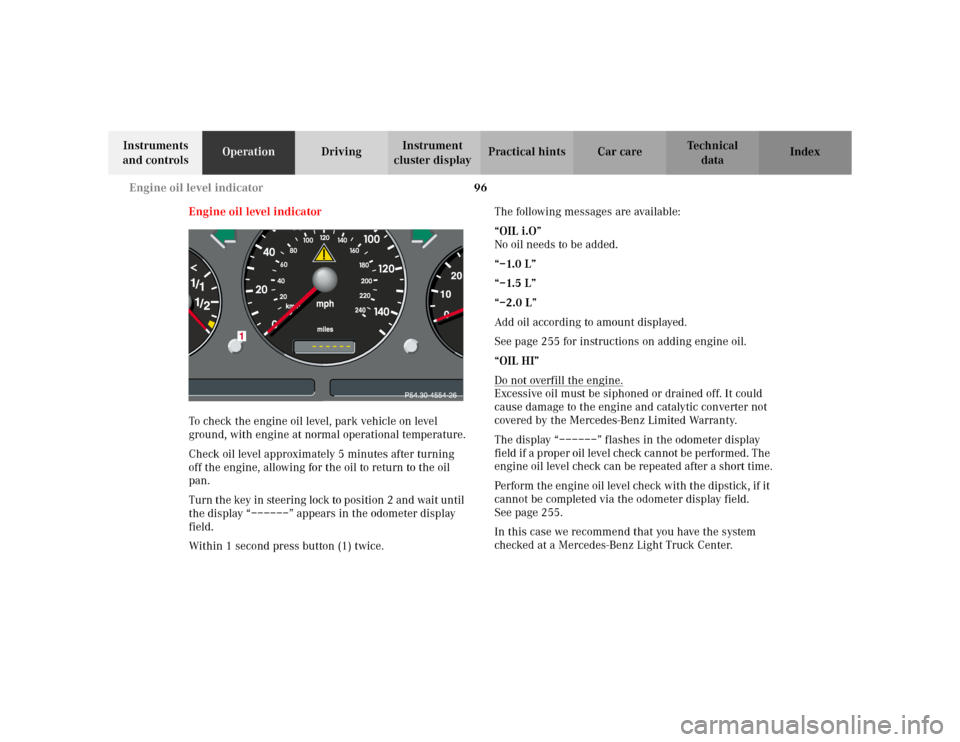
Turn the key in steering lock to position 2 and wait until
the display “––––––” appears in the odometer display
field.
Within 1 second press button (1) twice.The following messages are available:
“OIL i.O”
No oil needs to be added.
“–1.0 L”
“–1.5 L”
“–2.0 L”
Add oil according to amount displayed.
See page 255 for instructions on adding engine oil.
“OIL HI”
Do not overfill the engine.
Excessive oil must be siphoned or drained off. It could
cause damage to the engine and catalytic converter not
covered by the Mercedes-Benz Limited Warranty.
The display “––––––” flashes in the odometer display
field if a proper oil level check cannot be performed. The
engine oil level check can be repeated after a short time.
Perform the engine oil level check with the dipstick, if it
cannot be completed via the odometer display field.
Seepage255.
In this case we recommend that you have the system
checked at a Mercedes-Benz Light Truck Center.
Page 102 of 342

99 Exterior lamp switch
Te ch n i c a l
data Instruments
and controlsOperationDrivingInstrument
cluster displayPractical hints Car care Index Headlamp mode
The headlamps can be switched on and off manually or
automatically.
Manual operation:
The low beam headlamps and parking lamps can be
switched on and off with the exterior lamp switch. For
exterior lamp switch, see page 97.
Automatic operation:
With electronic key in steering lock in position 1 turn
exterior lamp switch to positionU.
The parking lamps switches on and off automatically
depending on the brightness of the ambient light.With the engine running and exterior lamp switch in
positionU:
USA only:
The low beam headlamps and parking lamps are
switched on and off automatically depending on the
brightness of the ambient light.
Canada only:
In conjunction with the daytime running lamps, see
page 100, in low ambient light conditions the parking
lamps will also switch on.
Note:
The high beam headlamps, high beam flasher, low beam
headlamps, parking lamps can still be switched on and
off manually using the exterior lamp switch.
The headlamps will not be automatically switched on
under foggy conditions.
Front fog lamps and rear fog lamps cannot be switched
on manually with exterior lamp switch in positionU.
To activate the fog lamps turn exterior switch to
positionB.
Wa r n i n g !
The driver is responsible for the operation of the
vehicle’s lights at all times. The automatic
headlamp feature is only an aid to the driver.
Switch on the vehicle lights by hand when driving
or traffic conditions require you to do so.
Page 103 of 342
100 Exterior lamp switch
Te ch n i c a l
data Instruments
and controlsOperationDrivingInstrument
cluster displayPractical hints Car care Index
Daytime running lamp mode (Canada only)
Turn exterior lamp switch to positionD.
When the engine is running the low beam headlamps
are automatically switched on. In low ambient light
conditions the parking lamps will also switch on.
When shifting from a driving position to position “N”
or “P”, the exterior lamps switches off (3 minutes delay).For nighttime driving the exterior lamp switch should
be turned to position õ or U to permit activation
of the high beam headlamps.
Note:
The high beam flasher is always available.