Page 34 of 342

31 Central locking system
Te ch n i c a l
data Instruments
and controlsOperationDrivingInstrument
cluster displayPractical hints Car care Index Each individual door and the liftgate must be locked
with the respective door lock button – the driver’s door
can only be locked when it is closed.
Notes:
The alarm sounds when unlocking the driver’s door.
Cancel alarm by turning key in steering lock to
position 1, or with the remote control by pressing
buttonŒ or‹.
If the vehicle has previously been locked from the
outside, only the door being opened from the inside will
unlock, and the alarm will come on. The remaining
doors, the liftgate and fuel filler flap remain locked.
In case of a malfunction in the central locking system
the doors can be locked and unlocked individually.To lock, push down lock buttons and turn mechanical
key in driver’s door lock to position 3. In addition lock
the liftgate.
To unlock, pull inside door handles and turn mechanical
key in driver’s door lock to position 2.
Rear doors, previously centrally locked, can be opened
from inside by first unlocking the vehicle with the
central locking switch, see page 32, or by first pulling
up the door lock button.
If the fuel filler flap cannot be opened, see page 295.
Page 46 of 342

43 Seats
Te ch n i c a l
data Instruments
and controlsOperationDrivingInstrument
cluster displayPractical hints Car care Index Memory function
(optional; Canada only: standard on ML 500;
USA: standard on ML 55 AMG)
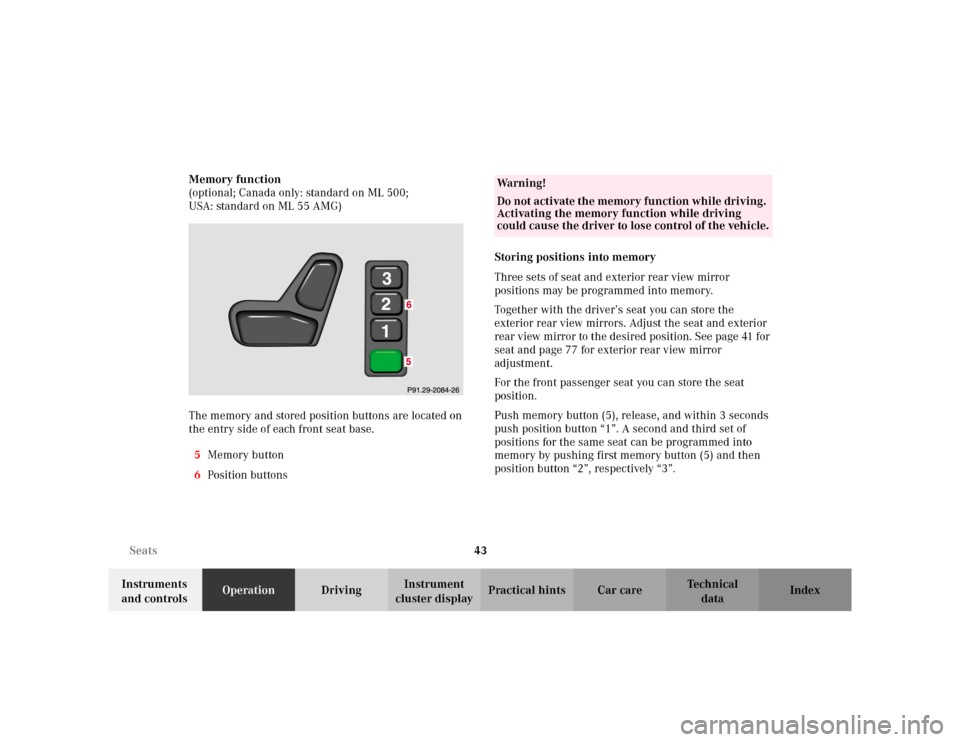
The memory and stored position buttons are located on
the entry side of each front seat base.
5Memory button
6Position buttonsStoring positions into memory
Three sets of seat and exterior rear view mirror
positions may be programmed into memory.
Together with the driver’s seat you can store the
exterior rear view mirrors. Adjust the seat and exterior
rear view mirror to the desired position. See page 41 for
seat and page 77 for exterior rear view mirror
adjustment.
For the front passenger seat you can store the seat
position.
Push memory button (5), release, and within 3 seconds
push position button “1”. A second and third set of
positions for the same seat can be programmed into
memory by pushing first memory button (5) and then
position button “2”, respectively “3”.
Wa r n i n g !
Do not activate the memory function while driving.
Activating the memory function while driving
could cause the driver to lose control of the vehicle.
Page 47 of 342
44 Seats
Te ch n i c a l
data Instruments
and controlsOperationDrivingInstrument
cluster displayPractical hints Car care Index
Recalling positions from memory
To recall a seat and exterior rear view mirror position,
push and hold one of the position buttons “1”, “2” or “3”
until seat movement has stopped. The seat movement
stops when the respective position button is released.Caution!
Do not operate the power seats using the memory
button if the seat backrest is in an excessively reclined
position. Doing so could cause damage to front or rear
seats.
First move the backrest to an upright position.
Page 143 of 342
140 Interior equipment
Te ch n i c a l
data Instruments
and controlsOperationDrivingInstrument
cluster displayPractical hints Car care Index
5. Pull lock button (2) up, and fold seat back forward
until it locks in place.
The red backrest lock indicators at the lock
buttons (2) are not visible in locked position.6. Press and hold lock button (3) to unlock lever (4).
Pull lever (4) in direction of arrow (5), then pull
lever (1) and push down seat bench section until it
locks in place.
Page 144 of 342
141 Interior equipment
Te ch n i c a l
data Instruments
and controlsOperationDrivingInstrument
cluster displayPractical hints Car care Index To return seat bench section to sitting position:
1. Pull lever (1) and raise seat bench section until it
locks in place.
2. Pull lock button (2) up, and unfold seat back to
upright position. Check for secure locking by
pushing and pulling on the backrest. The red
backrest lock indicators at the lock buttons (2) are
not visible in locked position.
3. Pull lever (1) in direction of arrow, and slide seat
bench section rearward to desired position.4. Install and adjust head restraint.
For installation of head restraints see page 143.
Wa r n i n g !
Failure to assure that seats are locked into place
could result in an increased chance of injury in an
accident.Never place hands under seat or near any moving
parts while a seat is being adjusted.
Page 145 of 342

142 Interior equipment
Te ch n i c a l
data Instruments
and controlsOperationDrivingInstrument
cluster displayPractical hints Car care Index
Easy entry/exit feature
(only in vehicles with third row seats)
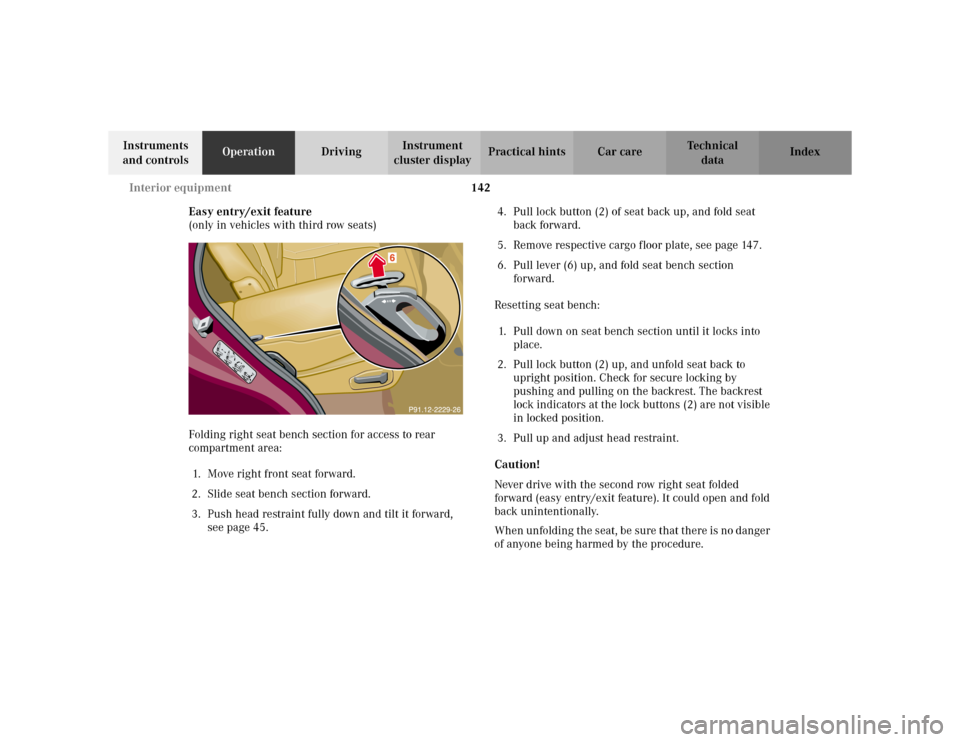
Folding right seat bench section for access to rear
compartment area:
1. Move right front seat forward.
2. Slide seat bench section forward.
3. Push head restraint fully down and tilt it forward,
see page 45.4. Pull lock button (2) of seat back up, and fold seat
back forward.
5. Remove respective cargo floor plate, see page 147.
6. Pull lever (6) up, and fold seat bench section
forward.
Resetting seat bench:
1. Pull down on seat bench section until it locks into
place.
2. Pull lock button (2) up, and unfold seat back to
upright position. Check for secure locking by
pushing and pulling on the backrest. The backrest
lock indicators at the lock buttons (2) are not visible
in locked position.
3. Pull up and adjust head restraint.
Caution!
Never drive with the second row right seat folded
forward (easy entry/exit feature). It could open and fold
back unintentionally.
When unfolding the seat, be sure that there is no danger
of anyone being harmed by the procedure.
Page 162 of 342

159 Garage door opener
Te ch n i c a l
data Instruments
and controlsOperationDrivingInstrument
cluster displayPractical hints Car care Index For operation in the USA only: This device complies
with Part 15 of the FCC Rules. Operation is subject to
the following two conditions:
(1) This device may not cause harmful interference, and
(2) this device must accept any interference received,
including interference that may cause undesired
operation.
Any unauthorized modification to this device could void
to the user’s authority to operate the equipment.
Programming or reprogramming the integrated
remote control:
1. Turn key in steering lock to position 1 or 2.
2. Hold the end of the hand-held transmitter of the
device you wish to train approximately 2 to 5 inches
(5 cm to 12 cm) away from the surface of the
integrated remote control located on the overhead
console, keeping the indicator lamp in view.3. Using both hands, simultaneously push the hand-
held transmitter button and the desired integrated
remote control button. Do not release the buttons
until completing step 4.
4. The indicator lamp on the integrated remote control
will flash, first slowly and then rapidly. When the
indicator lamp flashes rapidly, both buttons may be
released (the rapid flashing lamp indicates
successful programming of the new frequency
signal). To program the remaining two buttons,
follow steps 1 through 4.
Note:
If after repeated attempts, you do not successfully
program the integrated remote control device to learn
the signal of the hand-held transmitter, the garage door
opener could be equipped with the “rolling code
feature”.
Page 164 of 342
161 Garage door opener
Te ch n i c a l
data Instruments
and controlsOperationDrivingInstrument
cluster displayPractical hints Car care Index Operation of remote control:
1. Turn key in steering lock to position 1 or 2.
2. Select and press the appropriate button to activate
the remote controlled device. The integrated remote
control transmitter continues to send the signal as
long as the button is pressed – up to 20 seconds.Erasing the remote control memory:
1. Turn key in steering lock to position 1 or 2.
2. Simultaneously holding down the left and right side
buttons for approximately 20 seconds, or until the
control lamp blinks rapidly, will erase the codes of
all three channels.