2002 MERCEDES-BENZ ML320 latch
[x] Cancel search: latchPage 53 of 342
50 Restraint systems
Te ch n i c a l
data Instruments
and controlsOperationDrivingInstrument
cluster displayPractical hints Car care Index
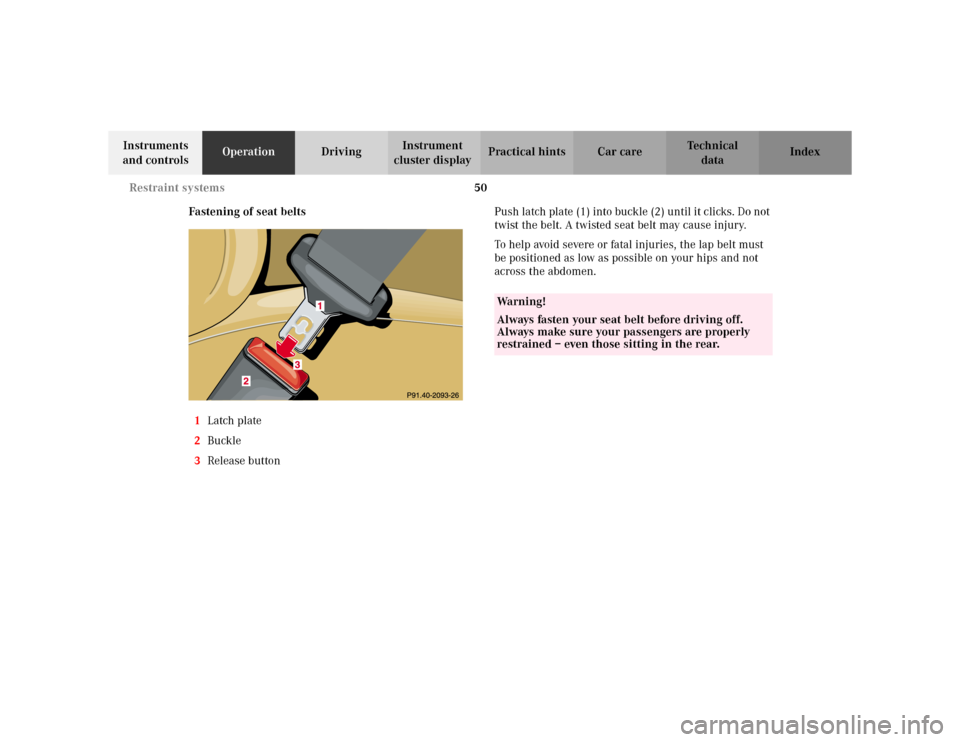
Fastening of seat belts
1Latch plate
2Buckle
3Release buttonPush latch plate (1) into buckle (2) until it clicks. Do not
twist the belt. A twisted seat belt may cause injury.
To help avoid severe or fatal injuries, the lap belt must
be positioned as low as possible on your hips and not
across the abdomen.
Wa r n i n g !
Always fasten your seat belt before driving off.
Always make sure your passengers are properly
restrained – even those sitting in the rear.
Page 55 of 342
52 Restraint systems
Te ch n i c a l
data Instruments
and controlsOperationDrivingInstrument
cluster displayPractical hints Car care Index
Operation
The inertia reel stops the belt from unwinding during
sudden vehicle stops or when quickly pulling on the
belt. The locking function of the reel may be checked by
quickly pulling out the belt.
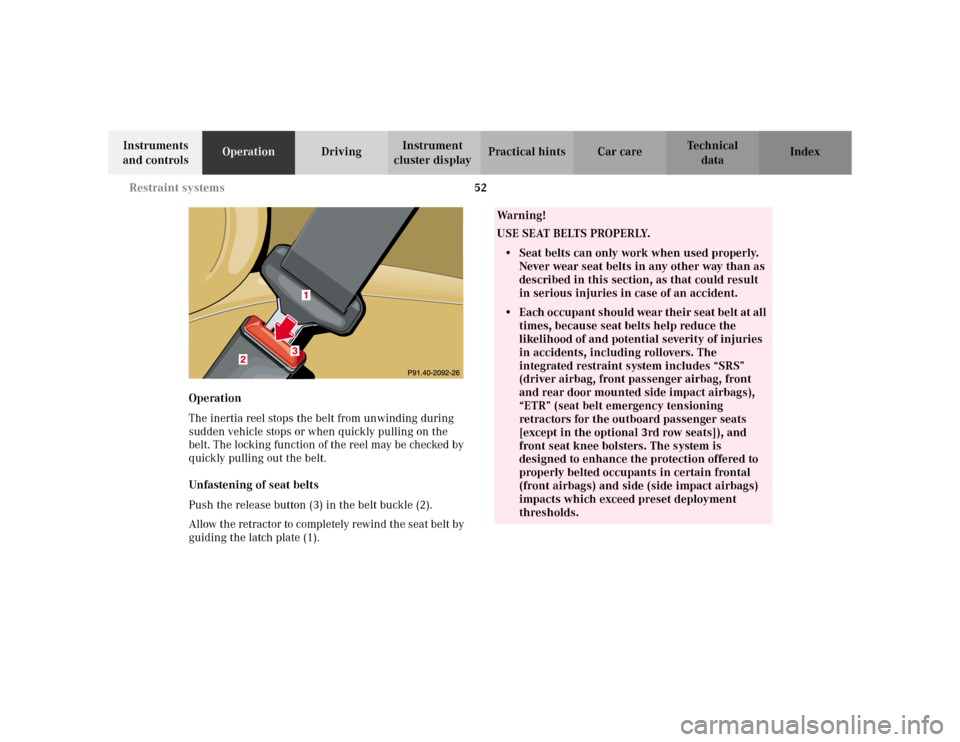
Unfastening of seat belts
Push the release button (3) in the belt buckle (2).
Allow the retractor to completely rewind the seat belt by
guiding the latch plate (1).
Wa r n i n g !
USE SEAT BELTS PROPERLY.• Seat belts can only work when used properly.
Never wear seat belts in any other way than as
described in this section, as that could result
in serious injuries in case of an accident.• Each occupant should wear their seat belt at all
times, because seat belts help reduce the
likelihood of and potential severity of injuries
in accidents, including rollovers. The
integrated restraint system includes “SRS”
(driver airbag, front passenger airbag, front
and rear door mounted side impact airbags),
“ETR” (seat belt emergency tensioning
retractors for the outboard passenger seats
[except in the optional 3rd row seats]), and
front seat knee bolsters. The system is
designed to enhance the protection offered to
properly belted occupants in certain frontal
(front airbags) and side (side impact airbags)
impacts which exceed preset deployment
thresholds.
Page 75 of 342
72 Restraint systems
Te ch n i c a l
data Instruments
and controlsOperationDrivingInstrument
cluster displayPractical hints Car care Index
Important!
An infant and child restraint system must not be
installed on the right second row seat while a passenger
rides in a third row seat. Use of the easy-entry / exit
feature is not possible. See page 142 for easy-entry / exit
feature.
Note:
When installing an infant or child restraint system with
a top tether strap on the left second row seat, the left
third row seat should not be occupied. For storage of the
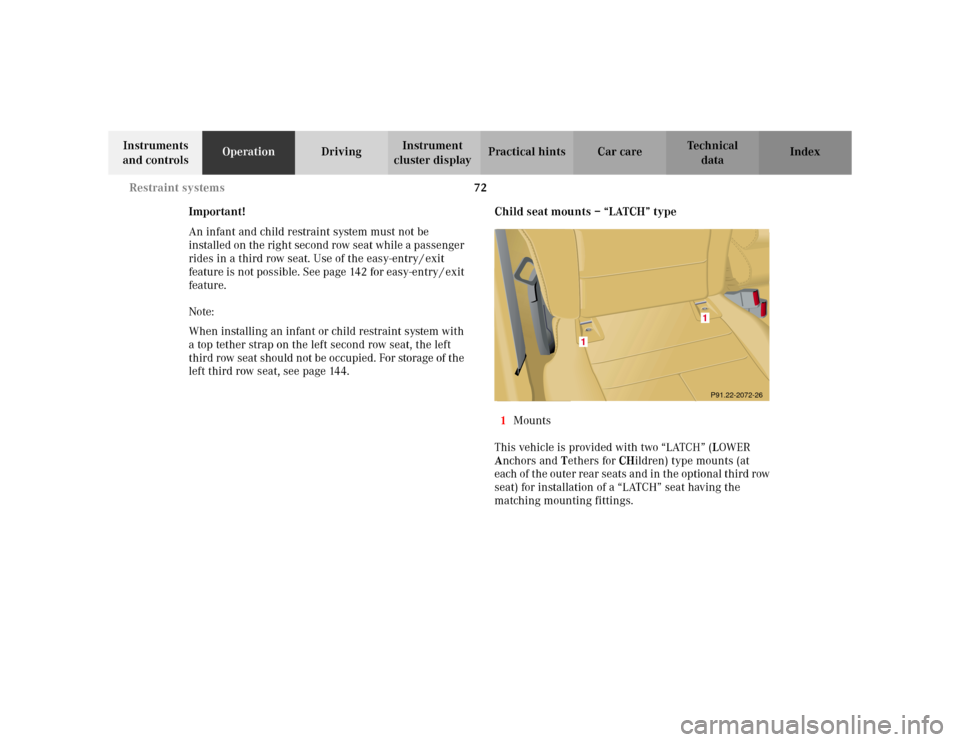
left third row seat, see page 144.Child seat mounts – “LATCH” type
1Mounts
This vehicle is provided with two “LATCH” (LOWER
Anchors and Tethers for CHildren) type mounts (at
each of the outer rear seats and in the optional third row
seat) for installation of a “LATCH” seat having the
matching mounting fittings.
1
1
P91.22-2072-26
Page 76 of 342
73 Restraint systems
Te ch n i c a l
data Instruments
and controlsOperationDrivingInstrument
cluster displayPractical hints Car care Index Install a “LATCH” type child seat according to the
manufacturer’s instructions.
The child seat must be firmly attached in the right and
left side mounting fittings (1).
Non-“LATCH” type child seats may also be used and are
capable of being installed using the vehicle’s seat belt
system. Install child seat according to the
manufacturer’s instructions.
Note:
With a child seat installed in the left rear seat, the seat
belt for the center seat occupied by a passenger must
operate freely. Guide seat belt between its seat cushion
mount and backrest mount along outside of right side
child seat mount.
Wa r n i n g !
The “LATCH” mounting fittings are intended for
children up to 22 kg (50 lbs) in weight.Children too big for child restraint systems must
ride in back seats using regular seat belts. Position
shoulder belt across chest and shoulder, not face or
neck. A booster seat may be necessary to achieve
proper belt positioning for children from 41 lbs. to
the point where a lap / shoulder belt fits properly
without one.Install child seat according to manufacturer’s
instructions.The child seat must be firmly attached in the right
and left side mounting fittings (1).An incorrectly mounted child seat may come loose
during an accident.Damaged or impact damaged child seats or child
seat mounting fittings must be replaced.Do not leave children unattended in the vehicle,
even if the children are secured in a child restraint
system.
Page 273 of 342
270 Tires, Wheels
Te ch n i c a l
data Instruments
and controlsOperation DrivingInstrument
cluster displayPractical hintsCar care Index
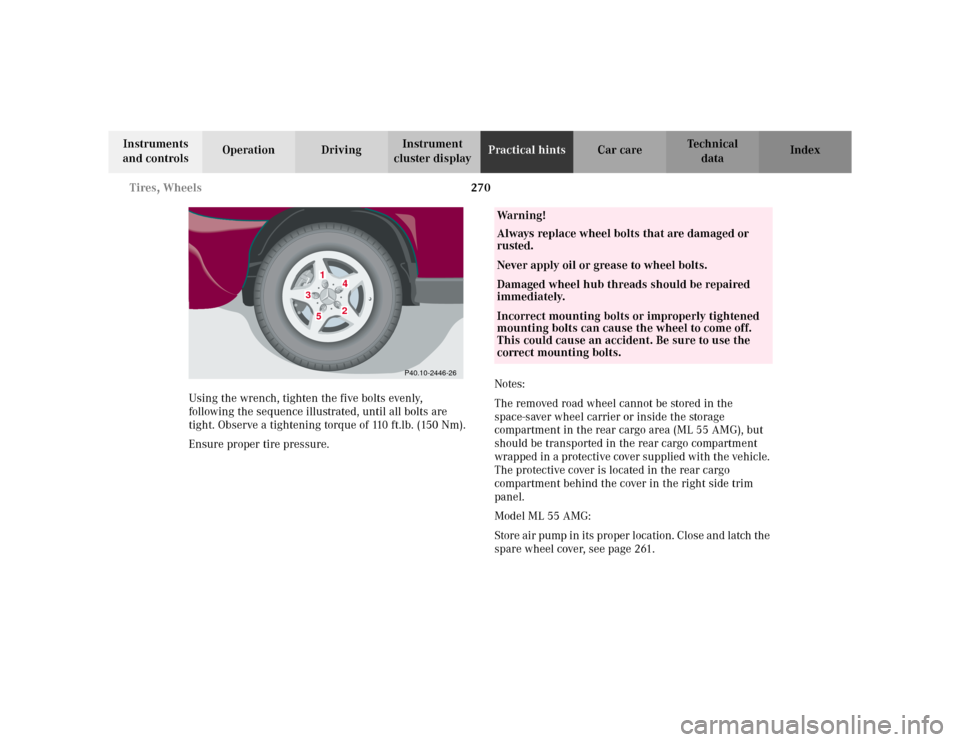
Using the wrench, tighten the five bolts evenly,
following the sequence illustrated, until all bolts are
tight. Observe a tightening torque of 110 ft.lb. (150 Nm).
Ensure proper tire pressure.Notes:
The removed road wheel cannot be stored in the
space-saver wheel carrier or inside the storage
compartment in the rear cargo area (ML 55 AMG), but
should be transported in the rear cargo compartment
wrapped in a protective cover supplied with the vehicle.
The protective cover is located in the rear cargo
compartment behind the cover in the right side trim
panel.
Model ML 55 AMG:
Store air pump in its proper location. Close and latch the
spare wheel cover, see page 261.
1
2
3
4
5
P40.10-2446-26
Wa r n i n g !
Always replace wheel bolts that are damaged or
rusted.Never apply oil or grease to wheel bolts.Damaged wheel hub threads should be repaired
immediately.Incorrect mounting bolts or improperly tightened
mounting bolts can cause the wheel to come off.
This could cause an accident. Be sure to use the
correct mounting bolts.
Page 276 of 342

273 Battery
Te ch n i c a l
data Instruments
and controlsOperation DrivingInstrument
cluster displayPractical hintsCar care Index If a tire constantly loses air, it should be inspected for
damage.
The spare tire should be checked periodically for
condition and inflation. Spare tire will age and become
worn over time even if never used, and thus should be
inspected and replaced when necessary.Battery
Important!
Battery replacement information:
The maintenance-free battery is located in the engine
compartment.
The service life of the battery is dependent on its
condition of charge. The battery should always be kept
sufficiently charged, in order to last an optimum length
of time.
Wa r n i n g !
Do not overinflate tires. Overinflating tires can
result in sudden deflation (blowout) because they
are more likely to become punctured or damaged
by road debris, potholes etc.. Follow recommended
inflation pressures.Do not overload the tires by exceeding the specified
vehicle capacity weight (as indicated by the label
on the driver’s door latch post). Overloading the
tires can overheat them, possibly causing a
blowout.
Wa r n i n g !
Failure to follow these instructions can result in
severe injury or death.Never lean over batteries while connecting, you
might get injured.Battery fluid contains sulfuric acid. Do not allow
this fluid to come in contact with eyes, skin or
clothing. In case it does, immediately flush affected
area with water and seek medical help if necessary.A battery will also produce hydrogen gas, which is
flammable and explosive. Keep flames or sparks
away from battery, avoid improper connection of
jumper cables, smoking etc..
Page 327 of 342
324 Index
Te ch n i c a l
data Instruments
and controlsOperation DrivingInstrument
cluster displayPractical hints Car careIndex
Central locking system ................................................... 26
Automatic central locking ......................................... 33
Locking and unlocking .............................................. 27
Mechanical keys .......................................................... 29
Panic button ................................................................. 28
Remote control ............................................................ 26
Unlocking the liftgate ................................................. 27
Vehicle keys ................................................................. 24
Changing wheels ...........................................................267
Inflating the space-saver tire .................................. 271
Charge indicator lamp ................................................... 245
CHECK ENGINE
malfunction indicator lamp ..................................... 240
Check regularly and before a long trip ......................238
Checking engine oil level
Via engine oil level indicator .................................... 96
Via oil dipstick ...........................................................255
Child restraint .............................................. 39, 48, 55, 68
Child seat mounts
See Infant and child restraint systems .................... 72
Child seat mounts – “LATCH” type ............................... 72
Cleaning and care of the vehicle .................................298
Climate control
Special settings ..........................................................114
Clock, adjusting ............................................................... 87
Compartment under front passenger seat ................. 134Consumer information ................................................. 320
Control and operation of radio transmitters .............. 164
Coolant level
Adding ........................................................................ 257
Checking .................................................................... 256
Low engine coolant level warning ......................... 246
Coolant temperature gauge ............................................87
Coolants ........................................................................... 318
Anticorrosion/antifreeze quantity ......................... 318
Low engine coolant level warning ......................... 246
Cover blind, cargo area ................................................. 155
Cruise control ................................................................. 214
Cup holder
Instrument panel ...................................................... 134
Rear center console .................................................. 136
Cup holder in front seat armrest ................................. 135
DDeep water
Driving instructions .................................................201
Display illumination ........................................................86
Doors ..................................................................................30
Drinking and driving ..................................................... 192
Drive sensibly - save fuel .............................................. 192
Page 330 of 342
327 Index
Te ch n i c a l
data Instruments
and controlsOperation DrivingInstrument
cluster displayPractical hints Car careIndex Fuel reserve warning ....................................................242
Fuels, coolants, lubricants etc. - Capacities .............. 314
Fuse boxes ....................................................................... 251
Fuses, electrical ............................................................. 250
GGarage door opener ....................................................... 158
Gasoline
Additives .................................................................... 318
Fuel requirements .................................................... 317
Premium unleaded ................................................... 317
General notes on the central locking system .............. 25
Glass breakage sensor .................................................... 37
Glove box ......................................................................... 133HHazard warning flasher switch ................................... 104
Head restraints
Adjusting ...................................................................... 45
Front ............................................................................. 45
Front, removal ............................................................. 45
Rear ............................................................................. 143
Removal ............................................................... 45, 143Headlamp aim, adjusting ............................................. 290
Headlamp assembly
BiXenon ..................................................................... 284
Halogen ...................................................................... 283
Headlamp cleaning system ........................................... 104
Headlamp mode ................................................................99
Headlights ......................................................................... 97
Heated seats ......................................................................46
High beam
See Exterior lamp switch ...........................................97
Hood ................................................................................ 253
Hooks ............................................................................... 151
IIdentification labels ...................................................... 307
Illuminated vanity mirrors ........................................... 131
Indicator lamps in the instrument cluster ...................84
Infant and child restraint system
Installation ................................................................... 70
Infant and child restraint systems ................................68
Child seat mounts - LATCH type ..............................72
Inflating the space-saver tire ....................................... 271
Information call
See Tele Aid ............................................................... 166