Page 79 of 342

76 Rear view mirrors
Te ch n i c a l
data Instruments
and controlsOperationDrivingInstrument
cluster displayPractical hints Car care Index
Automatic (optional on ML 320):
With the key in steering lock position 2 and the
automatic antiglare function activated, the mirror
reflection brightness responds to changes in light
sensitivity.
To a c ti va te :
Press button (1). The green indicator lamp in the inside
rear view mirror lights up.To d e a c t i va t e :
Press button (1) again. The indicator lamp in the inside
rear view mirror goes out. The mirror brightness does
not respond to changes in light sensitivity.
Notes:
With gear selector lever in position “R”, or with the
interior lamps (except cargo compartment lamp)
switched on, the mirror brightness does not respond to
changes in light sensitivity.
The automatic antiglare function does not react, if
incoming light is not aimed directly at sensors in the
inside rear view mirror.
The antiglare function will not react for example, if the
cargo area is fully loaded.
Wa r n i n g !
In the case of an accident liquid electrolyte may
escape the mirror housing when the mirror glass
breaks.Electrolyte has an irritating effect. Do not allow the
liquid come into contact with eyes, skin, clothing,
or respiratory system. In cases it does, immediately
flush affected area with water, and seek medical
help if necessary.
Page 80 of 342
77 Rear view mirrors
Te ch n i c a l
data Instruments
and controlsOperationDrivingInstrument
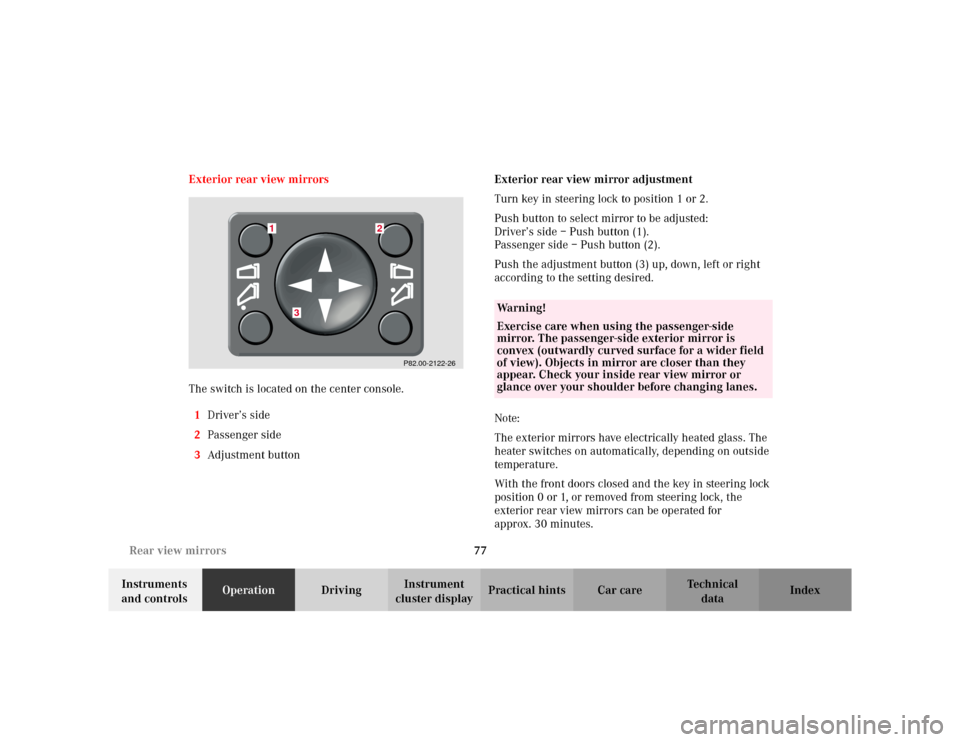
cluster displayPractical hints Car care Index Exterior rear view mirrors
The switch is located on the center console.
1Driver’s side
2Passenger side
3Adjustment buttonExterior rear view mirror adjustment
Turn key in steering lock to position 1 or 2.
Push button to select mirror to be adjusted:
Driver’s side – Push button (1).
Passenger side – Push button (2).
Push the adjustment button (3) up, down, left or right
according to the setting desired.
Note:
The exterior mirrors have electrically heated glass. The
heater switches on automatically, depending on outside
temperature.
With the front doors closed and the key in steering lock
position 0 or 1, or removed from steering lock, the
exterior rear view mirrors can be operated for
approx. 30 minutes.
P82.00-2122-26
1
2
3
Wa r n i n g !
Exercise care when using the passenger-side
mirror. The passenger-side exterior mirror is
convex (outwardly curved surface for a wider field
of view). Objects in mirror are closer than they
appear. Check your inside rear view mirror or
glance over your shoulder before changing lanes.
Page 81 of 342
78 Rear view mirrors
Te ch n i c a l
data Instruments
and controlsOperationDrivingInstrument
cluster displayPractical hints Car care Index
Storing exterior rear view mirror positions
(only vehicle with memory function)
The exterior rear view mirror positions are stored in
memory with the seat positions and can be recalled
when necessary. See page 43 for notes on the memory
function.
Parking position (only vehicle with memory function)
The passenger side exterior mirror can be adjusted and
programmed to assist the driver during parking
maneuvers (e.g. to observe the curb or other objects
close to the vehicle).
With the key in steering lock position 2, and the exterior
rear view mirror switch in the passenger side position,
the passenger side mirror will be turned downward
when placing the gear selector lever in “R” reverse.
The passenger side mirror will return to its previous
position:
•immediately at speeds above approx. 6 mph
(10 km/h) – independent of the engaged gear,
•after 10 seconds when shifting gear selector lever
from “R” Reverse,
•by pressing the driver’s side mirror button%.To store passenger side mirror parking position:
1. The vehicle must be stationary.
Turn key to steering lock position 1 or 2.
2. Select passenger side mirror& and adjust the
mirror to view the curb.
3. Push the memory button “M”, see page 43.
4. Within 3 seconds push bottom of adjustment
button (3), see page 77.
The mirror should not move.
Repeat the memory procedure if the mirror moves.
Note:
The selected position will be stored relative to the
memory button (1, 2, 3) pushed.
Page 82 of 342
79 Rear view mirrors
Te ch n i c a l
data Instruments
and controlsOperationDrivingInstrument
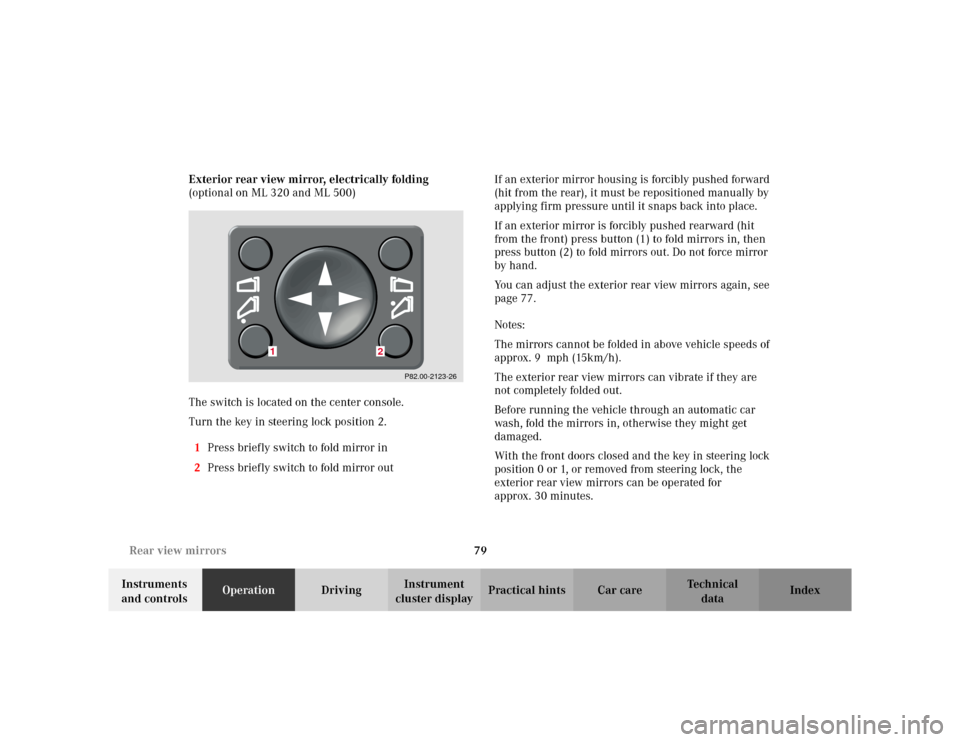
cluster displayPractical hints Car care Index Exterior rear view mirror, electrically folding
(optional on ML 320 and ML 500)
The switch is located on the center console.
Turn the key in steering lock position 2.
1Press briefly switch to fold mirror in
2Press briefly switch to fold mirror outIf an exterior mirror housing is forcibly pushed forward
(hit from the rear), it must be repositioned manually by
applying firm pressure until it snaps back into place.
If an exterior mirror is forcibly pushed rearward (hit
from the front) press button (1) to fold mirrors in, then
press button (2) to fold mirrors out. Do not force mirror
by hand.
You can adjust the exterior rear view mirrors again, see
page 77.
Notes:
The mirrors cannot be folded in above vehicle speeds of
approx. 9 mph (15km/h).
The exterior rear view mirrors can vibrate if they are
not completely folded out.
Before running the vehicle through an automatic car
wash, fold the mirrors in, otherwise they might get
damaged.
With the front doors closed and the key in steering lock
position 0 or 1, or removed from steering lock, the
exterior rear view mirrors can be operated for
approx. 30 minutes.
P82.00-2123-26
1
2
Page 83 of 342
80 Rear view mirrors
Te ch n i c a l
data Instruments
and controlsOperationDrivingInstrument
cluster displayPractical hints Car care Index
Driver’s side exterior rear view mirror, antiglare
mode (optional on ML 320)
Antiglare mode:
With the key in steering lock position 2, the mirror
reflection brightness responds to changes in light
sensitivity.
With the gear selector lever in position “R”, or with the
interior light switched on, the mirror brightness does
not respond to changes in light sensitivity.Note:
The automatic antiglare function does not react, if
incoming light is not aimed directly at sensors in the
inside rear view mirror.
The antiglare function will not react for example, if the
cargo area is fully loaded.
Page 89 of 342

86 Instrument cluster
Te ch n i c a l
data Instruments
and controlsOperationDrivingInstrument
cluster displayPractical hints Car care Index
Activating instrument cluster display
The display for temperature, odometer, oil level
indicator and clock is activated by:
•Opening the driver’s door.
•Pressing button (1) in the instrument cluster (with
key removed or in steering lock position 0).
•Turning the key in steering lock to position 1 or 2.
The instrument cluster display shuts off automatically.Display illumination
The instrument cluster illumination can be set with the
park lamps, low beam headlamps or high beam
headlamps switched on.
Rotate knob (1) to vary intensity of instrument lamps:
•Clockwise - instrument lamp intensity increases.
•Counterclockwise - instrument lamp intensity
decreases.
Odometer/trip odometer (8)
Activate the instrument cluster.
•Press knob (1) once to switch to or from odometer to
trip odometer readout.
•Press and hold knob (1) for more than 1 second to
reset trip odometer (with trip odometer displayed).
•Press knob (1) twice to display next scheduled
service.
2
Page 92 of 342
89 Trip computer
Te ch n i c a l
data Instruments
and controlsOperationDrivingInstrument
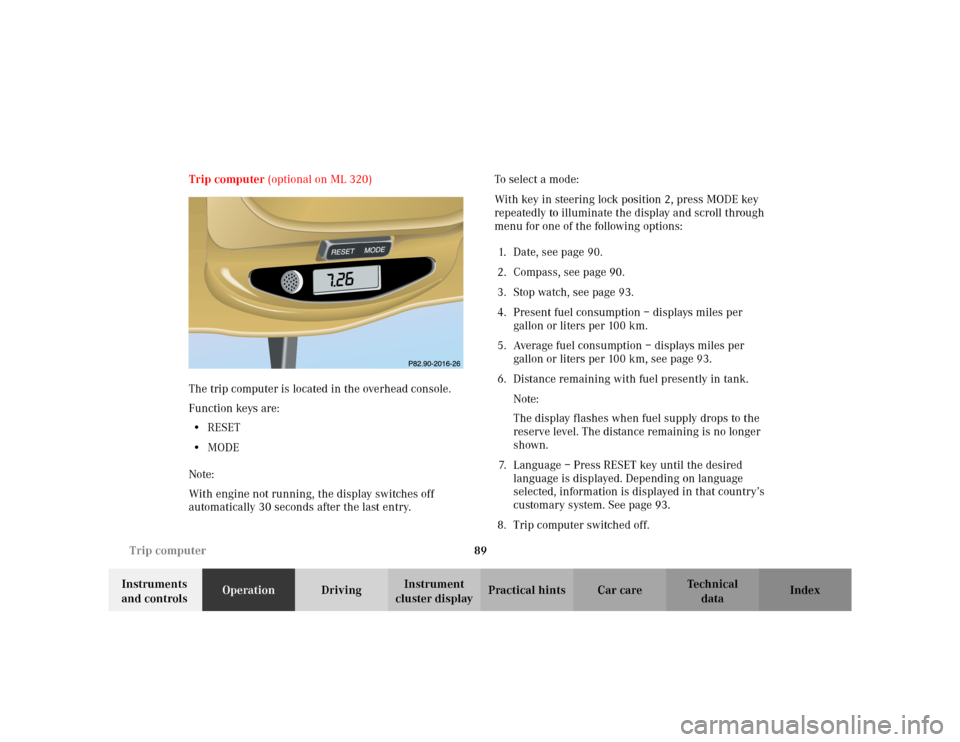
cluster displayPractical hints Car care Index Trip computer (optional on ML 320)
The trip computer is located in the overhead console.
Function keys are:
•RESET
•MODE
Note:
With engine not running, the display switches off
automatically 30 seconds after the last entry.To s e l e c t a m o d e :
With key in steering lock position 2, press MODE key
repeatedly to illuminate the display and scroll through
menu for one of the following options:
1. Date, see page 90.
2. Compass, see page 90.
3. Stop watch, see page 93.
4. Present fuel consumption – displays miles per
gallon or liters per 100 km.
5. Average fuel consumption – displays miles per
gallon or liters per 100 km, see page 93.
6. Distance remaining with fuel presently in tank.
Note:
The display flashes when fuel supply drops to the
reserve level. The distance remaining is no longer
shown.
7. Language – Press RESET key until the desired
language is displayed. Depending on language
selected, information is displayed in that country’s
customary system. See page 93.
8. Trip computer switched off.
MODE
Page 93 of 342
90 Trip computer
Te ch n i c a l
data Instruments
and controlsOperationDrivingInstrument
cluster displayPractical hints Car care Index
To change an entry, select mode to be changed:
•Date –
Press RESET key, the month shown blinks. Now
press MODE key to advance to selected month.
Press RESET key again, the day shown blinks. Now
press MODE key to advance to selected day.
Press RESET key again, the year shown blinks. Now
press MODE key to advance to selected year.
Press RESET key again, the display stops blinking
and the date is set.
•Compass –
The compass displays the direction the vehicle is
traveling, such as N, NE, E, SE, S, SW, W or NW.
Note:
The presence of buildings, bridges, power lines and
large antenna masts can influence the displayed
values. Metallic or magnetic objects in or on the
vehicle can influence the accuracy of the compass.To change the compass zones:
Determine the geographical point of the vehicle with the
aid of the zone maps below:
1. Turn key in steering lock to position 2.
2. Press MODE key repeatedly until the compass
display appears in the trip computer display.
3. Press RESET key to select the compass zone mode.
The zone selected last is shown in the display.
4. Press RESET key repeatedly until the correct
compass zone, as determined from the zone map, is
shown in the display.
5. Press MODE key twice to activate the new compass
zone and change back to compass display.