Page 99 of 342
96 Engine oil level indicator
Te ch n i c a l
data Instruments
and controlsOperationDrivingInstrument
cluster displayPractical hints Car care Index
Engine oil level indicator
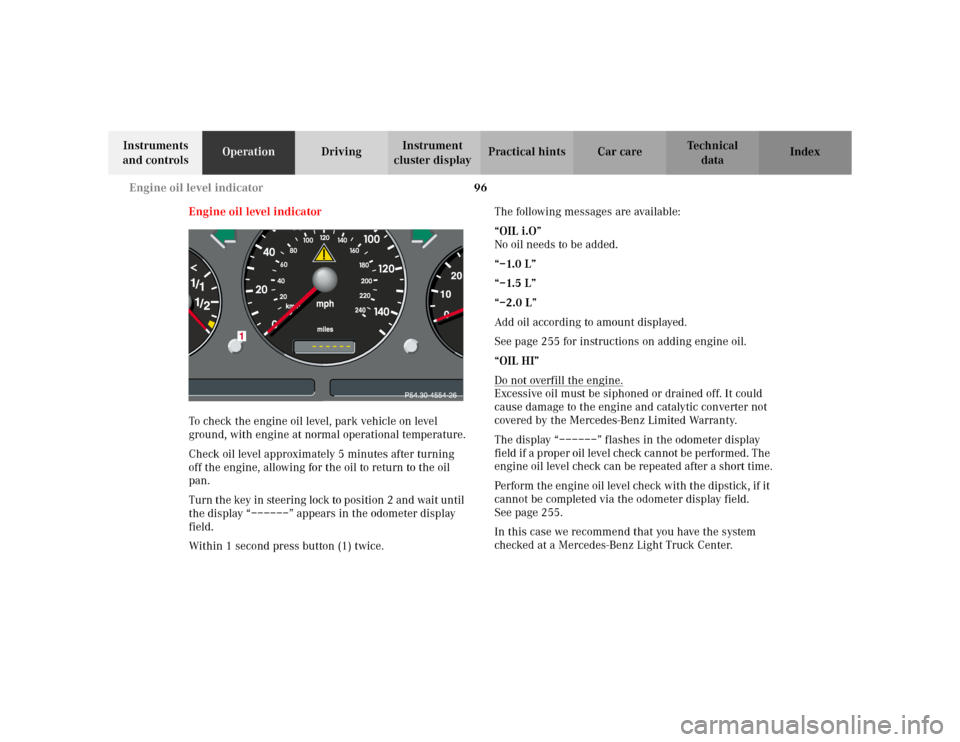
To check the engine oil level, park vehicle on level
ground, with engine at normal operational temperature.
Check oil level approximately 5 minutes after turning
off the engine, allowing for the oil to return to the oil
pan.
Turn the key in steering lock to position 2 and wait until
the display “––––––” appears in the odometer display
field.
Within 1 second press button (1) twice.The following messages are available:
“OIL i.O”
No oil needs to be added.
“–1.0 L”
“–1.5 L”
“–2.0 L”
Add oil according to amount displayed.
See page 255 for instructions on adding engine oil.
“OIL HI”
Do not overfill the engine.
Excessive oil must be siphoned or drained off. It could
cause damage to the engine and catalytic converter not
covered by the Mercedes-Benz Limited Warranty.
The display “––––––” flashes in the odometer display
field if a proper oil level check cannot be performed. The
engine oil level check can be repeated after a short time.
Perform the engine oil level check with the dipstick, if it
cannot be completed via the odometer display field.
Seepage255.
In this case we recommend that you have the system
checked at a Mercedes-Benz Light Truck Center.
Page 102 of 342
99 Exterior lamp switch
Te ch n i c a l
data Instruments
and controlsOperationDrivingInstrument
cluster displayPractical hints Car care Index Headlamp mode
The headlamps can be switched on and off manually or
automatically.
Manual operation:
The low beam headlamps and parking lamps can be
switched on and off with the exterior lamp switch. For
exterior lamp switch, see page 97.
Automatic operation:
With electronic key in steering lock in position 1 turn
exterior lamp switch to positionU.
The parking lamps switches on and off automatically
depending on the brightness of the ambient light.With the engine running and exterior lamp switch in
positionU:
USA only:
The low beam headlamps and parking lamps are
switched on and off automatically depending on the
brightness of the ambient light.
Canada only:
In conjunction with the daytime running lamps, see
page 100, in low ambient light conditions the parking
lamps will also switch on.
Note:
The high beam headlamps, high beam flasher, low beam
headlamps, parking lamps can still be switched on and
off manually using the exterior lamp switch.
The headlamps will not be automatically switched on
under foggy conditions.
Front fog lamps and rear fog lamps cannot be switched
on manually with exterior lamp switch in positionU.
To activate the fog lamps turn exterior switch to
positionB.
Wa r n i n g !
The driver is responsible for the operation of the
vehicle’s lights at all times. The automatic
headlamp feature is only an aid to the driver.
Switch on the vehicle lights by hand when driving
or traffic conditions require you to do so.
Page 105 of 342
102 Exterior lamp switch
Te ch n i c a l
data Instruments
and controlsOperationDrivingInstrument
cluster displayPractical hints Car care Index
Setting illumination time:
The illumination time can only be set while the vehicle
is at a standstill and the electronic key in steering lock
position 2.
1. Turn exterior lamp switch to positionD.
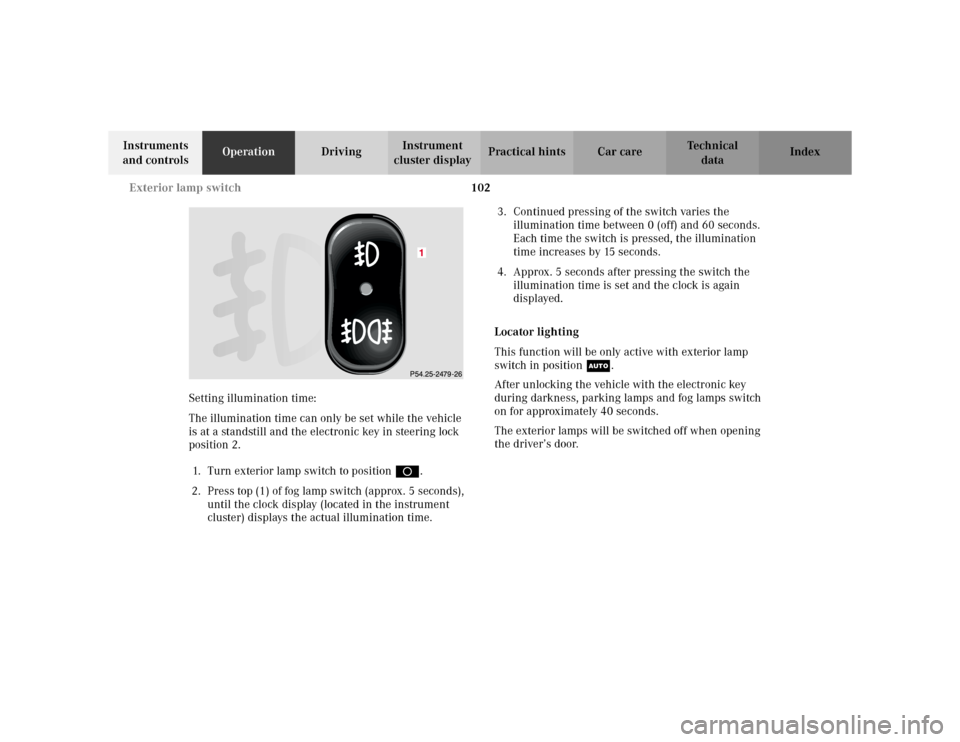
2. Press top (1) of fog lamp switch (approx. 5 seconds),
until the clock display (located in the instrument
cluster) displays the actual illumination time.3. Continued pressing of the switch varies the
illumination time between 0 (off) and 60 seconds.
Each time the switch is pressed, the illumination
time increases by 15 seconds.
4. Approx. 5 seconds after pressing the switch the
illumination time is set and the clock is again
displayed.
Locator lighting
This function will be only active with exterior lamp
switch in positionU.
After unlocking the vehicle with the electronic key
during darkness, parking lamps and fog lamps switch
on for approximately 40 seconds.
The exterior lamps will be switched off when opening
the driver’s door.
Page 126 of 342
123 Interior equipment
Te ch n i c a l
data Instruments
and controlsOperationDrivingInstrument
cluster displayPractical hints Car care Index Turn key in steering lock to position 1 or 2.
Opening the side windows:
Press k on the switch to resistance point.
Closing the side windows:
Press j on the switch to resistance point.
Release switch when window is in desired position.
Express opening and closing of windows
Press k or j on the switch past resistance point
and release – window opens or closes completely.
To interrupt procedure, briefly press j or k.
If the upward movement of the window is blocked
during the closing procedure, the window will stop
during the last few inches before closure and open
slightly.
When pressing and holding the switch j to close the
window, and upward movement of the window is
blocked during the last few inches before closure, it will
stop and reopen.
Wa r n i n g !
When closing the windows, be sure that there is no
danger of anyone being harmed by the closing
procedure.The closing procedure can be immediately reversed
by pressing the power window switch.When leaving the vehicle, always remove the key
from the steering lock, and lock the vehicle. Do not
leave children unattended in the vehicle, or with
access to an unlocked vehicle. Unsupervised use of
vehicle equipment can cause serious personal
injury.
Page 134 of 342
131 Interior equipment
Te ch n i c a l
data Instruments
and controlsOperationDrivingInstrument
cluster displayPractical hints Car care Index Sun visors
Swing sun visors down to protect against sun glare.
If sunlight enters through a side window, disengage
visor from inner mounting, pivot it to the side, and slide
it to the desired position.Illuminated vanity mirrors
With the visor engaged in its inner mounting and with
key in steering lock position 1 or 2, the lamp is switched
on by opening the cover.
Wa r n i n g !
Do not use the vanity mirror while driving.
Page 141 of 342
138 Interior equipment
Te ch n i c a l
data Instruments
and controlsOperationDrivingInstrument
cluster displayPractical hints Car care Index
Lighter
1Center console lighter
Turn key in steering lock to position 1 or 2.
Push in lighter (1); it will pop out automatically when
hot.
Note:
The lighter socket can be used to accommodate
electrical accessories up to maximum 50 W.2Rear passenger compartment lighter
P68.20-2337-26
1
Wa r n i n g !
Never touch the heating element or sides of the
lighter, they are extremely hot, hold at knob only.When leaving the vehicle always remove the key
from the steering lock. Do not leave children
unattended in the vehicle, or with access to an
unlocked vehicle. Unsupervised use of vehicle
equipment may cause serious personal injury.
Page 174 of 342
171 Tele Aid
Te ch n i c a l
data Instruments
and controlsOperationDrivingInstrument
cluster displayPractical hints Car care Index When the connection is established, the message
“ROADSIDE ASSISTANCE – CALL CONNECTED”
appears in the MCS display. The Tele Aid system will
transmit data generating the vehicle identification
number, model, color and location (subject to
availability of cellular and GPS signals).
While the call is connected, you can change to
navigation menu by pressing NAVI button on the MCS.
A voice connection between the Roadside Assistance
dispatcher and the occupants of the vehicle will be
established. When a voice connection is established the
audio system mutes and the message “TELE AID –
ROADSIDE ASSISTANCE CALL ACTIVE” appears in the
MCS display. The nature of the need for assistance can
then be described. The Mercedes-Benz Roadside
assistance dispatcher will either dispatch a qualified
Mercedes-Benz technician or arrange to tow your
vehicle to the nearest Mercedes-Benz Center. For
services such as labor and/or towing charges may apply.
Refer to the Roadside Assistance manual for more
information.These programs are only available in the USA:
•Sign and Drive services: Services such as jump start,
a few gallons of fuel or the replacement of a flat tire
with the vehicle spare tire are obtainable,
•Remote Vehicle Diagnostics: This function permits
the Mercedes-Benz Roadside Assistance dispatcher
to download malfunction codes and actual vehicle
data.
Notes:
The indicator lamp in the Roadside Assistance
button• remains illuminated in red for
approximately 10 seconds during the system self-check
after turning key in steering lock to position 2 (together
with the “SOS” button and the Information
button¡).
See system self-check on page 166 when the indicator
lamp does not light up in red or stay on longer than
approximately 10 seconds.
Page 176 of 342
173 Tele Aid
Te ch n i c a l
data Instruments
and controlsOperationDrivingInstrument
cluster displayPractical hints Car care Index The Tele Aid system will transmit data generating the
vehicle identification number, model, color and location
(subject to availability of cellular and GPS signals).
While the call is connected, you can change to
navigation menu by pressing NAVI button on the MCS.
A voice connection between the Customer Assistance
Center representative and the occupants of the vehicle
will be established. When a voice connection is
established, the audio system mutes and the message
“TELE AID – INFO CALL ACTIVE” appears in the MCS
display. Information regarding the operation of your
vehicle, the nearest Mercedes-Benz Light Truck Center
or Mercedes-Benz USA products and services is
available to you.
For more details concerning Tele Aid, please visit
www.mbusa.com and use your ID and password, sent to
you separately, to learn more (USA only).Notes:
The indicator lamp in the Information button¡
remains illuminated in red for approximately
10 seconds during the system self-check after turning
key in steering lock to position 2 (together with the
“SOS” button and the Roadside Assistance button•).
See system self-check on page 166 when the indicator
lamps do not light up in red or stay on longer than
approximately 10 seconds.
If the indicator lamp in the Information button¡ is
illuminated continuously and there was no voice
connection to the Response Center established, then the
Tele Aid system could not initiate an Roadside
Assistance call (e.g. the relevant cellular phone network
is not available). The message “Info – CALL FAILED”
appears in the MCS display.
Should this occur, information must be summoned by
other means.
Information calls can be terminated using the END
button on the MCS unit.