Page 49 of 385

46 Seats
Te ch n i c a l
data Instruments
and controlsOperationDrivingInstrument
cluster displayPractical hints Car care Index
Power seat
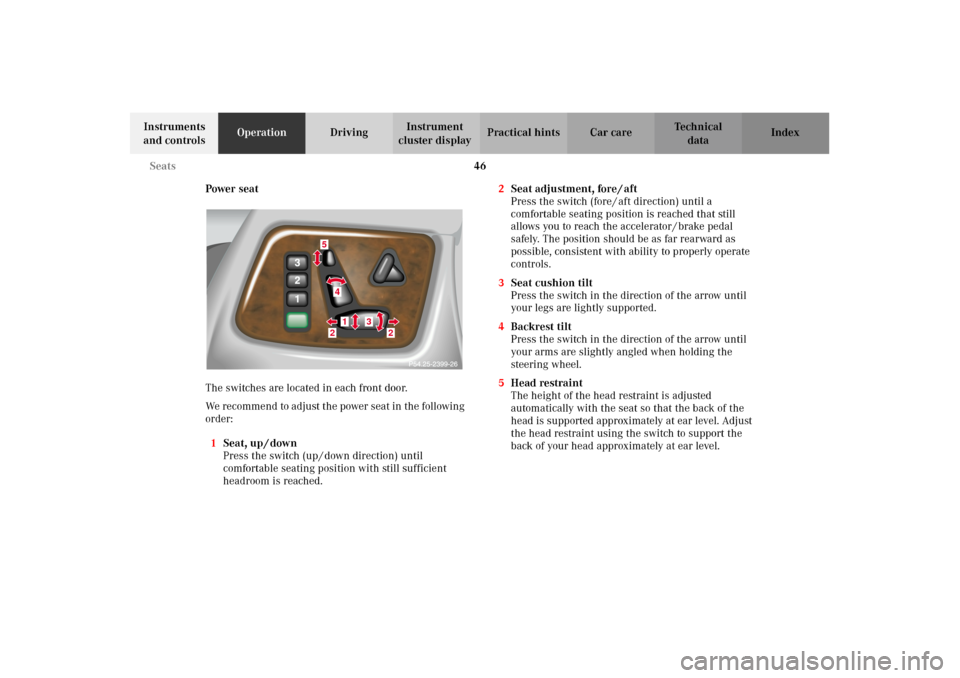
The switches are located in each front door.
We recommend to adjust the power seat in the following
order:
1Seat, up / down
Press the switch (up / down direction) until
comfortable seating position with still sufficient
headroom is reached.2Seat adjustment, fore / aft
Press the switch (fore / aft direction) until a
comfortable seating position is reached that still
allows you to reach the accelerator / brake pedal
safely. The position should be as far rearward as
possible, consistent with ability to properly operate
controls.
3Seat cushion tilt
Press the switch in the direction of the arrow until
your legs are lightly supported.
4Backrest tilt
Press the switch in the direction of the arrow until
your arms are slightly angled when holding the
steering wheel.
5Head restraint
The height of the head restraint is adjusted
automatically with the seat so that the back of the
head is supported approximately at ear level. Adjust
the head restraint using the switch to support the
back of your head approximately at ear level.
5
41
3
2
2
J_G463.book Seite 46 Mittwoch, 19. September 2001 8:06 08
Page 53 of 385

50 Seats
Te ch n i c a l
data Instruments
and controlsOperationDrivingInstrument
cluster displayPractical hints Car care Index
Important!
Prior to operating the vehicle, the driver should check
and adjust if necessary the seat height, seat position
fore and aft, and backrest angle to insure adequate
control, reach and comfort. The head restraint should
also be adjusted for proper height. See also airbag
section for proper seat positioning.
In addition, also adjust the steering wheel to ensure
ad eq uate con tr ol, r each, operation and com fort. B ot h the
inside and outside rear view mirrors should be adjusted
for adequate rearward vision.
Fasten seat belts. Infants and small children should be
seated in a properly secured restraint system that
complies with U.S. Federal Motor Vehicle Safety
Standard 213 and Canadian Motor Vehicle Safety
Standard 213.
All seat, head restraint, steering wheel, and rear view
mirror adjustments as well as fastening of seat belts
should be done before the vehicle is put into motion.
Wa r n i n g !
Children 12 years old and under must never ride in
the front seat, except in a Mercedes-Benz
authorized BabySmart
TM compatible child seat,
which operates with the BabySmart
TM system
installed in the vehicle to deactivate the passenger
side front airbag when it is properly installed.
Otherwise they will be struck by the airbag when it
inflates in a crash. If this happens, serious or fatal
injury can result.
According to accident statistics, children are safer
when properly restrained in the rear seating
positions than in the front seating positions.
Infants and small children must ride in back seats
and be seated in an appropriate infant or child
restraint system, which is properly secured with
the vehicle’s seat belt, fully in accordance with the
child seat manufacturer’s instructions.A child’s risk of serious or fatal injuries is
significantly increased if the child restraints are
not properly secured in the vehicle and the child is
not properly secured in the child restraint.
J_G463.book Seite 50 Mittwoch, 19. September 2001 8:06 08
Page 62 of 385
59 Restraint systems
Te ch n i c a l
data Instruments
and controlsOperationDrivingInstrument
cluster displayPractical hints Car care Index Tighten the lap portion to a snug fit by pulling shoulder
portion up.
The shoulder portion of the seat belt must be pulled
snug and checked for snugness immediately after
engaging it.
Adjust seat belt so that shoulder portion is located as
close as possible to the middle of your shoulder (it
should not touch the neck). For this purpose, you can
adjust the height of the belt outlet. Five positions are
available.4 Button for belt outlet height adjustment
To raise, slide belt height adjustment upward.
To lower, press button (4) and slide belt outlet
downward.
Caution!
For safety reasons, avoid adjusting the seat or backrest
into positions which could affect the correct seat belt
positioning.
2302
4
J_G463.book Seite 59 Mittwoch, 19. September 2001 8:06 08
Page 81 of 385

78 Steering wheel adjustment
Te ch n i c a l
data Instruments
and controlsOperationDrivingInstrument
cluster displayPractical hints Car care Index
Steering wheel adjustment
To operate the steering wheel adjustment switches, turn
the electronic key in starter switch to position 1 or 2
(with a front door opened, the steering wheel
adjustment can also be operated with the electronic key
removed or in starter switch position 0 for
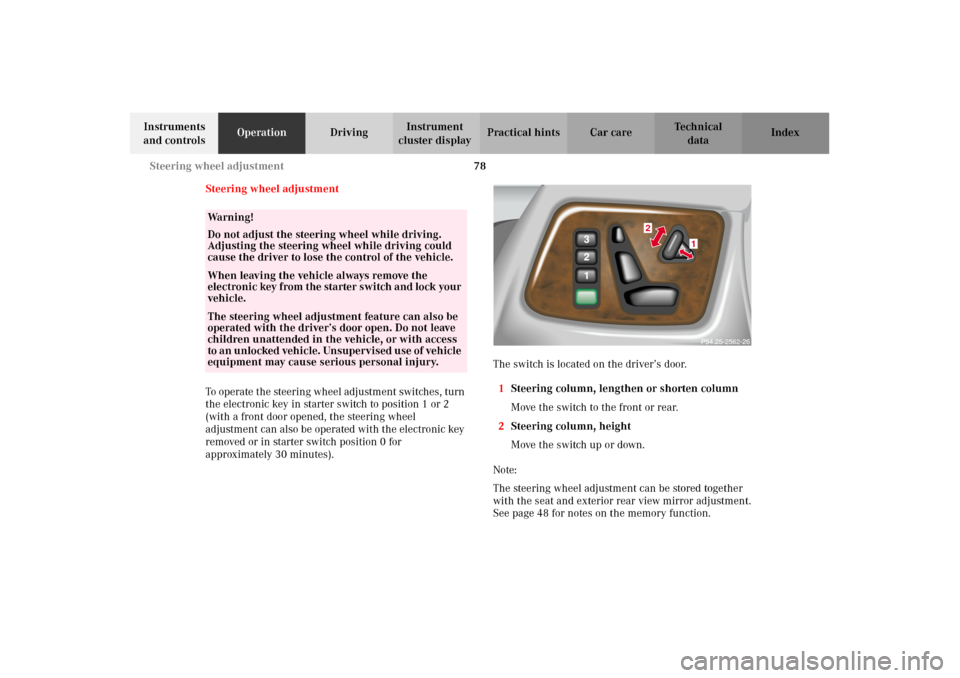
approximately 30 minutes).The switch is located on the driver’s door.
1Steering column, lengthen or shorten column
Move the switch to the front or rear.
2Steering column, height
Move the switch up or down.
Note:
The steering wheel adjustment can be stored together
with the seat and exterior rear view mirror adjustment.
See page 48 for notes on the memory function.
Wa r n i n g !
Do not adjust the steering wheel while driving.
Adjusting the steering wheel while driving could
cause the driver to lose the control of the vehicle.When leaving the vehicle always remove the
electroni c key f rom t he sta rter s wi tch a nd lock your
vehicle.The steering wheel adjustment feature can also be
operated with the driver’s door open. Do not leave
children unattended in the vehicle, or with access
to a n un locked vehi cle. Un supervi sed use of vehicl e
equipment may cause serious personal injury.
1
2
2562
J_G463.book Seite 78 Mittwoch, 19. September 2001 8:06 08