2002 MERCEDES-BENZ G500 seats
[x] Cancel search: seatsPage 176 of 385
173 Interior equipment
Te ch n i c a l
data Instruments
and controlsOperationDrivingInstrument
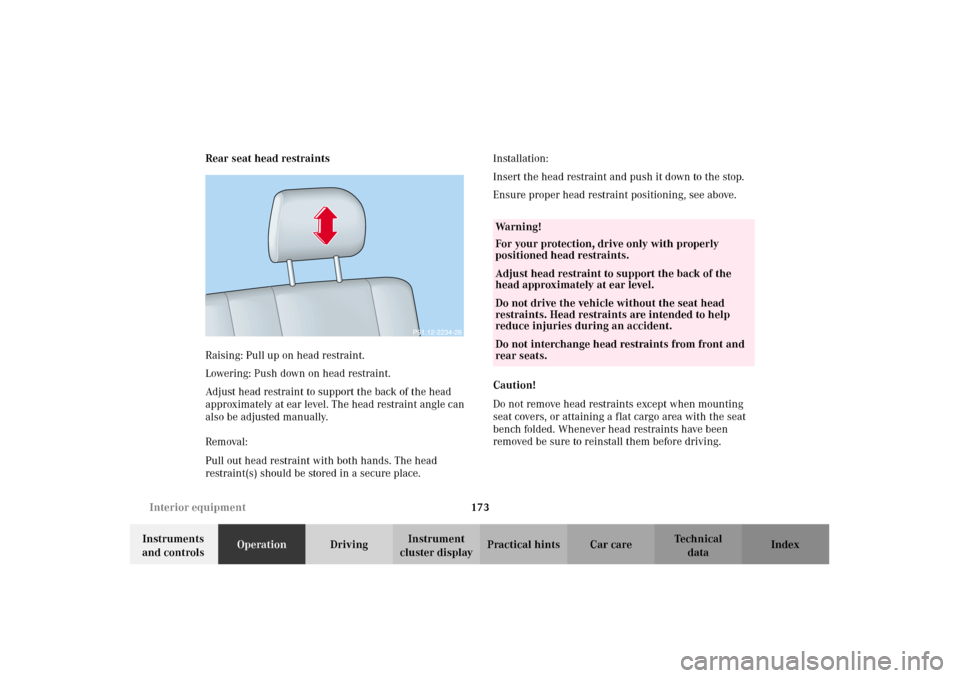
cluster displayPractical hints Car care Index Rear seat head restraints
Raising: Pull up on head restraint.
Lowering: Push down on head restraint.
Adjust head restraint to support the back of the head
approximately at ear level. The head restraint angle can
also be adjusted manually.
Removal:
Pull out head restraint with both hands. The head
restraint(s) should be stored in a secure place.Installation:
Insert the head restraint and push it down to the stop.
Ensure proper head restraint positioning, see above.
Caution!
Do not remove head restraints except when mounting
seat covers, or attaining a flat cargo area with the seat
bench folded. Whenever head restraints have been
removed be sure to reinstall them before driving.
Wa r n i n g !
For your protection, drive only with properly
positioned head restraints.Adjust head restraint to support the back of the
head approximately at ear level.Do not drive the vehicle without the seat head
restraints. Head restraints are intended to help
reduce injuries during an accident.Do not interchange head restraints from front and
rear seats.
J_G463.book Seite 173 Mittwoch, 19. September 2001 8:06 08
Page 178 of 385
175 Interior equipment
Te ch n i c a l
data Instruments
and controlsOperationDrivingInstrument
cluster displayPractical hints Car care Index Partition net (MB Accessory)
Us e of t he p artition n et is a p artic ular ly important s afety
factor when the vehicle is loaded higher than the top of
the seat backrests with smaller objects.
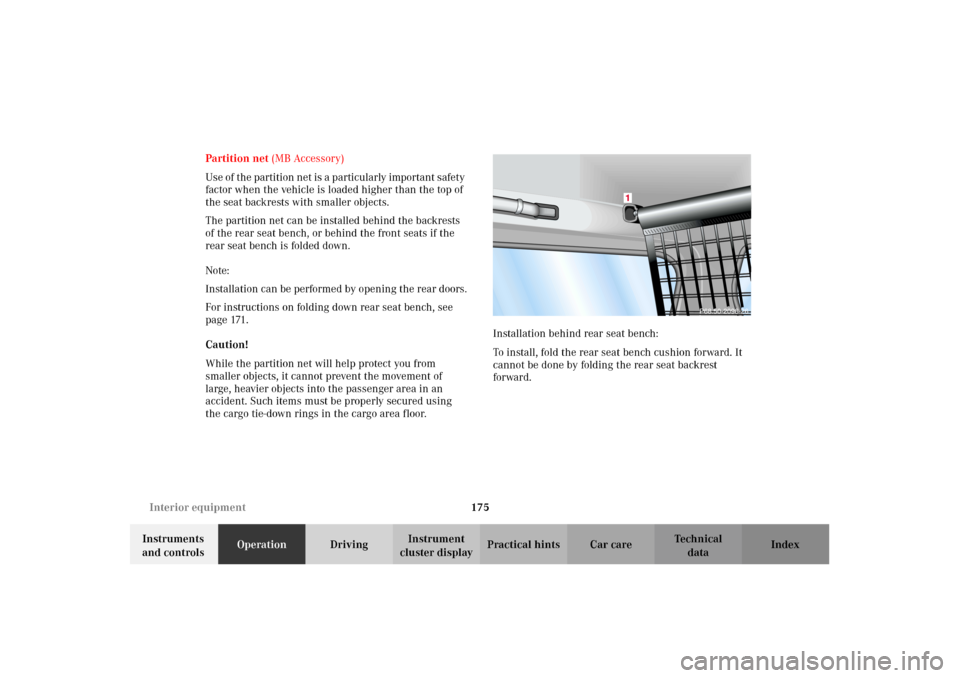
The partition net can be installed behind the backrests
of the rear seat bench, or behind the front seats if the
rear seat bench is folded down.
Note:
Installation can be performed by opening the rear doors.
For instructions on folding down rear seat bench, see
page 171.
Caution!
While the partition net will help protect you from
smaller objects, it cannot prevent the movement of
large, heavier objects into the passenger area in an
accident. Such items must be properly secured using
the cargo tie-down rings in the cargo area floor.Installation behind rear seat bench:
To install, fold the rear seat bench cushion forward. It
cannot be done by folding the rear seat backrest
forward.
J_G463.book Seite 175 Mittwoch, 19. September 2001 8:06 08
Page 180 of 385
177 Interior equipment
Te ch n i c a l
data Instruments
and controlsOperationDrivingInstrument
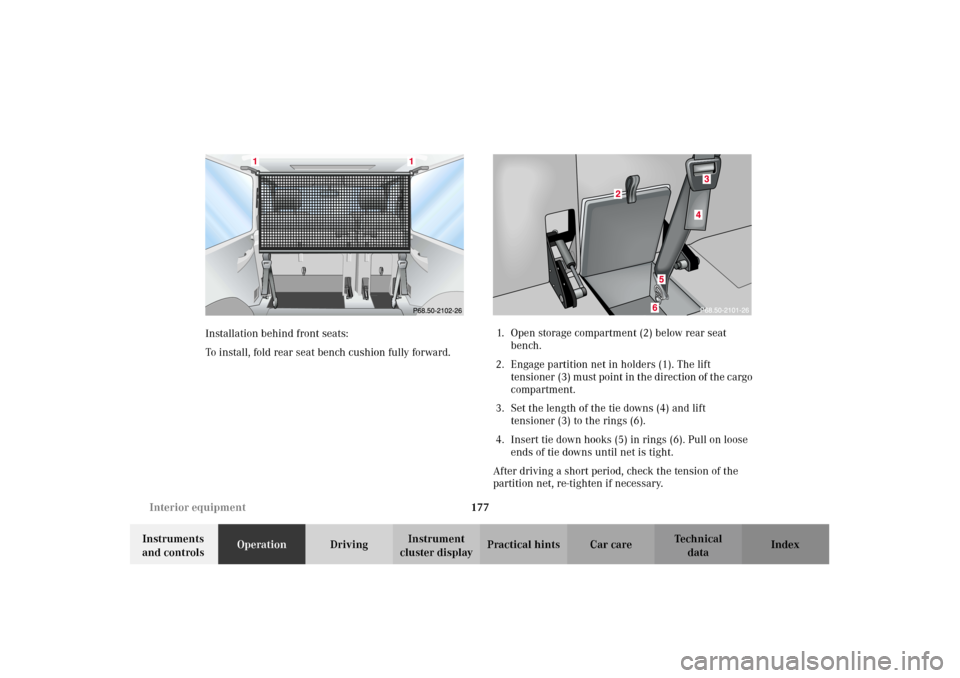
cluster displayPractical hints Car care Index Installation behind front seats:
To install, fold rear seat bench cushion fully forward.1. Open storage compartment (2) below rear seat
bench.
2. Engage partition net in holders (1). The lift
tensioner (3) must point in the direction of the cargo
compartment.
3. Set the length of the tie downs (4) and lift
tensioner (3) to the rings (6).
4. Insert tie down hooks (5) in rings (6). Pull on loose
ends of tie downs until net is tight.
After driving a short period, check the tension of the
partition net, re-tighten if necessary.
1
1
J_G463.book Seite 177 Mittwoch, 19. September 2001 8:06 08
Page 182 of 385
179 Interior equipment
Te ch n i c a l
data Instruments
and controlsOperationDrivingInstrument
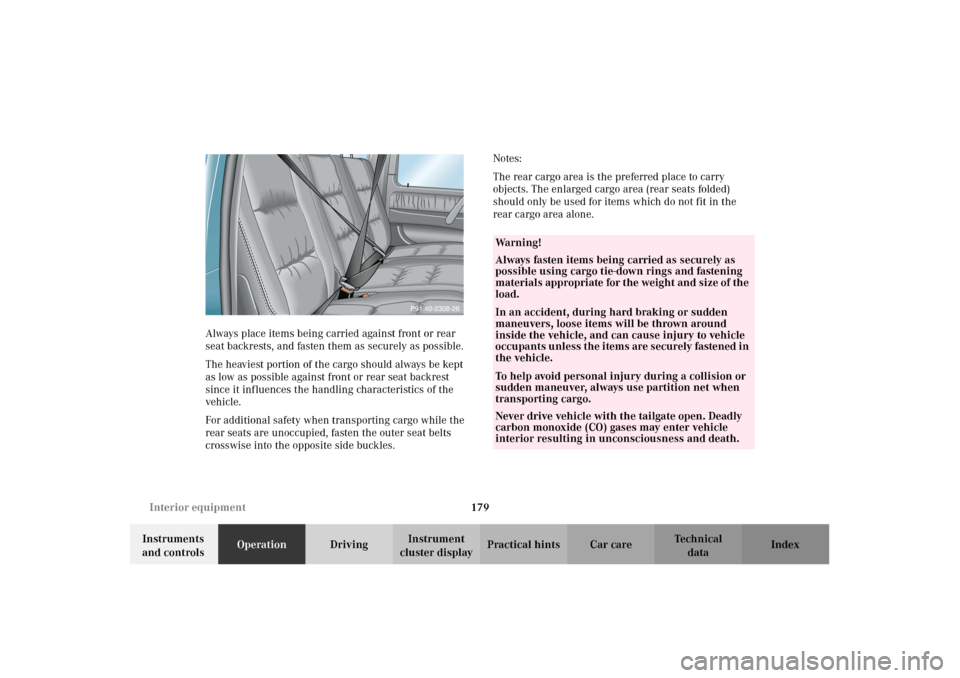
cluster displayPractical hints Car care Index Always place items being carried against front or rear
seat backrests, and fasten them as securely as possible.
The heaviest portion of the cargo should always be kept
as low as possible against front or rear seat backrest
since it influences the handling characteristics of the
vehicle.
For additional safety when transporting cargo while the
rear seats are unoccupied, fasten the outer seat belts
crosswise into the opposite side buckles.Notes:
The rear cargo area is the preferred place to carry
objects. The enlarged cargo area (rear seats folded)
should only be used for items which do not fit in the
rear cargo area alone.
Wa r n i n g !
Always fasten items being carried as securely as
possible using cargo tie-down rings and fastening
materials appropriate for the weight and size of the
load.In an accident, during hard braking or sudden
maneuvers, loose items will be thrown around
inside the vehicle, and can cause injury to vehicle
oc cu pa nt s u nl ess t he i tem s are s ecurely fastened i n
the vehicle.To help avoid personal injury during a collision or
sudden maneuver, always use partition net when
transporting cargo.
Never drive vehicle with the tailgate open. Deadly
carbon monoxide (CO) gases may enter vehicle
interior resulting in unconsciousness and death.
J_G463.book Seite 179 Mittwoch, 19. September 2001 8:06 08
Page 208 of 385
205 Starter switch
Te ch n i c a l
data Instruments
and controlsOperationDrivingInstrument
cluster displayPractical hints Car care Index Important!
If the electronic key is left in the starter switch
position 0 for a extended period of time, it can no longer
be turned in the lock. In this case, remove electronic key
from starter switch and reinsert.
Caution!
To prevent accelerated battery discharge and a possible
dead battery, always remove the electronic key from the
starter switch. Do not leave the electronic key in starter
switch position 0.Notes:
A warning sounds when the driver’s door is opened
with the electronic key is in starter switch position 1
or 0.
If the electronic key cannot be turned in the starter
switch, the vehicle battery may not be sufficiently
charged. See battery on page 319 or jump starting on
page 321.
With the engine at idle speed, the charging rate of the
alternator (output) is limited.
It is therefore recommended that you turn off
unnecessary electrical consumers while driving in stop-
and-go traf fic. This precaution helps to avoid draining of
the battery.
Unnecessary strain on the battery and charging system
may be minimized by turning off the following power-
consuming devices, for example:
Heated seats, rear window defroster. In addition, the
automatic climate air volume control should be set to
the lowest position.
J_G463.book Seite 205 Mittwoch, 19. September 2001 8:06 08
Page 274 of 385
271 Malfunction and indicator lamps
Te ch n i c a l
data Instruments
and controlsOperation DrivingInstrument
cluster displayPractical hints Car care Index Malfunction and indicator lamp in the center
console
AIRBAG OFF indicator lamp
The ü indicator lamp will light up for approximately
6 seconds when you turn the electronic key in starter
switch to position 1 or 2.
It does not light up if there is a fault in the system.
The ü indicator lamp stays lit as long as a
Baby Smart
TM child seat is properly installed on the
front passenger seat. It indicates that the front
passenger airbag is switched off.
See page 63 for BabySmart
TM airbag and its deactivation
system.
Baby Smart
TM is a trademark of Siemens Automotive Corp.
Wa r n i n g !
The BabySmart
TM airbag deactivation system will
ONLY work with a special child seat designed to
operate with it. It will not work with child seats
which are not BabySmart
TM compatible.
Never place anything between seat cushion and
child seat (e.g. pillow), since it reduces the
effectiveness of the deactivation system.Follow the manufacturer’s instructions for
installation of special child seats.The passenger front airbag will not deploy only if
the ü indicator lamp remains illuminated.Please be sure to check the indicator every time
you use the special system child seat. Should the
light go out while the restraint is installed, please
check installation. If the light remains out, do not
use the BabySmart
TM restraint to transport children
on the front passenger seat until the system has
been repaired.
J_G463.book Seite 271 Mittwoch, 19. September 2001 8:06 08
Page 357 of 385
354 Cleaning and care of the vehicle
Te ch n i c a l
data Instruments
and controlsOperation DrivingInstrument
cluster displayPractical hintsCar careIndex
Cup holder
Use a gentle dishwashing detergent or mild detergent
for delicate fabrics as a washing solution. Wipe with a
cloth moistened in lukewarm solution. Do not use
scouring agents.
Seat belts
The webbing must not be treated with chemical
cleaning agents. Use only clear, lukewarm water and
soap. Do not dry the webbing at temperatures above
176
°F (80
°C) or in direct sunlight.
Headliner
Clean with soft bristle brush, or use a dry-shampoo
cleaner in case of excessive dirt.Upholstery
Using aftermarket seat covers or wearing clothing that
have the tendency to give off coloring (e.g. when wet
etc.) may cause the upholstery to become permanently
discolored. By lining the seats with a proper
intermediate cover, contact-discoloration will be
prevented.
Leather Upholstery
Wipe leather upholstery with a damp cloth and dry
thoroughly or clean with Mercedes-Benz approved
Leather Care. Exercise particular care when cleaning
perforated leather as its underside should not become
wet.
Cloth Upholstery
Clean with soft bristle brush, or use a dry-shampoo
cleaner in case of excessive dirt.
Hard plastic trim items
Pour Mercedes-Benz approved Interior Care onto soft
lint-free cloth and apply with light pressure.
Plastic and rubber parts
Do not use oil or wax on these parts.
Wa r n i n g !
Do not bleach or dye seat belts as this may severely
weaken them. In a crash they may not be able to
provide adequate protection.
J_G463.book Seite 354 Mittwoch, 19. September 2001 8:06 08
Page 376 of 385
373 Index
Te ch n i c a l
data Instruments
and controlsOperation DrivingInstrument
cluster displayPractical hints Car careIndex Fuel
Gasoline additives ....................................................365
Premium unleaded gasoline ................. 259, 362, 364
Fuel filler flap, manual release ...................................347
Fuel requirements ......................................................... 364
Fuel reserve warning ....................................................268
Fuels, coolants, lubricants etc. - Capacities .............. 361
Fuse box in battery box ................................................300
Fuse box in front passenger footwell ......................... 298
Fuse box in middle tunnel ........................................... 299
Fuse box in the passenger compartment ................... 297
Fuses, electrical ............................................................. 297
GGarage door opener ....................................................... 185
Gasoline
Additives .................................................................... 365
Fuel requirements ....................................................364
Premium unleaded ................................................... 364
Glove box ......................................................................... 163
HHazard warning flasher switch ................................... 139
Head restraints
Rear ............................................................................. 173
Removal ...................................................................... 173
Head restraints, front seats
Removal and installation ........................................... 51
Headlamp assembly
Halogen ...................................................................... 329
Headlamp cleaning system ........................................... 133
Headlamp mode (HEADLAMPS) .................................. 130
Heated seats, front ........................................................... 52
Heated seats, rear ............................................................ 54
High and low beam, bulb .............................................. 331
Hood ................................................................................ 302IIdentification labels ...................................................... 357
Illuminated vanity mirrors ........................................... 161
Indicator lamps in the instrument cluster ...................86
J_G463.book Seite 373 Mittwoch, 19. September 2001 8:06 08