2002 MERCEDES-BENZ G500 engine oil
[x] Cancel search: engine oilPage 285 of 385
282 Malfunction and warning messages
Te ch n i c a l
data Instruments
and controlsOperation DrivingInstrument
cluster displayPractical hints Car care Index
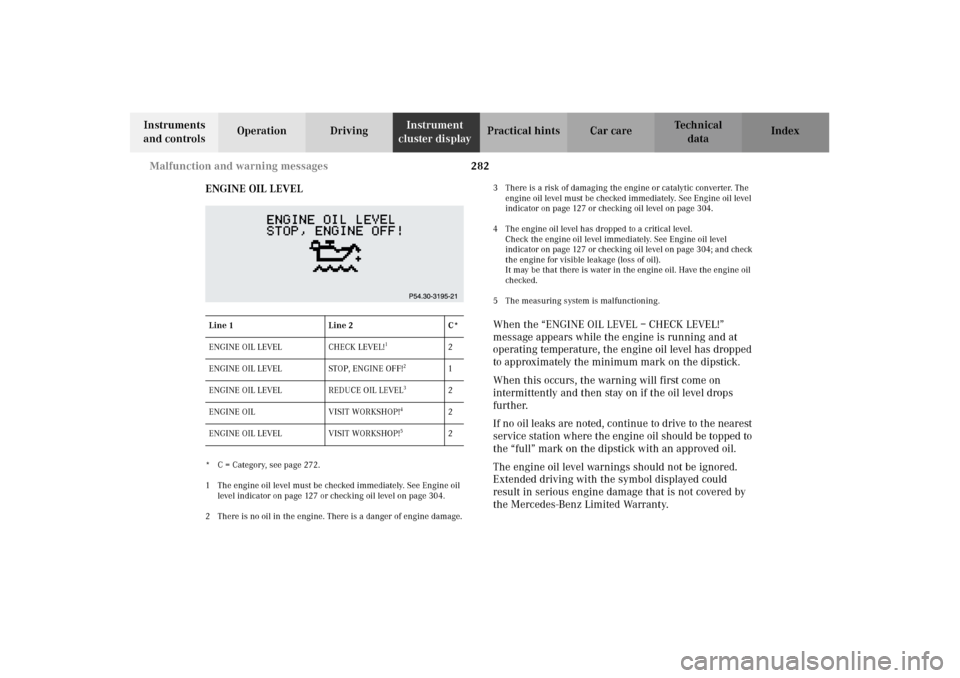
ENGINE OIL LEVEL
* C = Category, see page 272.
1 The engine oil level must be checked immediately. See Engine oil
level indicator on page 127 or checking oil level on page 304.
2 There is no oil in the engine. There is a danger of engine damage.3 There is a risk of damaging the engine or catalytic converter. The
engine oil level must be checked immediately. See Engine oil level
indicator on page 127 or checking oil level on page 304.
4 The engine oil level has dropped to a critical level.
Check the engine oil level immediately. See Engine oil level
indicator on page 127 or checking oil level on page 304; and check
the engine for visible leakage (loss of oil).
It may be that there is water in the engine oil. Have the engine oil
checked.
5 The measuring system is malfunctioning.
When the “ENGINE OIL LEVEL – CHECK LEVEL!”
message appears while the engine is running and at
operating temperature, the engine oil level has dropped
to approximately the minimum mark on the dipstick.
When this occurs, the warning will first come on
intermittently and then stay on if the oil level drops
further.
If no oil leaks are noted, continue to drive to the nearest
service station where the engine oil should be topped to
the “full” mark on the dipstick with an approved oil.
The engine oil level warnings should not be ignored.
Extended driving with the symbol displayed could
result in serious engine damage that is not covered by
the Mercedes-Benz Limited Warranty.
Line 1 Line 2 C*
ENGINE OIL LEVEL CHECK LEVEL!
1
2
ENGINE OIL LEVEL STOP, ENGINE OFF!
2
1
ENGINE OIL LEVEL REDUCE OIL LEVEL
3
2
ENGINE OIL VISIT WORKSHOP!
4
2
ENGINE OIL LEVEL VISIT WORKSHOP!
5
2
J_G463.book Seite 282 Mittwoch, 19. September 2001 8:06 08
Page 298 of 385
295 Contents - Practical hints
Te ch n i c a l
data Instruments
and controlsOperation DrivingInstrument
cluster displayPractical hintsCar care Index
Practical hintsFirst aid kit, vehicle tools
and jack ......................................296
CD-changer .....................................296
Fuses ................................................297
Electrical outlet .............................. 301
Stowing items in the vehicle ........ 301
Hood .................................................302
Checking engine oil level .............304
Automatic transmission
fluid level ...................................305
Engine oil consumption ................305
Coolant level ...................................306
Adding coolant ...........................306
Windshield washer/headlamp
cleaning system .........................307
Windshield and headlamp
washer fluid mixing ratio .........307Vehicle jack .................................... 308
Wheels ............................................. 310
Tire replacement ........................ 310
Rotating wheels .......................... 311
Spare wheel cover ..........................312
Spare wheel ..................................... 313
Changing wheels ............................ 314
Tire inflation pressure .................. 318
Battery .............................................. 319
Jump starting ................................. 321
Towing the vehicle ........................ 324
Transmission selector lever,
manually unlocking .................. 327
Stranded vehicle ............................ 327
Exterior lamps ............................... 328
Headlamp assembly .................. 329
Fog lamp, front ........................... 332
Turn signal lamp, front ............ 334Turn signal lamp, side ...............335
Front and rear
side marker lamps .....................337
Taillamp assemblies ..................339
License plate lamp .....................340
Rear fog lamp / Backup lamp ... 341
Changing batteries in
the electronic key .....................343
Synchronizing
remote control ............................345
Emergency operation of
sliding/pop-up roof ...................346
Manual release for
fuel filler flap .............................347
Replacing wiper blades .................348
J_G463.book Seite 295 Mittwoch, 19. September 2001 8:06 08
Page 306 of 385
303 Engine compartment
Te ch n i c a l
data Instruments
and controlsOperation DrivingInstrument
cluster displayPractical hintsCar care Index
Wa r n i n g !
To help prevent personal injury, stay clear of
moving parts when the hood is open and the engine
is running. Be sure the hood is properly closed
before driving. When closing hood, use extreme
caution not to catch hands or fingers.The radiator fan may continue to run for
approximately 30 seconds or even restart after the
engine has been turned off. Stay clear from fan
blades.The engine is equipped with a transistorized
ignition system. Because of the high voltage it is
dangerous to touch any components (ignition coils,
spark plug sockets, diagnostic socket) of the
ignition system
• with the engine running,
• while starting the engine,
• if ignition is “on” and the engine is turned
manually.
If you see flames, steam or smoke coming from the
engine compartment, or if the coolant temperature
gauge indicates that the engine is overheated, do
not open the hood. Move away from vehicle and do
not open the hood until the engine has cooled. If
necessary, call a fire department.
J_G463.book Seite 303 Mittwoch, 19. September 2001 8:06 08
Page 307 of 385
304 Engine compartment
Te ch n i c a l
data Instruments
and controlsOperation DrivingInstrument
cluster displayPractical hintsCar care Index
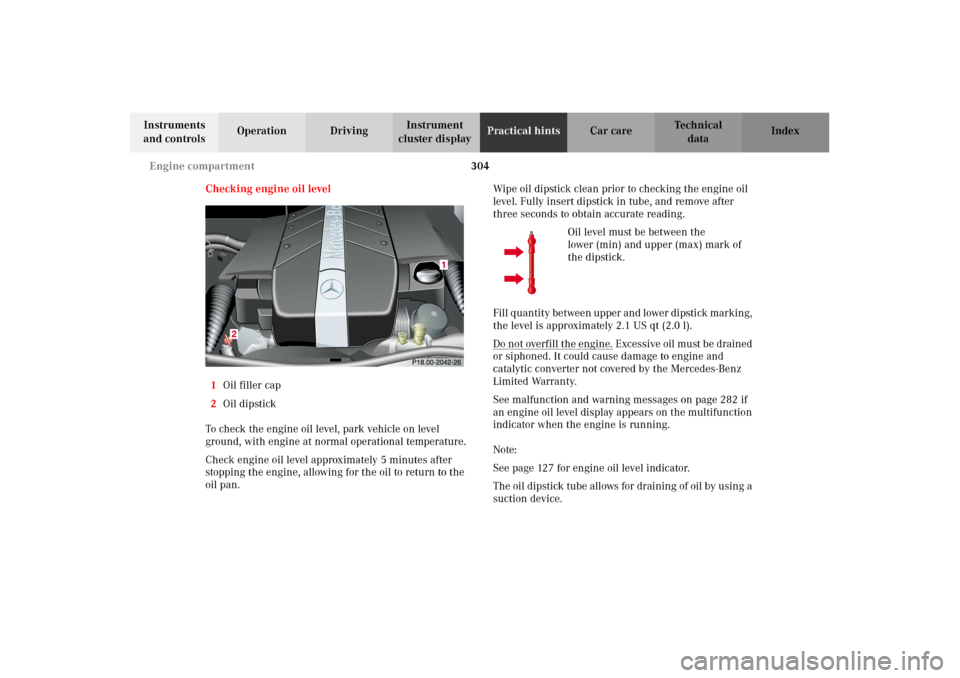
Checking engine oil level
1Oil filler cap
2Oil dipstick
To check the engine oil level, park vehicle on level
ground, with engine at normal operational temperature.
Check engine oil level approximately 5 minutes after
stopping the engine, allowing for the oil to return to the
oil pan.Wipe oil dipstick clean prior to checking the engine oil
level. Fully insert dipstick in tube, and remove after
three seconds to obtain accurate reading.
Oil level must be between the
lower (min) and upper (max) mark of
the dipstick.
Fil l q u a n t it y b e twe e n up p e r a n d l owe r d ip stick m a r k in g ,
the level is approximately 2.1 US qt (2.0 l).
Do not overfill the engine.
Excessive oil must be drained
or siphoned. It could cause damage to engine and
catalytic converter not covered by the Mercedes-Benz
Limited Warranty.
See malfunction and warning messages on page 282 if
an engine oil level display appears on the multifunction
indicator when the engine is running.
Note:
See page 127 for engine oil level indicator.
The oil dipstick tube allows for draining of oil by using a
suction device.
J_G463.book Seite 304 Mittwoch, 19. September 2001 8:06 08
Page 308 of 385
305 Engine compartment
Te ch n i c a l
data Instruments
and controlsOperation DrivingInstrument
cluster displayPractical hintsCar care Index Automatic transmission fluid level
The transmission has a permanent fill of automatic
transmission fluid.
Regular automatic transmission fluid level checks and
changes are not required. For this reason the dipstick is
omitted.
If you notice fluid leaks or gear shifting malfunctions,
have your authorized Mercedes-Benz Light Truck Center
check the transmission fluid level.Engine oil consumption
Engine oil consumption checks should only be made
after the break-in period. During the break-in period,
higher oil consumption may be noticed and is normal.
Frequent driving at high engine speeds results in
increased consumption.
J_G463.book Seite 305 Mittwoch, 19. September 2001 8:06 08
Page 351 of 385
348 Replacing wiper blades
Te ch n i c a l
data Instruments
and controlsOperation DrivingInstrument
cluster displayPractical hintsCar care Index
Replacing wiper blades
For safety reasons, remove electronic key from starter
switch before replacing the wiper blade, otherwise the
motor can suddenly turn on and cause injury.
Notes:
Do not open engine hood with wiper arm folded forward.
Do not allow the wiper arm to contact the windshield
glass without a wiper blade inserted. The glass may be
scratched or broken.
Make certain that the wiper blade is properly installed.
An improperly installed wiper blade may cause
windshield damage.
The wiper with air spoiler should be mounted on the
driver’s side.Replacing windshield/rear window wiper blade
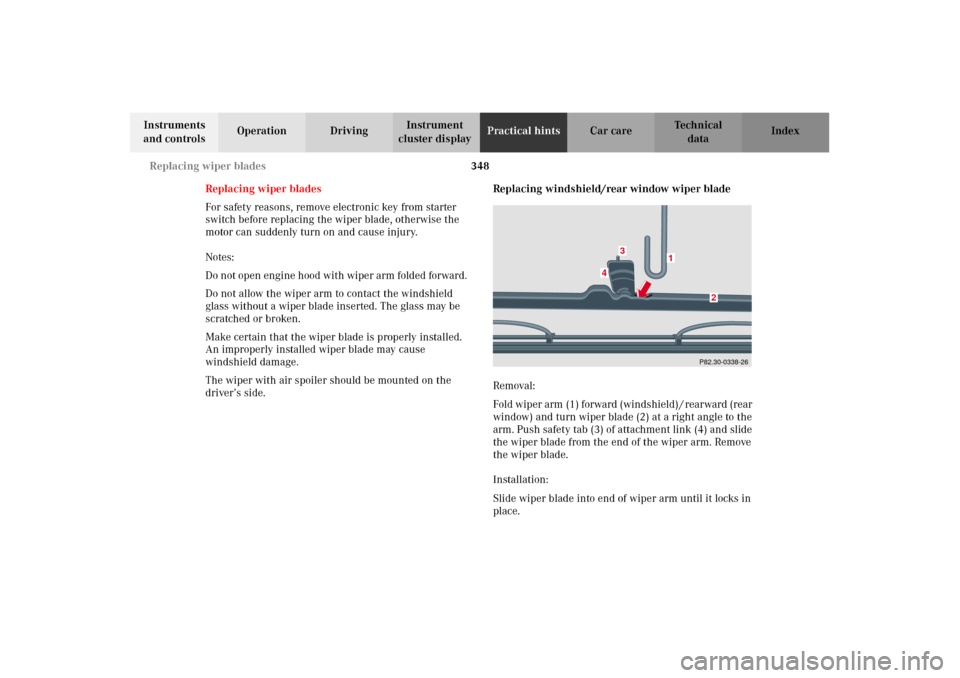
Removal:
Fold wip er arm (1 ) forward (win ds hield ) / rear war d (rear
window) and turn wiper blade (2) at a right angle to the
arm. Push safety tab (3) of attachment link (4) and slide
the wiper blade from the end of the wiper arm. Remove
the wiper blade.
Installation:
Slide wiper blade into end of wiper arm until it locks in
place.
P82.30-0338-26
1
2
3
4
J_G463.book Seite 348 Mittwoch, 19. September 2001 8:06 08
Page 358 of 385

355 Contents - Technical data
Te ch n i c a l
data Instruments
and controlsOperation DrivingInstrument
cluster displayPractical hints Car care Index
Technical dataSpare parts service ........................356
Warranty coverage .........................356
Identification labels .......................357
Layout of poly-V-belt drive ............358
Technical data ................................359
Fuels, coolants, lubricants etc. –
capacities ................................... 361Engine oils ...................................... 363
Engine oil additives ...................... 363
Air conditioner refrigerant .......... 363
Brake fluid ...................................... 363
Premium unleaded gasoline ........ 364
Fuel requirements ........................ 364
Gasoline additives ......................... 365
Coolants .......................................... 365
Consumer information ................. 367
J_G463.book Seite 355 Mittwoch, 19. September 2001 8:06 08
Page 366 of 385
363 Fuels, coolants, lubricants etc.
Te ch n i c a l
data Instruments
and controlsOperation DrivingInstrument
cluster displayPractical hints Car care Index Engine oils
Engine oils are specifically tested for their suitability in
our engines. Therefore, use only engine oils
recommended by Mercedes-Benz. Information on
recommended brands is available in the Factory
Approved Service Products pamphlet, or at your
authorized Mercedes-Benz Light Truck Center.
Please follow Service Booklet recommendations for
scheduled oil changes. Failure to do so could result in
engine damage not covered by the Mercedes-Benz
Limited Warranty.
Engine oil additives
Do not blend oil additives with engine oil. They may be
harmful to the engine operation.
Damage or malfunctions resulting from blending oil
additives are not covered by the Mercedes-Benz Limited
Warranty.Air conditioner refrigerant
R-134a (HFC) refrigerant and special PAG lubricating oil
is used in the air conditioner system.
Never use R-12 (CFC) or mineral-based lubricating oil,
otherwise damage to the system will occur.
Brake fluid
During vehicle operation, the boiling point of the brake
fluid is continuously reduced through the absorption of
moisture from the atmosphere. Under extremely hard
operating conditions, this moisture content can lead to
the formation of bubbles in the system thus reducing
the system’s efficiency.
The brake fluid must therefore be replaced every two
years, preferably in the spring.
It is recommended to use only brake fluid approved by
Mercedes-Benz. Your authorized Mercedes-Benz Light
Truck Center will provide you with additional
information.
J_G463.book Seite 363 Mittwoch, 19. September 2001 8:06 08