2002 MERCEDES-BENZ E WAGON wheel bolts
[x] Cancel search: wheel boltsPage 7 of 354

4 Contents
Malfunction and warning
messages in the
multifunction display ...............250
DISPLAY DEFECTIVE ................ 251
BATTERY / ALTERNATOR .........252
ABS-SYSTEM ...............................253
BRAKE ASSIST ...........................253
BRAKE LINING WEAR ..............254
BRAKE FLUID .............................254
PARKING BRAKE .......................255
ENGINE FAN ...............................255
COOLANT (coolant level) ..........256
COOLANT TEMP. ........................257
LIGHTING SYSTEM ....................258
LIGHT SENSOR ...........................259
REMOVE KEY .............................259
STEERING GEAR OIL .................260
ENGINE OIL LEVEL ................... 261
WASHER FLUID ..........................262
ELEC. STABIL. PROG.
(Electronic stability program) ..263
TELE AID .....................................263
Practical hintsFirst aid kit ..................................... 266
Fuses ............................................... 267
Electrical outlet ............................. 269
Hood ................................................ 270
Checking engine oil level ............. 273
Automatic transmission
fluid level ....................................274
Coolant level ....................................274
Adding coolant ........................... 275
Windshield and headlamp
washer system ...........................276
Windshield and headlamp
washer fluid mixing ratio .........276
Spare wheel, vehicle tools,
storage compartment ............... 277
Vehicle jack .................................... 278
Wheels ............................................ 279
Tire replacement ....................... 279
Rotating wheels ......................... 280
Spare wheel .................................... 281
Spare wheel bolts ...................... 281Changing wheels ...........................282
Tire inflation pressure ..................287
Battery .............................................289
Jump starting .................................. 291
Towing the vehicle .........................294
Transmission selector lever,
manually unlocking ..................296
Exterior lamps ................................297
Headlamp assembly ...................298
Taillamp assemblies .................. 301
Changing batteries
in the electronic main key ......304
Synchronizing
remote control ............................306
Emergency engine shut-down .....306
Emergency operation of
sliding / pop-up roof .................307
Manual release for
fuel filler flap .............................308
Replacing wiper blade insert .......308
Roof rack ..........................................311
Page 268 of 354
265 Contents – Practical hints
Te ch n i c a l
data Instruments
and controlsOperation DrivingInstrument
cluster displayPractical hintsCar care Index
Practical hintsFirst aid kit .....................................266
Fuses ................................................267
Electrical outlet ..............................269
Hood .................................................270
Checking engine oil level .............273
Automatic transmission
fluid level ................................... 274
Coolant level ................................... 274
Adding coolant ...........................275
Windshield and headlamp
washer system ........................... 276
Windshield and headlamp
washer fluid mixing ratio ......... 276Spare wheel, vehicle tools,
storage compartment ............... 277
Vehicle jack .................................... 278
Wheels ............................................ 279
Tire replacement ....................... 279
Rotating wheels ......................... 280
Spare wheel .................................... 281
Spare wheel bolts ...................... 281
Changing wheels ........................... 282
Tire inflation pressure ................. 287
Battery ............................................. 289
Jump starting ................................. 291
Towing the vehicle ........................ 294
Transmission selector lever,
manually unlocking ................. 296Exterior lamps ................................297
Headlamp assembly ...................298
Taillamp assemblies .................. 301
Changing batteries
in the electronic main key ......304
Synchronizing
remote control ............................306
Emergency engine shut-down .....306
Emergency operation of
sliding / pop-up roof .................307
Manual release for
fuel filler flap .............................308
Replacing wiper blade insert .......308
Roof rack ..........................................311
Page 282 of 354

279 Tires, Wheels
Te ch n i c a l
data Instruments
and controlsOperation DrivingInstrument
cluster displayPractical hintsCar care Index Wheels
Replace rims or tires with the same designation,
manufacturer and type as shown on the original part.
See your authorized Mercedes-Benz Center for further
information.
See your authorized Mercedes-Benz Center for
information on tested and recommended rims and tires
for summer and winter operation. They can also offer
advice concerning tire service and purchase.
Tire replacement
Front tires should be replaced in sets. Rims and tires
must be of the correct size and type. For dimensions,
see page 326.
We recommend that you break in new tires for
approximately 60 miles (100 km) at moderate speed.
It is imperative that the wheel mounting bolts be
fastened to a tightening torque of 80 ft.lb. (110 Nm)
whenever wheels are mounted.
For rim and tire specifications, see page 326.
Wa r n i n g !
Worn, old tires can cause accidents. If the tire tread
is badly worn, or if the tires have sustained
damage, replace them.When replacing rims, use only genuine
Mercedes-Benz wheel bolts specified for the
particular rim type. Failure to do so can result in
the bolts loosening and possibly an accident.
Page 284 of 354
281 Tires, Wheels
Te ch n i c a l
data Instruments
and controlsOperation DrivingInstrument
cluster displayPractical hintsCar care Index Spare wheel
Important!
Unidirectional tires must always be mounted with arrow
on tire sidewall pointing in direction of vehicle forward
movement.
If the arrow on tire side wall does not point in direction
of vehicle forward movement when using the spare
wheel, observe the following restrictions:
•Drive to the nearest tire repair facility as soon as
possible.
For rim and tire specifications, see page 326.
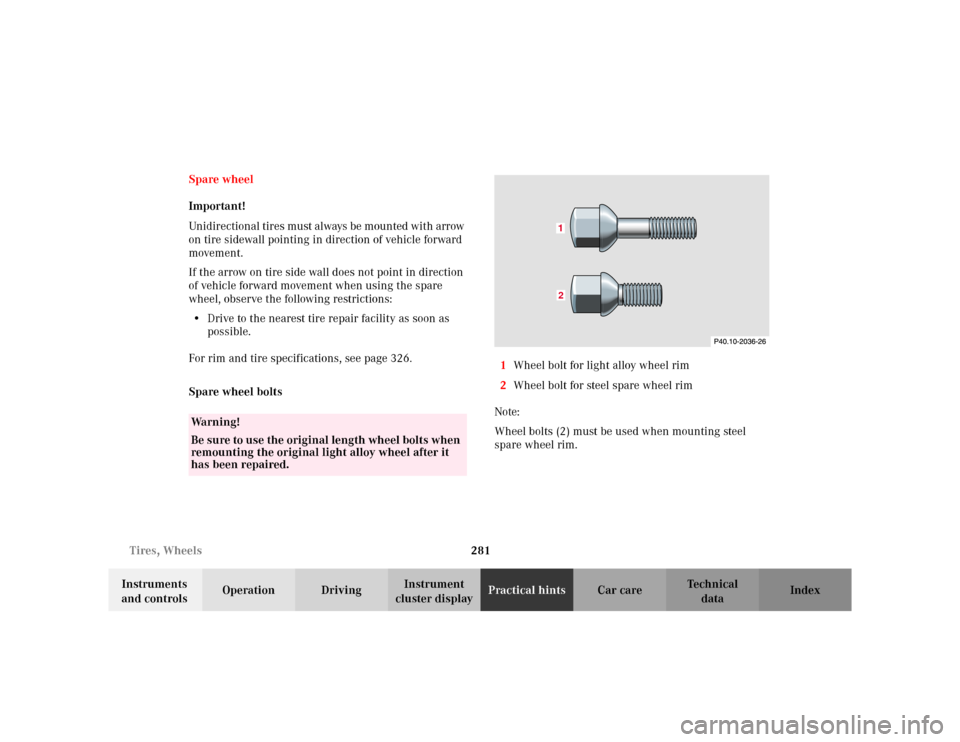
Spare wheel bolts1Wheel bolt for light alloy wheel rim
2Wheel bolt for steel spare wheel rim
Note:
Wheel bolts (2) must be used when mounting steel
spare wheel rim.
Wa r n i n g !
Be sure to use the original length wheel bolts when
remounting the original light alloy wheel after it
has been repaired.
12
Page 286 of 354
283 Tires, Wheels
Te ch n i c a l
data Instruments
and controlsOperation DrivingInstrument
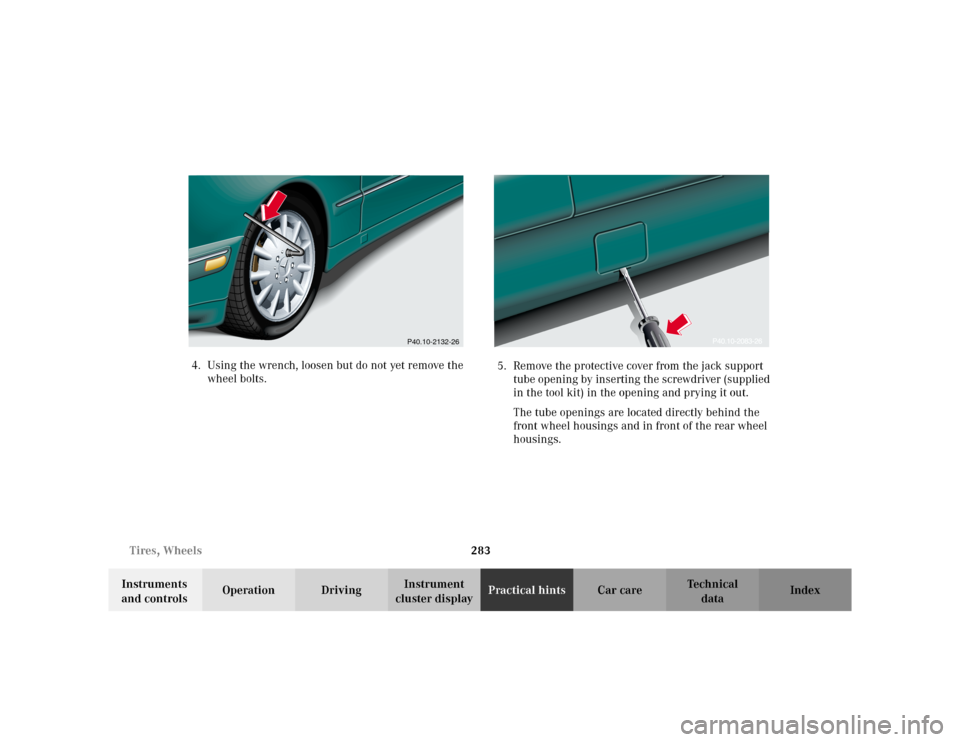
cluster displayPractical hintsCar care Index 4. Using the wrench, loosen but do not yet remove the
wheel bolts.5. Remove the protective cover from the jack support
tube opening by inserting the screwdriver (supplied
in the tool kit) in the opening and prying it out.
The tube openings are located directly behind the
front wheel housings and in front of the rear wheel
housings.
P40.10-2132-26
Page 287 of 354
284 Tires, Wheels
Te ch n i c a l
data Instruments
and controlsOperation DrivingInstrument
cluster displayPractical hintsCar care Index
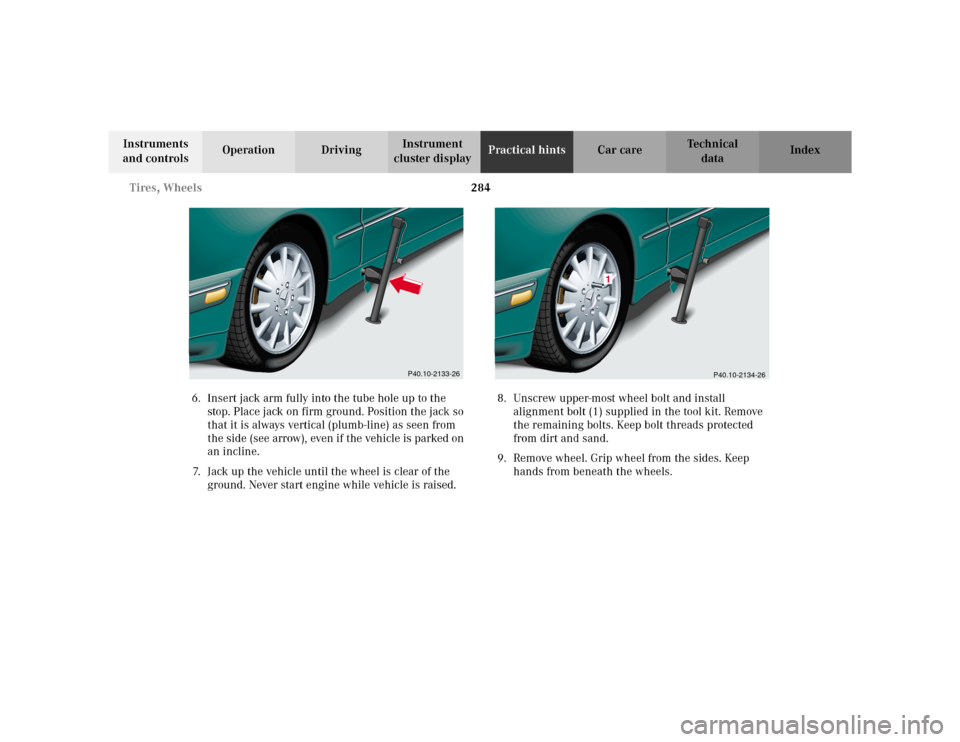
6. Insert jack arm fully into the tube hole up to the
stop. Place jack on firm ground. Position the jack so
that it is always vertical (plumb-line) as seen from
the side (see arrow), even if the vehicle is parked on
an incline.
7. Jack up the vehicle until the wheel is clear of the
ground. Never start engine while vehicle is raised.8. Unscrew upper-most wheel bolt and install
alignment bolt (1) supplied in the tool kit. Remove
the remaining bolts. Keep bolt threads protected
from dirt and sand.
9. Remove wheel. Grip wheel from the sides. Keep
hands from beneath the wheels.
P40.10-2133-26
P40.10-2134-26
1
Page 288 of 354
285 Tires, Wheels
Te ch n i c a l
data Instruments
and controlsOperation DrivingInstrument
cluster displayPractical hintsCar care Index Important!
When installing steel spare wheel rim, make certain to
use the correct wheel bolts, supplied in the vehicle tool
kit, see page 281 and page 277.10. Clean contact surfaces of wheel and wheel hub.
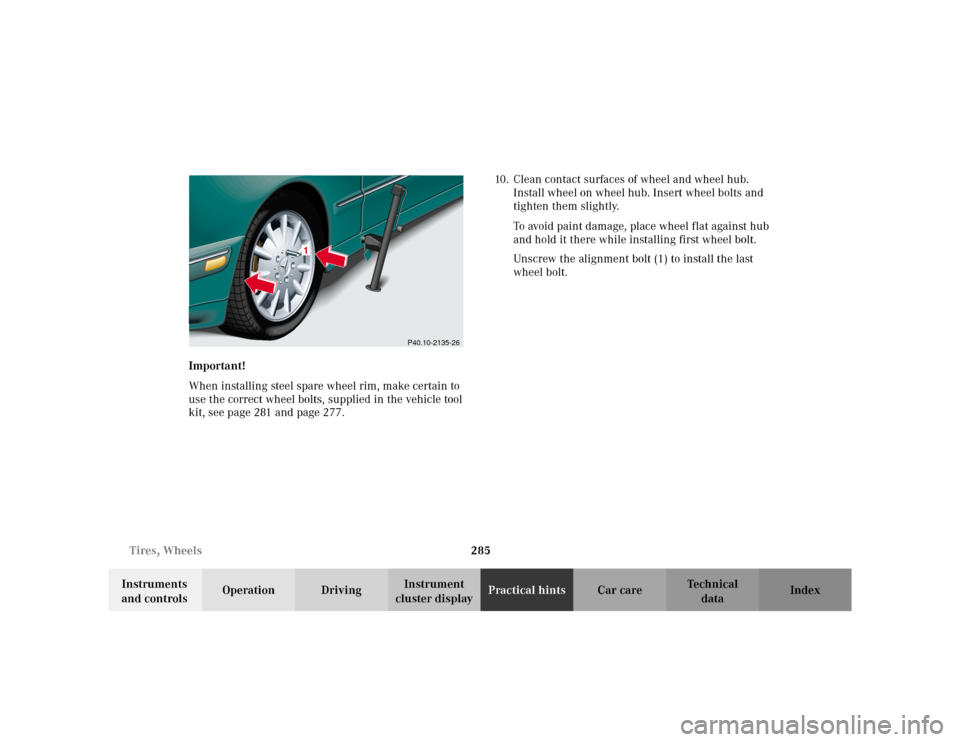
Install wheel on wheel hub. Insert wheel bolts and
tighten them slightly.
To avoid paint damage, place wheel flat against hub
and hold it there while installing first wheel bolt.
Unscrew the alignment bolt (1) to install the last
wheel bolt.
P40.10-2135-26
1
Page 289 of 354
286 Tires, Wheels
Te ch n i c a l
data Instruments
and controlsOperation DrivingInstrument
cluster displayPractical hintsCar care Index
11. Lower vehicle. Remove jack and insert jack tube
cover.
Before storing the jack, the jack arm must be
lowered almost to the base of the jack.
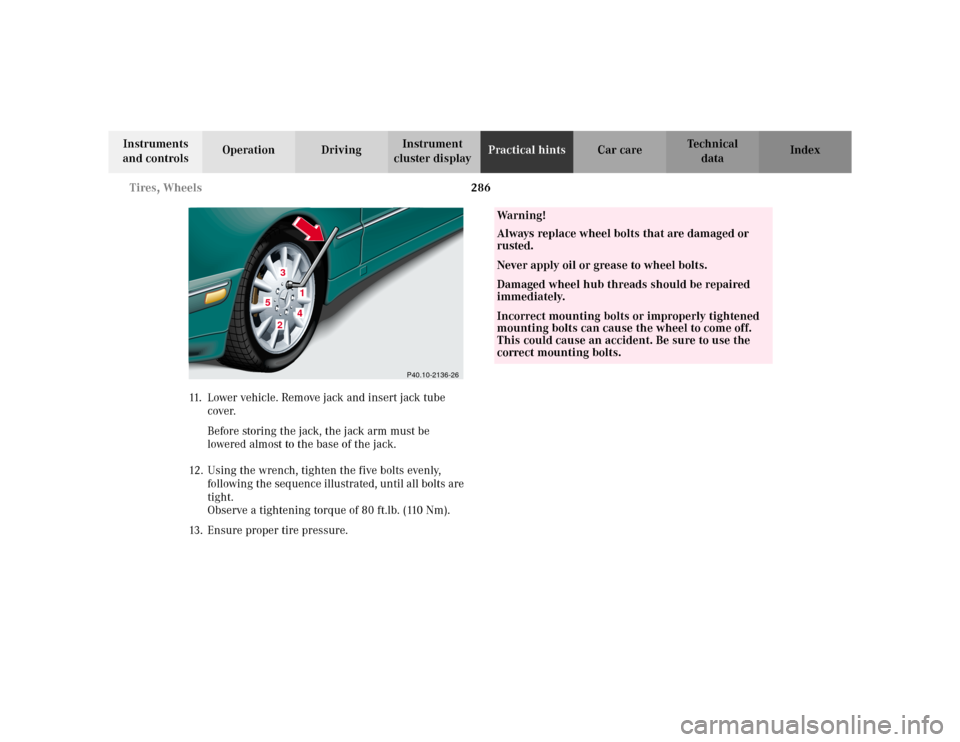
12. Using the wrench, tighten the five bolts evenly,
following the sequence illustrated, until all bolts are
tight.
Observe a tightening torque of 80 ft.lb. (110 Nm).
13. Ensure proper tire pressure.
P40.10-2136-26
32
41
5
Wa r n i n g !
Always replace wheel bolts that are damaged or
rusted.Never apply oil or grease to wheel bolts.Damaged wheel hub threads should be repaired
immediately.Incorrect mounting bolts or improperly tightened
mounting bolts can cause the wheel to come off.
This could cause an accident. Be sure to use the
correct mounting bolts.