Page 81 of 330
78 Restraint systems
Technical
data Instruments
and controlsOperationDrivingInstrument
cluster displayPractical hints Car care Index
Installation of infant and child restraint systems
This vehicle is provided with tether anchorages for a top
tether strap at each of the rear seating positions.
Prior to installing a tether strap, remove cover (1) from
anchorage ring (2) and store in a convenient place (e.g.
glove box).To secure a tether strap to the anchorage, securely
fasten the hook (3), which is part of the tether strap, to
the anchorage ring (2). For safety, please make sure that
the hook has attached to the ring beyond the safety
catch, as illustrated.
After removing the tether strap, reinstall the cover (1).
1
J_C208_II.book Seite 78 Donnerstag, 31. Mai 2001 10:13 10
Page 120 of 330

117 Exterior lamp switch
Technical
data Instruments
and controlsOperationDrivingInstrument
cluster displayPractical hints Car care Index Notes:
With the electronic key removed and the driver’s door
open, a warning sounds and the message “SWITCH OFF
LIGHTS” in the multifunction indicator appears if the
vehicle’s exterior lamps (except standing lamps) are not
switched off.
Fog lamps will operate with the parking lamps and / or
the low beam headlamps on. Fog lamps should only be
used in conjunction with low beam headlamps. Consult
your State or Province Motor Vehicle Regulations
regarding allowable lamp operation.
Fog lamps are automatically switched off when the
exterior lamp switch is turned to position D.Daytime running lamps (Canada only)
When the engine is running and the selector lever is in
a driving position, the low beam headlamps (includes
parking lamps, side marker lamps, taillamps and
license plate lamps) are automatically switched on.
When shifting from a driving position to position “N”
or “P”, the low beam switches off (2 seconds delay).
For nighttime driving the exterior lamp switch should
be turned to position B to permit activation of the
high beam headlamps.
Night security illumination
When exiting the vehicle after driving with the exterior
lamps on, they switch on again for added illumination
for approximately 30 seconds after closing the last door.
The lamp-on time period can be changed at your
Mercedes-Benz Center.
J_C208_II.book Seite 117 Donnerstag, 31. Mai 2001 10:13 10
Page 156 of 330

153 Interior equipment
Technical
data Instruments
and controlsOperationDrivingInstrument
cluster displayPractical hints Car care Index Illuminated vanity mirrors
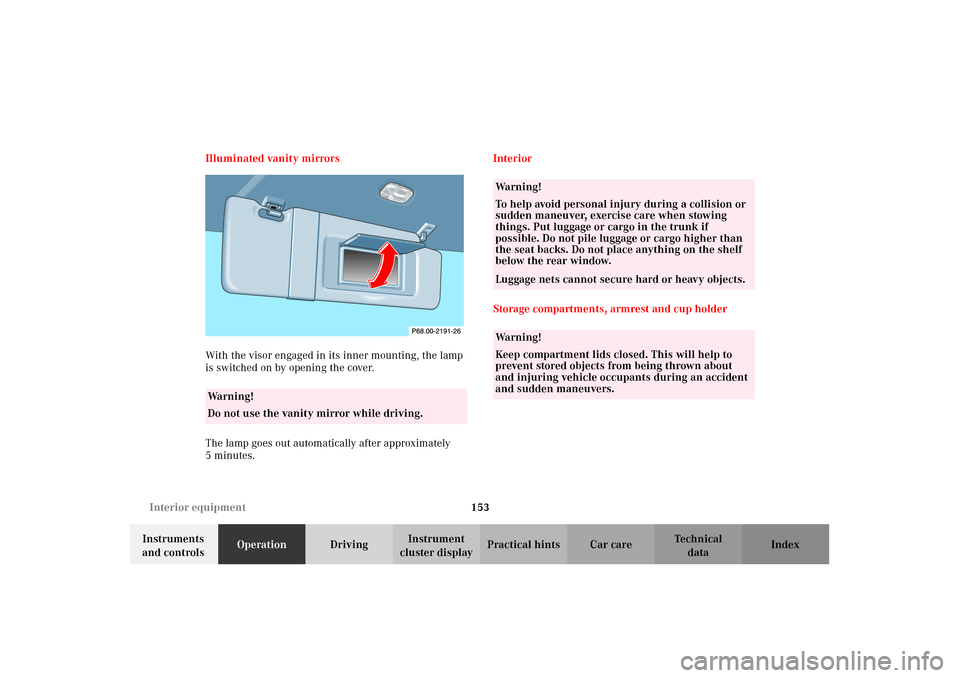
With the visor engaged in its inner mounting, the lamp
is switched on by opening the cover.
The lamp goes out automatically after approximately
5minutes.Interior
Storage compartments, armrest and cup holder
Wa r n i n g !
Do not use the vanity mirror while driving.
Wa r n i n g !
To help avoid personal injury during a collision or
sudden maneuver, exercise care when stowing
things. Put luggage or cargo in the trunk if
possible. Do not pile luggage or cargo higher than
the seat backs. Do not place anything on the shelf
below the rear window.Luggage nets cannot secure hard or heavy objects.Wa r n i n g !
Keep compartment lids closed. This will help to
prevent stored objects from being thrown about
and injuring vehicle occupants during an accident
and sudden maneuvers.
J_C208_II.book Seite 153 Donnerstag, 31. Mai 2001 10:13 10
Page 164 of 330
161 Interior equipment
Technical
data Instruments
and controlsOperationDrivingInstrument
cluster displayPractical hints Car care Index Fold down:
Pull locking handle and fold backrest forward.
Set up:
Pull backrest up until it locks in its upright position.
Check for secure locking by pushing and pulling on the
backrest.Note:
To prevent unauthorized persons from access to the
trunk, always lock backrest in its upright position.
Wa r n i n g !
Always lock backrest in its upright position when
rear seat bench is occupied by passengers, cargo is
being carried in the trunk, or the extended cargo
area is not in use.
J_C208_II.book Seite 161 Donnerstag, 31. Mai 2001 10:13 10
Page 165 of 330

162 Interior equipment
Technical
data Instruments
and controlsOperationDrivingInstrument
cluster displayPractical hints Car care Index
Loading instructions
The total load weight including vehicle occupants and
luggage/cargo should not exceed the vehicle capacity
weight indicated on the certification label which can be
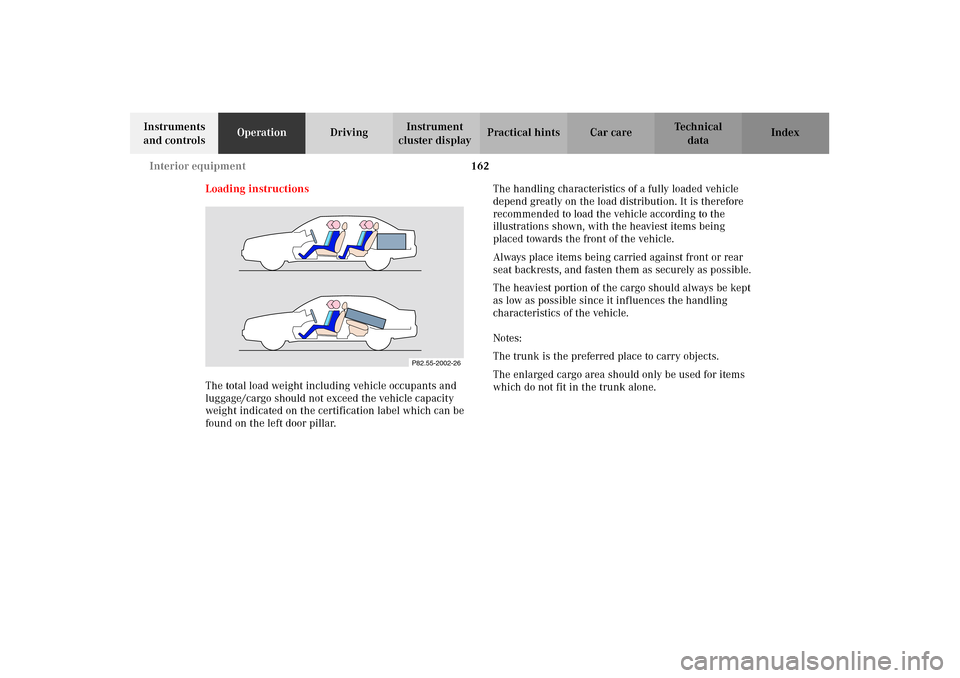
found on the left door pillar.The handling characteristics of a fully loaded vehicle
depend greatly on the load distribution. It is therefore
recommended to load the vehicle according to the
illustrations shown, with the heaviest items being
placed towards the front of the vehicle.
Always place items being carried against front or rear
seat backrests, and fasten them as securely as possible.
The heaviest portion of the cargo should always be kept
as low as possible since it influences the handling
characteristics of the vehicle.
Notes:
The trunk is the preferred place to carry objects.
The enlarged cargo area should only be used for items
which do not fit in the trunk alone.
P82.55-2002-26
J_C208_II.book Seite 162 Donnerstag, 31. Mai 2001 10:13 10
Page 166 of 330

163 Interior equipment
Technical
data Instruments
and controlsOperationDrivingInstrument
cluster displayPractical hints Car care IndexCargo tie down rings
1Ring
Carefully secure cargo by applying even load on all four
rings with rope of sufficient strength to hold down the
cargo.
Wa r n i n g !
In an accident, during hard braking or sudden
maneuvers, loose items will be thrown around
inside the vehicle, and can cause injury to vehicle
occupants unless the items are securely fastened in
the vehicle.To help avoid personal injury during a collision or
sudden maneuver, exercise care when stowing
things. Put luggage or cargo in the trunk if
possible. Do not pile luggage or cargo higher than
the seat backs. Do not place anything on the shelf
below the rear window.Never drive vehicle with trunk lid open while pass-
through is not c los ed a nd sea t ba ckrest sec tion s n ot
locked in their upright positions. Deadly carbon
monoxide (CO) gases may enter vehicle interior
resulting in unconsciousness and death.
J_C208_II.book Seite 163 Donnerstag, 31. Mai 2001 10:13 10
Page 173 of 330
170 Ski sack
Technical
data Instruments
and controlsOperationDrivingInstrument
cluster displayPractical hints Car care Index
Ski sack (optional on model CLK 430)
Unfolding and loading
1. Fold armrest (1) down.
2. Swing cover (2) down.
3. Pull ski sack into passenger compartment and
unfold.4. Swing flap (3) in trunk up (a magnet will hold flap
in its top position).
5. Slide skis into ski sack.
2
1
P91.10-2056-26
Wa r n i n g !
The ski sack is designed for up to two pairs of skis.
Do not load the ski sack with other objects.Always fasten the ski sack securely. In an accident,
an unfastened ski sack can cause injury to vehicle
occupants.
P91.10-2061.26
3
J_C208_II.book Seite 170 Donnerstag, 31. Mai 2001 10:13 10
Page 199 of 330

196 Automatic transmission
Technical
data Instruments
and controlsOperationDrivingInstrument
cluster displayPractical hints Car care Index
Selector lever position
The current selector lever position is indicated in the
gear range indicator display. The automatic gear
shifting process can be adapted to specific operating
conditions using the selector lever.Park position
The park position is to be used when parking the
vehicle. Engage only with the vehicle stopped.
The park position is not intended to serve as a
brake when the vehicle is parked. Rather, the
driver should always use the parking brake in
addition to placing the selector lever in park to
secure the vehicle.
Notes:
The electronic key can only be removed from the
steering lock with the selector lever in
position “P”. With the electronic key removed, the
selector lever is locked in position “P”.
With a malfunction in the vehicle’s electrical
system the selector lever could remain locked in
position “P”. To unlock the selector lever
manually, see page 274.
Reverse gear
Shift to reverse gear only with the vehicle
stopped.
10
J_C208_II.book Seite 196 Donnerstag, 31. Mai 2001 10:13 10