Page 161 of 346
158 Garage door opener
Technical
data Instruments
and controlsOperationDrivingInstrument
cluster displayPractical hints Car care Index
Garage door opener
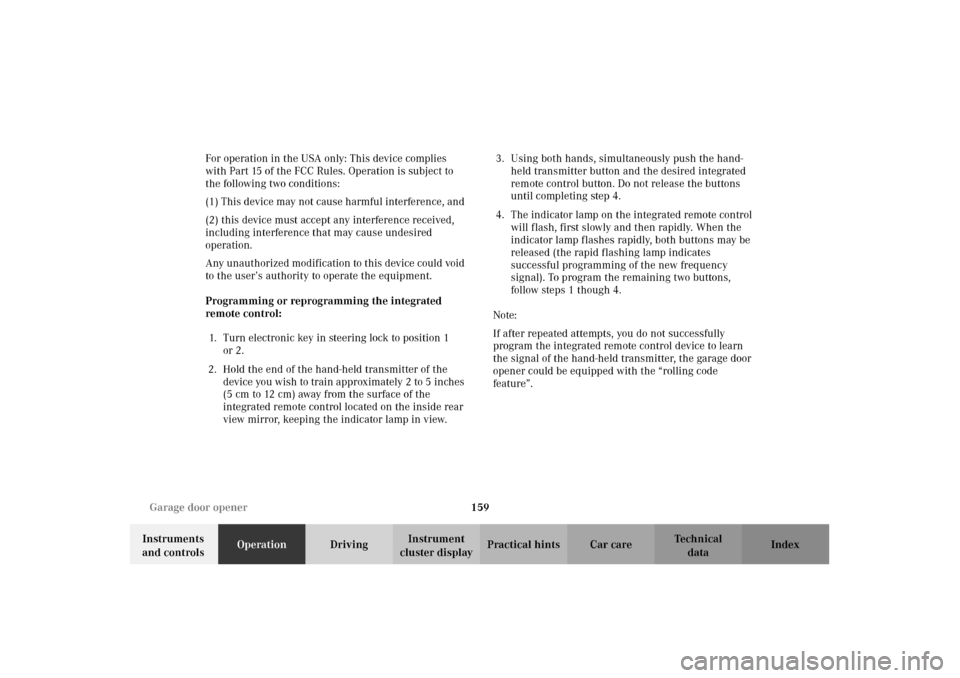
1Signal transmitter keys
2Indicator lamp
3Portable remote control transmitterThe built-in remote control is capable of operating up to
three separately controlled objects.
Notes:
Certain types of garage door openers are incompatible
with the integrated opener. If you should experience
difficulties with programming the transmitter, contact
your authorized Mercedes-Benz Center, or call
Mercedes-Benz Customer Assistance Center (in the USA
only) at 1-800-FOR-MERCedes, or Customer Service (in
Canada) at 1-800-387-0100.
1
2
3
Wa r n i n g !
When programming a garage door opener, the door
moves up or down.When programming or operating the remote
control make sure there is no possibility of anyone
being harmed by the moving door.
J_A208.book Seite 158 Donnerstag, 31. Mai 2001 9:35 09
Page 162 of 346

159 Garage door opener
Technical
data Instruments
and controlsOperationDrivingInstrument
cluster displayPractical hints Car care Index For operation in the USA only: This device complies
with Part 15 of the FCC Rules. Operation is subject to
the following two conditions:
(1) This device may not cause harmful interference, and
(2) this device must accept any interference received,
including interference that may cause undesired
operation.
Any unauthorized modification to this device could void
to the user’s authority to operate the equipment.
Programming or reprogramming the integrated
remote control:
1. Turn electronic key in steering lock to position 1
or 2.
2. Hold the end of the hand-held transmitter of the
device you wish to train approximately 2 to 5 inches
(5 cm to 12 cm) away from the surface of the
integrated remote control located on the inside rear
view mirror, keeping the indicator lamp in view.3. Using both hands, simultaneously push the hand-
held transmitter button and the desired integrated
remote control button. Do not release the buttons
until completing step 4.
4. The indicator lamp on the integrated remote control
will flash, first slowly and then rapidly. When the
indicator lamp flashes rapidly, both buttons may be
released (the rapid flashing lamp indicates
successful programming of the new frequency
signal). To program the remaining two buttons,
follow steps 1 though 4.
Note:
If after repeated attempts, you do not successfully
program the integrated remote control device to learn
the signal of the hand-held transmitter, the garage door
opener could be equipped with the “rolling code
feature”.
J_A208.book Seite 159 Donnerstag, 31. Mai 2001 9:35 09
Page 164 of 346
161 Garage door opener
Technical
data Instruments
and controlsOperationDrivingInstrument
cluster displayPractical hints Car care Index Operation of remote control:
1. Turn electronic key in steering lock to position 1
or 2.
2. Select and press the appropriate button to activate
the remote controlled device. The integrated remote
control transmitter continues to send the signal as
long as the button is pressed – up to 20 seconds.Erasing the remote control memory:
1. Turn electronic key in steering lock to position 1
or 2.
2. Simultaneously holding down the left and right side
buttons for approximately 20 seconds, or until the
control lamp blinks rapidly, will erase the codes of
all three channels.
J_A208.book Seite 161 Donnerstag, 31. Mai 2001 9:35 09
Page 167 of 346
164 Soft top
Technical
data Instruments
and controlsOperationDrivingInstrument
cluster displayPractical hints Car care Index
Lowering Soft Top
1. Engage parking brake.
2. Close luggage cover and trunk lid.
For notes on the luggage cover, see page 250.
3. Turn electronic key in steering lock to position 2.
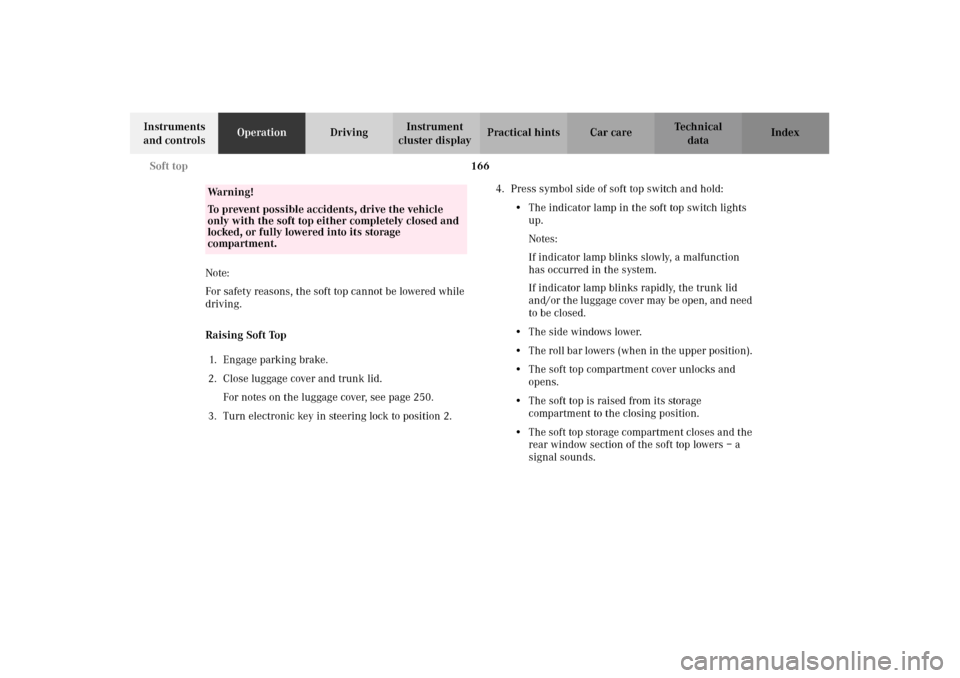
4. Press lock button (1) and fold down locking
handle (2).
5 . Turn lock in g han dle 9 0
° c lockwis e to unlock t he soft
top.Important!
Push soft top frame approx. 8 inches (20 cm) upward by
the locking handle. Failing to do so will result in
damage to the soft top folding mechanism that is not
covered by the Mercedes-Benz Limited Warranty.
Turn locking handle counterclockwise to the stop and
fold up until it locks in place.
•The indicator lamp in the soft top switch lights up.
•The side windows lower.
P77.30-2070-26
12
P77.30-2080-26
J_A208.book Seite 164 Donnerstag, 31. Mai 2001 9:35 09
Page 169 of 346

166 Soft top
Technical
data Instruments
and controlsOperationDrivingInstrument
cluster displayPractical hints Car care Index
Note:
For safety reasons, the soft top cannot be lowered while
driving.
Raising Soft Top
1. Engage parking brake.
2. Close luggage cover and trunk lid.
For notes on the luggage cover, see page 250.
3. Turn electronic key in steering lock to position 2. 4. Press symbol side of soft top switch and hold:
•The indicator lamp in the soft top switch lights
up.
Notes:
If indicator lamp blinks slowly, a malfunction
has occurred in the system.
If indicator lamp blinks rapidly, the trunk lid
and/or the luggage cover may be open, and need
to be closed.
•The side windows lower.
•The roll bar lowers (when in the upper position).
•The soft top compartment cover unlocks and
opens.
•The soft top is raised from its storage
compartment to the closing position.
•The soft top storage compartment closes and the
rear window section of the soft top lowers – a
signal sounds.
Wa r n i n g !
To prevent possible accidents, drive the vehicle
only with the soft top either completely closed and
locked, or fully lowered into its storage
compartment.
J_A208.book Seite 166 Donnerstag, 31. Mai 2001 9:35 09
Page 171 of 346

168 Soft top
Technical
data Instruments
and controlsOperationDrivingInstrument
cluster displayPractical hints Car care Index
Note:
For safety reasons, the soft top cannot be raised while
driving.
Wa r n i n g !
The soft top is not fully closed and locked:
• if the indicator lamp in the soft top switch does
not got out (electronic key in steering lock
position 2). • if the indicator lamp blinks, and a signal
sounds for 10 seconds when starting to drive.
Stop the vehicle and before continuing to drive,
close and lock the soft top. If the soft top is not locked, it may fold back or
forward when driving. During soft top operation, do not place your hands
near the roll bar, soft top frame, upper windshield
area or soft top storage compartment. Serious
personal injury may occur. To prevent possible accidents, drive the vehicle
only with the soft top either completely closed and
locked, or fully lowered into its storage
compartment.
J_A208.book Seite 168 Donnerstag, 31. Mai 2001 9:35 09
Page 172 of 346

169 Soft top
Technical
data Instruments
and controlsOperationDrivingInstrument
cluster displayPractical hints Car care Index If the indicator lamp in the soft top switch blinks slowly
while activating the switch,
•the battery voltage may be insufficient – start
engine and let it run while activating switch,
•the system may be overheated (for example after
lowering or raising the soft top approx. 5
consecutive times) – after approx. 10 minutes the
soft top switch may be activated again.
If indicator lamp in the soft top switch blinks rapidly
while activating the switch,
•the trunk lid and/or the luggage cover may be open,
and need to be closed,
•the soft top is still locked during the opening
procedure and needs to be unlocked,
•the opening/closing procedure is interrupted.
In this case the soft top needs to be synchronized.
Turn electronic key in steering lock back to
position 0, and then to position 2. Activate soft top
switch again. The soft top should now be operational
again.
If the indicator lamp continues to blink, raise the soft
top manually, see page 291. Have the system checked at your authorized
Mercedes-Benz Center as soon as possible.
Notes:
If the roll bar was raised automatically, the process of
raising or lowering the soft top will take somewhat
longer, as the roll bar must first be lowered.
Whenever possible, park vehicle in the shade as
continuous exposure to sun rays can prematurely
deteriorate the soft top material.
The soft top may become moldy and receive permanent
creases if it is kept in the storage compartment for an
extended period.
Therefore, we recommend raising and airing it
thoroughly with the side windows open (do not expose
it to the sun) at regular intervals during the wet and
cold seasons.
To prevent damage, the soft top must be dry and clean
before lowering it into the storage compartment. There
is the possibility of sharp-edged dirt particles damaging
the soft top or scratching the rear window.
J_A208.book Seite 169 Donnerstag, 31. Mai 2001 9:35 09
Page 185 of 346

182 Tele Aid
Technical
data Instruments
and controlsOperationDrivingInstrument
cluster displayPractical hints Car care Index
Tele Aid (optional for Canada)
Important!
The initial activation of the Tele Aid system may only be
performed by completing the subscriber agreement and
placing an acquaintance call using the “SOS” button.
Failure to complete either of these steps will result in a
system that is not activated. If the system is not
activated the indicator lamp in the “SOS” button stays
on after turning electronic key in starter switch to
position 2 and the message “TELE AID – NOT
ACTIVATED” will be shown in the multifunction display
for approx. 10 seconds.
If you have any questions regarding activation, please
call the Response Center at 1-800-756-9018 (in the USA)
or 1-888-923-8367 (in Canada).
(Telematic Alarm Identification on Demand)
The Tele Aid system consists of three types of response;
automatic and manual emergency, roadside assistance
and information.
The Tele Aid system is operational providing that the
vehicle’s battery is charged, properly connected, not
damaged and cellular and GPS coverage is available.The speaker volume of a Tele Aid call can be adjusted
when using the volume control on the multifunction
steering wheel, for raising press buttonæ and for
lowering press buttonç.
To activate, press the “SOS” button, the Roadside
Assistance button or the Information button¡,
depending on the type of response required.
Shortly after the completion of your Acquaintance Call,
you will receive a user ID and password via first call
mail. By visiting www.mbusa.com and selecting “Tele
Aid” (USA only), you will have access to account
information, remote door unlock, Info Services* profile
and more.
* Optional – available only with COMANDSystem self-check
Initially, after turning the electronic key in starter
switch to position 2, malfunctions are detected and
indicated (the indicator lamps in the “SOS” button, the
Roadside Assistance button and the Information
button¡ stay on longer than 10 seconds or do not
come on). The message “TELE AID – VISIT
WORKSHOP” appears for approx. 10 seconds in the
multifunction display.
J_A208.book Seite 182 Donnerstag, 31. Mai 2001 9:35 09