Page 360 of 430

357 Towing the vehicle
Te ch n i c a l
data Instruments
and controlsOperation DrivingInstrument
cluster displayPractical hintsCar care Index Towing the vehicleImportant!
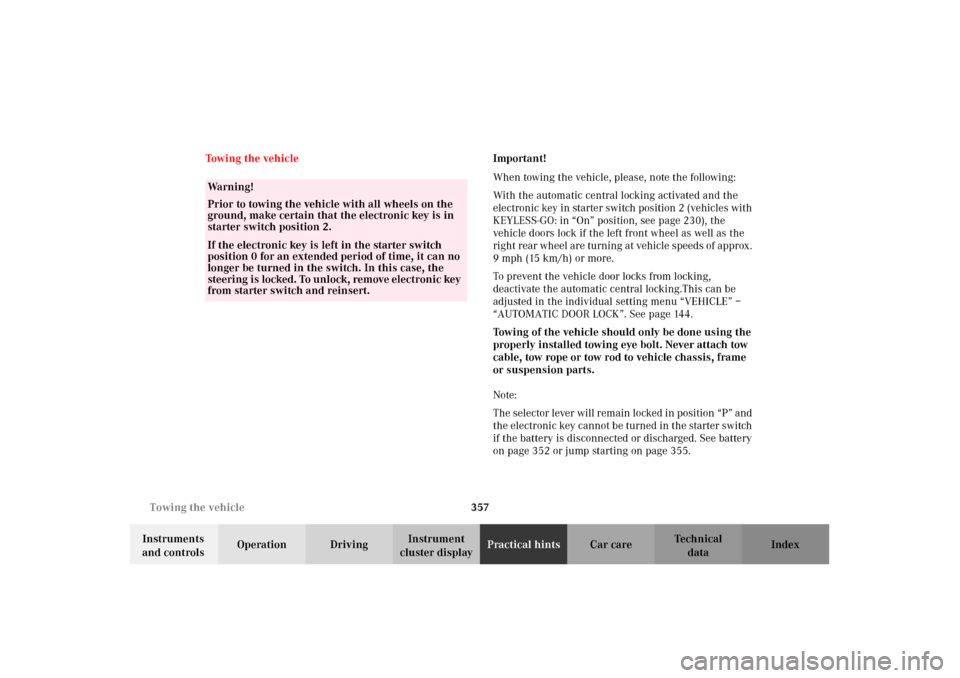
When towing the vehicle, please, note the following:
With the automatic central locking activated and the
electronic key in starter switch position 2 (vehicles with
KEYLESS-GO: in “On” position, see page 230), the
vehicle doors lock if the left front wheel as well as the
right rear wheel are turning at vehicle speeds of approx.
9 mph (15 km/h) or more.
To prevent the vehicle door locks from locking,
deactivate the automatic central locking.This can be
adjusted in the individual setting menu “VEHICLE” –
“AUTOMATIC DOOR LOCK”. See page 144.
Towing of the vehicle should only be done using the
properly installed towing eye bolt. Never attach tow
cable, tow rope or tow rod to vehicle chassis, frame
or suspension parts.
Note:
The selector lever will remain locked in position “P” and
the electronic key cannot be turned in the starter switch
if the battery is disconnected or discharged. See battery
on page 352 or jump starting on page 355.
Wa r n i n g !
Prior to towing the vehicle with all wheels on the
ground, make certain that the electronic key is in
starter switch position 2.If the electronic key is left in the starter switch
position 0 for an extended period of time, it can no
longer be turned in the switch. In this case, the
steering is locked. To unlock, remove electronic key
from starter switch and reinsert.
J_OM_215.book Seite 357 Mittwoch, 30. Mai 2001 2:01 14
Page 361 of 430
358 Towing the vehicle
Te ch n i c a l
data Instruments
and controlsOperation DrivingInstrument
cluster displayPractical hintsCar care Index
1Cover on right side of front bumper
To remove cover:
Press mark on cover in direction of arrow and lift cover
off to reveal threaded hole for towing eye bolt. The
towing eye bolt is supplied with the tool kit (located in
trunk in spare wheel). Screw towing eye bolt in to its
stop and tighten with lug wrench.
To reinstall cover:
Fit cover and snap into place.2Cover right side of rear bumper
To r e m ove c ove r :
Press mark on cover in direction of arrow and lift cover
off to reveal threaded hole for towing eye bolt. The
towing eye bolt is supplied with the tool kit (located in
trunk in spare wheel). Screw towing eye bolt in to its
stop and tighten with lug wrench.
To reinstall cover:
Fit cover and snap into place.
2
J_OM_215.book Seite 358 Mittwoch, 30. Mai 2001 2:01 14
Page 362 of 430

359 Towing the vehicle
Te ch n i c a l
data Instruments
and controlsOperation DrivingInstrument
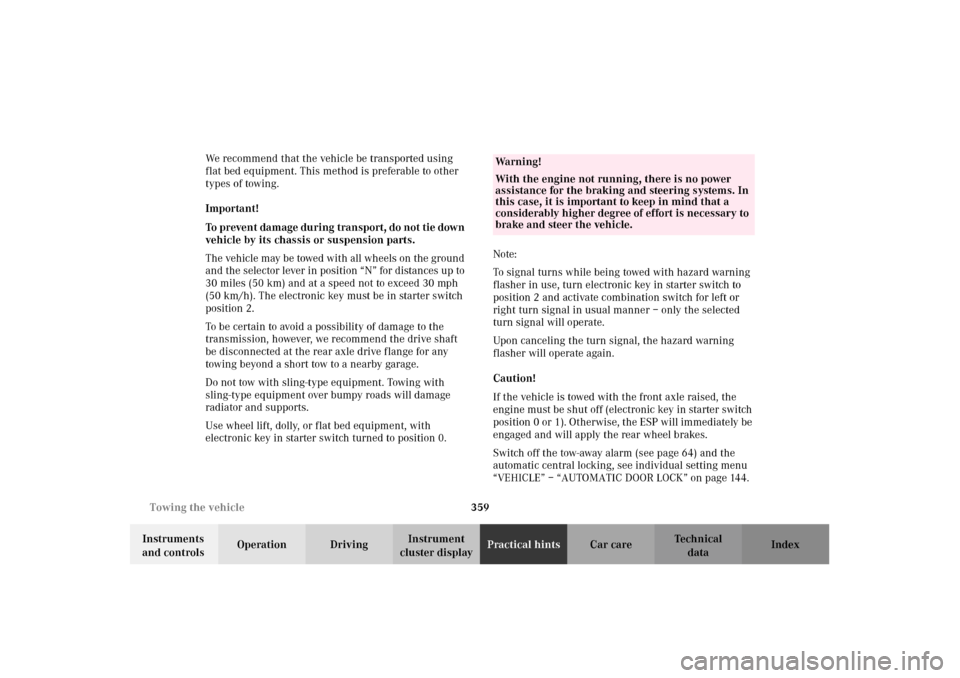
cluster displayPractical hintsCar care Index We recommend that the vehicle be transported using
flat bed equipment. This method is preferable to other
types of towing.
Important!
To prevent damage during transport, do not tie down
vehicle by its chassis or suspension parts.
The vehicle may be towed with all wheels on the ground
and the selector lever in position “N” for distances up to
30 miles (50 km) and at a speed not to exceed 30 mph
(50 km/h). The electronic key must be in starter switch
position 2.
To be certain to avoid a possibility of damage to the
transmission, however, we recommend the drive shaft
be disconnected at the rear axle drive flange for any
towing beyond a short tow to a nearby garage.
Do not tow with sling-type equipment. Towing with
sling-type equipment over bumpy roads will damage
radiator and supports.
Use wheel lift, dolly, or flat bed equipment, with
electronic key in starter switch turned to position 0.Note:
To signal turns while being towed with hazard warning
flasher in use, turn electronic key in starter switch to
position 2 and activate combination switch for left or
right turn signal in usual manner – only the selected
turn signal will operate.
Upon canceling the turn signal, the hazard warning
flasher will operate again.
Caution!
If the vehicle is towed with the front axle raised, the
engine must be shut off (electronic key in starter switch
position 0 or 1). Otherwise, the ESP will immediately be
engaged and will apply the rear wheel brakes.
Switch off the tow-away alarm (see page 64) and the
automatic central locking, see individual setting menu
“VEHICLE” – “AUTOMATIC DOOR LOCK” on page 144.
Wa r n i n g !
With the engine not running, there is no power
assistance for the braking and steering systems. In
this case, it is important to keep in mind that a
considerably higher degree of effort is necessary to
brake and steer the vehicle.
J_OM_215.book Seite 359 Mittwoch, 30. Mai 2001 2:01 14
Page 382 of 430

379 Contents - Vehicle care
Te ch n i c a l
data Instruments
and controlsOperation DrivingInstrument
cluster displayPractical hintsCar careIndex
Vehicle careCleaning and care of
the vehicle ..................................380
Power washer .............................. 381
Tar stains .....................................382
Paintwork, painted body
components .................................382
Engine cleaning ..........................382
Vehicle washing .........................382Ornamental moldings ............... 383
Headlamps, taillamps,
turn signal lenses ...................... 383
Cleaning the Distronic
system sensor ............................. 384
Cleaning the parktronic
system sensors ........................... 384
Wiper blades .............................. 385
Light alloy wheels ..................... 386
Instrument cluster ..................... 387Steering wheel and
gear selector lever ......................387
Cup holder ...................................387
Seat belts .....................................388
Headliner and shelf
below rear window .....................388
Leather upholstery .....................388
Hard plastic trim items .............388
Plastic and rubber parts ............388
J_OM_215.book Seite 379 Mittwoch, 30. Mai 2001 2:01 14
Page 386 of 430

383 Cleaning and care of the vehicle
Te ch n i c a l
data Instruments
and controlsOperation DrivingInstrument
cluster displayPractical hintsCar careIndex Due to the width of the vehicle, prior to running the
vehicle through an automatic car wash, fold back the
outside mirrors to prevent them from getting damaged.
In the winter, thoroughly remove all traces of road salt
as soon as possible.
When washing the underbody, do not forget to clean the
inner sides of the wheels.
Note:
Ve h i c l e s w i t h KE Y L E S S - G O :
If a door handle is hit by a strong jet of water, and a
KEYLESS-GO-card is in close proximity, approx 3 ft.
(approx.1m), the vehicle could be inadvertently locked
or unlocked.Ornamental moldings
For regular cleaning and care of very dirty chrome-
plated parts, use a chrome cleaner.
Headlamps, taillamps, turn signal lenses
Use a mild car wash detergent, such as Mercedes-Benz
approved Car Shampoo, with plenty of water.
To prevent scratches, never apply strong force and use
only a soft, non-scratchy cloth when cleaning the lenses.
Do not attempt to wipe dirty lenses with a dry cloth or
sponge.
J_OM_215.book Seite 383 Mittwoch, 30. Mai 2001 2:01 14
Page 389 of 430
386 Cleaning and care of the vehicle
Te ch n i c a l
data Instruments
and controlsOperation DrivingInstrument
cluster displayPractical hintsCar careIndex
Window cleaning
Use a window cleaning solution on all glass surfaces. An
automotive glass cleaner is recommended.
Note:
For safety reasons, switch off wipers and remove
electronic key from starter switch before cleaning the
windshield, otherwise the wiper motor can suddenly
turn on and cause injury.Light alloy wheels
Mercedes-Benz approved Wheel Care should be used for
regular cleaning of the light alloy wheels.
If possible, clean wheels once a week with Mercedes-
Benz approved Wheel Care, using a soft bristle brush
and a strong spray of water.
Follow instructions on container.
Note:
Use only acid-free cleaning materials. The acid could
lead to corrosion.
J_OM_215.book Seite 386 Mittwoch, 30. Mai 2001 2:01 14
Page 390 of 430
387 Cleaning and care of the vehicle
Te ch n i c a l
data Instruments
and controlsOperation DrivingInstrument
cluster displayPractical hintsCar careIndex Instrument cluster
Use a gentle dishwashing detergent or mild detergent
for delicate fabrics as a washing solution. Wipe with a
cloth moistened in lukewarm solution. Do not use
scouring agents.
Steering wheel and gear selector lever
Wipe with a damp cloth and dry thoroughly or clean
with Mercedes-Benz approved Leather Care.Cup holder
Use a gentle dishwashing detergent or mild detergent
for delicate fabrics as a washing solution. Wipe with a
cloth moistened in lukewarm solution. Do not use
scouring agents.
Note:
For ease of cleaning, the cup holder between the front
seats can be removed by pulling it up when in its closed
position.
J_OM_215.book Seite 387 Mittwoch, 30. Mai 2001 2:01 14
Page 398 of 430

395 Technical data
Te ch n i c a l
data Instruments
and controlsOperation DrivingInstrument
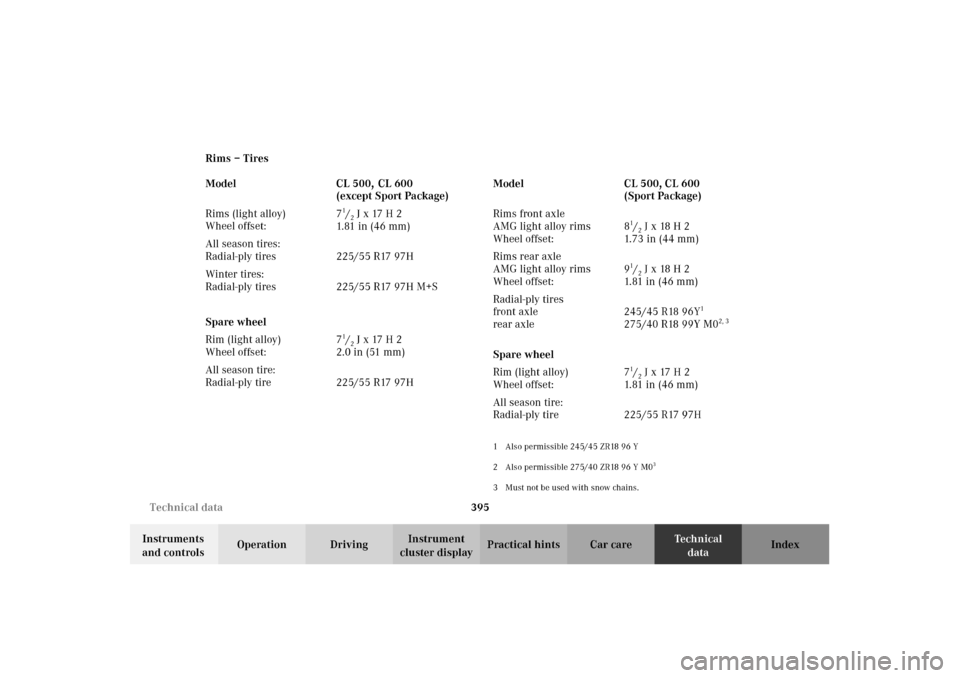
cluster displayPractical hints Car care Index Rims – Tires
1 Also permissible 245/45 ZR18 96 Y
2 Also permissible 275/40 ZR18 96 Y M0
3
3 Must not be used with snow chains.
Model CL 500, CL 600
(except Sport Package)
Rims (light alloy)
Wheel offset:7
1/2Jx17H2
1. 81 i n ( 4 6 m m )
All season tires:
Radial-ply tires 225/55 R17 97H
Winter tires:
Radial-ply tires 225/55 R17 97H M+S
Spare wheel
Rim (light alloy)
Wheel offset:7
1/2Jx17H2
2.0 in (51 mm)
All season tire:
Radial-ply tire 225/55 R17 97HModel CL 500, CL 600
(Sport Package)
Rims front axle
AMG light alloy rims
Wheel offset:8
1/2Jx18H2
1.73 in (44 mm)
Rims rear axle
AMG light alloy rims
Wheel offset:9
1/2Jx18H2
1. 81 i n ( 4 6 m m )
Radial-ply tires
front axle
rear axle245/45 R18 96Y
1
275/40 R18 99Y M0
2, 3
Spare wheel
Rim (light alloy)
Wheel offset:7
1/2Jx17H2
1. 81 i n ( 4 6 m m )
All season tire:
Radial-ply tire 225/55 R17 97H
J_OM_215.book Seite 395 Mittwoch, 30. Mai 2001 2:01 14