2002 MERCEDES-BENZ CL500 seat control
[x] Cancel search: seat controlPage 36 of 430

33 Central locking system
Te ch n i c a l
data Instruments
and controlsOperationDrivingInstrument
cluster displayPractical hints Car care Index Central locking system
Radio frequency and infrared remote control
The electronic key has an integrated radio frequency
and infrared remote control.
Due to the extended operational range of the remote
control, it could be possible to unintentionally lock or
unlock the vehicle by pressing the transmit button. If
one of the transmit buttons is pressed, the battery check
lamp lights up brief ly – indicating that the batteries are
in order. See page 369 for checking batteries.
The vehicle doors, trunk and fuel filler flap can be
centrally locked and unlocked via remote control.
Opening and closing the windows and sliding/pop-up
roof and switching on the driver’s seat ventilation can
only be done with the infrared portion of the remote
control. Aim transmitter eye at a receiver (6 or 7), press
and hold transmit buttonŒ or‹, seepage44.
With vehicle centrally locked, the trunk can also be
opened by using the remote control.
If the electronic key is inserted in starter switch, the
vehicle cannot be locked or unlocked, and the trunk lid
cannot be opened with the remote control.1Transmit button
‹Locking
ŒUnlocking
ŠOpening trunk (if not separately locked)
2Lamp for battery check (see page 369 for changing
batteries if it does not light up briefly)
3PANIC button
4Transmitter eye
5Locking tab for mechanical key
P80.35-2032-26
24
3
5
1
J_OM_215.book Seite 33 Mittwoch, 30. Mai 2001 2:01 14
Page 40 of 430

37 Central locking system
Te ch n i c a l
data Instruments
and controlsOperationDrivingInstrument
cluster displayPractical hints Car care Index KEYLESS-GO
Important!
For the KEYLESS-GO-system to function properly, the
operator should observe the following:
•The driver should carry the KEYLESS-GO-card with
him/her.
•To avoid radio transmission interference, never store
the KEYLESS-GO-card together with other electronic
items (e.g. cellular telephones, other KEYLESS-GO-
cards) or metallic objects (e.g. coins, metal foil).
•To lock or unlock the vehicle, the card must be
recognized by the system as being located outside
the vehicle. The card must be in close proximity to a
door or the trunk lid (approx. 3 ft. [1 m]). To activate
t he start/stop button function, t he KEYLE SS-GO-
card must be recognized by the system as being
located inside the vehicle.
•If the KEYLESS-GO-card is positioned farther away
from the vehicle (e.g. inside clothing or a briefcase)
and can no longer be recognized by the system, the
vehicle cannot be locked or the engine started via
the KEYLESS-GO-system.•If the KEYLESS-GO-card is removed from the vehicle
while the engine is running, or by placing the card
in front of the center armrest (see page 195), the
message “CHIP-CARD – NOT RECOGNIZED!” will
appear repeatedly in the multifunction display,
seepage324.
Find the card or change its present location (e.g.
place it on the front passenger seat or insert it in
shirt pocket).
•If the message “CHIP-CARD – NOT RECOGNIZED”
is ignored for an extended period of time (approx.15
minutes), the engine could stop by itself during a
vehicle stop (e.g. traffic light). The vehicle can then
no longer be centrally locked or the engine
restarted. You must first find the card or change its
present location (e.g. place it on the front passenger
seat or insert it in shirt pocket). Start the engine
again. See page 230.
•Do not forget, the engine can be started by anyone
with a KEYLESS-GO-card that is left inside the
vehicle. Leaving the chip-card behind when exiting
and locking the vehicle, the message “CHIP-CARD –
STILL IN VEHICLE” appears in the multifunction
display, see page 324.
J_OM_215.book Seite 37 Mittwoch, 30. Mai 2001 2:01 14
Page 47 of 430

44 Central locking system
Te ch n i c a l
data Instruments
and controlsOperationDrivingInstrument
cluster displayPractical hints Car care Index
Opening and closing windows and
sliding/pop-up roof from outside
(summer opening/convenience feature)
Aim transmitter eye of remote control at a door receiver.
Summer opening:
(Operation with electronic key)
The sliding /pop-up roof and all side windows can be
opened and the driver’s seat ventilation automatically
switches on. See page 79 for seat ventilation.
Continue to press transmit buttonΠafter unlocking
the vehicle.
The windows and sliding /pop-up roof begin to open
after approximately 1 second. The driver’s seat
ventilation automatically switches on. See page 79 for
seat ventilation.
To interrupt opening procedure, release transmit
button.Convenience feature:
(Operation with electronic key)
The sliding /pop-up roof and the side windows can be
closed.
Continue to press transmit button‹ after locking
the vehicle.
The windows and sliding /pop-up roof begin to close
after approximately 1 second.
To interrupt closing procedure, release transmit button.
Ensure that all side windows and the sliding /pop-up
roof are properly closed before leaving the vehicle.
Wa r n i n g !
Never operate the windows or sliding/pop-up roof if
there is the possibility of anyone being harmed by
the opening or closing procedure.In case the procedure causes potential danger, the
procedure can be immediately halted by releasing
the remote control button. To reverse direction of
movement pressŒ for opening or‹ for
closing.
J_OM_215.book Seite 44 Mittwoch, 30. Mai 2001 2:01 14
Page 70 of 430

67 Seats
Te ch n i c a l
data Instruments
and controlsOperationDrivingInstrument
cluster displayPractical hints Car care Index Front seat adjustment
To operate the front power seat adjustment switches,
turn the electronic key in starter switch to position 1
or 2 (with a front door open, the respective power seats
can also be operated with the electronic key removed or
in starter switch position 0).
Wa r n i n g !
Do not adjust the driver’s seat while driving.
Adjusting the seat while driving could cause the
driver to lose control of the vehicle.Never ride in a moving vehicle with the seat back
reclined. Sitting in an excessively reclined position
can be dangerous. You could slide under the seat
belt in a collision. If you slide under it, the belt
would apply force at the abdomen or neck. That
could cause serious or fatal injuries. The seat back
and seat belts provide the best restraint when the
wearer is in an upright position and belts are
properly positioned on the body.
Never place hands under seat or near any moving
parts while a seat is being adjusted.When leaving the vehicle always remove the
electronic key from the starter switch, take the
KEYLESS-GO-card (if so equipped) with you, and
lock your vehicle. The power seats can also be operated with the
driver’s or front passenger door open. Do not leave
children unattended in the vehicle, or with access
to an unl ocked vehic l e. Uns upervi s ed us e of vehi cl e
equipment may cause serious personal injury.
J_OM_215.book Seite 67 Mittwoch, 30. Mai 2001 2:01 14
Page 71 of 430

68 Seats
Te ch n i c a l
data Instruments
and controlsOperationDrivingInstrument
cluster displayPractical hints Car care Index
The switches are located in both doors.
We recommend to adjust the power seat in the following
order:
1Seat adjustment, fore/aft
Press the switch (fore/aft direction) until a
comfortable seating position is reached that still
allows you to reach the accelerator/brake pedal
safely. The position should be as far rearward as
possible, consistent with ability to properly operate
controls.Note:
Do not move the front passenger seat completely
forward if objects are stored in the parcel net in the
front passenger side footwell. Items in the net may be
damaged.
2Seat, up/down
Press the switch (up/down direction) until
comfortable seating position with still sufficient
headroom is reached.
3Seat cushion tilt
Press the switch in the direction of the arrow until
your legs are slightly supported.
4Backrest tilt
Press the switch in the direction of the arrow until
your arms are slightly angled when holding the
steering wheel.
5Seat cushion depth
Press the switch fore or aft until your legs are
supported comfortably.
422
3
51
3
1
4
J_OM_215.book Seite 68 Mittwoch, 30. Mai 2001 2:01 14
Page 72 of 430

69 Seats
Te ch n i c a l
data Instruments
and controlsOperationDrivingInstrument
cluster displayPractical hints Car care Index 6Head restraint
The height of the head restraint is adjusted
automatically with the seat so that the back of the
head is supported approximately at ear level. Adjust
the head restraint using the switch if the preset
position does not support the back of your head
approximately at ear level.
For steering wheel adjustment, see page 105;
inside rear view mirror, see page 106;
exterior rear view mirrors, see page 107.Adjust the head restraint angle (7) by hand. Push or pull
the head restraint in direction of arrow.
Storing seat positions
The head restraint, steering wheel and rear view mirror
positions are stored together with the seat position.
See page 111 for notes on the memory function. For
recalling a stored seat/steering wheel/rear view mirror
position see page 112.
6
7
J_OM_215.book Seite 69 Mittwoch, 30. Mai 2001 2:01 14
Page 73 of 430

70 Seats
Te ch n i c a l
data Instruments
and controlsOperationDrivingInstrument
cluster displayPractical hints Car care Index
Important!
Prior to operating the vehicle, the driver should adjust
the seat height for proper vision as well as fore/aft
placement and backrest angle to insure adequate
control, reach, operation, and comfort. The head
restraint should also be adjusted for proper height. See
also airbag section on page 92 for proper seat
positioning.
In addition, also adjust the steering wheel to ensure
adequate control, reach, operation, and comfort.
Both the inside and outside rear view mirrors should be
adjusted for adequate rearward vision.
Fasten seat belts. Infants and small children should be
seated in a properly secured restraint system that
complies with U.S. Federal Motor Vehicle Safety
Standard 213 and Canadian Motor Vehicle Safety
Standard 213.
All seat, head restraint, steering wheel, and rear view
mirror adjustments as well as fastening of seat belts
should be done before the vehicle is put into motion.
Wa r n i n g !
Children 12 years old and under must never ride in
the front seat, except in a Mercedes-Benz
authorized BabySmart
TM compatible child seat,
which operates with the BabySmart
TM system
installed in the vehicle to deactivate the passenger
side front airbag when it is properly installed.
Otherwise they will be struck by the airbag when it
inflates in a crash. If this happens, serious or fatal
injury will result.
According to accident statistics, children are safer
when properly restrained in the rear seating
positions than in the front seating positions.
Infants and small children must ride in back seats
and be seated in an appropriate infant or child
restraint system, which is properly secured with
the vehicle’s seat belt, fully in accordance with the
child seat manufacturer’s instructions.A child’s risk of serious or fatal injuries is
significantly increased if the child restraints are
not properly secured in the vehicle and the child is
not properly secured in the child restraint.
J_OM_215.book Seite 70 Mittwoch, 30. Mai 2001 2:01 14
Page 74 of 430

71 Seats
Te ch n i c a l
data Instruments
and controlsOperationDrivingInstrument
cluster displayPractical hints Car care Index Removal and installation of front seat head
restraints
Caution!
Do not remove head restraints except when mounting
seat covers. Whenever restraints have been removed be
sure to reinstall them before driving.Note:
Tilt the backrest rearward for easier removal and
installation of the head restraints.
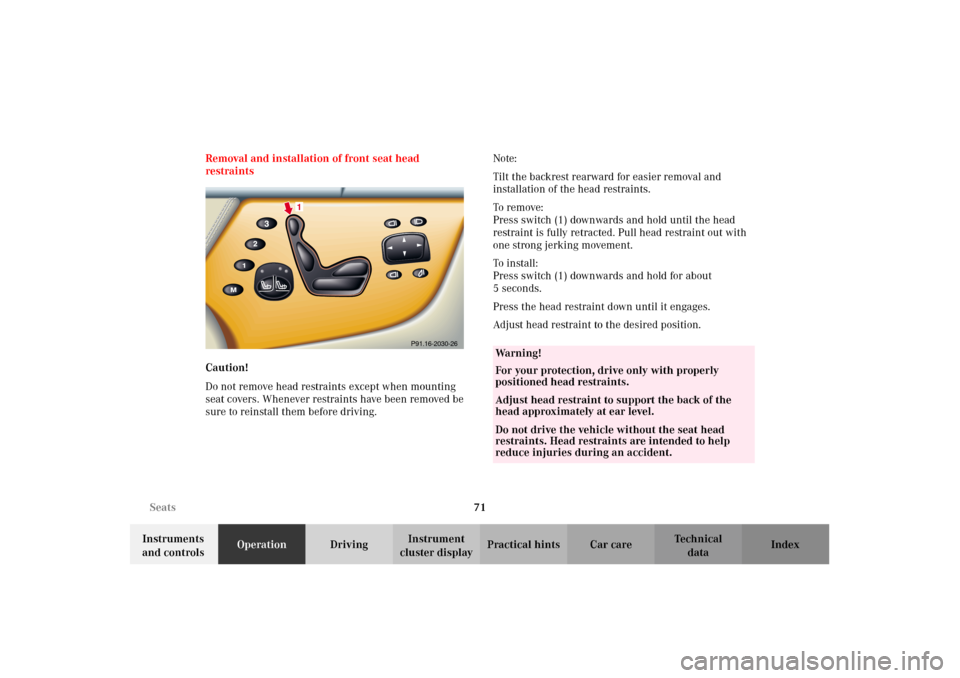
To r e m ove :
Press switch (1) downwards and hold until the head
restraint is fully retracted. Pull head restraint out with
one strong jerking movement.
To i n st a l l :
Press switch (1) downwards and hold for about
5seconds.
Press the head restraint down until it engages.
Adjust head restraint to the desired position.
P91.16-2030-26
1
Wa r n i n g !
For your protection, drive only with properly
positioned head restraints.Adjust head restraint to support the back of the
head approximately at ear level.Do not drive the vehicle without the seat head
restraints. Head restraints are intended to help
reduce injuries during an accident.
J_OM_215.book Seite 71 Mittwoch, 30. Mai 2001 2:01 14