Page 126 of 399

123 Multifunction steering wheel, multifunction display
Te ch n i c a l
data Instruments
and controlsOperationDrivingInstrument
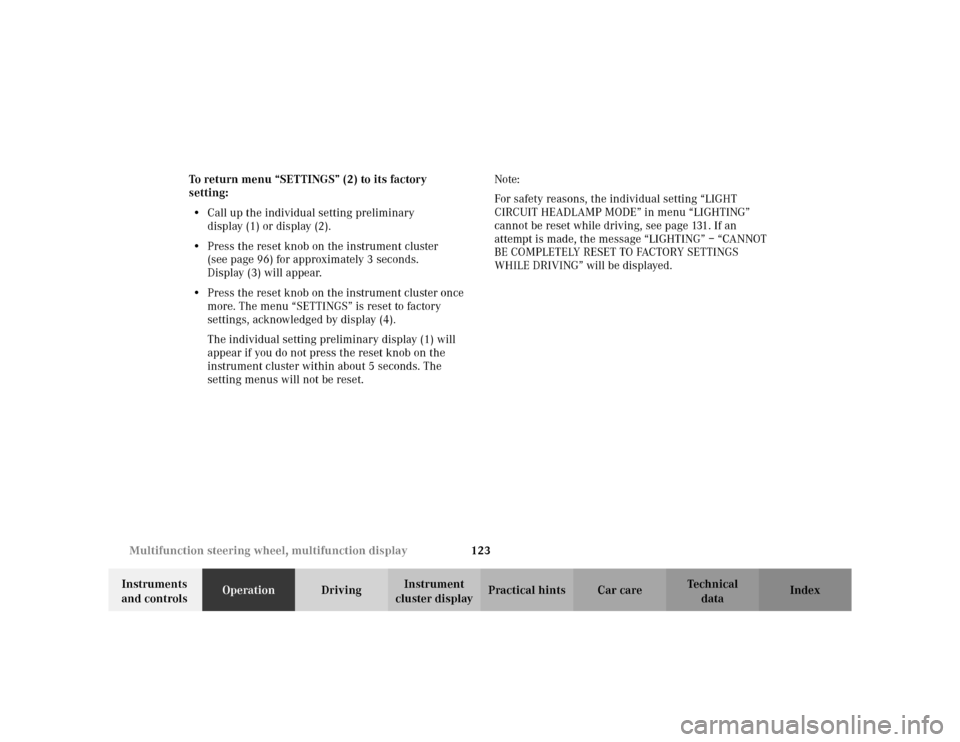
cluster displayPractical hints Car care Index To return menu “SETTINGS” (2) to its factory
setting:
•Call up the individual setting preliminary
display (1) or display (2).
•Press the reset knob on the instrument cluster
(see page 96) for approximately 3 seconds.
Display (3) will appear.
•Press the reset knob on the instrument cluster once
more. The menu “SETTINGS” is reset to factory
settings, acknowledged by display (4).
The individual setting preliminary display (1) will
appear if you do not press the reset knob on the
instrument cluster within about 5 seconds. The
setting menus will not be reset.Note:
For safety reasons, the individual setting “LIGHT
CIRCUIT HEADLAMP MODE” in menu “LIGHTING”
cannot be reset while driving, see page 131. If an
attempt is made, the message “LIGHTING” – “CANNOT
BE COMPLETELY RESET TO FACTORY SETTINGS
WHILE DRIVING” will be displayed.
Page 134 of 399

131 Multifunction steering wheel, multifunction display
Te ch n i c a l
data Instruments
and controlsOperationDrivingInstrument
cluster displayPractical hints Car care Index To return menu “LIGHTING” (3 to 6) to its factory
setting:
•Call up menu (3 to 6).
•Press the reset knob on the instrument cluster (see
page 96) in the instrument cluster for approximately
3 seconds. Display (7) will appear.
•Press the reset knob on the instrument cluster once
more. The individual setting menu “LIGHTING” is
reset to factory settings, acknowledged by
display (8).
The individual setting display “SETTINGS” (2) will
appear if you do not press the reset knob on the
instrument cluster within about 5 seconds. The
setting menus will not be reset.Note:
For safety reasons, the individual setting “LIGHT
CIRCUIT HEADLAMP MODE” in menu “LIGHTING”
cannot be reset while driving. If an attempt is made, the
message “LIGHTING” – “CANNOT BE COMPLETELY
RESET TO FACTORY SETTINGS WHILE DRIVING” will
be displayed.
Page 141 of 399

138 Flexible service system
Te ch n i c a l
data Instruments
and controlsOperationDrivingInstrument
cluster displayPractical hints Car care Index
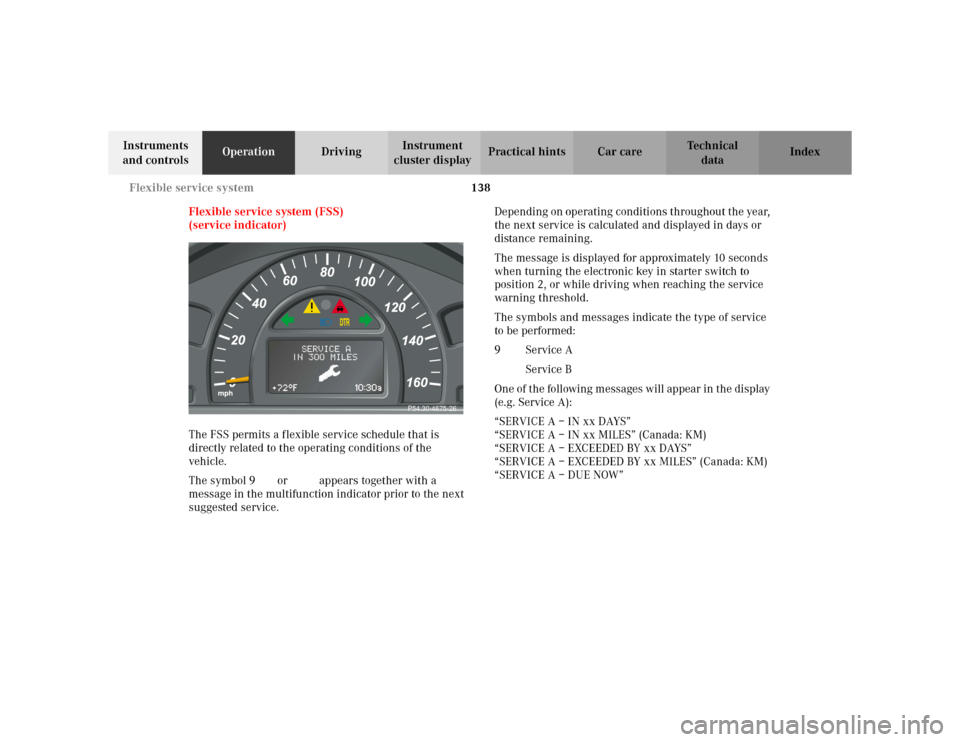
Flexible service system (FSS)
(service indicator)
The FSS permits a flexible service schedule that is
directly related to the operating conditions of the
vehicle.
The symbol 9 or ½ appears together with a
message in the multifunction indicator prior to the next
suggested service.Depending on operating conditions throughout the year,
the next service is calculated and displayed in days or
distance remaining.
The message is displayed for approximately 10 seconds
when turning the electronic key in starter switch to
position 2, or while driving when reaching the service
warning threshold.
The symbols and messages indicate the type of service
to be performed:
9Service A
½Service B
One of the following messages will appear in the display
(e.g. Service A):
“SERVICE A – IN xx DAYS”
“SERVICE A – IN xx MILES” (Canada: KM)
“SERVICE A – EXCEEDED BY xx DAYS”
“SERVICE A – EXCEEDED BY xx MILES” (Canada: KM)
“SERVICE A – DUE NOW”
P54.30-4675-26
Page 142 of 399

139 Flexible service system
Te ch n i c a l
data Instruments
and controlsOperationDrivingInstrument
cluster displayPractical hints Car care Index The next service due date is displayed either in days or
in miles, depending on your driving style.
Once the suggested service term has passed, the symbol
and message appear for approximately 30 seconds and
a signal sounds every time when turning the electronic
key in starter switch to position 2.
The service indicator disappears automatically after
30 seconds or if the knob for instrument cluster
illumination, see page 96, in the instrument cluster is
pressed.
Calling up service indicator manually:
Turn the electronic key in starter switch to position 1
or 2.
Call up the trip odometer and main odometer by
pressing button è or ÿ on the multifunction
steering wheel until the display appears. See page 106.
Press button j or k until the FSS indicator
appears.
The next or previous system is displayed by pressing
button è or ÿ.Important!
The FSS indicator is not an engine oil level indicator.
See page 141 for engine oil level indicator.
Note:
When disconnecting vehicle battery for one or more
days at a time, such days will not be counted. Any such
days not counted by the FSS can be added by your
Mercedes-Benz Center.
The interval between services is determined by the type
of driving for which the vehicle is used. For example,
driving at extreme speeds, and cold starts combined
with short distance driving in which the engine does not
reach operating normal temperature, reduce the interval
between services.
Page 144 of 399

141 Engine oil level indicator
Te ch n i c a l
data Instruments
and controlsOperationDrivingInstrument
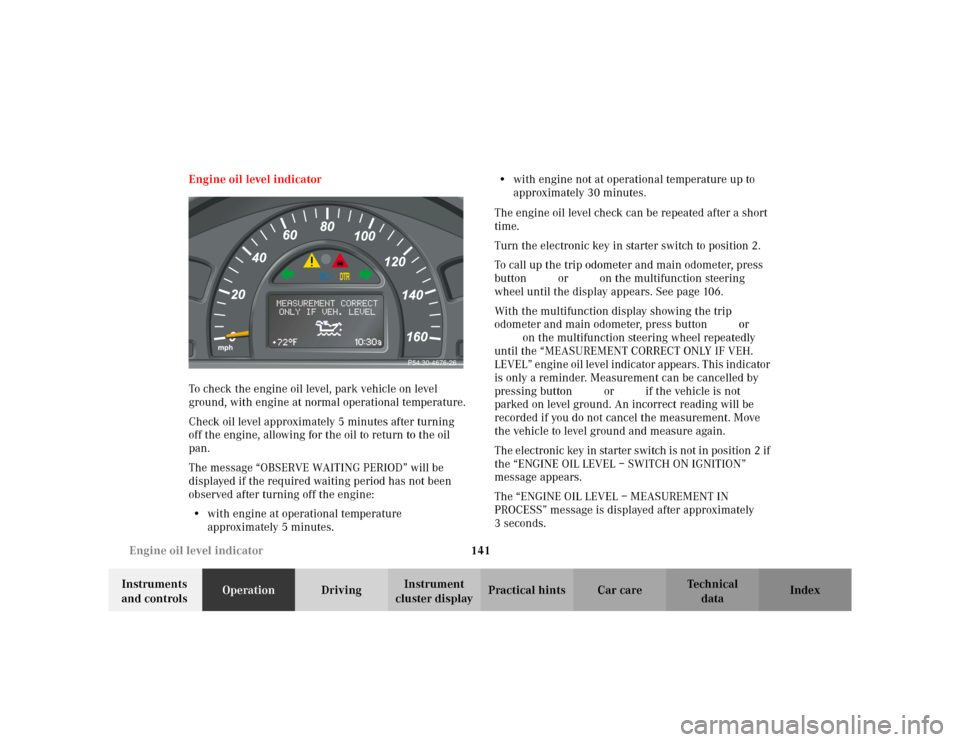
cluster displayPractical hints Car care Index Engine oil level indicator
To check the engine oil level, park vehicle on level
ground, with engine at normal operational temperature.
Check oil level approximately 5 minutes after turning
off the engine, allowing for the oil to return to the oil
pan.
The message “OBSERVE WAITING PERIOD” will be
displayed if the required waiting period has not been
observed after turning off the engine:
•with engine at operational temperature
approximately 5 minutes.•with engine not at operational temperature up to
approximately 30 minutes.
The engine oil level check can be repeated after a short
time.
Turn the electronic key in starter switch to position 2.
To call up the trip odometer and main odometer, press
button è or ÿ on the multifunction steering
wheel until the display appears. See page 106.
With the multifunction display showing the trip
odometer and main odometer, press button j or
k on the multifunction steering wheel repeatedly
until the “MEASUREMENT CORRECT ONLY IF VEH.
LEVEL” engine oil level indicator appears. This indicator
is only a reminder. Measurement can be cancelled by
pressing button j or k if the vehicle is not
parked on level ground. An incorrect reading will be
recorded if you do not cancel the measurement. Move
the vehicle to level ground and measure again.
The electronic key in starter switch is not in position 2 if
the “ENGINE OIL LEVEL – SWITCH ON IGNITION”
message appears.
The “ENGINE OIL LEVEL – MEASUREMENT IN
PROCESS” message is displayed after approximately
3seconds.
P54.30-4676-26
Page 145 of 399

142 Engine oil level indicator
Te ch n i c a l
data Instruments
and controlsOperationDrivingInstrument
cluster displayPractical hints Car care Index
One of the following messages will subsequently appear
on the indicator:
“ENGINE OIL LEVEL – O.K.”
No oil needs to be added.
“ENGINE OIL LEVEL – ADD 1.0 QUART”
(Canada: 1.0 L)
“ENGINE OIL LEVEL – ADD 1.5 QUART”
(Canada: 1.5 L)
“ENGINE OIL LEVEL – ADD 2.0 QUART”
(Canada: 2.0 L)
See “Adding engine oil level”, on page 318 for
instructions on adding engine oil.
“ENGINE OIL LEVEL – REDUCE OIL LEVEL”
Do not overfill the engine.
Excessive oil must be siphoned or drained off. It could
cause damage to the engine and catalytic converter not
covered by the Mercedes-Benz Limited Warranty.The “MEASURING NOT POSSIBLE” message will be
displayed if a proper oil level check cannot be
performed. The engine oil level check can be repeated
after a short while.
Notes:
See malfunction and warning messages on page 290
and page 299 if an engine oil level indicator appears on
the multifunction display when the engine is running.
The engine oil level cannot be checked while the engine
is running. The “ENGINE OIL LEVEL – NOT WHEN
ENGINE ON” message will appear.
Engine oil consumption
Engine oil consumption checks should only be made
after the break-in period. During the break-in period,
higher oil consumption may be noticed and is normal.
Frequent driving at high engine speeds results in
increased consumption.
Page 184 of 399

181 Audio system
Te ch n i c a l
data Instruments
and controlsOperationDrivingInstrument
cluster displayPractical hints Car care Index We a t h e r B a n d
Press the “WB” key. The last weather band station is
tuned in.
Use buttons - to select a different station. If
the station cannot be received, the next available station
is selected automatically.
Press button or . The next available station is
tuned in. The message “WB NONE” appears if no station
can be received.
Station memory
Ten stations each in the AM and FM bands can be stored
via the alpha-numeric keypad. The button
corresponds to location 10. Weatherband (WB)
channels 1 to 7 are preset at the factory and can be
retrieved via the alpha-numeric keypad, but cannot be
changed.Storing stations automatically (Autostore)
Press the “AS” key until the
word “SEARCH” is displayed.
The ten strongest stations are
stored automatically, with
having the strongest
signal.
If less than 10 stations are available within receiving
range, only those will be stored.
Pressing a station selection button without a stored
station will not display a frequency for approximately
2 seconds. Thereafter the station selected last will be
displayed.
Note:
Autostore memory is in addition to the regular station
memory. Previously stored stations are not erased.
Briefly press “AS” to leave the Autostore and return to
manual presets. Press “AS” again to call up Autostore.
7PQRS
0OPR
Page 197 of 399

194 Audio system
Te ch n i c a l
data Instruments
and controlsOperationDrivingInstrument
cluster displayPractical hints Car care Index
Express-dialing
Press one of the number buttons - for more
than 1 second.
The phone number or the name stored at this memory
location will appear on the screen.
When the call is initiated, the call time will appear on
the display.
Note:
Please be aware that button might already be
reserved for an emergency call number, see page 196.
Call hold feature
While on the telephone, a second call can be accepted
by pressing the “SND” key. The first call will be put on
hold. Press “SND” to toggle between the calls.
An additional call can be accepted after ending one of
the previous calls.Accepting incoming call in telephone mode
With an incoming call, a
ringing tone can be heard and
the message “CALL” appears
on the display. Press the
“SND” key to answer the call.
Accepting incoming call in tape, CD or radio mode
If the telephone is activated in the background (symbol
“S” on the display), then a switch is made automatically
to the telephone mode when a call is received. The audio
source is muted, the ringing tone is heard and the
message “CALL” appears. Press the soft key “SND” to
answer the call. After the call has been terminated, the
previously selected audio source is resumed.
0OPR